Featured image for how to put up string lights indoors
Image source: thumbs.dreamstime.com
Transform any indoor space into a warm, inviting retreat by choosing the right string lights—opt for LED or battery-operated styles for safety and flexibility. Use adhesive hooks, removable clips, or discreet nails to hang lights along walls, ceilings, or furniture without damaging surfaces. Strategic placement, like framing a headboard or outlining a window, instantly boosts ambiance with minimal effort.
Key Takeaways
- Plan your layout first: Sketch light placement to avoid overhangs and ensure even coverage.
- Use adhesive hooks: Secure lights without nails, ideal for renters and delicate surfaces.
- Test lights before installing: Check functionality to prevent mid-installation surprises.
- Layer lights with decor: Weave through shelves or mirrors for added depth and warmth.
- Keep cords hidden: Tuck wires along edges or behind furniture for a clean look.
- Dim or warm bulbs: Opt for adjustable brightness to enhance cozy ambiance.
📑 Table of Contents
How to Put Up String Lights Indoors for Cozy Ambiance
Imagine stepping into a room bathed in the soft, warm glow of string lights—fairy lights twinkling above your bed, delicate bulbs tracing the outline of your bookshelf, or a cascading canopy of lights creating a magical retreat in your living room. String lights aren’t just for holiday décor; they’re a year-round tool for transforming any indoor space into a cozy, inviting sanctuary. Whether you’re aiming for a minimalist Scandinavian vibe, a boho-chic hideaway, or a romantic nook for date nights, string lights offer unparalleled versatility. Their gentle illumination can elevate your mood, reduce stress, and create a sense of intimacy that harsh overhead lighting simply can’t match.
The best part? You don’t need to be a DIY expert to achieve this ambiance. With a few simple tools, a bit of creativity, and the right techniques, anyone can master the art of indoor string light installation. From choosing the perfect lights to securing them without damaging your walls, this guide will walk you through every step. We’ll cover safety considerations, creative placement ideas, and practical solutions for common challenges—so you can enjoy your glowing masterpiece with confidence. Let’s dive into the world of indoor string lights and unlock the secret to effortless, year-round coziness.
Choosing the Right String Lights for Your Space
Types of String Lights: LED, Incandescent, and Smart Options
Before you start hanging, it’s crucial to select the type of string lights that align with your needs. The market offers three primary options:
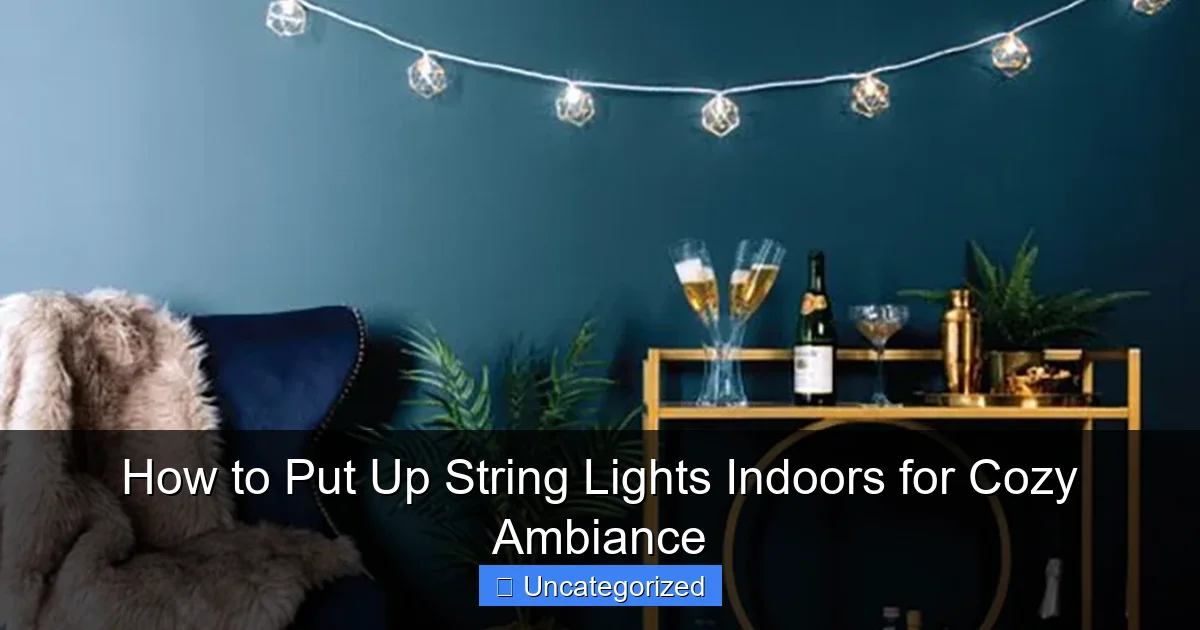
Visual guide about how to put up string lights indoors
Image source: stylecaster.com
- LED String Lights: Energy-efficient, long-lasting (up to 25,000 hours), and cool to the touch. Ideal for bedrooms and living rooms. Look for options with adjustable brightness or color temperature (warm white vs. cool white).
- Incandescent String Lights: Classic, warm glow with a vintage feel. However, they consume more energy, generate heat, and have shorter lifespans. Best for occasional use or holiday décor.
- Smart String Lights: Wi-Fi or Bluetooth-enabled lights that sync with apps, voice assistants (e.g., Alexa), or music. Perfect for tech-savvy users who want customizable color schemes or automated schedules.
For example, a bedroom might benefit from warm-white LED lights with a dimmer switch, while a home office could use smart color-changing lights to boost focus during the day and relax at night.
Bulb Styles and Spacing: Creating the Perfect Glow
Bulb design dramatically impacts the ambiance. Consider these popular styles:
- Fairy Lights: Tiny, delicate bulbs on thin wire—ideal for draping over headboards, mirrors, or plants.
- Edison Bulbs: Vintage-style bulbs with exposed filaments, adding industrial charm to dining rooms or patios (yes, they work indoors too!).
- Globe Lights: Spherical bulbs offering a softer, diffused glow—great for canopies or outlining windows.
- Twinkle Lights: Randomly flashing bulbs that mimic fireflies—perfect for a whimsical touch.
Spacing matters: Lights spaced 4–6 inches apart create a dense, magical effect, while 8–12 inches apart offer a more subtle look. For a 10-foot wall, aim for 20–30 bulbs per strand.
Length, Power, and Safety: Measuring and Planning
Always measure your space first. A common mistake is buying lights that are too short. Use a tape measure to calculate the distance you want to cover (e.g., around a window frame, along a bookshelf, or across a ceiling). Add 10% extra length for draping or overlaps.
- Power Source: Battery-operated lights offer flexibility for renters or spaces without outlets. Plug-in lights provide continuous power but require proximity to an outlet.
- Voltage and Safety: Ensure lights are rated for indoor use (look for UL, ETL, or CSA certifications). Avoid overloading circuits by checking wattage. For example, a 100-bulb LED strand typically uses 4.8 watts—safe for most outlets.
Preparing Your Space and Tools
Assessing Your Room: Light Placement Ideas
Start by visualizing where lights will shine brightest. Here are five popular indoor placements:
- Bedroom: Drape lights above the bed (like a canopy), along the headboard, or around a mirror.
- Living Room: Outline shelves, frame a gallery wall, or hang lights from the ceiling in a zigzag pattern.
- Kitchen: Wrap lights around a pot rack, under cabinets, or above a breakfast nook.
- Bathroom: Line the mirror or create a glowing border around the tub.
- Stairwells/Hallways: Run lights up the banister or along the baseboard.
Pro Tip: Use painter’s tape to mock up your design before committing. This helps avoid overhangs or awkward gaps.
Essential Tools and Materials
Gather these supplies for a stress-free installation:
- Adhesives: Command™ hooks, adhesive clips, or museum putty (renter-friendly).
- Hardware: Small nails, picture hooks, or tension rods (for permanent installations).
- Measuring Tape: For precise spacing and length calculations.
- Level: Ensures straight lines, especially for ceiling installations.
- Extension Cords: Hide them with cord covers or tuck them behind furniture.
- Scissors/Pliers: For trimming excess wire or adjusting clips.
For renters, Command™ products are a game-changer. Their adhesive hooks and clips leave no residue and support up to 3–5 lbs—perfect for most string lights.
Safety First: Avoiding Hazards
String lights are generally safe, but follow these precautions:
- Never cover lights with flammable materials (e.g., curtains, paper).
- Keep lights away from water sources (e.g., sinks, showers).
- Check for frayed wires or damaged sockets before use.
- Use surge protectors for plug-in lights.
- For high ceilings, use a step ladder with a spotter.
Data Point: According to the U.S. Consumer Product Safety Commission, overheating is the leading cause of string light fires—always opt for LED or low-wattage bulbs.
Step-by-Step Installation Techniques
Method 1: Adhesive Clips and Hooks (No-Damage Option)
Ideal for renters or delicate surfaces (e.g., painted walls, wallpaper):
- Clean the surface with rubbing alcohol to remove dust.
- Press adhesive clips every 6–12 inches along your design path.
- Thread the light strand through the clips, starting from the power source.
- Use a level to ensure clips are aligned.
- For curves (e.g., around a mirror), space clips closer together.
Example: To outline a 6-foot mirror, place 12 clips at 6-inch intervals. Use transparent clips for an invisible look.
Method 2: Nails, Hooks, and Tension Rods (Permanent Installations)
For long-term setups or heavy lights (e.g., Edison bulbs):
- Mark nail/hook positions with a pencil. Use a level for straight lines.
- Hammer small nails or screw in picture hooks (1–2 inches long).
- For ceilings, use ceiling hooks or a tension rod (e.g., for a canopy).
- Hang lights by looping the wire over hooks or threading through nail heads.
Pro Tip: In plaster or drywall, use drywall anchors for extra support. For a “floating” look, hang lights from a tension rod between two walls.
Method 3: Ceiling and Wall Canopies (Advanced Designs)
Create a dramatic focal point with a light canopy:
- Measure the area (e.g., 4’x6’ over a bed).
- Install hooks in the ceiling at the corners and midpoints.
- Attach a central anchor point (e.g., a hook or rod) for the main light strand.
- Drape lights in a crisscross or spiral pattern, securing each end to a hook.
- Use zip ties or clips to tidy excess wire.
Creative Idea: For a “starry sky” effect, hang individual fairy light strands from the ceiling at varying heights using fishing line.
Managing Power Cords and Excess Wire
Visible cords ruin the ambiance. Try these tricks:
- Hide cords: Run them behind furniture, through a cord cover, or under rugs.
- Use cord clips: Secure cords to baseboards or walls with adhesive clips.
- Coil excess wire: Wrap it around a binder clip or store it in a decorative box.
- Smart outlets: Schedule lights to turn on/off automatically, reducing cord visibility.
Example: For a bookshelf with lights, run the cord behind the shelf and plug it into an outlet behind a couch.
Creative Design Ideas for Every Room
Bedroom: Dreamy Canopies and Headboard Accents
Transform your bedroom into a sanctuary:
- Canopy: Hang lights from the ceiling above the bed using a tension rod or hooks. Drape them loosely for a “floating” effect.
- Headboard: Attach lights to a wooden headboard with adhesive clips or small nails. Opt for warm white LEDs to promote sleep.
- Under-Bed Glow: Place battery-operated puck lights under the bed frame for a soft, ambient glow.
Pro Tip: Use a dimmer switch to adjust brightness for reading or sleeping.
Living Room: Gallery Walls and Ceiling Draping
Elevate your living room with these ideas:
- Gallery Wall: Weave lights through framed photos or artwork. Use adhesive hooks to secure the strand.
- Ceiling Draping: Hang lights in a zigzag pattern from the ceiling using hooks. Add sheer curtains for a romantic touch.
- Fireplace Mantle: Wrap lights around the mantle or drape them in front of a mirror.
Example: For a 12’x15’ living room, use two 10-foot light strands in a crisscross pattern, anchored to opposite walls.
Kitchen and Dining Area: Functional Ambiance
Blend style and practicality:
- Under-Cabinet Lighting: Adhere battery-operated puck lights under upper cabinets for task lighting.
- Dining Table Canopy: Hang lights above the table using a chandelier or tension rod.
- Pantry/Shelving: Line open shelves with fairy lights to highlight dishes or cookbooks.
Pro Tip: Use waterproof lights near sinks or stoves (look for IP44-rated bulbs).
Bathroom: Spa-Like Glow
Create a relaxing retreat:
- Mirror Frame: Outline the mirror with adhesive clips and warm white lights.
- Tub Border: Hang lights around the bathtub (ensure they’re 3+ feet from water).
- Shower Nook: Use waterproof LED strips in a niche or shelf.
Maintaining and Troubleshooting Your String Lights
Cleaning and Storage Tips
Keep lights looking their best:
- Clean bulbs: Wipe with a microfiber cloth. For dust, use compressed air.
- Store properly: Coil lights around cardboard or a reel to prevent tangling. Store in a cool, dry place.
- Check connections: Inspect wires and sockets annually for wear.
Example: For a 50-bulb strand, coil it in a figure-eight pattern around a piece of cardboard to avoid kinks.
Common Issues and Fixes
Don’t let a burnt-out bulb ruin the mood:
- Flickering lights: Tighten loose bulbs or replace faulty ones. Check the power source.
- Half the strand is out: Replace the fuse (usually in the plug) or check for a broken wire.
- Overheating: Turn off immediately. Ensure lights aren’t covered or overloaded.
- Adhesive failure: Reapply clips or switch to stronger hooks.
Data Table: Common String Light Issues
| Issue | Likely Cause | Solution |
|---|---|---|
| Flickering | Loose bulb, faulty socket | Tighten bulb; replace socket |
| Half-lit strand | Blown fuse, broken wire | Replace fuse; check wiring |
| Overheating | Overloaded circuit, covered lights | Unplug; remove coverings |
| Adhesive failure | Dirty surface, weak adhesive | Clean surface; use stronger clips |
Seasonal Updates and Themed Designs
Refresh your lights seasonally:
- Spring: Add pastel-colored bulbs or floral garlands.
- Summer: Use blue/white lights for a coastal vibe.
- Fall: Incorporate orange or amber bulbs with leaf garlands.
- Winter: Opt for warm white or multicolored lights with snowflakes.
Pro Tip: Use smart lights to automate seasonal color changes.
Conclusion
String lights are more than just décor—they’re a tool for crafting atmosphere, sparking joy, and turning ordinary rooms into extraordinary spaces. Whether you’re draping fairy lights over a headboard, outlining a gallery wall, or creating a canopy above your dining table, the right lighting transforms your home into a sanctuary. By choosing quality lights, using renter-friendly installation methods, and embracing creative designs, you can achieve a cozy ambiance that feels uniquely yours.
Remember, the key to success lies in planning, patience, and personalization. Start small—a single strand above your bed or along a shelf—and build from there. With the techniques in this guide, you’ll avoid common pitfalls, keep your space safe, and enjoy your glowing creation for years to come. So grab your lights, gather your tools, and let your imagination shine. Your cozy, illuminated haven awaits.
Frequently Asked Questions
How do I put up string lights indoors without damaging walls?
Use non-damaging methods like adhesive hooks, removable mounting strips, or tension rods to hang your string lights indoors. These options provide a secure hold while keeping your walls intact, making them perfect for renters or temporary decor.
What are the best spots to hang indoor string lights for a cozy ambiance?
Ideal spots include headboards, ceiling beams, window frames, or draped along a mantel to create a warm glow. For a whimsical touch, weave them through bookshelves or around a gallery wall.
Can I use command hooks to hang string lights indoors?
Yes, command hooks are a popular and reliable choice for putting up string lights indoors. They’re easy to install, hold weight well, and remove cleanly without leaving residue or holes.
How do I hide the cords when installing string lights indoors?
Route cords along baseboards, behind furniture, or use cord covers to blend them into the background. For a seamless look, tuck them into crown molding or use decorative clips to guide them discreetly.
What type of string lights work best for indoor use?
Opt for UL-listed indoor string lights with LED bulbs for safety and energy efficiency. Battery-powered or plug-in options with adjustable brightness add versatility for creating the perfect cozy ambiance.
How do I secure string lights on smooth surfaces like glass or tile?
Use clear suction cup hooks for glass surfaces or specialized adhesive clips designed for tile. Ensure the surface is clean and dry before applying for maximum grip when putting up string lights indoors.

