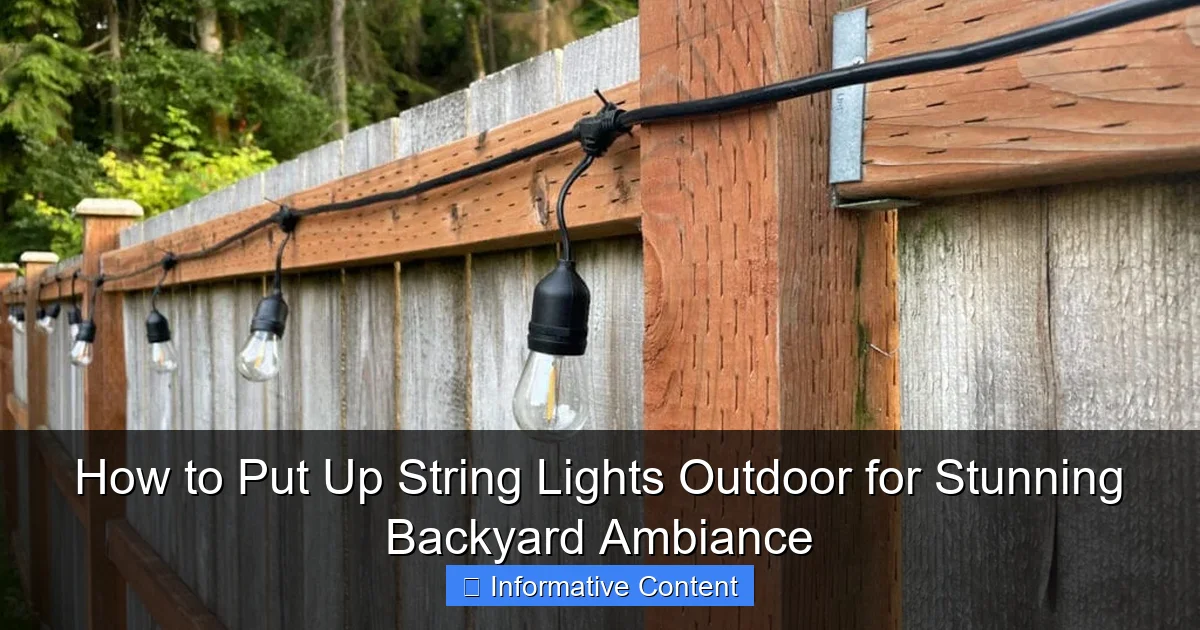
Featured image for how to put up string lights outdoor
Image source: jessicawellinginteriors.com
Transform your backyard into a magical retreat by securely mounting string lights along fences, trees, or pergolas using weather-resistant hooks or zip ties. Ensure even spacing and a safe, taut hang to prevent sagging and tripping hazards while maximizing visual impact. Always use outdoor-rated lights and GFCI outlets to guarantee safety and long-lasting ambiance.
Key Takeaways
- Plan your layout: Sketch light placement before installation to avoid mistakes.
- Use durable hardware: Choose weather-resistant hooks or clips for secure mounting.
- Measure carefully: Ensure string lights reach power sources without excessive slack.
- Prioritize safety: Turn off power when connecting lights near outlets or wires.
- Test before hanging: Check bulbs and connections to troubleshoot issues early.
- Space evenly: Maintain consistent gaps between lights for a professional look.
📑 Table of Contents
- How to Put Up String Lights Outdoor for Stunning Backyard Ambiance
- Choosing the Right Outdoor String Lights
- Planning Your Layout: Mapping the Magic
- Installation Methods: Hanging Lights the Right Way
- Power and Safety: Don’t Let the Lights Go Out (Literally)
- Maintenance and Seasonal Care: Keep the Glow Going
- Conclusion: Your Backyard, Brighter and Better
How to Put Up String Lights Outdoor for Stunning Backyard Ambiance
There’s something magical about string lights in the backyard. Whether you’re hosting a summer barbecue, enjoying a quiet evening with a book, or sharing stories around a fire pit, those twinkling bulbs instantly transform an ordinary space into a cozy, inviting oasis. I remember the first time I strung lights across my patio—simple white globe lights, nothing fancy. But the moment I flipped the switch, the whole vibe changed. It felt like stepping into a scene from a movie. Suddenly, my backyard wasn’t just a patch of grass and a grill; it was a place where memories were made.
If you’ve ever looked at your outdoor space and thought, “This could be so much more,” string lights are one of the easiest, most affordable ways to make it happen. But if you’ve never installed them before, the process can feel a little overwhelming. Where do you start? How do you keep them secure? What if the weather ruins them? Don’t worry—I’ve been there. After years of trial, error, and a few too many tangled messes, I’ve learned the best ways to put up string lights outdoor that look stunning and last season after season. In this guide, I’ll walk you through every step, from choosing the right lights to securing them safely and stylishly. Let’s turn your backyard into a glowing retreat.
Choosing the Right Outdoor String Lights
Not all string lights are created equal—especially when it comes to outdoor use. The last thing you want is to spend time hanging beautiful lights only to have them short-circuit in the rain or look dim and dull after a few weeks. So, before you start drilling holes or tying knots, take a moment to pick the right type of lights for your space.
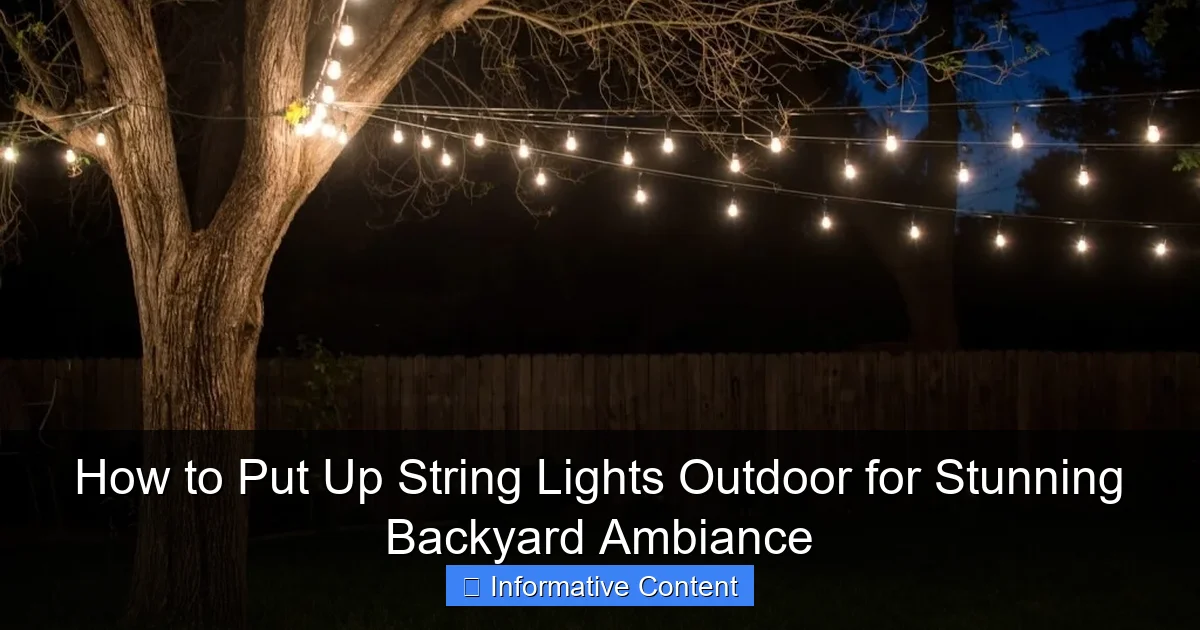
Visual guide about how to put up string lights outdoor
Image source: menterarchitects.com
Weather Resistance: IP Rating Matters
When you’re putting up string lights outdoor, weather resistance is non-negotiable. Look for lights with an IP (Ingress Protection) rating of at least IP44. This means they’re protected against splashing water from any direction. For areas with heavy rain or snow, go for IP65 or higher. I learned this the hard way when my first set of “outdoor” lights—rated only IP20—fizzled out after a spring shower. Now, I always check the label or product description for that IP rating.
Bulb Type: LED vs. Incandescent
- LED string lights: These are the clear winner for outdoor use. They’re energy-efficient, last up to 25,000 hours (that’s over 10 years with 6 hours of use per night), and generate less heat. Plus, they come in a wide range of colors, shapes (globe, Edison, fairy), and dimmable options. Yes, they cost a bit more upfront, but the long-term savings on electricity and replacement bulbs make them worth it.
- Incandescent lights: These give off a warm, nostalgic glow, but they’re less efficient and burn out faster. They also get hot, which can be a safety concern around kids, pets, or flammable surfaces. I used them once for a party and had to replace three bulbs the next day. Not ideal.
Length, Spacing, and Power Source
Measure your space before buying. A 25-foot string might sound long, but if your patio is 40 feet wide, you’ll need multiple sets. Look for lights with end-to-end connectors so you can link several strands together. But don’t go overboard—most sets can only be connected up to 3–5 times (check the manufacturer’s limit to avoid overloading).
Also, consider the power source. Battery-operated lights are great for temporary setups or areas without outlets, but for permanent or semi-permanent installations, plug-in lights with outdoor-rated extension cords are more reliable. I use a heavy-duty 16-gauge cord with a built-in timer—no more remembering to turn the lights off at 2 a.m.
Style and Aesthetic
Think about the mood you want to create. For a romantic, bistro-style look, go with warm white Edison bulbs on a dark wire. Want a playful, festive vibe? Try color-changing RGB lights or globe lights in soft pastels. I once used vintage-style lantern string lights for a garden party, and guests kept asking where I got them. The right style can make your backyard feel intentional and thoughtfully designed.
Planning Your Layout: Mapping the Magic
Now that you’ve got your lights, it’s time to plan where they’ll go. A well-thought-out layout is the difference between “Oh, nice” and “Wow, this is amazing.” I’ve seen too many backyards where lights are just draped haphazardly across trees, creating a tangled, uneven mess. With a little planning, you can create a balanced, intentional look.
Sketch Your Space
Grab a piece of paper or use a free design app (like SketchUp Free or even Google Slides) to sketch your backyard. Mark key features: patio, deck, trees, pergola, railings, and any obstacles (like a grill or planter box). Then, decide on the lighting zones—areas where you want focused ambiance.
For example, you might want:
- Overhead lights above the dining table
- Twinkling strands along the fence for privacy
- Fairy lights in the trees for a whimsical touch
- A canopy of lights over a seating area
This helps you avoid over-lighting or leaving dark spots.
Choose Your Mounting Points
Your mounting points are where the lights will attach. The key is to create a balanced, symmetrical pattern so the lights hang evenly and don’t sag. Common mounting points include:
- Fences and railings: Easy to access, but make sure your lights are rated for vertical surfaces.
- Trees: Use soft, flexible straps or zip ties (not nails!) to avoid damaging bark. I like to wrap lights around the trunk or drape them from branches.
- Pergolas or gazebos: These are ideal for overhead lighting. Run lights along the beams or create a crisscross pattern.
- Posts or poles: If you don’t have natural anchor points, install temporary or permanent posts (like 4x4s or metal stakes). I once used PVC conduit pipes painted black to create “light poles” for a wedding setup—worked like a charm.
Test Before You Commit
Before drilling or tying anything, lay out the lights (or use rope/string as a stand-in) and turn them on at night. This lets you see how the light spreads, where shadows fall, and if any areas are too bright or too dim. I once planned a zigzag pattern across my deck, but when I tested it, the lights were blinding from one angle. A simple tweak to a crisscross pattern fixed it.
Pro tip: Use glow sticks or LED flashlights to simulate light placement if your string lights aren’t working yet.
Installation Methods: Hanging Lights the Right Way
Now for the fun part—actually putting up the string lights outdoor. The method you choose depends on your mounting points, but the goal is always the same: secure, safe, and visually appealing installation.
Using Hooks and Screws (For Permanent Installs)
If you’re installing lights on a pergola, deck railing, or wooden fence, cup hooks or screw eyes are your best friends. They’re inexpensive, easy to install, and hold weight well. I use stainless steel ones (they resist rust) and space them 2–3 feet apart for even tension.
Steps:
- Mark your hook locations with a pencil.
- Pre-drill a small pilot hole (prevents wood from splitting).
- Screw in the hook by hand or with a screwdriver.
- Attach the light strand using the built-in loops or zip ties.
For a cleaner look, paint the hooks to match your surface. I once painted mine black to blend into the dark wood—barely noticeable.
Zip Ties and Straps (For Trees and Flexible Surfaces)
Trees are tricky—you don’t want to damage the bark, but you need a secure hold. Reusable zip ties (like these VELCRO One-Wrap straps) are perfect. Wrap them around the trunk or a sturdy branch, then attach the lights. They’re adjustable, don’t cut into the bark, and can be removed easily if the tree grows.
For extra-large trees, use tree-friendly rope or paracord in a loop-and-knot system. I once used a “tree hugger” strap (a padded nylon band) for a 30-inch-diameter oak—no damage, no fuss.
Command Hooks and Adhesive Strips (For Temporary or Rental-Friendly Setups)
Renting? Don’t want to drill holes? Outdoor-rated Command hooks are a game-changer. They hold up to 5 pounds (enough for most string lights) and remove cleanly. I used them on my vinyl siding last summer, and they stayed put through wind and rain. Just make sure the surface is clean and dry before applying.
For smooth surfaces (like metal railings), heavy-duty adhesive strips (like 3M Outdoor Mounting Tape) work well. Press firmly for 30 seconds, wait 24 hours before hanging, and you’re good to go.
Creating a Canopy or “Light Ceiling”
Want that dreamy, starry-sky effect? Create a canopy. Run lights in a grid pattern across your patio or deck. Use turnbuckles or adjustable tensioners between hooks to keep the wires taut and prevent sagging. I used this method for a friend’s birthday party—lights crisscrossed over the table, and it felt like dining under the stars.
For larger areas, consider light suspension kits (available at hardware stores). These include cables, turnbuckles, and hooks to create a professional-looking grid.
Power and Safety: Don’t Let the Lights Go Out (Literally)
Nothing ruins a backyard ambiance like a tripped breaker or a fire hazard. When putting up string lights outdoor, power and safety should be top priorities. I once ignored a frayed cord because “it’s just one night,” and let’s just say the fire department wasn’t happy. Lesson learned.
Use Outdoor-Rated Extension Cords
Never use indoor extension cords outside. They’re not insulated for moisture, UV exposure, or temperature changes. Always choose a heavy-duty, outdoor-rated cord (look for “SJTW” on the label). I keep a 50-foot 16-gauge cord in my garage—it’s flexible, durable, and handles multiple light strands.
Pro tip: Coil excess cord neatly and secure it with zip ties or cord clips to prevent tripping hazards.
Weatherproof Connections
Where cords plug in (especially where multiple strands connect) is a weak point. Use outdoor-rated power boxes or weatherproof outlet covers to protect connections from rain and snow. I use a Bell Outdoor Power Box—it’s like a little shelter for my plugs.
For extra protection, apply a dab of dielectric grease to plug ends. It repels moisture and prevents corrosion.
Timers and Smart Controls
Don’t rely on manual on/off. Use a photocell timer (turns lights on at dusk, off at dawn) or a smart plug (control via phone or voice). I use a TP-Link Kasa Smart Plug—set it to turn on at 7 p.m. and off at 11 p.m. No more forgetting to flip the switch.
Bonus: Smart plugs can help you monitor energy usage. My string lights use about 20 watts total—less than a space heater!
Inspect Regularly
Check your lights monthly for:
- Frayed or cracked cords
- Loose bulbs or connections
- Corrosion on plugs
- Signs of animal chewing (squirrels love chewing wires!)
I keep a small repair kit (bulb replacements, zip ties, electrical tape) handy for quick fixes.
Maintenance and Seasonal Care: Keep the Glow Going
String lights are a long-term investment. With proper care, they can last 5–10 years. But neglect them, and you’ll be replacing them every season. Here’s how to keep your lights shining bright.
Cleaning and Storage
At the end of the season (or after heavy storms), clean your lights:
- Unplug and remove from mounts.
- Wipe bulbs and cords with a damp cloth (no soap—it can leave residue).
- For stubborn dirt, use a soft brush or compressed air.
- Let dry completely before storing.
Store in a cool, dry place—I use a plastic bin with silica gel packets to absorb moisture. Coil lights loosely (no tight knots!) to prevent cord damage.
Seasonal Adjustments
Winter? Take down lights if you live in a snowy climate. Ice and heavy snow can weigh down strands and damage bulbs. In milder areas, leave them up but use frost-resistant lights and check for ice buildup.
Summer? Trim back overhanging branches that could rub against lights and cause wear.
Upgrades and Repairs
Bulbs burn out? Replace them with the same type (LEDs last longer, but incandescents need more frequent swaps). Cords damaged? Cut out the bad section and splice in a new one with a waterproof connector. I once repaired a 10-foot section with a $5 connector kit—saved me $50 on a new set.
Data Table: Recommended Outdoor String Lights
| Brand/Model | Bulb Type | IP Rating | Length | Connectable? | Best For |
|---|---|---|---|---|---|
| Brightech Ambience Pro | LED Edison | IP65 | 48 ft | Yes (up to 3) | Pergolas, patios |
| Minetom Fairy Lights | LED Micro | IP67 | 100 ft | Yes (up to 5) | Trees, fences |
| Koopower Outdoor String Lights | LED Globe | IP44 | 25 ft | Yes (up to 2) | Deck railings, small spaces |
| GE Color Effects | LED RGB | IP65 | 24 ft | No | Parties, events |
| Twinkle Star Solar | LED (Solar-Powered) | IP65 | 33 ft | No | No outlet? No problem! |
Conclusion: Your Backyard, Brighter and Better
Putting up string lights outdoor isn’t just about adding light—it’s about creating a feeling. A place where laughter lingers, stories unfold, and everyday moments feel a little more special. Whether you’re using them for a one-time party or a year-round retreat, the right setup makes all the difference.
Start with the right lights (LEDs, IP44+), plan your layout thoughtfully, and install them securely—whether that’s with hooks, straps, or adhesive strips. Power them safely with outdoor cords and timers, and don’t forget to maintain them season after season. A little effort upfront means years of glowing memories.
And remember: there’s no “perfect” way to do it. Your backyard is unique, and your lights should reflect that. Mix and match styles, experiment with patterns, and don’t be afraid to change things up. I’ve redone my own setup three times—and I’m still tweaking it. The goal isn’t perfection; it’s joy.
So grab your lights, grab a friend, and get to work. When you finally flip that switch and see your backyard transformed, you’ll know it was worth every step. Happy lighting!
Frequently Asked Questions
How do I hang outdoor string lights without damaging my house?
Use removable adhesive hooks, gutter clips, or tension rods to avoid nails or screws. These methods securely hold string lights while protecting siding, shingles, or paint.
What’s the best way to put up string lights in a backyard without trees or poles?
Install freestanding poles, shepherd’s hooks, or attach lights to fences, pergolas, or railings. For open spaces, consider a central mast or umbrella-style frame to anchor the lights.
How to put up string lights outdoor for a long-lasting setup?
Choose weatherproof, commercial-grade string lights and UV-resistant cables. Secure connections with electrical tape or waterproof covers and elevate cords to prevent tripping hazards.
Can I use command strips to hang outdoor string lights?
Yes, heavy-duty outdoor-rated Command Strips work for smooth surfaces like wood or stucco. Ensure the surface is clean and dry, and avoid prolonged exposure to direct sunlight or rain.
How do I plan the layout for outdoor string lights in a large backyard?
Sketch a rough diagram, measure distances, and test spacing with rope or tape first. Use a mix of overhead crisscross patterns and vertical drops to create balanced, layered lighting.
What power source should I use for outdoor string lights?
Use a GFCI-protected outdoor outlet or a weatherproof extension cord. For remote areas, consider solar-powered string lights to avoid long cords or generator use.

