Featured image for how to repair led christmas string lights
Image source: images-na.ssl-images-amazon.com
Repairing LED Christmas string lights is often quick and affordable—most issues stem from loose connections, faulty bulbs, or damaged wires. With simple tools like a multimeter and electrical tape, you can troubleshoot and fix 90% of problems in under 30 minutes, saving time and money over replacement.
How to Repair LED Christmas String Lights Quick and Easy Fixes
Key Takeaways
- Inspect bulbs first: Check for loose or burnt-out LEDs before other fixes.
- Test the fuse: Replace faulty fuses in the plug to restore power.
- Check wiring: Look for frayed or broken wires causing shorts.
- Use a multimeter: Verify voltage flow to pinpoint dead sections.
- Secure connections: Tighten loose bulb bases or repair solder joints.
- Replace damaged parts: Swap broken sockets or LEDs for seamless operation.
Why This Matters / Understanding the Problem
It’s the holiday season, and your favorite LED string lights—meant to brighten your home with festive cheer—are suddenly dim, flickering, or completely dark. You’ve untangled them, plugged them in, and even tried different outlets, but nothing works. Before you toss them in the trash and buy new ones, consider this: how to repair LED Christmas string lights quick and easy fixes can save you time, money, and the frustration of holiday prep.
Unlike traditional incandescent bulbs, LED lights are more energy-efficient and longer-lasting, but they’re not indestructible. A single faulty bulb, loose wire, or bad connection can shut down an entire strand. The good news? Most issues are fixable with basic tools and a little patience. This guide walks you through how to repair LED Christmas string lights quick and easy fixes so you can get back to decking the halls in no time.
Whether it’s a single dark section, a blinking strand, or lights that won’t turn on at all, we’ll help you diagnose and fix the problem. You don’t need to be an electrician—just someone who wants to keep their holiday magic alive.
What You Need
Before diving into repairs, gather the right tools and materials. Having everything ready makes the process smoother and safer. Here’s what you’ll need:
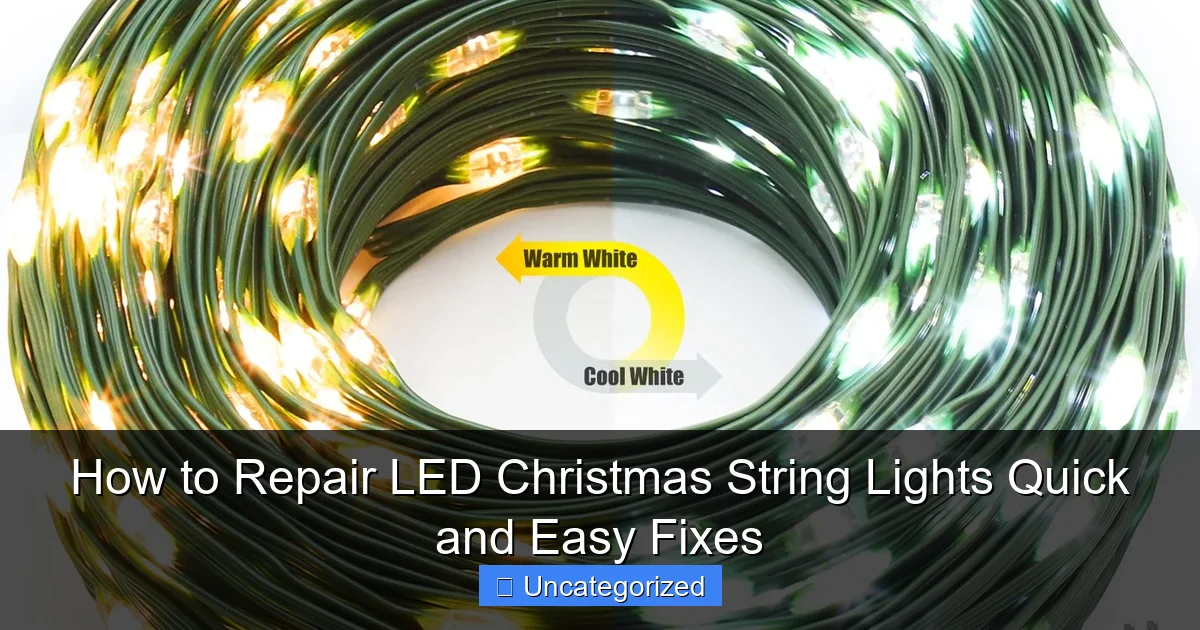
Visual guide about how to repair led christmas string lights
Image source: m.media-amazon.com
- Multimeter (digital or analog): Essential for checking voltage and continuity.
- Needle-nose pliers: For gripping small wires and removing bulb bases.
- Wire cutters/strippers: To trim damaged wires and expose fresh copper.
- Soldering iron and solder: For secure wire connections (optional but recommended).
- Heat-shrink tubing or electrical tape: To insulate repaired wires.
- Replacement LED bulbs: Match your current lights (check voltage and color).
- Small screwdriver set: For opening light sockets or control boxes.
- Flashlight: Helps inspect dark or hard-to-see areas.
- Work gloves (optional): Protects hands from sharp wires and cold.
Bonus tip: Keep a notebook or take photos during disassembly—this helps you remember how parts fit back together. Also, always unplug the lights before starting any repair work. Safety first!
Most of these tools can be found at hardware stores or online. If you don’t own a multimeter, many local libraries or tool-sharing programs lend them out. For a quick fix, you might only need pliers and tape, but having the full kit gives you more repair options.
Step-by-Step Guide to How to Repair LED Christmas String Lights Quick and Easy Fixes
Step 1: Identify the Problem Area
Start by plugging in the lights and observing their behavior. Are they completely off? Flickering? Only one section dark? This tells you where to focus your repair efforts.
LED lights are usually wired in series or parallel. In series wiring, if one bulb fails, the whole strand may go dark. In parallel wiring, individual sections stay lit even if one bulb is out. Knowing your setup helps you troubleshoot faster.
Use the section test: Unplug the lights, then plug them back in one segment at a time. If the first 10 bulbs light up but the next 10 don’t, the issue is likely between those sections. This method works great for long strands.
Pro tip: Label each section with tape or a marker as you test. This prevents confusion later and speeds up diagnosis when applying how to repair LED Christmas string lights quick and easy fixes.
Step 2: Check the Power Source and Plug
Don’t skip this step—many “broken” lights are actually victims of a bad plug or faulty outlet. Start at the source.
Test the wall outlet with another device (like a phone charger or lamp). If it works, plug the lights into a different outlet to rule out a circuit breaker trip or dead socket.
Inspect the plug itself. Look for:
- Cracks or melted plastic
- Frayed or loose wires inside the plug housing
- Corrosion or discoloration on metal contacts
If the plug looks damaged, cut it off (leave at least 6 inches of wire) and replace it with a new plug. Most replacement plugs are screw-on and easy to install—just match the wires (black to brass, white to silver, green to ground if present).
Use a multimeter on the AC voltage setting. Plug in the lights (with no bulb in the first socket) and touch the probes to the metal contacts inside the plug. You should see a reading close to your household voltage (120V in the US). No reading? The plug or cord is faulty.
Warning: Never work on a live circuit. Always unplug the lights before handling wires or using a multimeter. Safety is key to successful how to repair LED Christmas string lights quick and easy fixes.
Step 3: Inspect and Test Each Bulb
LED bulbs rarely burn out completely, but they can fail in subtle ways. A single bad bulb can disrupt the entire circuit—especially in series-wired strands.
Start at the first dark socket and remove each bulb one by one. Look for:
- Blackened or cracked bulb housing
- Corroded or bent metal contacts in the socket
- Visible damage to the LED chip (tiny black spot)
Use your multimeter on the continuity (beep) setting. Set it to ohms (Ω) or continuity mode. Touch one probe to the metal base of the bulb and the other to the tip (or side contact, depending on the bulb type). A good LED will show a low resistance reading (around 10–100 ohms) and may even glow faintly. No reading or infinite resistance? The bulb is dead.
Replace dead bulbs with exact matches. Check the packaging or a working bulb for details: voltage (e.g., 3V, 12V), color (warm white, cool white, RGB), and base type (mini, C7, etc.). Mismatched bulbs can cause flickering or damage the strand.
Quick fix: If you don’t have a replacement, try a jumper wire. Cut a short piece of thin wire (like from a paperclip), strip the ends, and insert them into the socket where the bulb was. This bypasses the dead bulb and restores power to the rest of the strand. Not permanent, but great for a temporary fix.
Pro tip: Keep a few spare bulbs in your holiday storage bin. It’s a small investment that saves you from last-minute panic when applying how to repair LED Christmas string lights quick and easy fixes.
Step 4: Examine the Wiring and Connections
Wires can fray, break, or come loose from sockets—especially in older strands or those exposed to wind, snow, or pets.
Run your fingers along the wire from plug to end. Feel for:
- Soft spots (indicating internal breaks)
- Visible cracks or cuts
- Sections that feel stiff or twisted
Look closely at each socket. The wires are usually soldered or crimped to metal tabs inside. Over time, these connections can loosen or corrode.
Use your multimeter on continuity mode. Set one probe on the plug’s hot contact and the other on the wire leading to a specific bulb. If there’s no beep, the wire is broken somewhere along that path.
To locate the break, use the half-splitting method: Start at the middle of the strand. If the first half tests fine, the break is in the second half. Keep halving until you find the damaged section.
Once found, cut out the damaged wire (leave at least 1 inch on each side). Strip the ends with wire strippers (about 1/4 inch of bare copper). Twist the wires together and secure them with:
- Soldering iron: Apply heat and solder to create a strong, permanent bond. Then cover with heat-shrink tubing or electrical tape.
- Wire nuts: A quicker, no-solder option. Twist the wires clockwise and cap them.
- Electrical tape: Wrap tightly in a figure-eight pattern. Not ideal for outdoor use, but works for indoor repairs.
After reconnecting, test the lights again. If they work, seal the repair with silicone caulk or a waterproof tape (for outdoor strands) to prevent moisture damage.
Warning: Avoid taping over a hot soldering point—it can melt the tape and cause a short. Let the joint cool first. This is a common mistake when rushing through how to repair LED Christmas string lights quick and easy fixes.
Step 5: Test and Fix the Controller or Transformer (if present)
Many LED strands have a control box (for blinking, fading, or color-changing modes) or a transformer (to step down voltage). These can fail and mimic a broken strand.
Look for the small black box along the cord. It may have buttons, a switch, or a dial. Check for:
- Cracks or water damage
- Loose wires inside (if you can open it)
- Burnt smell or discolored components
Test the output voltage with your multimeter. Set it to DC volts. Touch the probes to the output wires (usually two thin wires leading to the lights). A working transformer should show 3V, 5V, or 12V (check your lights’ specs). No reading? The transformer is dead.
For control boxes, try a simple bypass: Cut the wires just after the box and splice them directly to the light strand (bypassing the box). If the lights work, the controller is faulty. You can either replace it or keep the lights on steady mode.
If the box is repairable (e.g., a loose wire or broken solder joint), use your soldering iron to fix it. But if it’s sealed or water-damaged, replacement is safer.
Pro tip: Mark the wires before cutting—this ensures you reconnect them correctly. A mismatched connection can damage the lights or transformer when applying how to repair LED Christmas string lights quick and easy fixes.
Step 6: Address Flickering or Intermittent Issues
Flickering lights are annoying and often signal a loose connection or failing component.
Start by wiggling the plug and each bulb socket. If flickering stops when you touch a specific area, you’ve found the culprit.
For loose sockets:
- Gently bend the metal tabs inside the socket outward with pliers. This improves contact with the bulb.
- Apply a tiny drop of dielectric grease to the tabs (not the bulb). This reduces corrosion and improves conductivity.
For flickering caused by voltage drops:
- Check for long runs of lights (over 100 feet). Voltage drop can dim the end of the strand. Use a higher-gauge wire or a booster transformer.
- Ensure all connections are tight. Loose splices can cause resistance and flickering.
If flickering persists, use your multimeter to test voltage at different points. A large drop (e.g., 12V at the plug, 6V at the end) means you need to shorten the run or add a parallel feed.
Example: For a 150-foot strand, split it into two 75-foot sections and plug them into separate outlets. This reduces strain on the wiring.
Warning: Never overload a circuit with too many lights. Check your outlet’s amperage and the lights’ wattage. Overloading can trip breakers or cause fires. Always follow safety guidelines when using how to repair LED Christmas string lights quick and easy fixes.
Step 7: Final Testing and Safety Check
After all repairs, it’s time to test the entire strand under real conditions.
Plug in the lights and let them run for at least 30 minutes. Watch for:
- Consistent brightness (no dimming or flickering)
- Even heat distribution (no hot spots)
- No sparks, smoke, or strange smells
Check each repair point. The splices should be cool to the touch. If any area feels warm, unplug immediately—it may be a loose connection causing resistance.
For outdoor lights, spray the strand with a light mist of water (from a spray bottle) to simulate rain. Look for sparks or shorts. This is a crucial safety test.
Once everything passes, store your repaired lights properly. Coil them loosely (avoid tight knots) and keep them in a dry, temperature-controlled space. This prevents future damage and makes next year’s setup easier.
Pro tip: Add a small tag to your storage bin with notes like “Repaired splice at bulb 24” or “Replaced transformer.” This saves time if you need how to repair LED Christmas string lights quick and easy fixes again next season.
Pro Tips & Common Mistakes to Avoid
Even with the right tools, it’s easy to make mistakes when fixing LED lights. Here are expert tips to help you succeed:
- Label everything: Use masking tape or colored tags to mark wires, sections, and bulbs. This prevents mix-ups during reassembly.
- Work in a clean, well-lit area: A cluttered workspace leads to lost parts and accidental shorts. A bright LED work light helps you see tiny details.
- Don’t rush the soldering: A cold solder joint (grainy or dull) won’t conduct properly. Heat the joint fully, then add solder. Let it cool naturally.
- Avoid over-tightening wire nuts: This can break the wires inside. Tighten just until the nut won’t turn by hand.
- Match bulb types exactly: A 5V bulb in a 12V strand can overheat and fail. Check labels carefully.
- Test early, test often: Don’t wait until the end to plug in the lights. Test each section as you go to catch problems early.
- Use the right tape: Regular duct tape can melt or lose adhesion. Use electrical tape or heat-shrink for long-lasting repairs.
Common mistake: Assuming all LEDs are the same. Different brands and models have unique wiring and voltage needs. Always test before assuming. This is a frequent error when applying how to repair LED Christmas string lights quick and easy fixes.
Pro tip: If you’re not comfortable with soldering, use a wire nut or lever connector. They’re faster and safer for beginners.
FAQs About How to Repair LED Christmas String Lights Quick and Easy Fixes
Q: Can I repair LED lights without a multimeter?
A: You can try, but it’s much harder. A multimeter is the best tool for diagnosing issues like dead bulbs, broken wires, or faulty transformers. Without it, you’re guessing. For how to repair LED Christmas string lights quick and easy fixes, a $10 multimeter is a worthwhile investment.
Q: Why do LED lights sometimes flicker even when they’re new?
A: Flickering can be caused by loose sockets, voltage drops, or incompatible dimmer switches. New lights may also flicker if they’re not seated properly in the socket. Try tightening the bulbs or using a non-dimmable strand with a standard switch.
Q: Are LED lights repairable if they’re water-damaged?
A: It depends. If the damage is minor (e.g., light rain exposure), dry the strand thoroughly (use a fan or dehumidifier) and test it. If you see corrosion or mold, the wires or sockets may be compromised. In severe cases, replacement is safer. For outdoor lights, always use weatherproof models and seal repairs with silicone.
Q: How do I know if the issue is the lights or the outlet?
A: Plug a known-working device (like a lamp) into the outlet. If it works, the outlet is fine. Then test the lights in a different outlet. If they work there, the original outlet is the problem. If they don’t work anywhere, focus on the lights.
Q: Can I cut LED light strands to make them shorter?
A: Yes, but only if the strand has a cuttable design (look for a dotted line or scissor icon on the wire). Cut at the marked point, then seal the end with electrical tape or a waterproof cap. Never cut in the middle of a wire—it will ruin the circuit. This is a useful trick when applying how to repair LED Christmas string lights quick and easy fixes for custom lengths.
Q: Why do some LED strands have a “dummy bulb” or shunt?
A: In series-wired strands, a dummy bulb (or internal shunt) keeps power flowing even if one bulb fails. This prevents the whole strand from going dark. If your lights stay on when a bulb is removed, you have a shunted strand. No dummy bulb? The strand is likely unshunted and more prone to total failure.
Q: How long do LED Christmas lights usually last?
A: Quality LED lights can last 10–25 years with proper care. Avoid leaving them on 24/7, protect them from moisture, and store them properly. With occasional repairs, they can outlast incandescent bulbs by decades.
Final Thoughts
Repairing LED Christmas lights isn’t just about saving money—it’s about keeping the spirit of the season alive. With the right tools and a bit of know-how, you can fix most issues in under an hour. From checking bulbs to splicing wires, every step brings you closer to a fully lit display.
Remember, how to repair LED Christmas string lights quick and easy fixes starts with patience and safety. Don’t rush the process. Test each repair, document your work, and always unplug before touching wires.
Next year, when your lights flicker or dim, you’ll know exactly what to do. Keep this guide handy, and consider storing a repair kit with your holiday decorations. A few spare bulbs, tape, and a multimeter can save the day.
So go ahead—grab your tools, plug in those lights, and let the holiday magic shine bright. Your home (and your wallet) will thank you.

