Featured image for how to replace led bulbs in string lights
Image source: images.nexusapp.co
Replacing LED bulbs in string lights is a simple, cost-effective way to restore their glow without replacing the entire set. Always start by unplugging the lights and checking the bulb type—most use standard E12 or E17 bases—then gently twist out the old bulb and insert the new one, ensuring a snug fit. For lasting results, handle LEDs by the base to avoid damaging delicate components.
How to Replace LED Bulbs in String Lights: A Quick Guide
Key Takeaways
- Power off first: Always disconnect lights before replacing bulbs to avoid shocks.
- Match bulb type: Use identical LED wattage and base size for safe replacements.
- Check for damage: Inspect sockets and wires for wear before installing new bulbs.
- Twist gently: Rotate bulbs counterclockwise to remove, clockwise to secure firmly.
- Test immediately: Turn on lights after replacement to confirm functionality.
- Store spares: Keep extra bulbs on hand to avoid future interruptions.
Why This Matters / Understanding the Problem
String lights add magic to patios, bedrooms, and holiday displays—but when one LED bulb goes out, the whole strand can seem broken. Unlike old incandescent bulbs, LED bulbs are more energy-efficient and longer-lasting, but they can still fail over time. The good news? You don’t need to toss out the entire set. Learning how to replace LED bulbs in string lights a quick guide can save you money, reduce waste, and restore your favorite lighting setup in under 30 minutes.
Many people assume that if one bulb fails, the whole string is done. But most modern LED string lights use individual bulb sockets, meaning only the faulty bulb needs attention. Whether it’s a flickering outdoor set or a dim indoor garland, replacing a single LED bulb is simpler than you think—especially with the right know-how.
Understanding this process also helps you avoid common pitfalls, like buying incompatible bulbs or damaging the wiring. This guide walks you through every detail, from diagnosing the issue to testing your fix, so you can confidently tackle the job—no electrician required. Plus, we’ll share insider tips to extend the life of your lights and prevent future failures.
Pro Insight: LED string lights typically last 10,000–50,000 hours. If yours fail early, it’s often due to water exposure, voltage surges, or poor-quality bulbs—not the design.
What You Need
Before diving in, gather the right tools and materials. You don’t need a full toolkit—just a few essentials to make the job safe and efficient. Here’s what you’ll need for how to replace LED bulbs in string lights a quick guide:
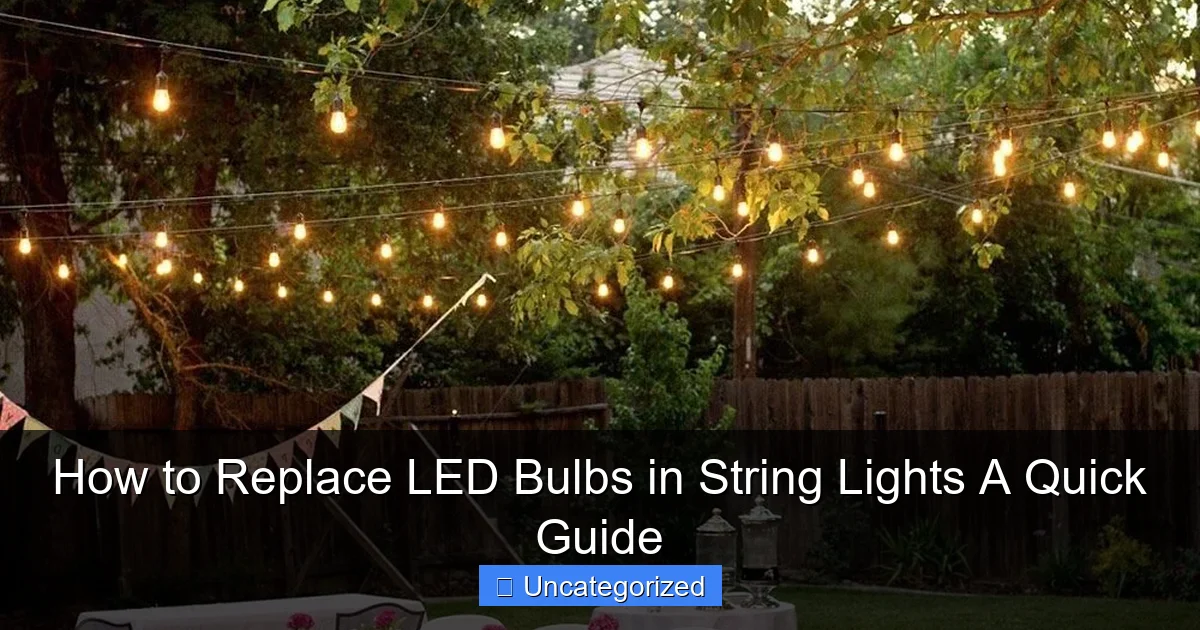
Visual guide about how to replace led bulbs in string lights
Image source: images.nexusapp.co
- Replacement LED bulbs (match wattage, voltage, and base type—more on this below)
- Small flathead screwdriver (for prying open sockets if needed)
- Needle-nose pliers (optional, for stubborn bulbs)
- Electrical tape (for sealing outdoor connections)
- Multimeter (optional but helpful for testing circuits)
- Soft cloth or gloves (to avoid oil from skin on bulbs)
- Replacement socket covers (if the housing is cracked)
- Work gloves (for outdoor jobs or rough wiring)
Finding the right replacement bulb is the most critical step. Check the base type (usually E12 or E17 for small strings), voltage (typically 24V or 120V), and bulb shape (candelabra, globe, etc.). Look for labels on the original bulb or the string’s packaging. If you can’t find a match, take a dead bulb to a hardware store and ask for a replacement.
For outdoor lights, choose weatherproof LED bulbs with IP65 or higher ratings. Indoor sets can use standard bulbs, but always verify compatibility. Using the wrong voltage or base can cause overheating, flickering, or even fire hazards—so double-check!
Warning: Never touch LED bulb contacts with bare hands. Oils from your skin can reduce lifespan or cause early failure.
Step-by-Step Guide to How to Replace LED Bulbs in String Lights A Quick Guide
Step 1: Unplug the Lights and Inspect the Strand
Safety first: always unplug the string lights before starting. Even if the lights appear off, residual voltage can pose a risk. Lay the strand on a flat, dry surface—ideally indoors or under a covered area if working with outdoor lights.
Now, inspect the entire string. Look for:
- Broken or cracked sockets
- Frayed or exposed wires
- Bulbs that are loose, cracked, or discolored
- Signs of water damage (especially on outdoor sets)
If you see major wire damage, consider replacing the whole string. But if it’s just one or two dead bulbs, you’re in the right place. This step ensures you’re fixing the actual problem—not just a symptom. For example, a flickering bulb might not be dead; it could be a loose connection or a failing socket.
Pro Tip: Use a multimeter to test the circuit if multiple bulbs are out. Set it to continuity mode and check between socket contacts. No continuity? The issue might be wiring, not the bulb.
Step 2: Identify the Faulty Bulb
Not every dark bulb is dead. LED strings often have series or parallel wiring:
- Series: If one bulb fails, the whole string goes out (rare in modern sets).
- Parallel: Each bulb has its own circuit—only the dead one stops working (common).
To identify the culprit, plug in the string and look for bulbs that are:
- Completely dark (no glow, even when others are on)
- Flickering or dim
- Physically damaged (cracked lens, blackened base)
For flickering bulbs, gently wiggle each one while the lights are on. If the flicker stops temporarily, the bulb is loose or failing. This step helps you avoid replacing a perfectly good bulb—saving time and money.
For outdoor sets, check for moisture inside sockets. If you see condensation, dry the socket with a hairdryer (cool setting) before proceeding.
Common Mistake: Assuming all dark bulbs are dead. Sometimes, a bulb is just loose or the socket is corroded.
Step 3: Remove the Old LED Bulb
Most LED bulbs twist in and out like traditional bulbs, but some have push-in connectors or screw-in bases. Here’s how to handle each:
- Twist-type: Grip the bulb base (not the lens) and turn counterclockwise until it releases. Use needle-nose pliers if it’s stuck, but wrap the bulb in cloth to avoid damage.
- Push-in: Press down slightly and pull straight out. These are common in holiday lights. If it won’t budge, use a flathead screwdriver to gently pry the socket clips.
- Screw-in (E12/E17): Turn counterclockwise. Some bulbs have plastic bases—be gentle to avoid cracking.
For stubborn bulbs, apply a drop of penetrating oil (like WD-40) around the base and wait 5 minutes. Then twist again. Avoid twisting the lens—LEDs are sensitive to pressure.
Once removed, inspect the socket. Look for:
- Corrosion (green or white powder)
- Broken contacts
- Loose wires
If the socket is damaged, you may need to replace it (see Step 6). For corrosion, clean with a cotton swab and rubbing alcohol.
Pro Tip: Label the dead bulb with masking tape and take it with you when shopping for replacements. This ensures you get the right match.
Step 4: Match and Install the New LED Bulb
Now comes the critical part: matching the replacement bulb. Check these specs:
- Base type: E12 (candelabra) or E17 (intermediate) for most string lights.
- Voltage: Usually 24V or 120V. Match exactly—don’t guess.
- Wattage: LED wattage is low (0.5W–2W), but the total string load matters.
- Color temperature: 2700K (warm white) or 3000K (soft white) for cozy lighting.
- Shape and size: Ensure it fits the socket and doesn’t block adjacent bulbs.
Once you’ve got the right bulb, handle it by the base—never touch the lens. Align the bulb’s pins or threads with the socket and:
- Twist-type: Turn clockwise until snug (don’t over-tighten).
- Push-in: Press straight in until it clicks.
- Screw-in: Turn clockwise until secure.
For outdoor lights, add a drop of dielectric grease (available at auto stores) to the base before installing. This prevents corrosion and makes future removal easier.
Warning: Installing a 120V bulb in a 24V string can cause overheating or fire. Always verify voltage!
Step 5: Test the New Bulb
Before reassembling the entire setup, test the new bulb. Plug in the string and check:
- Does the new bulb light up?
- Is the brightness consistent with others?
- Are there any flickers or sparks?
If the bulb works, great! If not, double-check:
- Voltage and base compatibility
- Socket contacts (clean them with alcohol if corroded)
- Wiring (ensure no loose connections)
For flickering, try tightening the bulb or replacing the socket. A multimeter can help test socket voltage—set it to AC volts and touch the probes to the socket contacts. You should see the rated voltage (e.g., 24V).
If the entire string still doesn’t work, the problem might be:
- A blown fuse (check the plug)
- A broken wire (inspect the cord)
- A faulty controller (if it’s a smart string)
Pro Tip: Test bulbs in a known-good socket. If it works there but not in the string, the issue is the socket—not the bulb.
Step 6: Replace Damaged Sockets or Wiring (If Needed)
If the socket is cracked, corroded, or the wires are frayed, don’t skip this step. A bad socket can ruin a new bulb. Here’s how to replace it:
- Cut the wires: Use wire strippers to cut 2–3 inches from the socket, leaving enough to work with.
- Strip the wires: Remove 1/2 inch of insulation from each wire.
- Splice in a new socket: Connect the wires to a replacement socket using wire nuts or soldering (for permanent fixes).
- Insulate: Cover connections with electrical tape or heat-shrink tubing.
For outdoor use, use waterproof wire connectors and seal the entire socket with silicone caulk after installing the bulb.
If multiple sockets are damaged, consider replacing the whole string. It’s safer and often cheaper than repairing each one.
Warning: Never splice wires without insulating them. Exposed connections can cause shocks or shorts.
Step 7: Seal and Protect Outdoor Lights
Outdoor string lights face rain, snow, and UV rays. To extend their life, add extra protection:
- Seal sockets: Apply silicone caulk around the base of each bulb.
- Use electrical tape: Wrap connections and splices tightly.
- Install drip loops: Let the cord hang in a “U” shape to prevent water from running into sockets.
- Choose weatherproof bulbs: Look for “wet location” or “outdoor use” labels.
For long-term outdoor use, invest in commercial-grade LED strings with sealed sockets and UV-resistant cords. They cost more upfront but last years longer.
Pro Tip: Store outdoor lights in a dry, ventilated area during off-seasons. Humidity accelerates corrosion.
Pro Tips & Common Mistakes to Avoid
Mastering how to replace LED bulbs in string lights a quick guide isn’t just about the steps—it’s about avoiding pitfalls. Here are the top tips and mistakes:
- Tip 1: Keep spare bulbs on hand. Buy extras when replacing one. You’ll have them ready when another fails.
- Tip 2: Use LED-specific bulbs. Regular incandescent bulbs won’t work—and can overload the circuit.
- Tip 3: Label your sets. Use colored tags or stickers to note voltage, base type, and purchase date.
- Tip 4: Test bulbs before storage. Check each one before packing away for the season.
- Tip 5: Avoid overloading circuits. Don’t connect too many strings. Check the manufacturer’s “max connections” limit.
Common Mistakes:
- Ignoring the socket: A corroded socket will kill new bulbs. Clean it first!
- Using wrong voltage: 120V in a 24V string? Disaster waiting to happen.
- Twisting the lens: Cracked lenses expose LEDs to moisture and damage.
- Skipping insulation: Exposed wires risk shocks and shorts.
- Buying cheap replacements: Low-quality bulbs fail faster and waste time.
Real-Life Scenario: Sarah replaced a flickering bulb but didn’t clean the socket. The new bulb failed in a week. A quick alcohol wipe would’ve saved her time and money.
FAQs About How to Replace LED Bulbs in String Lights A Quick Guide
Q: Can I replace an LED bulb with an incandescent one?
A: No. Incandescent bulbs draw more power and can overload the circuit. Stick to LED replacements. Some strings even have fuses that blow if you use the wrong type.
Q: Why do my LED bulbs burn out so fast?
A: Common causes include: poor-quality bulbs, water exposure, voltage surges (use a surge protector), or overheating (ensure bulbs aren’t touching each other). Also, cheap strings often use low-grade LEDs.
Q: Can I repair a broken LED bulb?
A: Rarely. LED bulbs have complex internal circuits. It’s cheaper and safer to replace them. For DIY enthusiasts, soldering a new LED chip is possible but not recommended for beginners.
Q: What if the whole string goes out after replacing one bulb?
A: The issue is likely wiring or a fuse. Check for loose connections, frayed wires, or a blown fuse in the plug. Use a multimeter to test continuity.
Q: Are there universal LED bulbs for string lights?
A: Some brands offer “universal” replacements, but always check voltage and base type. A “universal” 120V bulb won’t work in a 24V string.
Q: How do I know if my string lights are series or parallel?
A: Plug in the string. If one bulb goes out and others stay on, it’s parallel. If the whole string goes dark, it’s series (rare in modern sets). You can also check the manual or look for “parallel wiring” labels.
Q: Can I use outdoor bulbs indoors?
A: Yes. Outdoor bulbs are just more durable. But indoor bulbs may not handle moisture, so don’t use them outside unless rated for it.
Final Thoughts
Replacing LED bulbs in string lights doesn’t have to be a hassle. With this how to replace LED bulbs in string lights a quick guide, you’ve learned to diagnose issues, choose the right replacements, and install them safely. You’ll save money, reduce waste, and keep your favorite lights shining for years.
Remember: always match voltage and base type, clean sockets before installing new bulbs, and protect outdoor sets from the elements. Keep spare bulbs and tools handy—so you’re ready when the next one fails.
Next time a bulb goes dark, don’t toss the whole string. Grab your tools, follow these steps, and restore the glow. Whether it’s a cozy bedroom garland or a festive backyard display, a little know-how goes a long way. Now go light up your world—one bulb at a time!

