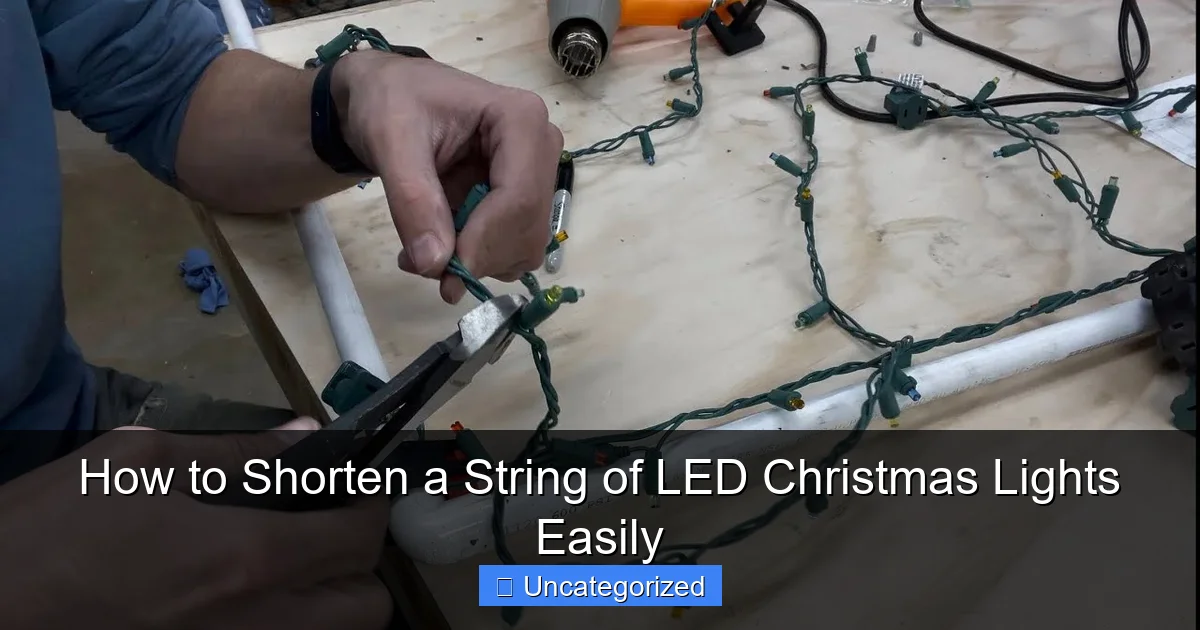
Featured image for how to shorten a string of led christmas lights
Image source: i.ytimg.com
Shorten your LED Christmas lights safely by cutting only at the marked cut points to avoid damaging the circuit or creating hazards. Always unplug the lights and use wire strippers to prep ends for reconnecting—no soldering required if you use compatible connectors. This quick fix keeps your display bright and tidy without buying a new set.
“`html
How to Shorten a String of LED Christmas Lights Easily
Key Takeaways
- Unplug lights first: Always disconnect power before shortening for safety.
- Cut only at marked points: Follow manufacturer guidelines to avoid damage.
- Seal cut ends tightly: Use heat-shrink tubing to prevent moisture entry.
- Test before reusing: Verify functionality after shortening the string.
- Use waterproof connectors: Ensure outdoor safety with proper connections.
- Measure twice, cut once: Avoid mistakes by planning your cut carefully.
Why This Matters / Understanding the Problem
You’ve got a beautiful string of LED Christmas lights, but it’s just a few feet too long for your mantel, tree, or window frame. Instead of hiding the extra length behind furniture (which creates tripping hazards) or buying a new set, there’s a smarter solution: learning how to shorten a string of LED Christmas lights easily.
Unlike older incandescent lights, LED strings are more energy-efficient and often come with complex wiring, making DIY modifications feel intimidating. But with the right approach, you can safely trim excess bulbs without damaging the circuit or voiding warranties. This guide walks you through the process step by step—saving you money, reducing waste, and giving your holiday decor a custom fit.
Whether you’re decorating a small apartment, a narrow staircase, or a compact Christmas tree, shortening your lights ensures a clean, professional look. And the best part? You don’t need to be an electrician. With basic tools and a little patience, anyone can master how to shorten a string of LED Christmas lights easily.
What You Need
Before you start, gather these materials and tools. Most are household items, so you probably already have them.
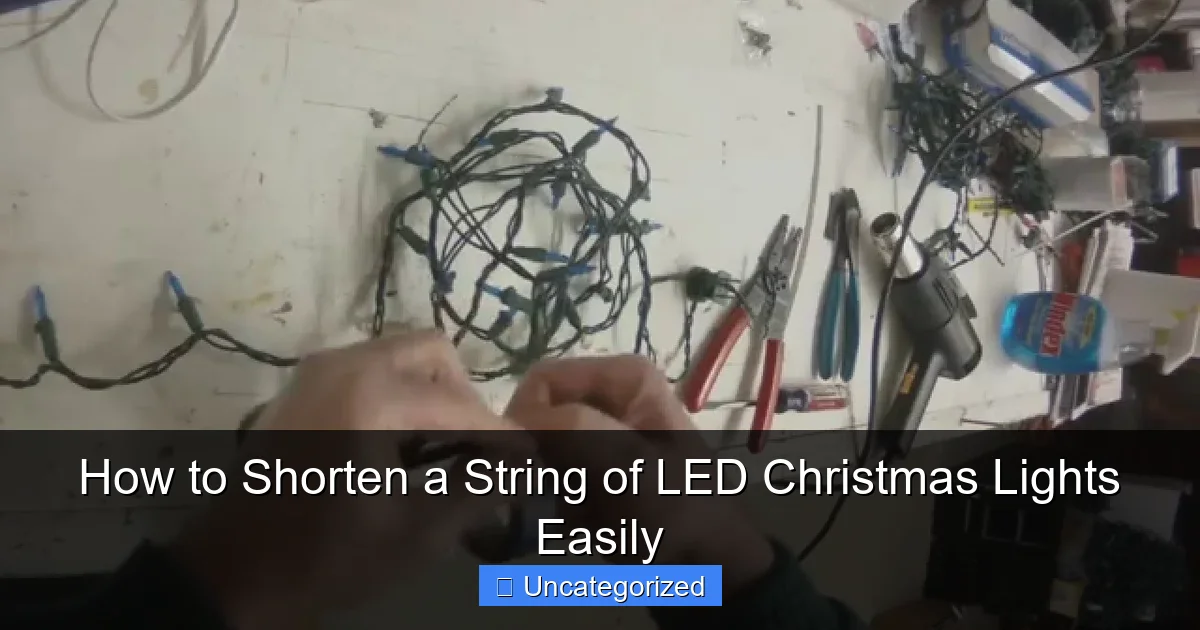
Visual guide about how to shorten a string of led christmas lights
Image source: i.ytimg.com
- LED Christmas light string (non-dimmable or dimmable, but check for cut marks)
- Wire cutters or sharp scissors (precision is key)
- Electrical tape (high-quality, UL-listed)
- Heat shrink tubing (optional but recommended for durability)
- Heat source (lighter, heat gun, or hair dryer for shrink tubing)
- Multimeter (optional, for testing continuity)
- Marker or tape (to label cut points)
- Small zip ties or twist ties (for strain relief)
- Work gloves (to protect hands from sharp wire ends)
<
<
Pro Tip: Always work on a flat, well-lit surface. Keep kids and pets away during the process. Safety first!
Step-by-Step Guide to How to Shorten a String of LED Christmas Lights Easily
Step 1: Check for Manufacturer Cut Marks
The easiest way to shorten LED lights is to use the manufacturer’s built-in cut points. Many LED strings include cut marks—small notches or labels on the wire between bulbs—indicating safe places to trim.
Unroll your lights fully and lay them out straight. Look closely at the wire between each bulb. You’ll often see a tiny “|” symbol, a label that says “Cut Here,” or a slightly thicker insulation section.
If you find these marks, great! They mean the manufacturer designed this section to be safely cut without damaging the circuit. If there are no marks, proceed with caution—your lights may be in a series circuit, and cutting randomly could break the entire string.
Warning: Never cut between bulbs if there are no cut marks. Doing so may short-circuit the string or render it unusable.
Step 2: Test the Lights Before Cutting
Plug in your LED string and confirm all bulbs are working. This is crucial—once you cut, you can’t go back.
If one bulb is out, check if it’s loose or needs a quick twist. Some LED strings have a “shunt” design where a failed bulb doesn’t break the circuit, but others don’t. A fully lit string means the circuit is intact.
Use a multimeter (if you have one) to test continuity between the plug and the end of the string. This confirms the wiring is continuous and safe to modify. If the multimeter beeps, you’re good to go.
Even without a multimeter, testing visually ensures you’re not shortening a damaged string—saving time and frustration later.
Pro Tip: Take a photo of the working string before unplugging. That way, you’ll remember how it looked if something goes wrong after cutting.
Step 3: Determine How Many Bulbs to Remove
Measure your space. For example, if your mantel is 6 feet long and each bulb is spaced 4 inches apart, you’ll need about 18 bulbs (6 ft = 72 in ÷ 4 in = 18 bulbs).
Count the total number of bulbs on your string, then subtract the number you need. The difference tells you how many bulbs to remove from the end (not the plug end).
Why the end? Because most LED strings have a plug at one end and a dead-end cap at the other. Cutting near the cap keeps the plug functional. Never cut near the plug unless the manufacturer allows it—some have special “end-to-end” connectors.
Mark your cut point with a piece of tape or a marker. Double-check your count. It’s better to cut one bulb too few than too many.
Common Mistake: Cutting too close to the plug. This can damage internal wiring and make the string unsafe. Always leave at least 2–3 inches of wire from the last bulb to the cut point.
Step 4: Cut the Wire at the Designated Cut Point
Using sharp wire cutters or scissors, make a clean, straight cut at the marked location. Cut only the wire, not the bulb base or socket.
If your string has cut marks, cut just beyond the mark (closer to the end of the string). This ensures you’re not slicing into a bulb socket or junction.
After cutting, you’ll see two or three exposed wires (depending on whether the string is 2-wire or 3-wire). Most LED strings use 2-wire parallel circuits, but some have a third wire for dimming or color control.
Use gloves to handle the cut ends. The wires can be sharp and may carry a small current if accidentally touched while plugged in.
Pro Tip: If you’re unsure about the wiring, take a close-up photo of the cut end before proceeding. This helps if you need to troubleshoot later.
Step 5: Insulate the Cut Ends
This step is critical for safety and longevity. Exposed wires can cause short circuits, electrical shocks, or fire hazards—especially when stored in damp garages or attics.
Start by twisting the exposed wire strands tightly to prevent fraying. Then, cover each wire end with electrical tape. Wrap it tightly in a spiral, starting ½ inch below the cut and extending ½ inch above. Overlap each wrap slightly.
For extra protection, slide a piece of heat shrink tubing (slightly longer than the cut area) over each wire before taping. Slide it down, cover with tape, then use a heat gun or lighter to shrink the tubing. This creates a waterproof, durable seal.
If you have a 3-wire string, insulate each wire separately. Don’t let any wires touch each other.
Warning: Never leave wires bare or use regular duct tape. Electrical tape is designed to resist heat, moisture, and UV exposure—regular tape can melt or fall off.
Step 6: Add Strain Relief (Optional but Recommended)
When you hang lights, the weight of the string can pull on the cut end, loosening the insulation over time. To prevent this, add a strain relief.
Take a small zip tie or twist tie and loop it around the wire just before the cut point (closer to the last bulb). Tighten it so the knot can’t slide past the bulb base. This acts as a “stopper,” so any pulling force stops at the bulb, not the cut end.
Alternatively, wrap a few turns of electrical tape around the wire just before the cut. This creates a thicker section that resists bending.
Strain relief is especially important if you’re hanging lights on a tree, roofline, or staircase—anywhere they’ll bear weight or movement.
Pro Tip: Use colored zip ties that match your lights for a clean look. No one will notice the extra step, but your lights will last longer.
Step 7: Test the Shortened String
Plug in your newly shortened LED string and check that all remaining bulbs light up. If they do—congrats! You’ve successfully learned how to shorten a string of LED Christmas lights easily.
If some bulbs don’t light, the cut may have disrupted the circuit. This usually happens if you cut outside a manufacturer-approved zone or damaged a wire during insulation.
Unplug immediately. Double-check that no wires are touching and that the insulation is secure. If the problem persists, the string may be in a series circuit (common in older or cheap models) and can’t be safely shortened. In that case, consider using the excess length coiled behind furniture or donating the extra bulbs.
Store the shortened string carefully. Wrap it loosely around a cardboard tube or use a storage reel to prevent tangles.
Common Mistake: Over-tightening the insulation. This can pinch the wire and break internal strands. Wrap snugly, but don’t crush the wires.
Step 8: Optional – Create a New End Cap
If you want a polished, professional look, you can make a DIY end cap instead of just taping the wires.
Cut a small piece of plastic (from a milk jug or food container) into a ½-inch square. Drill a tiny hole in the center just big enough for the wires to pass through.
Slide the plastic over the insulated wires, then tape it in place. This mimics a factory end cap and gives a cleaner finish.
For color-changing or smart LED strings, consider using a silicone sealant around the wires after taping. This waterproofs the cut end for outdoor use.
While not required, this extra step makes your DIY modification look store-bought—perfect for gift-giving or high-visibility decor.
Pro Tips & Common Mistakes to Avoid
- Use manufacturer cut marks when available. They’re there for a reason—don’t ignore them. Cutting elsewhere risks breaking the circuit.
- Always insulate cut wires. Even indoor lights can be exposed to humidity. A single rainstorm or spilled drink can cause a short.
- Don’t cut near the plug. The plug contains internal wiring and a fuse. Cutting close can damage these components.
- Label your shortened strings. Use a tag or marker to note the bulb count. This helps next year when you’re setting up.
- Work slowly. Rushing leads to uneven cuts, loose insulation, or accidental wire damage. Take your time.
- Check for parallel vs. series circuits. Most LED strings are parallel (each bulb has its own path), but some are series (one broken bulb breaks the whole string). Series circuits can’t be shortened safely.
- Store properly. Wrap lights loosely around a flat cardboard sheet or use a cord reel. Never knot them—this damages internal wires.
Real-Life Scenario: Sarah tried to shorten her outdoor LED lights without cut marks. She cut between two bulbs, and the entire string went dark. After testing, she learned the string was in a series circuit. Now she only modifies lights with clear cut points.
Warning: Never use metal wire nuts on Christmas lights. They’re designed for permanent wiring, not seasonal use. Stick to electrical tape or heat shrink tubing.
FAQs About How to Shorten a String of LED Christmas Lights Easily
Can I shorten any LED light string?
Not all LED strings can be safely shortened. Only modify lights with manufacturer-approved cut marks or those confirmed to be in a parallel circuit. Series-circuit strings (where one failed bulb breaks the whole string) should not be cut. When in doubt, check the product manual or contact the manufacturer. Always prioritize safety over convenience.
Is it safe to cut LED Christmas lights?
Yes—if you follow proper steps. Cutting at designated points and insulating wires prevents electrical hazards. Never leave exposed wires. For outdoor lights, use heat shrink tubing or silicone sealant for weatherproofing. If you’re uncomfortable, use the lights as-is or buy a shorter set. Safety always comes first.
Can I reconnect the cut end to make it longer later?
Technically yes, but it’s not recommended. Reconnecting requires soldering and precise wire alignment, which most people can’t do safely. Plus, splices create weak points that can fail over time. It’s better to store the excess length (if uncut) or accept the shortened version. For flexibility, buy strings with end-to-end connectors.
Do I need to cut both wires or just one?
Cut both wires (or all three, if it’s a 3-wire string). Each wire carries part of the circuit. Cutting only one breaks the connection and may damage the lights. Use sharp cutters to slice both at the same time for a clean break.
What if my lights have no cut marks?
If there are no cut marks, the string may not be designed for shortening. Some LED lights use a “series-parallel” hybrid circuit that can’t be safely modified. In this case, your best options are:
- Use the lights as-is and hide excess length behind furniture
- Buy a shorter set for small spaces
- Use a light reel or storage box to manage the extra length
Never cut without cut marks unless you’ve tested the circuit and are confident in your skills.
Can I shorten battery-powered LED lights?
Yes, but with caution. Battery-powered strings often have simpler circuits, but cutting can still damage the battery pack or internal wiring. Look for cut marks. If none exist, consider replacing the string or using it in a longer space. Always insulate cut ends, even if the voltage is low.
How do I know if my lights are parallel or series?
Test one bulb: Remove a bulb from the middle of the string. If the rest stay lit, it’s a parallel circuit and can likely be shortened. If all bulbs go out, it’s a series circuit and should not be cut. This simple test saves time and prevents damage.
Final Thoughts
Learning how to shorten a string of LED Christmas lights easily is a game-changer for holiday decor. No more messy tangles, tripping hazards, or ill-fitting light displays. With just a few tools and this guide, you can customize your lights to fit any space—perfect for small homes, tight corners, or minimalist designs.
Remember: Always check for cut marks, test before cutting, and insulate properly. These steps ensure your lights stay safe, functional, and beautiful for years to come. And don’t forget to add strain relief—it’s a small step with big benefits.
Next time you unbox your lights, take a few extra minutes to shorten them right. You’ll save time during setup, reduce clutter, and create a more polished look. Plus, you’ll impress your family with your DIY skills!
So grab your wire cutters, follow these steps, and enjoy a perfectly lit holiday season. Happy decorating—and may your lights shine bright (and just the right length)!
“`

