Featured image for how to shorten c9 led string lights wired in series
Image source: grayhousestudio.com
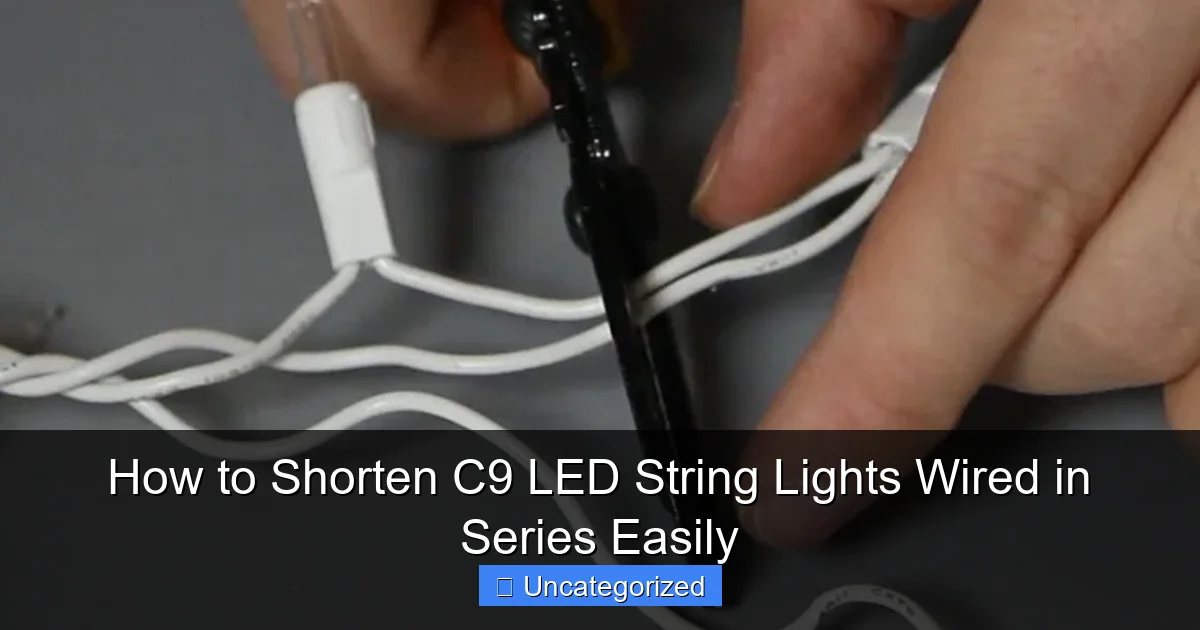
Shortening C9 LED string lights wired in series is safe and simple when you cut only at designated cut points and seal the end with a proper cap. Always disconnect power, locate the marked cut lines, and use wire strippers and waterproof end caps to maintain circuit integrity and weather resistance. Never cut between sockets—this breaks the series circuit and voids functionality.
“`html
How to Shorten C9 LED String Lights Wired in Series Easily
Key Takeaways
- Cut only at marked points to avoid damaging the circuit or creating hazards.
- Always disconnect power before cutting or modifying the light string.
- Seal cut wires properly with heat-shrink tubing to prevent shorts.
- Test before reattaching bulbs to ensure the shortened string works correctly.
- Match wire gauge when splicing to maintain consistent voltage and brightness.
- Use waterproof connectors for outdoor installations to protect connections from moisture.
- Keep spare bulbs on hand to replace any that fail after shortening.
Why This Matters / Understanding the Problem
You’ve got beautiful C9 LED string lights wired in series, but they’re just too long for your porch, roofline, or holiday display. Maybe you’re tired of tangled wires or lights dangling where they shouldn’t. The good news? You don’t need to buy a new set. Learning how to shorten C9 LED string lights wired in series easily saves time, money, and frustration.
Unlike parallel-wired strings, series-wired lights depend on every bulb working in a chain. Cut the wrong spot, and the whole string goes dark. That’s why this process isn’t just about snipping a few wires—it’s about doing it safely and correctly.
Whether you’re trimming lights for a cozy backyard or a minimalist Christmas display, mastering this skill gives you full control over your lighting. And the best part? It’s easier than you think when you know the right steps.
What You Need
Before diving into how to shorten C9 LED string lights wired in series easily, gather these tools and materials. Having everything ready prevents mid-process delays and keeps your work clean.
Visual guide about how to shorten c9 led string lights wired in series
Image source: grayhousestudio.com
- Wire cutters or sharp scissors – For clean cuts on insulated wires.
- Wire strippers (or a utility knife) – To expose copper without damaging it.
- Electrical tape or heat-shrink tubing – For insulating splices.
- Heat gun (if using heat-shrink) – Ensures a tight, waterproof seal.
- Multimeter (optional but recommended) – To test continuity and voltage.
- Needle-nose pliers – For twisting wires securely.
- Marker or tape – To label wires before cutting.
- Replacement plug (if cutting at the end) – Only if you’re removing the original plug.
- Work gloves (optional) – Protects hands from sharp wire ends.
Most of these items are common household tools. If you don’t have a multimeter, borrow one or buy a basic model—it’s worth the $10–$20 for peace of mind.
Pro tip: Use LED-specific string lights. Older incandescent C9s may have different wiring, and the process varies slightly. Always check the manufacturer label.
Step-by-Step Guide to How to Shorten C9 LED String Lights Wired in Series Easily
Now that you’re equipped, let’s walk through the process step by step. This method works for most commercial C9 LED strings (e.g., from GE, Philips, or Home Depot brands) wired in series. Remember: how to shorten C9 LED string lights wired in series easily starts with understanding the circuit.
Step 1: Unplug and Inspect the String
First things first: unplug the lights. Never work on live electrical circuits—even low-voltage LEDs can cause a shock or damage components.
Next, lay the string out on a flat surface. Look for the plug (usually at one end), the first bulb, and the last bulb. Most C9 LED strings have 25, 50, or 100 bulbs. Count the bulbs to decide where to cut.
Example: You have a 50-bulb string but only need 30. Mark the 31st bulb as your cut point. That means you’ll keep bulbs 1–30 and remove 31–50.
Check for a controller box (if your lights have timers or color modes). This box is usually near the plug and must stay intact. Never cut wires leading into it.
Step 2: Identify the Wiring Configuration
Here’s where many people go wrong. In a series-wired string, the current flows from the plug through each bulb and back. There are typically two wires: a “hot” (positive) and a “neutral” (negative), but they may not be color-coded consistently.
To confirm the wiring:
- Look at the first and last bulb sockets. In series strings, the two wires from the plug connect to the first bulb’s contacts.
- At the last bulb, the wires loop back to form a continuous circuit. This “loop” is key—you’ll need to preserve it.
- Some strings have a third wire (a “return” line), but most C9 LEDs use just two.
Use your multimeter to double-check. Set it to continuity mode (beep mode). Touch one probe to the plug’s hot prong and the other to the first bulb’s metal contact. You should hear a beep. Do the same for the neutral side.
If you don’t have a multimeter, test the string briefly (plug it in, then unplug) to see which wires carry current. But again—unplug before cutting.
Step 3: Mark and Cut the Wires
Once you’ve located the cut point (e.g., between bulb 30 and 31), follow these steps:
- Label the wires with tape or a marker. Write “Plug Side” on the wire coming from the plug and “End Side” on the wire leading to the last bulb.
- Cut one wire at a time. Start with the wire closest to the plug (the “hot” side). Cut about 1 inch from the last bulb you’re keeping (bulb 30).
- Cut the second wire (the “neutral” or return side) at the same spot. Keep both wires the same length—this ensures even tension when splicing.
- Set aside the unwanted end (bulbs 31–50). You can reuse it later or donate it.
Why cut one at a time? Cutting both wires at once risks short-circuiting if the ends touch. Safety first!
Pro tip: Leave a little extra wire (1–2 inches) beyond the bulb socket. This gives you room to strip and splice without stressing the connection.
Step 4: Strip the Wires and Prepare for Splicing
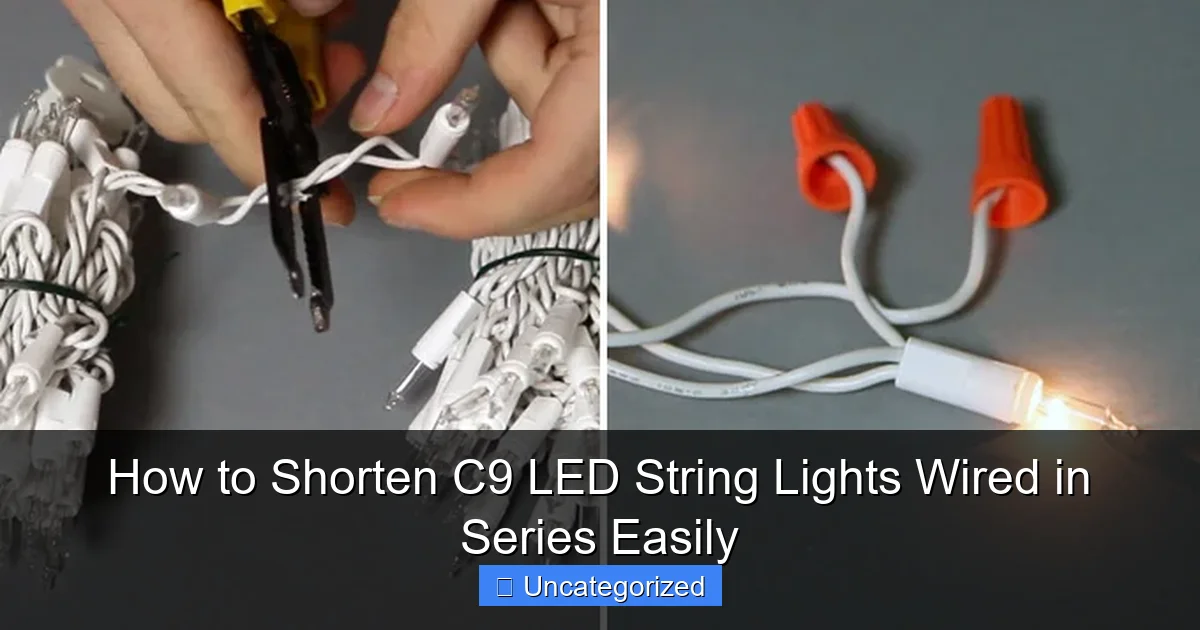
Now it’s time to expose the copper. Use wire strippers to remove about 1/2 inch of insulation from each cut end. If you don’t have strippers, carefully score the insulation with a utility knife and pull it off.
Check the copper: It should be shiny and clean. If it’s corroded or brittle, cut back a little more until you see fresh metal.
For a secure splice, twist the strands tightly with needle-nose pliers. This prevents fraying and ensures good conductivity.
Note: Some C9 strings have ribbed (hot) and smooth (neutral) insulation. Match ribbed to ribbed and smooth to smooth when reconnecting.
Step 5: Splice the Wires Together
This is the heart of how to shorten C9 LED string lights wired in series easily. You’re reconnecting the two ends to restore the circuit.
Here’s the best method: the butt splice with heat-shrink tubing.
- Slide a 1-inch piece of heat-shrink tubing onto one wire (do this before twisting).
- Twist the two copper ends together tightly. Use pliers to ensure a firm, no-gap connection.
- Slide the heat-shrink over the splice. Center it so it covers both insulated sections.
- Use a heat gun or hair dryer to shrink the tubing. Move the heat evenly to avoid melting the wire.
Alternative: Use electrical tape. Wrap tightly in a spiral, overlapping each layer by 50%. Cover both the splice and 1/2 inch of insulation on each side. Tape is less durable than heat-shrink but works in a pinch.
Never use wire nuts—they’re for house wiring and can loosen over time.
Step 6: Test the Lights
Before hanging your lights, test them. Plug in the string and see if all 30 bulbs light up.
If some bulbs are dim, flickering, or off:
- Unplug and check the splice. Loose connections cause voltage drops.
- Use your multimeter to test voltage at the last bulb. It should be close to the original (e.g., 120V for standard strings).
- Re-strip and re-splice if needed. A poor splice is the #1 reason shortened strings fail.
Pro tip: If the whole string is dim, you may have cut too many bulbs. LED strings have a minimum voltage requirement. For example, a 50-bulb string might need at least 30 bulbs to work properly. Check the manufacturer’s specs.
Step 7: Secure and Weatherproof the Splice
Once the lights work, protect the splice from moisture and strain. This is crucial for outdoor use.
- For heat-shrink: Add a dab of silicone sealant (e.g., GE Silicone II) to the ends before shrinking. This blocks water.
- For tape: Wrap with a second layer of outdoor-rated electrical tape, then coat with silicone.
- Secure the splice to a fixed point (e.g., a gutter or railing) with a zip tie. This prevents tugs from loosening the connection.
Never leave the splice dangling. Wind and snow can pull it apart over time.
Step 8: (Optional) Add a New Plug
If you cut off the original plug, install a new one. This is common if you’re shortening the string at the beginning.
Steps:
- Strip the two wires (1/2 inch each).
- Open the replacement plug and connect the wires: Hot (ribbed) to the brass screw, neutral (smooth) to the silver screw.
- Tighten the screws and close the plug. Use a strain relief (included) to clamp the cord.
- Test the new plug with your lights.
Use a weatherproof plug for outdoor use. These have rubber gaskets to keep out moisture.
Pro Tips & Common Mistakes to Avoid
Even with clear steps, things can go wrong. Here’s how to avoid the most frequent issues when learning how to shorten C9 LED string lights wired in series easily.
Pro Tip 1: Label Everything
Use colored tape or markers to label wires before cutting. This prevents mix-ups, especially with unmarked strings.
Pro Tip 2: Use a Splice Kit
Buy a pre-made LED wire splice kit (e.g., from Amazon). These include heat-shrink, connectors, and instructions—perfect for beginners.
Pro Tip 3: Keep Extra Bulbs
Save the removed bulbs. They’re handy for replacements if a bulb burns out later.
Warning: Don’t Cut the Controller
If your lights have a timer or color controller, never cut the wires leading into it. The controller needs full voltage to work.
Warning: Avoid Over-Shortening
Cutting too many bulbs can overload the circuit. For example, a 100-bulb string might fail if shortened to 20. Stick to 60–80% of the original length unless the manual says otherwise.
Common Mistake: Poor Splicing
Loose or twisted wires cause flickering and voltage drops. Always twist tightly and insulate fully.
Common Mistake: Skipping the Test
Never hang lights without testing. A bad splice can overheat and damage the entire string.
Pro Tip 4: Use a Voltage Booster
If your shortened string is dim, use a low-voltage booster (available online). It steps up the voltage to compensate for fewer bulbs.
FAQs About How to Shorten C9 LED String Lights Wired in Series Easily
Q1: Can I shorten C9 lights wired in parallel the same way?
No. Parallel-wired strings have a separate circuit for each bulb. You can cut between bulbs without splicing, but how to shorten C9 LED string lights wired in series easily requires reconnecting the wires. Always check the wiring first.
Q2: What if my lights have 3 wires?
Some C9 strings have a third “return” wire for color-changing modes. In this case, splice all three wires together (hot, neutral, and return). Label them clearly to avoid mix-ups.
Q3: Can I use solder instead of twisting?
Yes! Soldering creates the strongest connection. After soldering, use heat-shrink for insulation. But soldering requires a soldering iron and skill—twisting is faster and safer for beginners.
Q4: Why do my lights flicker after shortening?
Flickering means a loose connection. Check the splice: Are the wires tightly twisted? Is the insulation secure? Re-splice if needed. Also, ensure no copper is exposed—this can cause shorts.
Q5: Can I shorten the string in the middle, not just the end?
Yes, but it’s harder. You’ll need to splice two sections: one to the plug and one to the end. This creates a “T” junction. Use a junction box or a weatherproof connector to protect both splices.
Q6: How do I know if my string is series or parallel?
Unplug and remove one bulb. If the rest stay lit, it’s parallel. If all go dark, it’s series. Simple!
Q7: Are shortened lights safe for outdoor use?
Yes—if you weatherproof the splice. Use heat-shrink with silicone or outdoor-grade tape. Also, secure the splice to prevent strain. Never leave it exposed to rain or snow.
Final Thoughts
Shortening C9 LED string lights wired in series isn’t just possible—it’s a game-changer. No more wasted lights, tangled cords, or mismatched displays. By following this guide, you’ve learned how to shorten C9 LED string lights wired in series easily while keeping them safe and bright.
Remember: Label your wires, splice tightly, and test before hanging. Take your time—rushing leads to mistakes. And when in doubt, use a multimeter to check your work.
Now go ahead and customize your lights for any occasion: a cozy patio, a festive roofline, or a minimalist holiday scene. With this skill, your lighting will always fit perfectly.
Got a friend with too-long lights? Share this guide. After all, the best lighting is the kind that works for you—not the other way around.
“`

