Featured image for how to string christmas lights outdoor
Image source: images.clipartpanda.com
Master the art of outdoor Christmas light installation by planning your layout and using the right tools—like LED lights, clips, and a timer—for a safe, dazzling display. Ensure all connections are weatherproof and elevated to prevent tripping hazards, and always follow manufacturer guidelines to avoid overloading circuits while achieving a professional, festive glow.
Key Takeaways
- Plan your layout first: Sketch your design to avoid mid-project changes and ensure even coverage.
- Use outdoor-rated lights: Choose weatherproof, UL-listed lights for safety and durability.
- Measure twice, hang once: Calculate total length needed to prevent gaps or excess wire.
- Secure with proper clips: Use adhesive or gutter hooks—never nails or staples.
- Test lights before hanging: Check for burnt bulbs or faults to save time and frustration.
- Layer lights for depth: Combine string, icicle, and net lights for a professional look.
📑 Table of Contents
Why Outdoor Christmas Lights Transform Your Home
There’s something magical about stepping outside on a crisp winter evening and seeing your home glowing with festive lights. The soft twinkle of bulbs against the dark sky, the warm glow reflecting off freshly fallen snow—these moments make the holiday season feel truly special. Stringing outdoor Christmas lights isn’t just about decoration; it’s about creating a welcoming atmosphere for family, friends, and even neighbors who pass by. Whether you’re a first-timer or a seasoned decorator, the right approach can turn your home into a winter wonderland without the stress.
I remember my first attempt at hanging lights—ladder wobbling, tangled cords everywhere, and one very confused squirrel trying to chew through a strand. It was chaotic, but also kind of fun. Over the years, I’ve learned a few tricks (and made more than a few mistakes) that helped me go from “What was I thinking?” to “Wow, this looks amazing!” In this guide, I’ll walk you through how to string Christmas lights outdoor like a pro. We’ll cover everything from planning and safety to installation and maintenance, so you can enjoy a stunning display without the headaches.
Plan Your Outdoor Christmas Light Display Like a Pro
Assess Your Home’s Architecture and Layout
Before you buy a single light strand, take a walk around your house—both during the day and at night. Pay attention to architectural features like rooflines, eaves, windows, porches, trees, and fences. These are your canvas. Think about which areas naturally draw the eye. For example, a two-story front porch might benefit from vertical icicle lights, while a long driveway could be accentuated with path lights or net lighting.
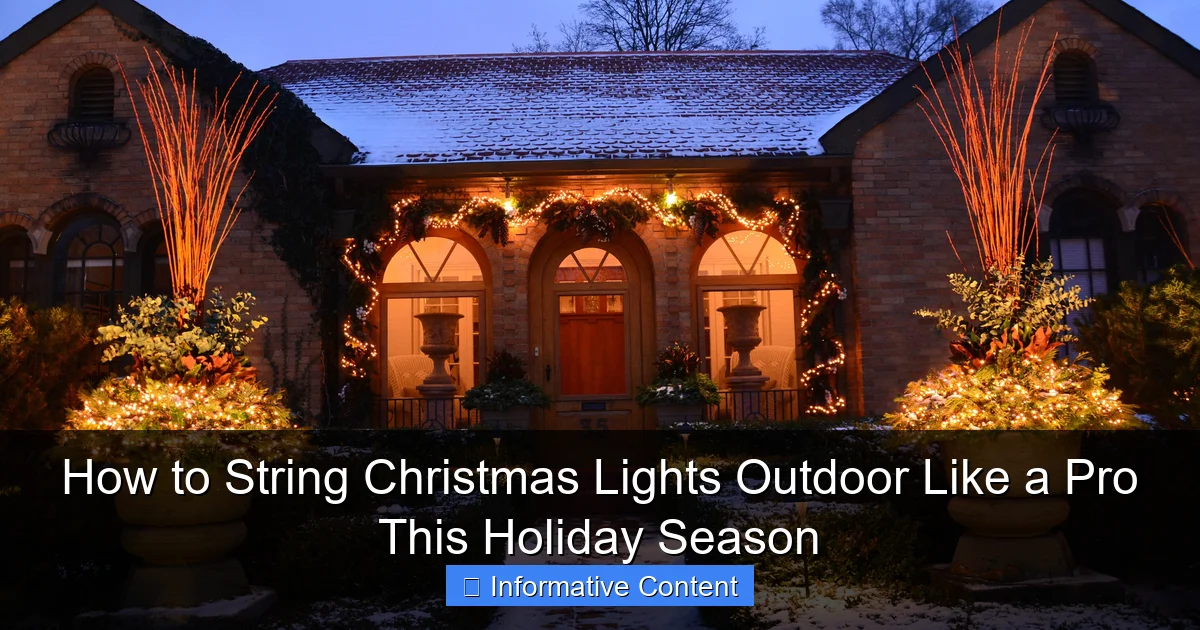
Visual guide about how to string christmas lights outdoor
Image source: thespruce.com
Sketch a simple diagram on paper or use a free design tool like Canva or SketchUp Free to map out your vision. Label where you want to place lights: roof peaks, gutters, trees, railings, etc. This visual plan helps you avoid overbuying and ensures balanced coverage. A well-planned display looks intentional, not chaotic.
Choose the Right Type of Christmas Lights
Not all lights are created equal. The market offers a dizzying array of options, so let’s break them down:
- Mini lights (incandescent or LED): Classic and versatile. Great for wrapping trees or outlining rooflines. LEDs last longer and use less energy.
- Icicle lights: Hang vertically from eaves or gutters for a frosty effect. Best for homes with steep roofs or porches.
- Net lights: Pre-strung grids perfect for shrubs, hedges, or fences. Save time and look neat.
- String lights (globe or fairy): Ideal for patios, pergolas, or wrapping columns. Add a whimsical touch.
- Path lights: Solar-powered stakes for driveways, walkways, or garden edges. Safe and eco-friendly.
- Animated or color-changing lights: For a dynamic display. Use sparingly to avoid overwhelming the scene.
Pro tip: Stick to one or two color schemes (e.g., warm white + red, or all cool white) for a cohesive look. Mixing too many colors can look chaotic unless you’re going for a bold, retro vibe.
Measure and Calculate Light Needs
Nothing’s worse than running out of lights halfway through the roofline. Measure each area you plan to decorate:
- Roofline: Measure the length of each eave and peak. Add 10–15% for overlap and sag.
- Trees: Measure the circumference and height. For wrapping, estimate 5–8 feet of lights per foot of tree height.
- Bushes: Use net lights sized to the shrub (e.g., 5′ x 5′ net for a medium bush).
- Porch: Measure railings, columns, and steps.
Use this formula: Total linear feet needed = (sum of all measurements) × 1.15. For example, a 40-foot roofline + 15-foot porch railing = 55 feet × 1.15 = ~63 feet of lights.
Prioritize Safety and Preparation
Inspect and Test All Equipment
Before climbing a ladder, check every strand of lights. Plug them in to ensure they work. Replace any with broken bulbs, frayed wires, or loose sockets. Test extension cords and timers too. A faulty cord can spark or overheat, especially in cold, damp conditions.
For outdoor use, only use lights rated for exterior conditions (look for “outdoor” on the packaging). Indoor lights can short-circuit or become fire hazards when exposed to snow or rain. Also, verify that your lights are UL-listed (Underwriters Laboratories) for safety compliance.
Gather the Right Tools and Gear
Having the right tools makes the job faster and safer. Here’s what you’ll need:
- Sturdy ladder: A 6–10 ft. A-frame ladder for porches, or an extension ladder (24+ ft.) for roofs. Use a ladder stabilizer to prevent scratching gutters.
- Light clips or hangers: Avoid nails or staples—they damage siding and create fire risks. Use:
- Adhesive gutter clips: For gutters and eaves.
- Shingle tabs: For sloped roofs (slide under shingles).
- Net light hangers: For bushes.
- Zip ties or twist ties: For railings or columns (cut after the season).
- Extension cords: Use outdoor-rated cords with ground fault circuit interrupter (GFCI) outlets. Never overload a single outlet—stick to 3 strands max per outlet (check packaging).
- Timer: A dusk-to-dawn sensor or programmable timer saves energy and ensures lights turn on/off automatically.
- Work gloves and non-slip shoes: Protect your hands and improve grip on icy surfaces.
Weatherproof Your Setup
Outdoor lights face snow, ice, wind, and temperature swings. To protect your display:
- Use weatherproof light clips: Avoid plastic clips that crack in cold. Metal or UV-resistant plastic is better.
- Seal connections: Wrap plug connections with electrical tape or use waterproof cord covers. Elevate plugs off the ground to prevent water pooling.
- Insulate timers: Place timers in a covered, elevated spot (e.g., under a porch). Use a plastic container if needed.
- Check local codes: Some areas have rules about voltage limits or light intensity. When in doubt, keep it simple.
Step-by-Step: How to String Christmas Lights Outdoor
Install Lights on Rooflines and Gutters
Rooflines are the focal point of most displays. Start here:
- Secure clips first: Place gutter clips every 6–12 inches along the eave. For shingle tabs, slide them under shingles at the same spacing.
- Hang lights from the top down: Attach the first bulb to the highest clip, then let the strand drape naturally. Avoid pulling tight—this stresses clips and can pull gutters loose.
- Work in sections: Hang lights on one side of the roof first, then move the ladder. Never stretch across a roof peak—it’s unsafe.
- Use icicle lights for drama: Hang them vertically from the edge of the eave, spacing them 6–8 inches apart.
Example: For a 30-foot front eave, use 36 feet of lights (30 ft + 20% for sag). Clip every 8 inches = ~45 clips. Start at one end, attach the first clip, drape 6 inches of slack, then move to the next clip.
Decorate Trees, Bushes, and Fences
Greenery adds depth to your display. Here’s how to do it right:
- Trees: Wrap trunk and branches in a spiral. Start at the base, working upward. Use fiberglass light poles (like tomato cages) to support tall strands. For large trees, work in teams.
- Bushes: Drape net lights over the top and sides. Secure with clips or zip ties. Avoid covering the entire bush—let some branches peek through for a natural look.
- Fences: Use net lights or string lights along the top rail. For chain-link fences, weave lights through the mesh (use zip ties every 2–3 feet).
Pro tip: For a “glowing” tree, wrap lights tightly from base to top, then add a second strand in a crisscross pattern. This hides the trunk and creates even illumination.
Highlight Entryways and Pathways
Make guests feel welcome with well-lit paths and doors:
- Porch: Wrap columns with string lights. Outline the roofline of the porch with mini lights. Hang a wreath with a battery-powered LED bow.
- Steps: Use path lights or LED strips under handrails. For wooden steps, secure lights with clips or adhesive strips (remove after the season).
- Door: Frame the door with a lighted garland or outline the frame with mini lights. Add a festive doormat with LED accents.
Example: For a 6-step porch, place a path light at the base, middle, and top. Use warm white lights to match the front door wreath.
Power Management and Energy Efficiency
Calculate Power Load and Avoid Overloads
Outdoor circuits have limited capacity. Overloading can trip breakers or cause fires. Here’s how to stay safe:
- Check wattage: Most LED strands use 5–10 watts per 100 bulbs. Incandescent strands use 40–60 watts per 100 bulbs.
- Limit strands per outlet: Most outdoor outlets handle 15 amps (1,800 watts). Example: 10 LED strands (10 watts each) = 100 watts—safe. 20 incandescent strands (50 watts each) = 1,000 watts—still safe, but leave room for a timer or other devices.
- Use multiple circuits: Plug lights into outlets on different sides of the house to distribute the load.
Use Smart Timers and Energy-Saving Features
Timers aren’t just convenient—they save energy and reduce fire risk. Options include:
- Dusk-to-dawn timers: Turn lights on at sunset and off at sunrise. Use for rooflines and trees.
- Programmable timers: Set on/off times (e.g., 5 PM–10 PM). Great for entryways.
- Smart plugs: Control lights via phone app. Turn off remotely if you forget.
Pro tip: For a “twinkling” effect, use a timer with a random mode—it varies the on/off pattern to mimic snowfall.
Table: Estimated Power Use for Common Light Types
| Light Type | Bulbs per Strand | Watts per Strand | Max Strands per Outlet (15A) | Best For |
|---|---|---|---|---|
| LED Mini Lights | 50–100 | 5–10 | 30–50 | Rooflines, trees |
| Incandescent Mini Lights | 50–100 | 40–60 | 10–15 | Small porches, wreaths |
| LED Icicle Lights | 70–100 | 8–12 | 25–35 | Eaves, porches |
| LED Net Lights | 144–288 | 10–20 | 15–25 | Bushes, fences |
| Solar Path Lights | 1–3 | 0.5–1 (solar) | Unlimited (no outlet) | Walkways, gardens |
Troubleshooting and Maintenance Tips
Fix Common Issues Quickly
Even the best displays face problems. Here’s how to fix them:
- Flickering or half-lit strand: Check for loose bulbs. Remove and reinsert them. If the issue persists, replace the strand.
- Tripped breaker: Unplug all lights, reset the breaker, then plug in one strand at a time to identify the culprit.
- Sagging lights: Add extra clips or use a light pole to support heavy strands.
- Timer not working: Replace batteries (for dusk-to-dawn) or check the outlet with a lamp.
Store Lights Properly for Longevity
Proper storage extends the life of your lights:
- Remove clips and ties: Don’t leave adhesive clips on gutters—they can damage paint or sealant.
- Coil strands gently: Wrap lights around a piece of cardboard or use a light reel to prevent tangling.
- Store in a cool, dry place: Avoid attics or damp basements. Use plastic bins with silica gel packs to absorb moisture.
- Label boxes: Note what type of lights and where they were used (e.g., “Front Roofline – LED Mini”).
Pro tip: Take a photo of your display before taking it down. Next year, you’ll remember exactly where everything went!
Final Thoughts: Enjoy the Glow
Stringing outdoor Christmas lights is more than a chore—it’s a tradition that brings joy to everyone who sees it. By planning carefully, prioritizing safety, and using the right tools, you can create a stunning display that feels magical without the stress. Remember, perfection isn’t the goal; connection is. When your lights twinkle against the winter sky, you’re not just decorating a house—you’re sharing warmth, light, and the spirit of the season.
So grab your ladder, test your lights, and take that first step. Whether you’re outlining your roofline, wrapping a tree, or lining your path with solar stakes, every bulb you hang is a little act of holiday magic. And when the snow falls and your home glows, you’ll know it was worth it. Happy decorating—and happy holidays!
Frequently Asked Questions
How do I choose the right outdoor Christmas lights for my home?
Look for UL-listed or ETL-certified lights rated for outdoor Christmas lights use, and opt for LED bulbs for energy efficiency and durability. Consider color, bulb shape (C9, mini, or icicle), and spacing based on your home’s architecture.
What’s the safest way to string Christmas lights on my roof or gutters?
Use plastic light clips designed for gutters or shingles—never nails or staples, which can damage wires. Secure clips every 12 inches and avoid overloading circuits to prevent fire hazards.
How do I hide the wires when installing outdoor Christmas lights?
Route cords behind downspouts, under eaves, or through shrubbery to keep them out of sight. Use cable ties or clips to secure wires along natural pathways like rooflines or fence posts.
Can I connect multiple strands of outdoor Christmas lights together?
Yes, but check the manufacturer’s limit (usually 3–5 strands) to avoid overloading. Use a power strip with surge protection and connect end-to-end, not in a daisy chain, for even power distribution.
How do I prevent outdoor Christmas lights from falling in wind or snow?
Use sturdy adhesive clips or screw-in hooks rated for outdoor use, and test tension before final installation. For heavy snow areas, install lights under eaves or awnings for added protection.
What’s the best way to test outdoor Christmas lights before hanging them?
Plug in each strand indoors first and check for burnt-out bulbs or frayed wires. Replace faulty strands to avoid mid-installation troubleshooting, and use a timer to automate on/off times.

