Featured image for how to string commercial outdoor lights on fence post
Image source: randolphsunoco.com
Stringing commercial outdoor lights on fence posts in 2026 is easier than ever with durable, weather-resistant LED strands and smart installation techniques. Use heavy-duty zip ties, adjustable mounting clips, or stainless steel cables to secure lights safely—ensuring a taut, professional look that withstands wind, rain, and seasonal changes. Always plan your layout, measure spacing, and use a transformer with proper wattage to maximize brightness and longevity.
“`html
How to String Commercial Outdoor Lights on Fence Post in 2026
Key Takeaways
- Plan spacing: Measure and mark equal distances for balanced light distribution.
- Use heavy-duty hooks: Install weather-resistant hooks for secure, long-lasting support.
- Choose LED lights: Opt for energy-efficient, durable commercial-grade LED strings.
- Test before hanging: Check lights for defects to avoid mid-installation failures.
- Secure connections: Use waterproof covers to protect electrical connections from moisture.
- Angle wires safely: Keep cords elevated to prevent tripping and damage.
- Inspect seasonally: Regularly check for wear, loose fittings, or weather damage.
Why This Matters / Understanding the Problem
Imagine this: It’s a crisp evening, you’ve invited friends over for a backyard dinner, and the sun is setting. You flip the switch, and nothing happens. The lights are tangled, one bulb flickers, and the entire fence line looks more like a DIY disaster than a welcoming glow.
Sound familiar? That’s why knowing how to string commercial outdoor lights on fence post in 2026 isn’t just about aesthetics—it’s about safety, durability, and making sure your outdoor space actually works when you need it.
Unlike flimsy string lights from the 2010s, today’s commercial-grade outdoor lighting is built for year-round use. But they’re also heavier, more powerful, and require a smarter approach to installation. If you just drape them over fence posts like holiday lights, you’re asking for trouble—especially in wind, rain, or snow.
The good news? With the right tools and a bit of planning, you can install commercial outdoor lights on your fence that last for years, look amazing, and survive even the wildest weather. And yes, you can do it yourself.
What You Need
Before we dive into the steps, let’s talk gear. You don’t need a construction crew, but you do need the right tools and materials. Here’s your quick checklist:
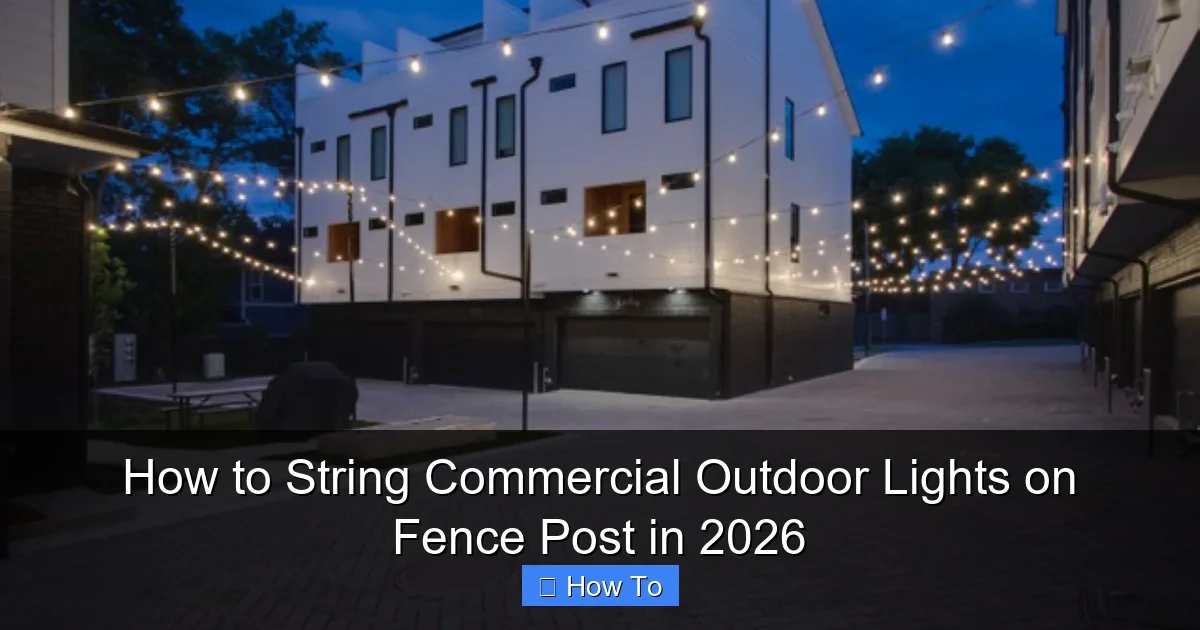
Visual guide about how to string commercial outdoor lights on fence post
Image source: outdoorlights.com
- Commercial-grade outdoor string lights (look for IP65 or higher weather rating)
- Stainless steel or aluminum S-hooks or carabiners (rated for outdoor use)
- Fence-mounted light clips or adjustable brackets (plastic ones degrade in UV)
- Measuring tape (for spacing and symmetry)
- Drill with masonry or wood bits (depending on your fence material)
- Level (to keep everything straight)
- Extension cords with outdoor-rated plugs (GFCI-protected is best)
- Weatherproof junction boxes (if connecting multiple strands)
- Wire cutters/strippers (if customizing lengths)
- Zip ties (UV-resistant) (for securing loose wires)
- Ladder (sturdy, non-slip) (safety first!)
- Timer or smart plug (for automated lighting)
Bonus: If your fence is over 50 feet long, consider a low-voltage transformer or solar-powered commercial lights to reduce voltage drop and energy use.
Pro Insight: I once used regular plastic clips on a cedar fence. By the end of summer, they were brittle and cracked. Switch to UV-stable polycarbonate or metal clips—they’re worth the extra $10.
Step-by-Step Guide to How to String Commercial Outdoor Lights on Fence Post in 2026
Step 1: Plan Your Layout Like a Pro
Start with a sketch. Grab a notebook or use a free app like SketchUp Free or even Google Drawings. Map out your fence line, noting:
- Total length of the fence
- Number of fence posts
- Where you want lights: top rail, mid-rail, or ground-level
- Power source location (outlet, transformer, or solar)
- Any obstacles (trees, gates, corners)
For how to string commercial outdoor lights on fence post in 2026, spacing matters. Most commercial lights have bulbs every 6–12 inches. Aim for even distribution—no clusters or gaps.
Use your measuring tape to mark light positions. A good rule: space bulbs 8–10 inches apart for ambient glow, or 12–18 inches for accent lighting.
Tip: If your fence has uneven spacing between posts, don’t force symmetry. Instead, adjust bulb spacing slightly to maintain visual balance. Your eyes will thank you.
Step 2: Choose the Right Mounting Method
Not all fence posts are the same. Your mounting method depends on the material:
- Wooden posts: Use adjustable fence clips or screw-in eye hooks. Pre-drill holes to avoid splitting.
- Metal or chain-link: Use magnetic clips (for steel) or zip-tie mounts with UV-rated ties.
- Vinyl/PVC: Avoid screws. Use adhesive-backed clips or slip-on sleeves that grip the post.
- Masonry (brick/stone): Use masonry anchors with eye bolts. Drill carefully with a masonry bit.
For long-term durability, I prefer S-hooks with locking carabiners. They’re easy to install, remove, and adjust—plus, they handle wind better than flimsy hooks.
Attach the first clip or hook at the starting point. Use a level to ensure it’s straight. Then, space the rest every 2–3 feet along the fence.
Warning: Don’t overtighten zip ties. They can cut into the light cord over time. Leave a tiny loop to allow for expansion in heat.
Step 3: Install the Mounting Hardware
Now it’s time to get your hands dirty. Here’s how to install the hardware safely and securely:
- Mark drill points: Use a pencil to mark where each clip or hook goes. Double-check spacing with your plan.
- Pre-drill (for wood/masonry): Use the correct bit size. For wood, go slightly smaller than the screw. For masonry, use a hammer drill if possible.
- Attach clips or hooks: Screw in eye hooks, snap on clips, or secure magnetic mounts. Make sure they’re snug but not over-tightened.
- Check alignment: Run a string line or use a laser level to ensure all mounts are at the same height.
If you’re using adhesive clips, clean the post with isopropyl alcohol first. Let it dry completely before applying.
For vinyl fences, I like slip-on clips that slide over the top rail. They don’t damage the material and are easy to reposition.
Pro Tip: Install all hardware before stringing the lights. It’s easier to adjust spacing and alignment without a heavy cord in the way.
Step 4: String the Lights (The Right Way)
Now comes the fun part—but don’t rush it. Start at the power source and work outward. Here’s the process:
- Unroll the lights: Lay the strand along the ground from the power source to the end of the fence. Avoid kinks.
- Attach the first end: Use an S-hook or carabiner to secure the male plug end to the first mount. Don’t plug it in yet.
- Hang each bulb: Clip each bulb socket into a mount. For long strands, work in sections—hang 10–15 bulbs at a time.
- Use zip ties for slack: If the cord sags, use UV-rated zip ties to gather excess every 4–5 feet. Leave a small loop to absorb movement.
- Secure corners and gates: Use extra clips or hooks to guide the lights around bends. Don’t let them rub against sharp edges.
For how to string commercial outdoor lights on fence post in 2026, remember: tension is key. The lights should be snug but not stretched. Think of it like guitar strings—tight enough to play, but not so tight they snap.
Real Talk: I once strung lights too tight and snapped a bulb socket in half. Now I test tension by gently tugging—it should move slightly, not pull out of the mount.
Step 5: Connect Multiple Strands (If Needed)
Most commercial lights come with end-to-end connectors. But don’t just plug and play. Here’s how to do it right:
- Check voltage drop: For runs over 50 feet, use a low-voltage transformer or split the load with multiple power sources.
- Use weatherproof connectors: Seal all plug connections with silicone or use a weatherproof junction box.
- Label each strand: Use colored zip ties or tags to identify which strand is which. Makes troubleshooting easier.
If you’re using a smart plug or timer, connect it at the main power source. Test each strand individually before finalizing connections.
Safety First: Never daisy-chain more than 3–4 strands without checking the manufacturer’s load rating. Overloading can cause fire hazards.
Step 6: Test, Adjust, and Secure
Plug in the lights. Walk the entire fence line. Look for:
- Flickering or dead bulbs (replace immediately)
- Sagging cords (add more clips)
- Uneven spacing (adjust mounts)
- Water pooling in sockets (reposition or seal)
Make adjustments now—it’s easier than doing it in the dark. Once everything looks good, secure loose wires with zip ties. Tuck cords into clips or behind mounts to reduce wind drag.
For extra protection, wrap connections in electrical tape or use heat-shrink tubing.
Step 7: Automate and Maintain
Now make it smart. Install a timer or smart plug to turn the lights on at dusk and off at midnight. I use a sunset-to-sunrise setting in summer, and a 5 PM–11 PM schedule in winter.
Set a seasonal maintenance reminder:
- Spring: Check for damage, tighten mounts, clean bulbs
- Fall: Remove debris, inspect seals, replace weak bulbs
- After storms: Look for loose wires or water intrusion
For how to string commercial outdoor lights on fence post in 2026, maintenance is what separates a 1-year project from a 10-year installation.
Pro Tips & Common Mistakes to Avoid
After installing over a dozen outdoor light systems, here’s what I’ve learned the hard way:
- Don’t use regular extension cords: They degrade in UV and aren’t rated for constant outdoor use. Use outdoor-rated, GFCI-protected cords.
- Avoid overloading circuits: A 15-amp circuit can handle about 1,440 watts. Most commercial strands are 100–200 watts. Do the math before plugging in.
- Never staple or nail cords: It can pierce the insulation and create a fire hazard. Use clips, not fasteners.
- Skip the “just drape it” method: Lights will sag, bulbs will break, and wind will rip them off. Mounting is non-negotiable.
- Don’t ignore local codes: Some areas require permits for permanent outdoor electrical installations. When in doubt, check with your local building department.
Personal Story: I once used cheap plastic clips on a coastal fence. Salt spray ate through them in 6 months. Now I only use stainless steel or UV-stable plastic. It’s worth the investment.
And here’s a pro move: Install a quick-disconnect system. Use S-hooks or carabiners so you can remove the lights for winter or maintenance without cutting zip ties.
FAQs About How to String Commercial Outdoor Lights on Fence Post in 2026
Q: Can I use regular holiday lights instead of commercial ones?
A: Technically, yes. But regular lights aren’t built for year-round outdoor use. They fade, break easily, and aren’t rated for wet conditions. For how to string commercial outdoor lights on fence post in 2026, invest in commercial-grade lights with IP65+ ratings. They last longer and look better.
Q: How do I handle corners or gates?
A: Use extra clips or hooks to guide the lights around the bend. For gates, install a flexible conduit or leave a service loop so the gate can open freely. I like using a “light bridge” with a small arch over the gate.
Q: What if my fence is uneven or wavy?
A: That’s okay! Adjust bulb spacing to maintain visual balance. Use shorter spans on tight curves and longer spans on straights. Your brain will fill in the gaps if the glow is consistent.
Q: Can I install these myself, or do I need an electrician?
A: If you’re using low-voltage (12V) lights or plug-in strands, DIY is fine. But if you’re hardwiring into your home’s electrical system or using high-voltage (120V) with permanent junction boxes, hire a licensed electrician. Safety > savings.
Q: How do I prevent voltage drop on long runs?
A: Use thicker gauge cords (16-gauge or lower), split the load with multiple power sources, or switch to low-voltage LED systems with a transformer. For runs over 100 feet, low-voltage is almost always better.
Q: Are solar-powered commercial lights worth it?
A: In sunny areas, yes. They’re energy-free and easy to install. But they’re dimmer and less reliable in winter or shaded areas. I use solar for accent lighting and grid-powered for main runs.
Q: How often should I replace bulbs?
A: Commercial LEDs last 25,000–50,000 hours (3–6 years of nightly use). But if a bulb flickers or burns out early, replace it immediately. A single bad bulb can affect the whole strand.
Final Thoughts
Installing commercial outdoor lights on your fence isn’t rocket science, but it does take patience, planning, and the right tools. When you master how to string commercial outdoor lights on fence post in 2026, you’re not just lighting up your yard—you’re creating an experience.
I’ve seen families gather under these lights, kids play safely at night, and couples enjoy quiet evenings that feel like a vacation. That’s the real magic.
So grab your tools, sketch your plan, and start small. Even one well-lit section makes a difference. And remember: it’s not about perfection. It’s about progress. Every clip you install, every bulb you hang—you’re building something that lasts.
Now go flip that switch. Your backyard is waiting.
“`

