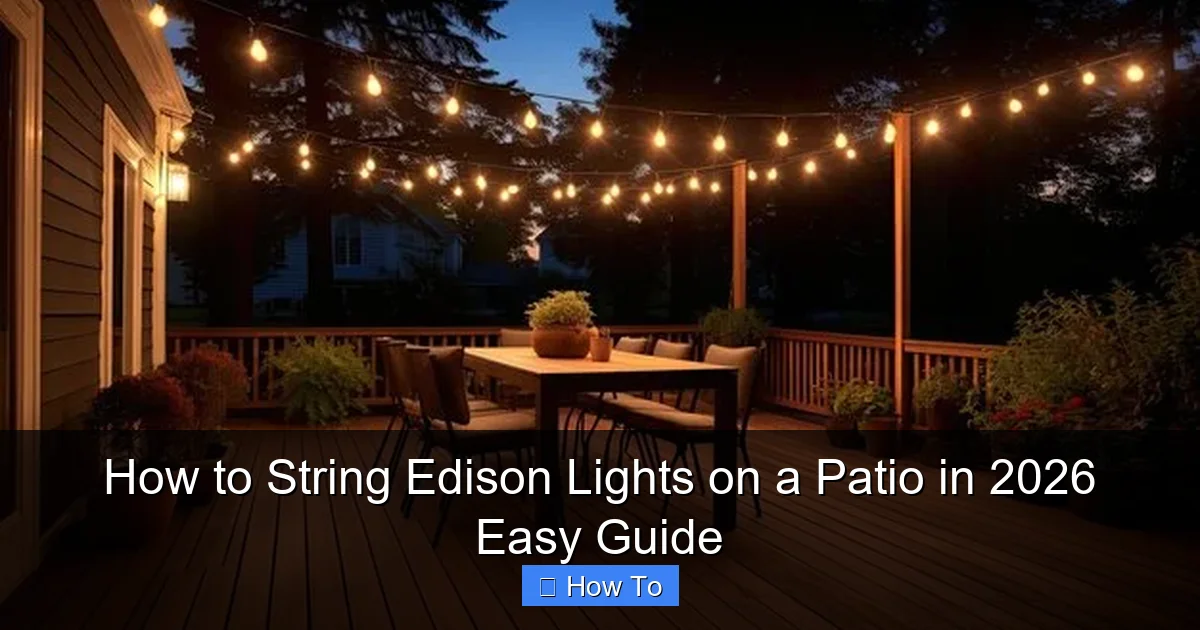
Featured image for how to string edison lights on a patio
Image source: img.freepik.com
Transform your patio into a cozy, inviting retreat by stringing Edison lights with ease using our 2026 step-by-step guide. Learn the best techniques for secure installation, optimal spacing, and weatherproof connections to ensure a stunning, long-lasting glow all year round. No electrician needed—just simple tools, smart planning, and stylish results.
“`html
How to String Edison Lights on a Patio in 2026 Easy Guide
Key Takeaways
- Plan your layout first: Sketch light placement to avoid mid-project changes.
- Use weatherproof bulbs: Ensure longevity and safety in outdoor conditions.
- Secure with tension: Prevent sagging by tightening wires between anchor points.
- Space sockets evenly: Maintain consistent gaps for balanced, professional look.
- Hide cords creatively: Use clips or conduit to keep wires tidy and safe.
- Test before hanging: Check all bulbs function to avoid rework later.
- Anchor securely: Use heavy-duty hooks or poles to withstand wind and weight.
Why This Matters / Understanding the Problem
Picture this: It’s a warm summer evening. You’re sitting outside with friends, a cold drink in hand, the sky turning that perfect dusky blue. But the moment the sun goes down? Darkness. And not the cozy kind—just plain dark. That’s where how to string Edison lights on a patio in 2026 easy guide comes in.
Edison lights aren’t just trendy—they’re timeless. Their warm, golden glow transforms any space into a welcoming retreat. Whether you’re hosting a BBQ, enjoying a quiet night, or setting the mood for a date, these lights add instant charm. But here’s the catch: stringing them up wrong can turn your dream patio into a tangled, droopy mess. Or worse—falling lights mid-dinner.
I’ve been there. I once tried to hang lights between two trees with nothing but hope and a ladder. The result? One end sagged, the other pulled a gutter loose. Not my finest moment. That’s why I’ve spent years refining the process—so you don’t have to learn the hard way. This guide shares what works, what doesn’t, and how to get it right the first time. Whether you’re using a pergola, fence, or open space, this how to string Edison lights on a patio in 2026 easy guide covers every scenario.
What You Need
Before you start, let’s gather your gear. You don’t need a toolbox full of fancy equipment—just a few essentials. Here’s your checklist:
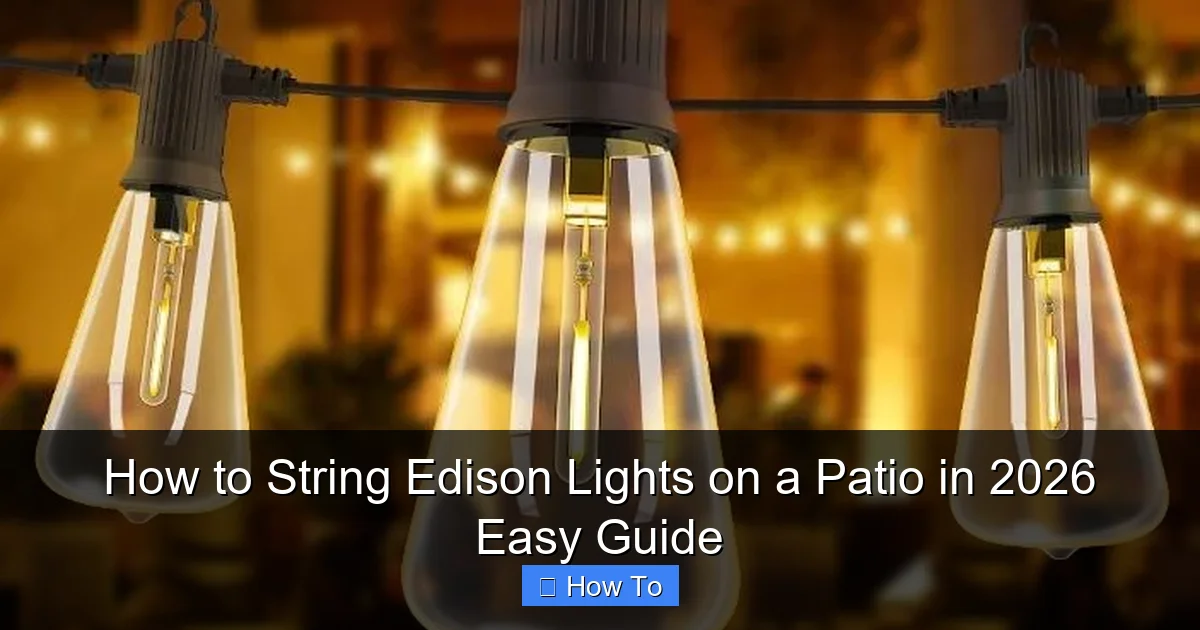
Visual guide about how to string edison lights on a patio
Image source: nerdtechy.com
- Edison bulb string lights – Look for weatherproof (IP65 or higher) and dimmable options. LED is best for energy efficiency and longevity.
- Measuring tape – For accurate spacing and planning.
- Drill & screws (or anchors) – For mounting hooks or eye screws into wood, brick, or stucco.
- Eye hooks or screw hooks – Stainless steel or zinc-plated to resist rust. Size #8 or #10 works well.
- Turnbuckles or tensioners – Optional but highly recommended for long runs to prevent sagging.
- Zip ties or cable clips – For securing loose wires along posts or railings.
- Extension cords & outdoor-rated power sources – Make sure your outlet is GFCI-protected.
- Ladder (sturdy, non-slip) – Safety first! A step ladder or extension ladder, depending on height.
- Level – To keep your lines straight (trust me, crooked lights are obvious).
- String or twine (temporary) – For mocking up the layout before drilling.
Pro tip: Buy lights with plug-and-play connectors. Some brands let you link multiple strands without overloading circuits. Check the max number of strands allowed per outlet—usually 3–4 for 25-ft sets.
Warning: Never use indoor lights outdoors. They’re not built for UV exposure, moisture, or temperature swings. Save yourself the fire hazard and invest in outdoor-rated Edison lights from the start.
Step-by-Step Guide to How to String Edison Lights on a Patio in 2026 Easy Guide
Step 1: Plan Your Layout (The Foundation of Success)
Don’t just start drilling. Take 10 minutes to plan. Grab your measuring tape and sketch a rough layout on paper or use a phone app like Sketchbook.
Ask yourself:
- Where do I want the lights to start and end?
- Am I connecting to existing structures (fence, pergola, house)? Or do I need poles?
- How high should they hang? (Aim for 7–8 feet—high enough to walk under, low enough to feel cozy.)
- Will the power source be visible? Can I hide the cord with a planter or bench?
Use string or twine to mock up the path. Walk under it. Sit under it. Does it feel right? Adjust until it does. This step alone prevents 80% of installation headaches.
For open patios without natural anchor points, consider installing light poles (like shepherd’s hooks or metal posts). They’re affordable, easy to set in concrete or ground sleeves, and give you flexibility.
Pro tip: If you’re going over a seating area, create a “canopy” effect by forming a grid or crisscross pattern. It looks stunning and distributes light evenly. But keep spacing at least 18–24 inches between lines to avoid tangling.
Step 2: Mark & Install Anchor Points
Now it’s time to drill. But first—mark your spots. Use a pencil or masking tape to mark where each hook will go.
For wooden structures (pergola, fence, deck railing):
- Pre-drill a pilot hole slightly smaller than the screw thread.
- Twist in a #8 or #10 stainless steel eye hook. Hand-tighten first, then use a screwdriver for the last few turns.
For brick, stucco, or concrete:
- Use a masonry bit to drill into the mortar (not the brick itself—it’s brittle).
- Insert a plastic anchor, then screw in the hook.
- For stucco, avoid drilling into the wire mesh. Use adhesive-backed hooks as an alternative (but only for lighter loads).
For vinyl or aluminum fencing:
- Use fence-mounted clips or zip ties to attach hooks. Avoid drilling into vinyl—it cracks easily.
Space hooks every 3–5 feet. Closer spacing = less sag. Use a level to ensure all hooks are aligned. Crooked hooks = crooked lights. And that’s not the “rustic charm” you’re going for.
Warning: If you’re drilling near electrical wires, gas lines, or plumbing, use a stud finder with a deep-scan mode to avoid accidents. When in doubt, hire a pro.
Step 3: Attach Turnbuckles or Tensioners (For Long Runs)
Got a span over 20 feet? Skip this step, and your lights will sag like a hammock. Enter: turnbuckles.
Turnbuckles are simple metal devices with hooks on each end. You attach one end to the anchor point, the other to the light string. By twisting the center, you tighten the line—eliminating droop.
Here’s how:
- Attach one end of the turnbuckle to the eye hook.
- Loop the light string’s cable through the other end (or use a carabiner for easy removal).
- Tighten the turnbuckle until the line is taut—but not overly tight. You want slight flexibility in wind.
Use turnbuckles on both ends of long runs. For shorter spans (under 15 ft), you can skip them—but still check for tension.
Pro tip: Paint turnbuckles black or match them to your fence to make them less noticeable. Or, wrap them with jute twine for a rustic look.
Step 4: Hang the Lights (The Fun Part)
Now for the magic. Unroll your Edison lights and lay them out on the ground. Plug them in to test—yes, before hanging. You don’t want to climb up just to find a dead bulb.
Start at the power source. Hang the first light strand, looping the cable through the eye hook or turnbuckle. Secure it with a zip tie or clip to prevent slipping.
Work outward. For a straight line:
- Hang the first end, then stretch the string to the next hook.
- Loop and secure. Repeat.
For a crisscross or grid pattern:
- Hang the horizontal lines first.
- Then weave vertical strands through the bulbs (don’t wrap—just drape).
- Secure at intersections with zip ties or clips.
Keep the cord slack but not loose. Too much slack = tripping hazard. Too tight = stress on the wiring.
Pro tip: If your lights have bulb covers (glass or plastic), install them now. They protect bulbs from rain and debris. But remove them in winter if you live in a freeze-prone area—ice can crack them.
Step 5: Manage the Power Cord
Nothing ruins a beautiful setup like a dangling cord. Here’s how to hide it:
- Run the cord along the base of a fence, under a deck, or behind furniture.
- Use outdoor cable clips to secure it to posts or railings.
- For ground-level runs, bury the cord under mulch or use a cord cover (like a flexible rubber sleeve).
- Plug into a weatherproof outlet cover (available at hardware stores). It keeps rain out and looks clean.
Never run cords under rugs or across walkways—tripping hazard. And avoid extension cords longer than 100 feet. Voltage drop makes lights dim.
Step 6: Test & Adjust
Plug everything in. Do all the bulbs light up? Is the spacing even? Does the glow feel right?
Look for:
- Sagging lines – Tighten turnbuckles or add support hooks.
- Uneven spacing – Adjust bulb positions or add/remove hooks.
- Glare – If bulbs shine directly into eyes, angle them downward or add shades.
Walk around. Sit in your favorite chair. Does the ambiance match your vision? Make small tweaks until it feels just right.
Pro tip: Use a dimmer switch or smart plug. It lets you adjust brightness for different moods—bright for parties, soft for romance.
Step 7: Seasonal Maintenance (Yes, You Need It)
Edison lights are tough, but they’re not indestructible. Here’s how to keep them shining:
- Fall: Wipe bulbs with a dry cloth. Check for cracks or water ingress.
- Winter: In snowy climates, remove lights or cover with a vented cover (allows airflow, prevents condensation).
- Spring: Inspect for rodent damage (yes, mice chew wires). Repair or replace damaged strands.
- Summer: Trim overhanging branches—they can snag lights in wind.
Store lights in a cool, dry place when not in use. Wrap them loosely around a cardboard tube to prevent tangling.
Pro Tips & Common Mistakes to Avoid
After years of trial and error, here are my top insights—things I wish someone had told me:
- Don’t overload circuits. Most outdoor outlets support 15 amps. A single 25-ft Edison strand uses about 0.5 amps. But add a heater, speaker, and TV? You’re in danger zone. Use a power strip with a built-in circuit breaker.
- Buy extra bulbs. Even LED bulbs fail. Keep 2–3 spare bulbs on hand. Most brands sell replacements.
- Use smart timers. No more remembering to turn lights on/off. Set them to come on at sunset and off at 10 PM. Bonus: saves energy.
- Mind the wind. In breezy areas, use wind-resistant clips or add guy wires (thin cables from the light line to a ground stake).
- Color temperature matters. 2700K–3000K = warm, cozy. 4000K+ = harsh, hospital-like. Stick to warm white for ambiance.
Common mistake: Hanging lights too low. I once set mine at 6 feet—perfect for sitting, but anyone over 5’8” hit their head. Now I go no lower than 7 feet. Your tall friends will thank you.
Another mistake: Ignoring the sun path. If your patio gets afternoon sun, the lights might be hard to see. Hang them where they’re shaded during the day—so they shine at night.
FAQs About How to String Edison Lights on a Patio in 2026 Easy Guide
Let’s tackle the questions I get most often:
Q: Can I string Edison lights without drilling holes?
A: Yes! Use adhesive hooks (like 3M Outdoor Heavy Duty) or magnetic clips for metal surfaces. For fences, try fence-mounted light clips. But these work best for short spans and lightweight lights. If you’re doing a 30-foot run, drilling is more secure.
Q: How far apart should I space the bulbs?
A: It depends on the look you want. For a subtle glow, space bulbs 12–18 inches apart. For a dramatic canopy, go 6–8 inches. Most commercial strings are pre-spaced at 12 inches—a safe middle ground.
Q: Can I connect multiple strands?
A: Yes, but check the manufacturer’s limit. Most allow 3–4 strands. Use a Y-splitter if you need more outlets. And never exceed the outlet’s amperage.
Q: What if my patio has no power source?
A: Go solar! Solar-powered Edison lights are now affordable and bright. Or use a portable power station (like a Jackery). Just charge it during the day.
Q: How do I keep lights from tangling?
A: Store them properly. Wrap around a cardboard tube or use a light reel. When hanging, unroll fully before lifting.
Q: Are Edison lights safe in rain?
A: Only if they’re outdoor-rated (IP65 or higher). Look for a rubber gasket on the bulb socket and a sealed plug. Indoor lights can short-circuit in rain.
Q: Can I leave them up year-round?
A: In mild climates, yes. But in areas with heavy snow, ice, or salt spray, take them down. Or cover with a vented cover to protect from moisture and debris.
Final Thoughts
Stringing Edison lights isn’t just about hanging bulbs—it’s about crafting a mood. A space where laughter lingers, conversations flow, and memories are made. And with this how to string Edison lights on a patio in 2026 easy guide, you’re not just following steps. You’re building an experience.
Start small. Test a short run first. Learn from the process. Then expand. Whether you’re lighting a cozy nook or a sprawling backyard, the principles stay the same: plan, anchor, tension, connect, and enjoy.
And remember: perfection isn’t the goal. Charm is. A little sag? That’s character. A bulb that flickers? It’s vintage. The goal is a space that feels lived-in and loved.
So grab your tools, invite a friend, and start stringing. Your dream patio is just a few hooks away. And when the sun sets and those golden bulbs glow? You’ll know it was worth every minute.
Happy lighting! ✨
“`

