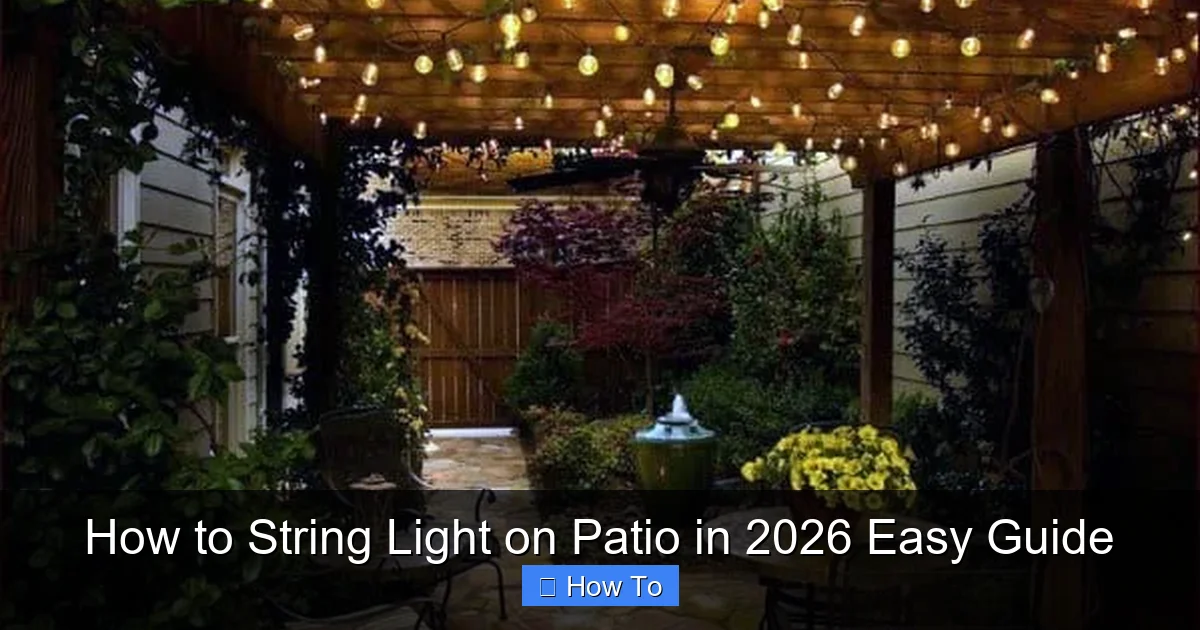
Featured image for how to string light on patio
Image source: nextluxury.com
Transform your patio into a stunning nighttime oasis in 2026 with our easy, step-by-step guide to stringing lights like a pro—no electrician needed. From measuring and choosing weather-resistant lights to securing them with durable hooks or clips, we simplify every step for a safe, dazzling display that lasts all season.
How to String Light on Patio in 2026 Easy Guide
Key Takeaways
- Plan your layout first: Measure and sketch to avoid mid-project adjustments.
- Use durable, weatherproof lights: Ensure longevity with outdoor-rated LED string lights.
- Anchor securely: Install hooks, poles, or cables to support weight safely.
- Keep power access in mind: Position lights near outlets or use solar-powered options.
- Test before finalizing: Check connections and brightness before securing all fixtures.
- Hide cords neatly: Use clips or conduits for a clean, professional look.
Why This Matters / Understanding the Problem
Let’s be honest—nothing beats a warm summer night on the patio, the air buzzing with laughter, the scent of grilled food in the breeze. But when the sun goes down, so does the mood if you don’t have proper lighting. That’s where string lights come in.
I remember setting up my first patio for a birthday dinner. I thought I could just drape a few lights over the railing and call it a day. Spoiler: it looked like a spiderweb after a storm. The lights sagged, one side was too bright, the other was dark, and I ended up with a tangled mess. Sound familiar?
If you’ve ever struggled with how to string light on patio in 2026 easy guide—whether it’s spacing, power access, or avoiding that “I did this in 10 minutes” look—you’re not alone. The good news? With a little planning and the right approach, you can transform your outdoor space into a cozy, Instagram-worthy retreat. And no, you don’t need to be a DIY pro.
Whether you’re hosting a party, enjoying a quiet evening, or just want to extend your outdoor time, string lights are the secret sauce. This guide walks you through every step—from planning to power—so your patio glows beautifully, safely, and with zero stress.
What You Need
Before you start, let’s gather your toolkit. You don’t need fancy gear, just the right basics. Here’s what I’ve learned works best after setting up string lights on patios, decks, and even pergolas over the years.
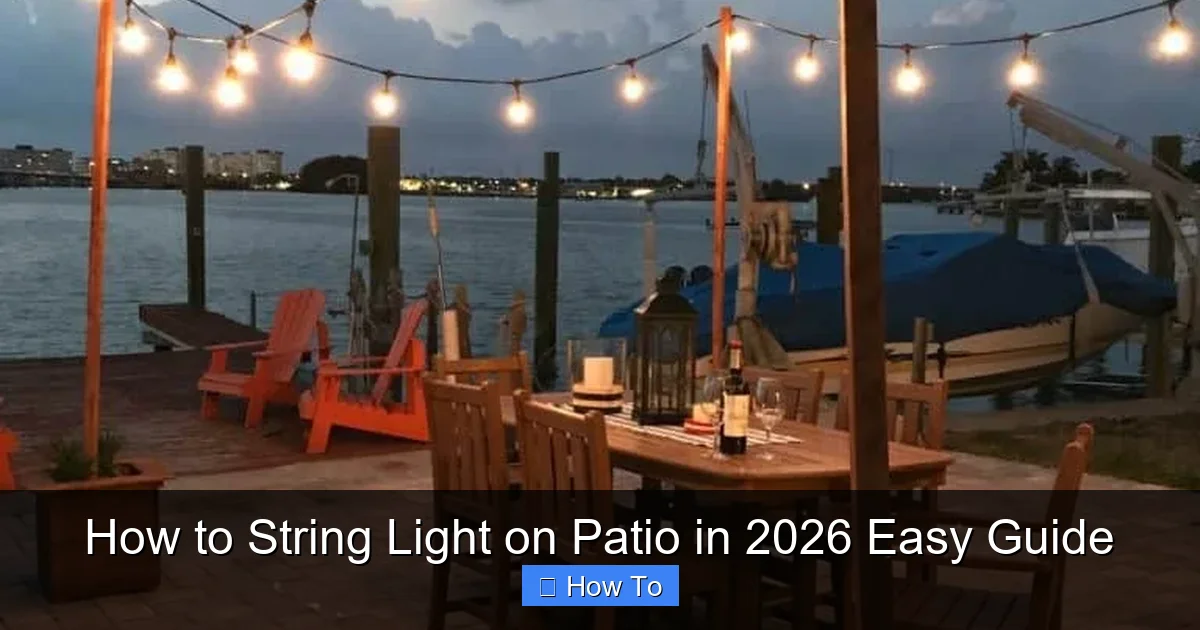
Visual guide about how to string light on patio
Image source: thesawguy.com
- String lights – LED, weatherproof, and preferably with a warm white glow (2700K–3000K). I like plug-in or solar-powered options depending on access to outlets.
- Measuring tape – Essential for spacing and avoiding “why is this side shorter?” moments.
- Drill and drill bits – For wood, concrete, or brick (use masonry bits for stone or brick).
- Outdoor-rated screws or hooks – Cup hooks or eye hooks work well. Use stainless steel or coated to prevent rust.
- Zip ties (outdoor-rated) – Great for temporary setups or securing loose wires.
- Light clips or adhesive hooks – For vinyl siding, stucco, or if you don’t want to drill.
- Extension cords (outdoor-rated) – GFCI-protected if near water sources.
- Timer or smart plug (optional) – So your lights turn on at sunset without you lifting a finger.
- Ladder – For reaching higher points safely.
- Helper (optional but helpful) – Someone to hold the lights while you secure them.
Pro tip: Always check your lights indoors first. Nothing’s worse than hanging a strand only to find a bulb is out. Test them, then test them again.
Now that you’ve got your gear, let’s get into the nitty-gritty of how to string light on patio in 2026 easy guide—step by step, with real-life fixes I’ve picked up along the way.
Step-by-Step Guide to How to String Light on Patio in 2026 Easy Guide
Step 1: Plan Your Layout (The Secret to a Balanced Look)
Before you touch a drill or a hook, take 10 minutes to plan. I can’t stress this enough. A good layout saves you from redoing everything halfway through.
Grab your measuring tape and walk around your patio. Ask yourself:
- Where do you want the lights to go? (Overhead, around railings, along walls, or in a canopy?)
- How high should they hang? (I aim for 7–8 feet so people don’t bump into them.)
- Where’s the power source? (You don’t want a 50-foot extension cord running across your lawn.)
Sketch a quick diagram on paper or use a phone app like SketchUp Free or RoomSketcher to visualize. I once used a napkin sketch that saved me from drilling holes in the wrong spot—true story.
For a classic look, I recommend a grid pattern (like a crisscross) or parallel lines (simple, elegant). If you have a pergola, go for a canopy. For railings or fences, wrap or drape.
Pro tip: Leave a little slack—about 1–2 inches per 10 feet—to avoid tension on the wires. This helps prevent sagging and keeps the lights looking intentional.
Step 2: Choose Your Mounting Method (Match It to Your Surface)
Not all patios are the same. Your mounting method depends on the surface: wood, vinyl, stucco, concrete, or metal.
- Wood (deck, pergola, railing): Use stainless steel cup hooks or eye screws. Drill pilot holes first to prevent splitting. I like 1-inch hooks for a low profile.
- Vinyl siding: Avoid drilling. Use adhesive outdoor hooks or zip ties through the siding’s nailing flange (the bottom edge). These hold surprisingly well.
- Stucco or plaster: Use plastic wall anchors with screws. Drill carefully—stucco can crack. I use a 1/8-inch bit for pilot holes.
- Concrete or brick: Use masonry screws or plastic anchors. A hammer drill helps, but a regular drill with masonry bit works in a pinch.
- Metal (fences, railings): Use magnetic hooks or zip ties. For permanent setups, weldable eyelets are an option (but that’s for pros).
Warning: Never use nails or staples on string lights. They can damage the wire insulation and create fire hazards. I learned this the hard way when a staple nicked a wire and caused a short. Yikes.
For renters or temporary setups, adhesive hooks or removable clips are your friends. Brands like 3M Outdoor Command Hooks hold up well in rain and wind.
Step 3: Mark and Install Your Mounting Points
Now it’s time to put those hooks in. But don’t just eyeball it—measure.
Start at one corner and measure every 2–3 feet. Use a pencil or masking tape to mark each spot. I like 2.5 feet for a balanced look—not too close, not too far.
For a grid pattern, mark both horizontal and vertical lines. Use a level or string line to keep them straight. Nothing kills the vibe like crooked lights.
Drill pilot holes (if needed), then screw in the hooks. Don’t over-tighten—snug is enough. For adhesive hooks, clean the surface with rubbing alcohol first. I once skipped this step, and the hook fell off after one rainstorm. Lesson learned.
If you’re using zip ties on railings, loop them through the balusters or around the top rail. Trim the excess with scissors or a utility knife.
Step 4: Hang the Lights (The Fun Part)
Now for the magic. Start at the end closest to the power source. This reduces cord clutter.
Unroll the lights and drape them over the hooks. Don’t stretch them tight—remember that 1–2 inches of slack per 10 feet. I like to hang them in a slight “S” curve for a relaxed, organic feel.
For parallel lines, connect multiple strands with end-to-end connectors (if your lights support it). Most LED strands allow 3–4 to be linked. Check the packaging.
If you’re doing a canopy, drape the lights diagonally from corner to corner, then add cross lines. Use a helper to hold the middle while you secure the ends. I once tried to do this solo and ended up with a tangled knot. Not fun.
For railings, wrap the lights loosely around each post or use clips to attach them vertically. I prefer the vertical look—it’s less likely to sag.
Pro tip: If your lights have a plug on one end, hang that end first. Then work backward. This keeps the plug accessible and reduces strain on the wire.
Step 5: Manage Power and Cords (No Tripping Hazards)
This is where many people slip up. Exposed cords aren’t just ugly—they’re a tripping hazard and can get damaged.
Use outdoor-rated extension cords rated for wet locations. Look for “SJTW” on the label. Avoid indoor cords—they’ll degrade quickly in the sun and rain.
Route cords along walls, railings, or under furniture. Use cord clips or zip ties to keep them tidy. I like to run cords behind planters or along the edge of the patio to hide them.
If you’re far from an outlet, use a weatherproof outlet box or outdoor power strip. Never daisy-chain more than three high-wattage devices. For lights, you’re usually safe with 4–5 strands, but check the wattage.
For a cleaner look, consider solar-powered string lights. They’re perfect for spots without power. Just make sure the solar panel gets 6+ hours of direct sunlight. I use them on my pergola—no cords, no fuss.
For ultimate convenience, add a smart plug or timer. I use a TP-Link Kasa plug that turns on at sunset. My lights come on automatically, and I never forget to turn them off.
Step 6: Test, Adjust, and Secure
Plug in the lights and step back. Look for:
- Uneven spacing
- Sagging wires
- Bright or dark spots
- Flickering bulbs
If a section sags, add a support hook in the middle. I use a small cup hook or a zip tie to “lift” the wire.
If a bulb is out, replace it or use a light tester pen to find the issue. Most LED strands are parallel-wired, so one bad bulb won’t kill the whole strand.
Once everything looks good, secure any loose wires with zip ties or clips. Trim the ends neatly. I use a utility knife—no frayed plastic.
For long-term setups, consider conduit or raceway to protect the cord. It’s overkill for most, but great if you’re in a high-traffic area.
Step 7: Seasonal Care and Storage (Keep Them Lasting)
String lights can last years if you care for them. Here’s how:
- Winter: If you live in a cold climate, take them down or use all-weather lights. Snow and ice can damage wires.
- Summer: Check for frayed cords or loose hooks. Replace damaged parts before they fail.
- Storage: Coil them loosely around a cardboard tube or a light reel. Store in a dry place. I use an old shoebox with silica gel packets to prevent moisture.
I leave my solar lights up year-round. The ones with batteries I take down and store in a bin with the charger. No tangles, no surprises next spring.
Pro Tips & Common Mistakes to Avoid
After years of trial and error, here are my top insider tips—plus the mistakes I wish I’d avoided.
- Don’t overhang: Keep lights at least 7 feet high. I once hung them too low, and my friend walked into them. Ouch.
- Use warm white, not cool: Cool white (5000K+) looks harsh outdoors. Warm white (2700K–3000K) is cozy and inviting.
- Mix bulb styles: For visual interest, mix Edison bulbs with fairy lights. I use Edison on the main lines and fairy lights for accents.
- Check for voltage drop: Long runs of low-voltage lights (like solar) can dim at the end. Use a voltage meter or add a booster if needed.
- Label your cords: Use colored tape to mark which plug goes to which strand. Saves time when you’re unplugging.
Common mistake: Hanging lights in a straight, tight line. It looks stiff and unnatural. Add a little curve—it makes the space feel relaxed and lived-in.
Another big one: ignoring the wind. If your patio is exposed, use heavier-duty hooks and secure the lights more frequently. I once had a gust blow a whole strand off the pergola. Now I use zip ties every 18 inches.
And finally: don’t rush the power plan. I’ve seen people run cords across lawns or through windows. It’s unsafe and ugly. Plan your power path before you hang anything.
When you follow this how to string light on patio in 2026 easy guide, you’re not just hanging lights—you’re creating an experience. And that’s what matters.
FAQs About How to String Light on Patio in 2026 Easy Guide
Let’s tackle the questions I get most—straight, simple, and from real experience.
Can I leave string lights up all year?
Yes, but only if they’re rated for all-weather or commercial-grade. Most consumer lights last 3–5 years outdoors. Check the packaging for an “IP” rating (like IP65). The higher, the better. I leave my solar lights up year-round, but I take down the plug-in ones in winter to avoid ice damage.
What if I don’t have an outdoor outlet?
You’ve got options. Use solar-powered lights (my favorite), battery-operated strands, or run an outdoor-rated extension cord from an indoor outlet. If you’re using an extension cord, make sure it’s GFCI-protected and never run it through a window or door—this is a fire hazard.
How do I prevent sagging?
Three ways: add support hooks every 2–3 feet, use heavier-gauge lights (like 20AWG), or choose lights with built-in tensioners. I also add a small zip tie in the middle of long spans to “lift” the wire. Works like a charm.
Can I connect different brands of string lights?
Not usually. Most brands use proprietary connectors. Stick to the same brand or use a universal light connector (available online). I tried mixing brands once—it didn’t work. Save yourself the hassle.
What’s the best way to hang lights on a pergola?
For a pergola, I like a canopy or grid pattern. Use cup hooks on the rafters, spaced 2–3 feet apart. Drape the lights diagonally first, then add cross lines. For a softer look, hang them in a zigzag. I use this for my pergola—it looks like a starry sky.
Are LED string lights safe outdoors?
Absolutely—if they’re UL-listed and weatherproof. Look for “wet location” on the label. LED lights run cool, so they’re safer than incandescent. Just avoid covering them with flammable materials (like fabric).
How many strands can I connect?
It depends on wattage. Most LED strands use 10–20 watts. Add them up and check your outlet’s capacity (usually 15 amps). I connect 4–5 strands max. If you’re unsure, use a power strip with overload protection.
Final Thoughts
String lights aren’t just decoration—they’re mood-makers. When you get it right, your patio transforms from a dark backyard into a welcoming oasis. And with this how to string light on patio in 2026 easy guide, you’ve got everything you need to do it right the first time.
Remember: plan your layout, match the mount to your surface, manage power smartly, and take care of your lights. It’s not about perfection—it’s about creating a space where you want to spend time.
So grab your tools, test your lights, and start hanging. Your next summer night just got a whole lot brighter. And hey, if you mess up? No worries. I’ve been there. Just unhook, adjust, and try again. That’s how we learn.
Now go make your patio glow—you’ve got this.

