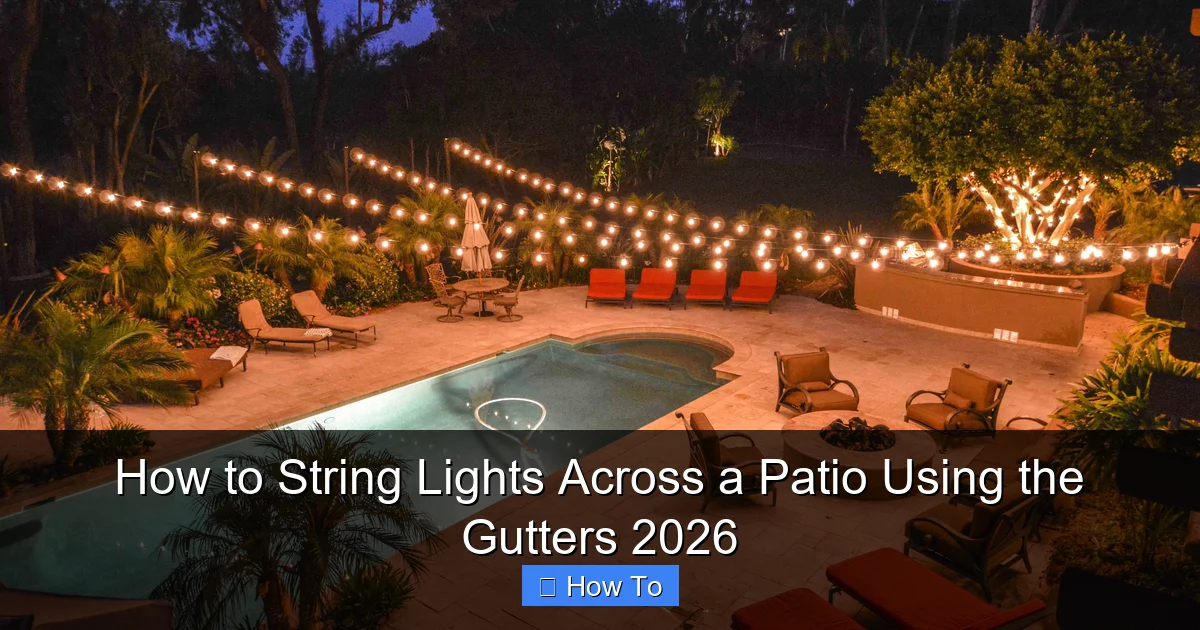
Featured image for how to string lights across a patio using the gutters
Image source: i.pinimg.com
Stringing lights across your patio using gutters is the easiest, most secure way to create a stunning outdoor ambiance without drilling or damaging walls. By attaching clips or hooks directly to the gutter edge, you can evenly space and suspend string lights for a professional look that withstands wind and weather. This method works year-round and keeps cords tidy, making it ideal for both holiday displays and everyday patio lighting.
How to String Lights Across a Patio Using the Gutters 2026
Key Takeaways
- Measure your patio to determine the right length and spacing for lights.
- Use gutter hooks for a secure, tool-free installation without damaging surfaces.
- Opt for LED lights to save energy and withstand outdoor conditions longer.
- Plan light layout to ensure even coverage and avoid excessive sagging.
- Check weather resistance of lights and cords before permanent installation.
- Anchor end points tightly to maintain tension and prevent drooping over time.
Why This Matters / Understanding the Problem
Picture this: it’s a warm summer evening, you’re sipping lemonade on your patio, and the sun dips below the horizon. The mood is perfect—until the darkness sets in. You want to extend those golden hours, but you’re not sure how to light your space without tripping over extension cords or drilling into your home’s exterior.
That’s where learning how to string lights across a patio using the gutters 2026 comes in. It’s one of the cleanest, most reliable ways to add ambiance without damaging your siding, roof, or deck. Unlike ground-mounted poles or freestanding fixtures, gutter-mounted lights blend into the architecture. They’re secure, weather-resistant, and—when done right—look professionally installed.
But here’s the catch: gutters are delicate. They’re not designed to hold heavy loads, and improper installation can lead to leaks, sagging, or even water damage. I learned this the hard way after my first attempt left my neighbor’s downspout dripping into their basement. (Yes, really.)
The good news? With the right tools, a little patience, and the method I’m about to share, you can avoid those headaches. This guide walks you through how to string lights across a patio using the gutters 2026 safely, affordably, and with a result you’ll love.
Pro Tip: This method works best on homes with aluminum, vinyl, or steel gutters. Avoid using it on older, brittle gutters or those already showing signs of wear.
What You Need
Before you climb that ladder, let’s gather your gear. You don’t need a full toolkit—just a few essentials that’ll make the job smoother and safer.
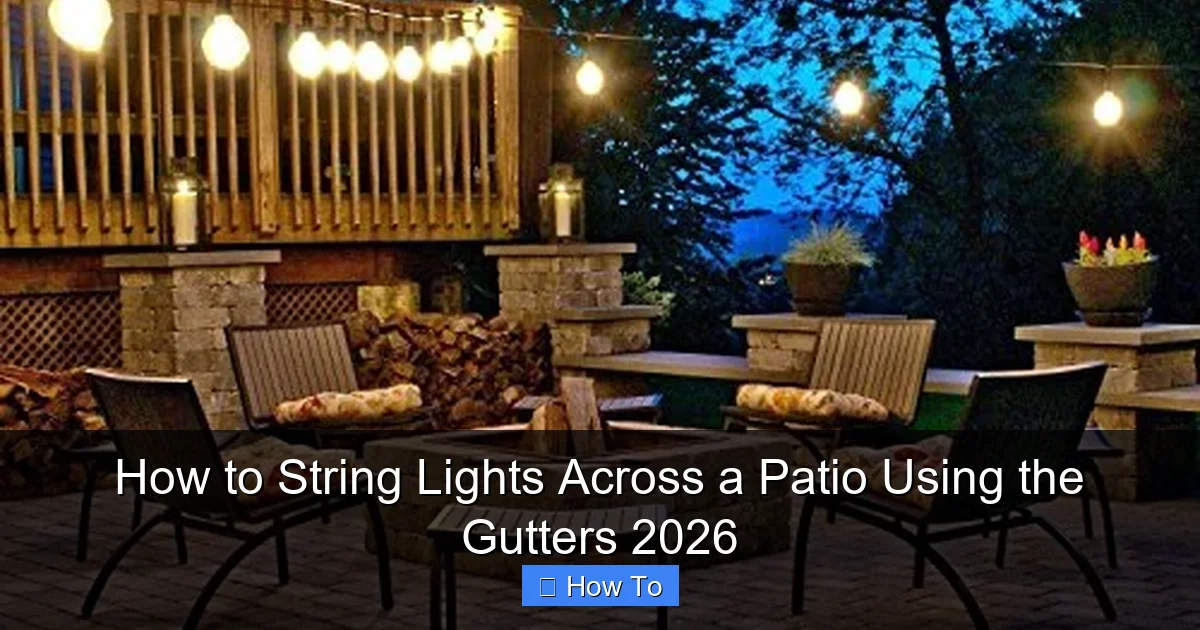
Visual guide about how to string lights across a patio using the gutters
Image source: houseandgardenstore.co.uk
- String lights: Choose LED, weatherproof (IP65 or higher), and with a plug that can reach an outdoor outlet. I recommend 48–72 feet for most standard patios. (More on choosing lights later.)
- Gutter clips: Use non-penetrating clips designed for gutters. Look for ones with rubberized grips—they won’t scratch or dent. Brands like ClipLight or PatioMate work great.
- Measuring tape: For spacing and layout planning.
- Extension ladder: A 12–16 ft. ladder with stabilizers. Safety first!
- Level: A small torpedo level helps keep lines straight.
- Outdoor-rated extension cord (if needed): Make sure it’s GFCI-protected.
- Zip ties (optional): For bundling excess wire or securing the plug.
- Work gloves: Protect your hands from sharp gutter edges.
- Smart plug or timer (optional but smart): So you don’t have to climb up every time to turn them on.
Total cost? Usually under $100—especially if you already have lights. And if you’re doing how to string lights across a patio using the gutters 2026 for the first time, this list covers 99% of what you’ll need.
Warning: Never use nails, screws, or adhesive hooks on gutters. They can void warranties, cause leaks, or damage the gutter’s structural integrity.
Step-by-Step Guide to How to String Lights Across a Patio Using the Gutters 2026
Step 1: Choose the Right String Lights
Not all lights are created equal. For gutter mounting, you need lights that are:
- Weatherproof: Look for “damp location” or “wet location” ratings (IP65 or higher).
- LED: They run cooler, use less energy, and last longer than incandescent.
- Plug-in (not battery): Batteries die, and solar isn’t reliable in shaded patios.
- Bulb spacing: 6–12 inches is ideal for even coverage without overcrowding.
I love the Brightown Outdoor String Lights—they’re affordable, come with shatterproof bulbs, and have a 50-foot strand that fits most homes. But any brand with rubberized cords and UV-resistant housing will do.
Pro tip: Buy one extra strand. You’ll likely need it for corners or if you misjudge the length. (I always do.)
Step 2: Measure Your Gutter Run
Grab your measuring tape and ladder. Measure the total length from one end of your patio’s gutter to the other. Don’t forget to add 6–12 inches on each end for slack and plug access.
For example: If your patio spans 20 feet, you’ll want at least 21–22 feet of light strand. If you’re wrapping around a corner, measure the full path—don’t cut corners (pun intended).
Also, check the gutter’s condition. Look for:
- Cracks or splits
- Loose hangers
- Clogged downspouts
If you spot any issues, fix them before installing lights. A weak gutter can’t support even lightweight strands over time.
This step is crucial for how to string lights across a patio using the gutters 2026—accuracy here prevents sagging and uneven tension later.
Step 3: Plan Your Layout
Now, decide how you want the lights to look. Most people go for one of two styles:
- Straight line: Parallel to the house, great for modern patios.
- “U” or “L” shape: Wraps around the front and side, perfect for L-shaped decks or open-air dining areas.
Use painter’s tape to mark key points on the gutter: start, end, and any corners. This helps you visualize the path before clipping anything.
Also, plan your power source. Can the plug reach an outlet? If not, you’ll need an extension cord—but make sure it’s rated for outdoor use and protected from foot traffic. I once used a regular indoor cord and nearly caused a short when a sprinkler hit it. Not fun.
Step 4: Install Gutter Clips (Without Damaging Anything)
Time to get up on the ladder—but slowly. Set it on level ground, use a stabilizer, and have someone spot you if possible.
Take your gutter clips and snap them onto the front lip of the gutter. The best ones have:
- Rubber or silicone padding to grip without scratching
- A loop or hook for the light strand
- Adjustable arms to fit different gutter sizes
Space clips every 12–18 inches. Closer spacing = better support, especially for heavier strands or windy areas. For corners, use a clip on both sides of the bend to keep the strand tight.
Don’t force clips. If they don’t fit, check the gutter type. Some clips are made for K-style gutters; others work better with half-round. Match them to your system.
Pro Tip: Test a clip on a hidden section first. Make sure it holds but doesn’t distort the gutter. You should be able to remove it easily later.
Step 5: String the Lights (The Right Way)
Now, uncoil your lights and plug them in—but don’t turn them on yet. You want to check for dead bulbs or wiring issues before hanging.
Start at the plug end. Clip the first 6 inches of the strand to the gutter. Then, gently drape the lights along the clips, working toward the other end.
Key things to remember:
- Don’t pull too tight. Leave a slight sag—about 1–2 inches between clips. This prevents strain on the clips and allows for expansion in heat.
- Keep the plug accessible. Don’t bury it in the middle. I like to leave it hanging just below the downspout so I can unplug it easily for storage.
- Secure the end. Use the last clip to hold the end of the strand, or loop the excess through a zip tie for a clean look.
If you’re using multiple strands, connect them before hanging. Most outdoor lights have end-to-end connectors. Just plug them together on the ground, then hang as one unit.
Step 6: Level and Adjust
Once the lights are up, step back and look from different angles. Are they straight? Do they sag in the middle? Is the plug in a safe spot?
Use your level to check the first and last clips. Adjust by loosening the clip, repositioning, and snapping it back. Small tweaks make a big difference.
If the lights sag, add an extra clip in the middle. If they’re too tight, remove a clip or two. Remember: the goal is a gentle, even curve—not a tight wire.
For corners, make sure the strand bends smoothly. Don’t force a 90-degree turn. Instead, use two clips at a slight angle to guide the light around the bend.
Step 7: Manage the Power Cord
This is where many people mess up. A dangling cord is not only ugly—it’s a tripping hazard and a lightning rod for water.
Here’s how to handle it:
- Route the cord down the downspout or along the gutter hanger.
- Use zip ties (outdoor-rated) to secure it every 12–18 inches.
- Run it along the wall to an outdoor outlet. If the outlet is on the other side of the house, use a weatherproof cord cover or bury it in a conduit (for permanent setups).
For extra safety, plug into a GFCI outlet. If you don’t have one, install a GFCI adapter. They cost $10 and could save you from an electrical fire.
Step 8: Test and Enjoy
Now, turn them on! Walk around the patio. Do the lights illuminate the whole space? Are there dark spots? Adjust the strand or add a second line if needed.
I like to use a dimmer or smart plug so I can set the mood. Warm white (2700K) gives a cozy, candle-like glow. Cool white (4000K) feels more modern but can be harsh.
Take photos at dusk. This helps you spot any issues before your guests arrive. And honestly, it’s just fun to see your handiwork shine.
Pro Tips & Common Mistakes to Avoid
After installing lights on five patios (including my own), here’s what I wish I’d known earlier:
Pro Tip #1: Use a light strand with replaceable bulbs. If one burns out, you don’t have to replace the whole set. Saves money and frustration.
Pro Tip #2: Install in dry weather. Wet gutters are slippery and harder to work with. Plus, moisture can damage the clips or lights.
Pro Tip #3: Label your strands. If you use multiple sets, label the plugs with tape. Makes troubleshooting easier when one goes out.
Common Mistake #1: Overloading the gutter. I once hung three strands on a single gutter. By spring, it was sagging like a hammock. Stick to one or two max. If you need more light, add a second row or use freestanding poles.
Common Mistake #2: Ignoring wind. Gutters catch wind like sails. If you live in a breezy area, use shorter strands and more clips. Or consider a wind-resistant design, like net lights.
Common Mistake #3: Forgetting about leaves. Gutters clog fast. If you don’t clean them regularly, debris can push clips off or block light. Set a reminder to clean gutters twice a year.
Common Mistake #4: Using indoor lights outdoors. I did this once—big mistake. The first rainstorm fried the wiring. Always check the rating. “Indoor/outdoor” doesn’t mean “wet location.”
And finally: Don’t rush. Take your time. A well-installed setup lasts years. A rushed one? It’ll fall down in the first storm.
When done right, how to string lights across a patio using the gutters 2026 becomes a seasonal tradition—not a one-time project.
FAQs About How to String Lights Across a Patio Using the Gutters 2026
Can I use this method on vinyl gutters?
Absolutely. Just use soft-grip clips. Vinyl is more flexible than aluminum, so avoid anything that pinches or clamps too tightly. Rubberized clips are your best bet.
What if my gutters are too high to reach?
Use a gutter cleaning pole with a clip attachment. Some models have magnetic or hook ends that let you install clips from the ground. Or, rent a lift for the day. (I’ve done both—the pole works surprisingly well.)
Are gutter clips safe in winter?
Yes, if they’re installed properly. Most clips are rated for -40°F to 140°F. But if you get heavy snow or ice, consider removing the lights temporarily. Ice dams can add weight and stress.
Can I connect multiple strands end-to-end?
Yes, but check the manufacturer’s limit. Most outdoor lights can handle 2–3 strands max. Overloading can cause overheating or voltage drop. If in doubt, use a separate circuit for each run.
What’s the best way to store lights in the off-season?
Remove them before winter. Coil them loosely (no tight loops), store in a breathable bag (not plastic), and keep in a dry place. I use a labeled bin in the garage. No tangles, no damage.
Do I need a permit or HOA approval?
Probably not for temporary installations (less than 90 days). But if you’re making it permanent, check with your HOA or local codes. Some areas regulate exterior lighting or electrical work.
How do I fix a sagging strand?
Add an extra clip in the middle. Or, re-string with a slightly longer strand. Sometimes, the sag is due to heat expansion—just loosen the clips a bit.
Final Thoughts
Learning how to string lights across a patio using the gutters 2026 isn’t just about aesthetics—it’s about creating a space where memories happen. A place for late-night talks, backyard barbecues, and quiet evenings under a canopy of stars (or, in this case, warm LED glow).
This method is smart because it’s:
- Non-invasive: No drilling, no damage.
- Reversible: Take it down in minutes.
- Weather-smart: Gutters protect the lights from direct rain.
- Cost-effective: Uses existing structure.
Yes, there’s a learning curve. But once you’ve done it once, you’ll wonder why you ever considered poles or ground lights. (Okay, maybe poles have their place—but gutters? They’re the secret weapon.)
Start small. Try a single strand. Test it for a week. Adjust as needed. Then, expand. Add a second line. Try different bulb styles. Play with timers or smart controls.
And remember: perfection isn’t the goal. Ambiance is. If your patio feels warm, inviting, and just a little magical, you’ve nailed it.
So grab your clips, climb that ladder, and light up your nights. The 2026 season is yours to shine.
Final Tip: Take a photo when it’s done. Frame it. You just upgraded your home—and your life.

