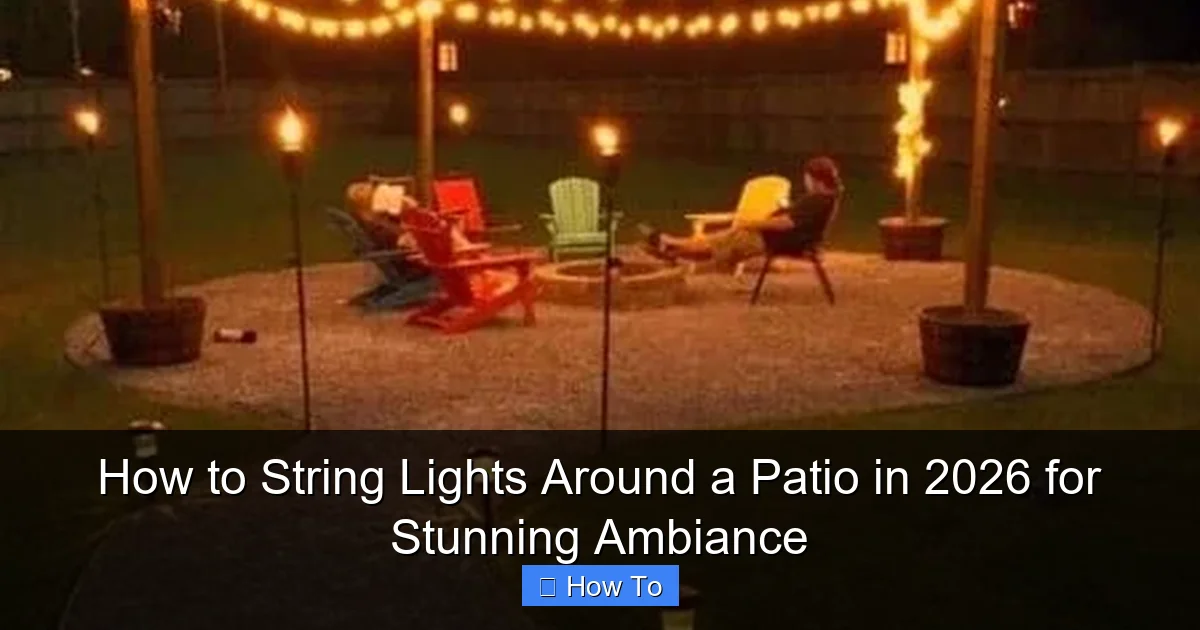
Featured image for how to string lights around a patio
Image source: nextluxury.com
Transform your patio into a captivating retreat in 2026 by strategically stringing lights along railings, pergolas, or overhead grids for balanced, ambient illumination. Choose weather-resistant, energy-efficient LED string lights and use adjustable hooks or zip ties for secure, damage-free installation. Layer lighting heights and spacing to create depth and a professional, magazine-worthy glow.
“`html
How to String Lights Around a Patio in 2026 for Stunning Ambiance
Key Takeaways
- Plan your layout: Sketch light placement before installation to ensure balanced coverage and avoid overhanging.
- Choose weatherproof lights: Use UL-rated outdoor string lights for safety and durability in all conditions.
- Anchor securely: Install hooks or eye screws into studs or sturdy structures to prevent sagging.
- Use dimmers or timers: Enhance ambiance and save energy with smart controls or automated scheduling.
- Layer lighting: Combine string lights with lanterns or LEDs for depth and visual interest.
- Check spacing: Keep bulbs 6–8 feet apart for even glow without overcrowding or dark gaps.
Why This Matters / Understanding the Problem
Let’s be honest—there’s something magical about a patio lit with soft, twinkling lights. Whether you’re hosting a summer BBQ, enjoying a quiet evening with a book, or sharing a glass of wine with a loved one, the right lighting transforms your outdoor space from “meh” to “wow.”
But here’s the catch: many of us start with great intentions, only to end up with a tangled mess, uneven spacing, or lights that fall after a light breeze. I’ve been there—three years ago, I spent an entire Saturday stringing lights, only to wake up to a droopy, sad-looking patio the next morning.
That’s why learning how to string lights around a patio in 2026 for stunning ambiance isn’t just about hanging bulbs. It’s about creating a mood, maximizing safety, and doing it in a way that lasts—without the frustration.
With new materials, smarter tools, and better design trends emerging every year, 2026 is the perfect time to get this right. Whether your patio is small and cozy or expansive and party-ready, this guide will help you achieve a warm, inviting glow—without the headache.
What You Need
Before we dive in, let’s gather the essentials. I’ve tested dozens of setups, and these are the tools and materials that actually work—no fluff, just what you need.
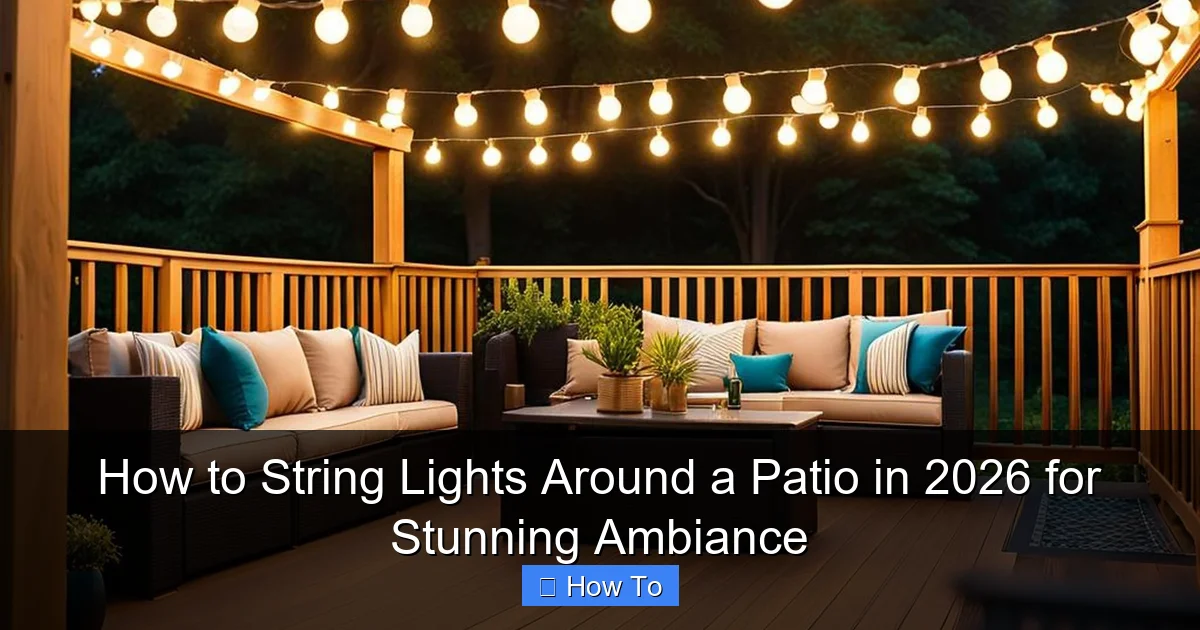
Visual guide about how to string lights around a patio
Image source: tiponthetrail.com
- String lights: Opt for LED, weatherproof (IP65 or higher), and preferably with a warm white glow (2700K–3000K). Solar-powered options are great for off-grid spots.
- Mounting hardware: Screw-in hooks, adhesive-backed clips (for smooth surfaces), or zip ties (temporary).
- Measuring tape: Essential for even spacing and avoiding over-stretching.
- Drill and screwdriver: For installing permanent hooks or anchors.
- Ladder or step stool: Safety first—don’t lean over railings.
- Extension cords or power strips: Outdoor-rated, GFCI-protected for safety.
- Timer or smart plug: Automate on/off times to save energy and boost ambiance.
- Optional but helpful: A second person (trust me, it makes a difference!), painter’s tape, and a notepad to sketch your layout.
Pro tip: Buy 10–20% more lights than you think you’ll need. You’ll want flexibility for curves, corners, or future expansion. This is especially true when planning how to string lights around a patio in 2026 for stunning ambiance—you don’t want to run out halfway through.
Step-by-Step Guide to How to String Lights Around a Patio in 2026 for Stunning Ambiance
Step 1: Plan Your Layout (Sketch It Out)
Before touching a single light, grab a piece of paper or use a free app like SketchUp Free or Canva to sketch your patio. Draw the shape, mark corners, railings, posts, and any obstacles (like plants or furniture).
Decide on your pattern:
- Perimeter wrap: Great for rectangular or square patios. Lights run along the edges.
- Crisscross (X-pattern): Ideal for larger spaces. Adds depth and drama.
- Canopy or grid: Best for open areas. Lights hang from overhead structures (like a pergola).
- Zigzag: A modern twist—adds movement and visual interest.
Measure the total distance you’ll cover. Multiply by 1.2 to account for slack and curves. For example, if your perimeter is 40 feet, plan for 48 feet of lights.
Insider tip: I once skipped this step and ended up with lights sagging in the middle because I underestimated the distance. Sketching saves time and heartache.
Step 2: Choose the Right Mounting Method
The way you attach lights depends on your patio’s surface. Here’s what works—and what doesn’t:
- Wooden railings or posts: Use screw-in cup hooks or eye hooks. Pre-drill holes to avoid splitting.
- Concrete or brick: Use masonry anchors with screws. Avoid adhesive clips—they fail in heat or cold.
- Stucco or painted walls: Try adhesive-backed clips (like 3M Outdoor Mounting Clips). Test one first—some paints peel.
- Glass or smooth metal: Use clear suction cups or non-marking adhesive hooks.
- No structure? (Open patio): Install freestanding poles, use shepherd’s hooks, or anchor to nearby trees (with tree-friendly straps).
For permanent setups, consider installing small metal J-hooks or eye bolts—they’re nearly invisible and hold weight well. If you’re going for a temporary look, adhesive clips work, but avoid cheap plastic ones—they crack in UV light.
This is a key part of how to string lights around a patio in 2026 for stunning ambiance: the right hardware ensures your lights stay put, rain or shine.
Step 3: Install Mounting Points (Even Spacing Is Key)
Now, mark where each hook or clip will go. Use a measuring tape and painter’s tape to mark spots every 12–18 inches. Why this range?
- Closer spacing (12″) = tighter, cozier look (great for intimate gatherings).
- Wider spacing (18″) = lighter, airier feel (ideal for large patios).
Install one point at a time. For screw-in hooks, drill pilot holes first—especially in hardwood. For adhesive clips, clean the surface with rubbing alcohol and press firmly for 30 seconds.
Warning: Don’t skip the cleaning step. Dust or grease ruins adhesion. I learned this the hard way when my lights fell during a dinner party—mortifying.
Pro tip: Use a level to keep hooks aligned. Even a 2-degree tilt becomes obvious at night.
Step 4: Test Your Lights Before Hanging
Plug in your string lights and lay them out on the ground or a table. Check:
- All bulbs work.
- No frayed wires or exposed copper.
- The plug is at a safe, accessible location (ideally near an outlet).
If using multiple strands, test connections. Some lights are “end-to-end” (plug one into another), while others require a splitter. Never exceed the manufacturer’s recommended number of connected strands—usually 2–3 for standard 25-foot sets.
For solar lights, place them in direct sunlight for a full day before testing.
Step 5: Hang the Lights (Start at the Power Source)
Begin at the power source and work outward. This prevents dangling cords and reduces strain on the first bulb.
- For perimeter wraps: Attach the first bulb to the hook, then gently drape the string along the path. Use zip ties or small clips to secure the wire between bulbs (don’t tie tightly—allow slack).
- For crisscross patterns: Anchor one end, run the string diagonally to the opposite corner, then back. Use a carabiner or loop knot to connect at intersections.
- For canopy grids: Hang main support lines first (like a clothesline), then attach lights perpendicularly with S-hooks.
Keep the wire taut but not stretched. You want a gentle curve, not a straight line. If lights sag, add more support clips.
Real talk: I once pulled the string too tight and popped a bulb. Now I use the “two-finger rule”—if you can pinch the wire between your fingers with slight resistance, it’s perfect.
Step 6: Manage Cords and Power (Safety First)
Visible cords ruin the magic. Here’s how to hide them:
- Run cords behind railings or under furniture.
- Use cord covers (like PVC conduit) for floor-level runs.
- For overhead setups, zip-tie cords to support lines or use decorative sleeves.
Always use outdoor-rated extension cords. Look for “SJTW” or “SJOOW” labels—they’re water-resistant. Plug into a GFCI outlet (or use a GFCI adapter). This shuts off power if moisture gets in, preventing shocks.
For solar lights, position panels in full sun. Use a timer to ensure lights turn on at dusk.
Step 7: Add Ambiance (The Fun Part!)
Now for the creative touches:
- Layer lighting: Combine string lights with lanterns, candles, or LED path markers.
- Use dimmers or smart bulbs: Adjust brightness for different moods. I love setting mine to 50% for dinner, 80% for parties.
- Play with colors: Warm white is classic, but soft amber or vintage Edison bulbs add character.
- Add greenery: Weave lights through potted plants or wrap around a tree trunk (use tree-safe straps).
This is where how to string lights around a patio in 2026 for stunning ambiance truly shines—your space becomes a personal sanctuary.
Step 8: Test, Adjust, and Enjoy
Step back and turn on the lights. Look for:
- Sagging areas (add clips).
- Uneven spacing (reposition bulbs).
- Glare (angle lights downward or use diffuser covers).
Invite a friend over for a “lighting test.” Get their honest feedback. Sometimes what looks great to you feels too bright or too dim to others.
Pro Tips & Common Mistakes to Avoid
- Don’t overhang lights: Bulbs near edges can fall. Keep them 6–8 inches from railings or walls.
- Skip the “daisy chain” trap: Connecting too many strands overloads circuits. Use a power strip with surge protection instead.
- Think about wind: In breezy areas, use shorter runs or add extra clips. I once lost a strand in a gust—now I use twist ties for backup.
- Use timers: Set lights to turn on at sunset and off at 11 PM. Saves energy and prevents burnout.
- Store properly: If removing lights, wrap them around a piece of cardboard or a reel. Tangle-free storage = easier setup next year.
My biggest lesson: Ambiance isn’t just about brightness. It’s about warmth, rhythm, and how the light interacts with your space. Less is often more.
One common mistake? Hanging lights too high. They should be visible from seated eye level (3–5 feet above the ground). Too high, and they feel distant. Too low, and they glare.
Also, avoid mixing bulb types (e.g., LED and incandescent) on the same strand—it creates uneven color temperature. Stick to one type for consistency.
For 2026, consider smart string lights with app control. You can change colors, set schedules, or sync with music. I use Philips Hue Outdoor—worth the investment if you love tech.
FAQs About How to String Lights Around a Patio in 2026 for Stunning Ambiance
Q: Can I leave string lights up year-round?
A: Yes, but only if they’re rated for outdoor use (look for “all-weather” or “IP65”). Even then, check them monthly. Replace any with cracked sockets or frayed wires. I leave mine up from spring to fall, but take them down for winter to prevent snow damage.
Q: What if my patio has no structure to hang from?
A: Use freestanding options! Install light poles (available at hardware stores), use shepherd’s hooks in planters, or anchor lights to nearby trees (with tree-friendly straps). I have a small patio with no roof—I used two 8-foot poles and a crossbar for a DIY pergola. Cost: $40, impact: priceless.
Q: How do I avoid tangled lights?
A: Store them properly! Wrap each strand around a piece of cardboard or a reel, then secure with a zip tie. Label the plug end. When hanging, unroll one section at a time—don’t dump the whole box on the ground. I keep a “light reel” in my garage—game-changer.
Q: Are solar string lights bright enough?
A: It depends. Modern solar lights with high-lumen LEDs (80+ lumens per bulb) are great for ambiance, but not for task lighting. Use them in shaded areas or as accent lights. For bright coverage, go electric. I use solar for my garden path and electric for the main patio.
Q: What’s the best color temperature?
A: For ambiance, warm white (2700K–3000K) is ideal. It’s cozy, inviting, and complements most outdoor settings. Cool white (4000K+) feels clinical. I tried cool white once—it looked like a parking lot. Switched back immediately.
Q: How do I clean dirty lights?
A: Turn them off and unplug. Wipe bulbs with a damp microfiber cloth. For stubborn grime, use a mix of water and mild soap. Never submerge sockets. Let them dry completely before turning on. I clean mine every spring—keeps them looking new.
Q: Can I use indoor lights outside?
A: No. Indoor lights lack weatherproofing. Rain or humidity can cause shorts, fire hazards, or electrocution. Always use outdoor-rated lights. Safety first—no exceptions.
Final Thoughts
Creating stunning ambiance with string lights isn’t about perfection—it’s about feeling. It’s the glow that makes your patio a place where memories happen.
Learning how to string lights around a patio in 2026 for stunning ambiance is easier than you think. Start small, plan well, and focus on the details that matter: even spacing, safe power, and a layout that complements your space.
Don’t stress if it’s not flawless the first time. I still tweak my setup every year. The goal isn’t Instagram perfection—it’s a place where you want to linger.
So grab your lights, call a friend, and enjoy the process. Light up your patio, and let the magic begin. You’ve got this.
“`

