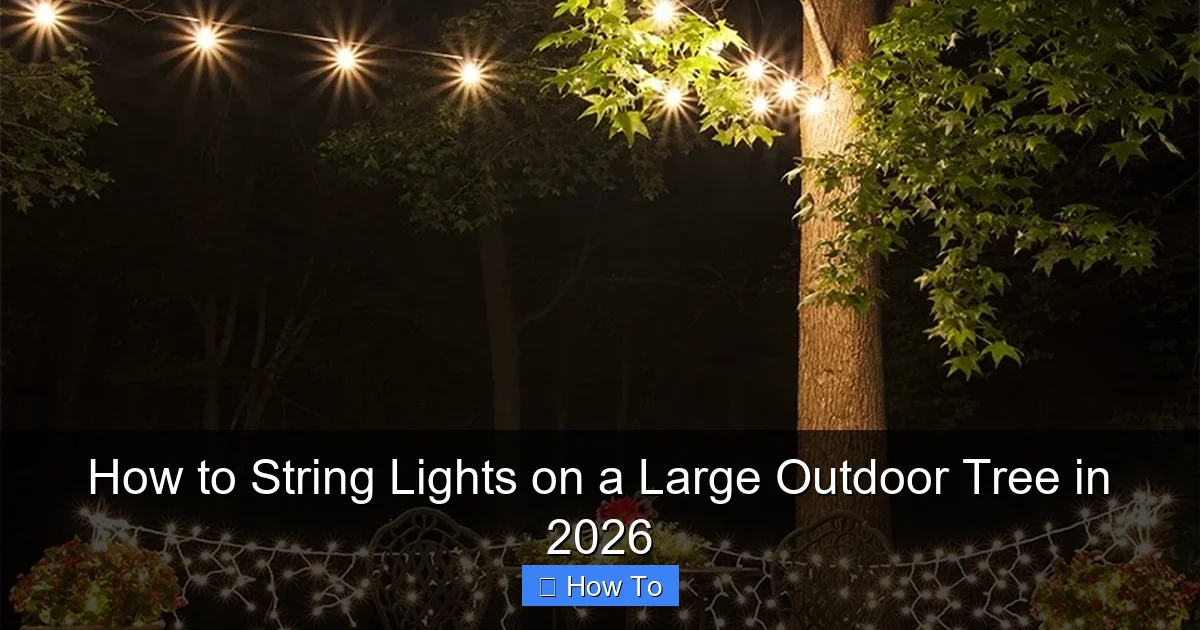
Featured image for how to string lights on a large outdoor tree
Image source: menterarchitects.com
Transform your large outdoor tree into a dazzling nighttime centerpiece by starting with a sturdy, weather-resistant light strand rated for outdoor use. Wrap the lights in a spiral pattern from the trunk’s base upward, securing them to major branches with insulated clips or zip ties to ensure even spacing and prevent sagging. For 2026’s top efficiency, opt for solar-powered or smart LED lights that offer app control and automatic timers—maximizing both safety and sparkle with minimal effort.
How to String Lights on a Large Outdoor Tree in 2026
Key Takeaways
- Plan your layout first: Sketch light placement to avoid over- or under-lighting.
- Use a sturdy ladder or lift: Safety is critical for reaching high branches.
- Choose weatherproof lights: Ensure durability with UL-rated outdoor LED strings.
- Anchor lights at the base: Secure the first strand to prevent sagging or tripping.
- Wrap lights evenly: Maintain consistent spacing for a professional, balanced look.
- Test lights before hanging: Check for faults to avoid mid-installation surprises.
- Use extension cords wisely: Keep them hidden and protected from moisture.
Why This Matters / Understanding the Problem
There’s nothing quite like the magic of a large outdoor tree lit up at night. Whether it’s for the holidays, a backyard wedding, or just to make your garden feel more welcoming, how to string lights on a large outdoor tree in 2026 is a question I’ve heard from countless friends and neighbors.
I’ll never forget the first time I tried it—standing on a wobbly ladder, tangled in cords, and realizing halfway through that my lights weren’t long enough. It was frustrating, and I ended up with uneven strands that looked more like a spiderweb than a winter wonderland.
The truth? Lighting a big tree isn’t just about plugging in some lights and calling it a day. It’s about planning, patience, and knowing a few clever tricks to make it look stunning—without spending a fortune or risking your neck on a ladder. And in 2026, with new LED tech, smart controls, and weatherproof options, there are more ways than ever to do it right.
If you’ve ever stared at your towering oak, maple, or pine and thought, “How on earth do I light this thing?”—you’re not alone. This guide is here to walk you through how to string lights on a large outdoor tree in 2026—safely, beautifully, and without the stress.
What You Need
Before you start climbing, let’s gather the essentials. You don’t need a professional lighting crew—just a few smart tools and the right gear. Here’s what I always recommend:
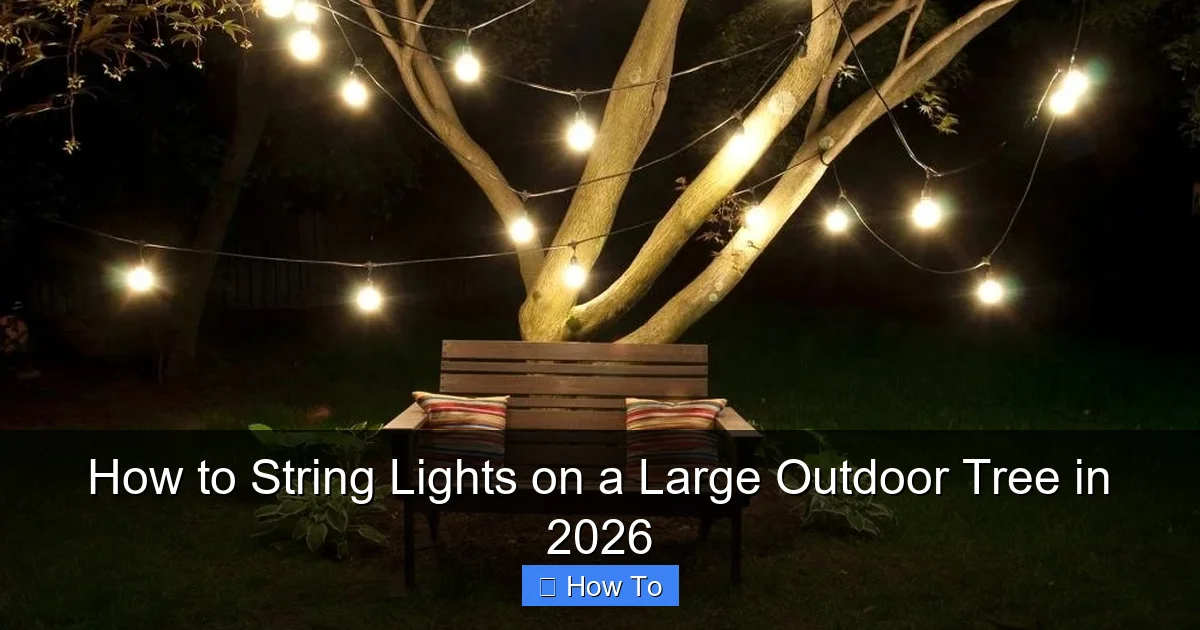
Visual guide about how to string lights on a large outdoor tree
Image source: menterarchitects.com
- LED string lights: Choose warm white or multicolor, but make sure they’re rated for outdoor use (look for IP65 or higher). I prefer LED because they’re energy-efficient, cool to the touch, and last years longer than incandescent.
- Measuring tape: You’ll need this to estimate how many strands you need. Trust me—eyeballing it never works.
- Extension cords: Outdoor-rated, with built-in GFCI protection. Get one long enough to reach your outlet without daisy-chaining.
- Light clips or adhesive hooks: Tree-safe clips (like the ones from LightClips or ZipClips) are a game-changer. Avoid nails or screws—they damage bark and invite pests.
- Telescoping pole with light hanger: This is the secret weapon for tall trees. Brands like LightWand or TreeTopper let you hang lights from the ground.
- Step ladder or extension ladder: Use a sturdy, non-conductive ladder. For really tall trees, a lift or professional help might be worth it.
- Timer or smart plug: So your lights turn on automatically at dusk. I use a Kasa smart plug—it’s cheap and works with Alexa.
- Work gloves: Protect your hands from bark and sharp branches.
- Helper (optional but recommended): Two sets of hands make the job safer and faster.
Pro Tip: Buy 10–20% more lights than you think you need. Trees are rarely symmetrical, and you’ll want extra for branches that stick out. I once miscalculated and had to run to the store at 8 PM—don’t be me.
Step-by-Step Guide to How to String Lights on a Large Outdoor Tree in 2026
Step 1: Plan Your Layout (Before You Plug In)
Before touching a single light, step back and look at your tree. Ask yourself: What’s the focal point? The trunk? The canopy? The weeping branches?
I like to use the layered approach: start at the trunk and work outward, then add vertical strands from the top down. This creates depth and avoids a flat, “wrapped sausage” look.
- Measure the height of the tree from ground to highest point.
- Measure the circumference of the trunk at chest height.
- Count the major branches you want to highlight.
Now, estimate how many light strands you’ll need. A good rule: 100 lights per foot of trunk circumference for a full look. For a 6-foot-wide trunk, that’s about 600 lights—so 6 strands of 100.
Sketch a simple diagram or take a photo and draw on it with your phone. This saves so much time later. Planning is the first step in mastering how to string lights on a large outdoor tree in 2026.
Warning: Don’t wrap the trunk too tightly. Girdling (tight wrapping) can damage the tree’s bark and restrict nutrient flow. Leave at least a 1-inch gap between wraps.
Step 2: Choose the Right Lights for Your Tree
Not all string lights are created equal. For large trees, I recommend:
- LED C9 or C7 bulbs: Larger bulbs stand out from a distance. C9s are great for tall trees.
- Commercial-grade strands: Look for “heavy-duty” or “commercial” labels. They’re thicker, more durable, and often come with end-to-end connectors.
- Smart lights (optional): In 2026, brands like Philips Hue Outdoor or Twinkly offer app-controlled, color-changing lights. Perfect for parties or holidays.
- Weatherproof rating: Must be IP65 or higher. This means they’re dust-tight and protected from water jets.
I avoid cheap indoor lights—they burn out fast and can’t handle wind or rain. One year, I used indoor lights and lost half the strands after a storm. Never again.
For energy savings, stick with LED. They use up to 80% less power and generate almost no heat—safer for bark and kids.
Step 3: Start at the Base (Trunk and Main Branches)
Begin at the trunk. Use tree-safe light clips every 6–8 inches. These grip the bark without piercing it.
- Start at the bottom and wrap loosely in a spiral, moving upward.
- Space wraps 6–12 inches apart. Closer = fuller look; wider = more subtle.
- When you reach a branch, clip the light strand to the branch and follow it outward.
For main branches, I use the “branch hugging” method: clip the light strand along the top edge of the branch, then drape it down the sides. This creates a glowing “halo” effect.
Don’t go all the way to the tips—focus on the first 2–3 feet of each branch. The ends get thin, and lights look sparse there anyway.
Pro Tip: Use a telescoping light hanger for hard-to-reach branches. I use the LightWand Pro—it extends to 20 feet and has a hook for easy placement. No ladder needed.
Step 4: Add Vertical Strands (From Top to Bottom)
This is where most people skip—and it’s a mistake. Vertical strands (also called “downward drops”) add drama and make the tree look taller.
- Use your telescoping pole to hang a strand from the highest point.
- Let it drape down the trunk or across major branches.
- Clip every 8–12 inches to keep it from sagging.
I like to place vertical strands every 2–3 feet around the tree. Think of them like ribbons on a gift—they break up the spiral pattern and add movement.
For weeping trees (like willows or fountains), let the strands hang naturally. Clip them to the main branches, then let the lights drape down like tinsel.
Warning: Don’t overload the top. Too many vertical strands can make the tree look top-heavy. 3–5 strands max for a 20-foot tree.
Step 5: Connect and Power Safely
Now comes the fun part—making it all light up. But safety first.
- Use outdoor-rated extension cords with GFCI (ground fault circuit interrupter). This shuts off power if there’s a short.
- Connect strands end-to-end, but don’t exceed the max load (check the box—usually 210 watts for LED).
- Use cord covers or bury cords in mulch to prevent tripping.
- Plug into a weatherproof outlet cover (like the Leviton or Hubbell brands).
I use a smart plug so I can control the lights from my phone. Set it to turn on at sunset and off at 10 PM—no more forgetting to unplug.
Test the lights as you go. I once connected 10 strands and realized the last one was faulty. Better to catch it early.
Step 6: Adjust and Refine
Step back and look. Turn the lights on at dusk—this is when you’ll see the real effect.
- Are any strands too tight or too loose?
- Are there dark spots or overly bright areas?
- Do the vertical strands drape naturally?
Adjust clips, re-wrap loose strands, and add extra lights to weak areas. I always find I need to tweak a few clips after the first test.
For a more natural look, mix light types. Try C9 bulbs on the trunk and smaller micro-LEDs on the branches. It creates depth and avoids a “Christmas factory” vibe.
Pro Tip: Use light diffusers (frosted sleeves) on bright bulbs to soften the glow. Great for weddings or romantic lighting.
Step 7: Secure and Maintain
Once you’re happy, secure everything for the season.
- Double-check all clips and connections.
- Use cable ties (outdoor-rated) to bundle excess cord.
- Cover the plug junction with a weatherproof box.
- Set a reminder to check every 2–3 weeks for sagging or damage.
After the season, remove lights gently. Don’t pull—unclip and unwind. Store in a cool, dry place. I use labeled bins with silica gel packs to prevent moisture.
For permanent installations (like year-round garden trees), consider commercial-grade systems with built-in clips and timers. They’re pricier but last decades.
Pro Tips & Common Mistakes to Avoid
After years of lighting trees (and making plenty of mistakes), here’s what I’ve learned:
- Don’t rush the planning: I’ve seen people buy lights first and regret it later. Always measure and sketch first.
- Avoid daisy-chaining too many strands: Most outdoor lights allow 2–3 in a row. More than that can overload the circuit.
- Use the right clips: Nails, staples, or zip ties can girdle the tree. Stick with tree-safe clips or adhesive hooks.
- Don’t ignore the weather: Wind can tangle lights. Use extra clips in storm-prone areas.
- Think about power access: If your outlet is far, use a heavy-duty 12-gauge extension cord. Thin cords overheat.
- Light the trunk, not just the branches: A glowing trunk adds drama and frames the tree.
- Test before the event: Nothing worse than discovering a dead strand on Christmas Eve.
Real Talk: I once tried to light a 30-foot oak with a single 100-light strand. It looked like a sad firefly. Learn from my mistake—more lights = more impact.
For large trees, consider zoning: use different colored lights on different sides (e.g., white on front, red on back). It adds dimension and lets you create themes.
And if you’re really ambitious, try smart lighting. In 2026, you can sync lights to music, change colors with an app, or set animated patterns. It’s pricey, but wow, is it impressive.
FAQs About How to String Lights on a Large Outdoor Tree in 2026
Q: How many lights do I need for a 20-foot tree?
A: For a full look, plan for 600–800 LEDs. That’s 6–8 strands of 100 lights. If you want a subtle glow, 3–4 strands might work. Measure the trunk and branches—every tree is different.
Q: Can I leave the lights up all year?
A: Only if they’re designed for it. Most holiday lights degrade after 3–4 months outdoors. For year-round use, invest in commercial-grade, UV-resistant strands with permanent clips.
Q: How do I light a tree without a nearby outlet?
A: Use a solar-powered system (like SolarString or Brightech). Or run a heavy-duty extension cord from the house, buried under mulch. Just make sure it’s GFCI-protected.
Q: Are LED lights safe for trees?
A: Yes! LEDs produce almost no heat, so they won’t burn bark. Just avoid wrapping too tightly—always use clips and leave a gap.
Q: What’s the easiest way to hang lights on a tall tree?
A: A telescoping light hanger is your best friend. No ladder, no risk. I use the LightWand—it reaches 20 feet and has a built-in hook for easy placement.
Q: How do I prevent lights from sagging?
A: Clip every 8–12 inches, especially on vertical strands. Use extra clips in windy areas. And don’t overload the strands—follow the manufacturer’s max length.
Q: Can I use smart lights on a large tree?
A: Absolutely! In 2026, brands like Twinkly and Philips Hue offer app-controlled, color-changing lights that work on trees up to 30 feet. Just make sure your Wi-Fi reaches the tree.
Final Thoughts
Lighting a large outdoor tree isn’t just a chore—it’s a chance to create something magical. Whether it’s for the holidays, a party, or just to make your yard feel more inviting, how to string lights on a large outdoor tree in 2026 is all about smart planning, the right tools, and a little patience.
Start with a sketch. Use tree-safe clips. Don’t skimp on lights. And for heaven’s sake, test before the big day.
Remember, it’s not about perfection—it’s about joy. That moment when you step back, flip the switch, and see your tree glow like a beacon? That’s the reward.
So grab your measuring tape, pick up some LED strands, and get to work. Your tree—and your neighbors—will thank you. And if you run into trouble? Just take a deep breath. You’ve got this.
Last Tip: Take a photo when you’re done. Share it with friends. You’ve just mastered how to string lights on a large outdoor tree in 2026—and that’s something to be proud of.

