Featured image for how to string lights on an indoor christmas tree
Image source: sweetclipart.com
Start by testing your lights and wrapping them around the tree vertically from the top down to ensure even coverage and avoid tangles. Weave the strands deep into the branches, spacing them 6–8 inches apart for a balanced glow that highlights the tree’s full shape—skip shortcuts for a truly pro finish.
Key Takeaways
- Plan your light count: Use 100 lights per foot of tree height for optimal brightness.
- Start from the bottom: Begin wrapping lights at the base for even distribution and visibility.
- Weave lights inward: Tuck strands into branches for a full, professional look.
- Use multiple strands: Connect LED or incandescent strands end-to-end safely for seamless coverage.
- Secure the end plug: Tuck the final plug inside branches to hide and prevent dangling.
- Test before decorating: Check all lights work before adding ornaments or tinsel.
📑 Table of Contents
- How to String Lights on an Indoor Christmas Tree Like a Pro
- 1. Choosing the Right Christmas Tree Lights
- 2. Preparing Your Tree and Lights
- 3. The Step-by-Step Stringing Technique
- 4. Troubleshooting Common Lighting Problems
- 5. Advanced Tips for a Professional Look
- 6. Maintenance and Safety Throughout the Season
How to String Lights on an Indoor Christmas Tree Like a Pro
The glow of a well-lit Christmas tree is one of the most iconic symbols of the holiday season. There’s something magical about the way the lights twinkle, casting a warm, festive glow across the room. But behind that enchanting display often lies a frustrating process—stringing lights on an indoor Christmas tree. Many of us have faced the tangled mess of cords, unevenly spaced bulbs, or the dreaded discovery of a dark section where the strand has burned out. The good news? With the right approach, you can master the art of lighting your tree like a pro, transforming it from a chaotic chore into a rewarding ritual.
This guide is designed to help you string lights on your indoor Christmas tree efficiently, evenly, and beautifully. Whether you’re using a fresh-cut fir, an artificial spruce, or a pre-lit tree with a few dead zones, we’ll walk you through every step—from choosing the right lights to achieving a professional, magazine-worthy finish. We’ll cover essential tools, placement techniques, troubleshooting common issues, and even how to maintain your tree’s glow throughout the season. By the end of this post, you’ll have the knowledge and confidence to light your tree with precision, elegance, and a touch of holiday flair.
1. Choosing the Right Christmas Tree Lights
Types of Christmas Lights
Before you even plug in a strand, it’s crucial to select the right type of lights for your tree. The market offers a wide range of options, each with unique benefits and drawbacks. Here are the most popular types:
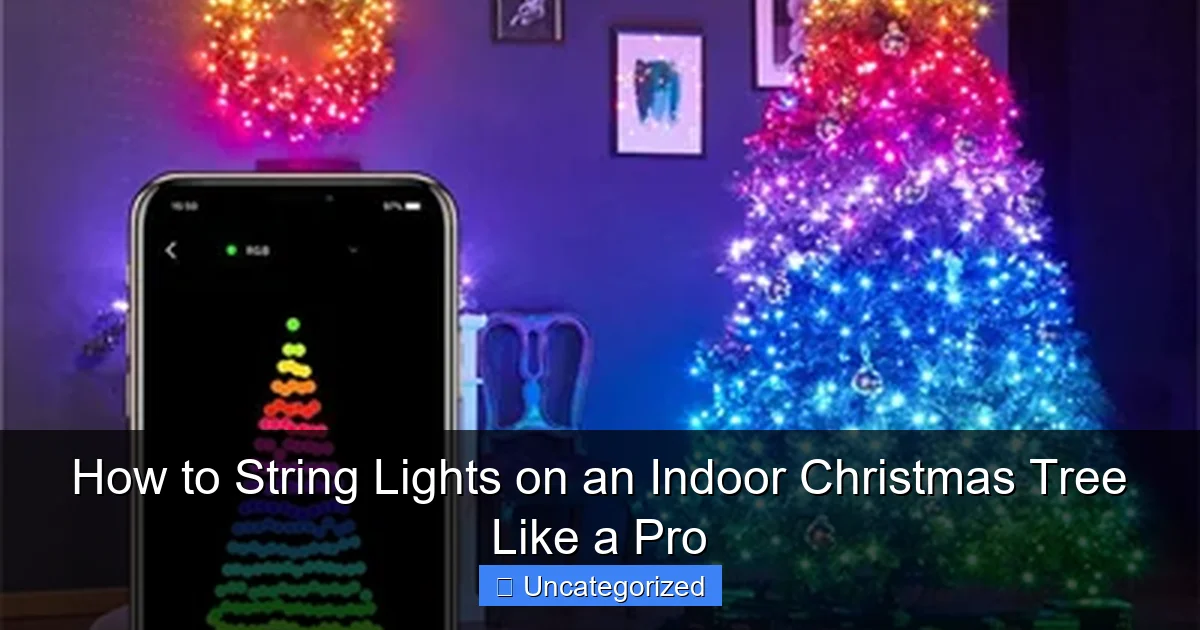
Visual guide about how to string lights on an indoor christmas tree
Image source: christmas-lights-manufacturers.com
- Incandescent Mini Lights: The classic choice, these warm white or colored bulbs provide a traditional, cozy glow. They’re affordable and widely available, but they consume more energy and generate heat. Great for smaller trees or nostalgic displays.
- LED Lights: Energy-efficient, cool to the touch, and long-lasting (often rated for 25,000+ hours), LED lights are ideal for large trees or extended use. They come in warm white, cool white, multi-color, and even color-changing options. Modern LEDs mimic the warm glow of incandescents without the heat.
- Twinkle or Flicker Lights: These add movement and sparkle by randomly flashing or dimming bulbs. Use them sparingly—too many can be overwhelming—but they’re perfect for adding a magical touch to the outer branches.
- Net Lights: Designed to drape over branches, these are excellent for quick, even coverage on the lower and mid-sections of the tree. They’re especially useful for artificial trees with dense foliage.
- Icicle or Drop Lights: Best for the outer edges or as a finishing touch, these create a cascading effect that mimics snow or rain.
How Many Lights Do You Need?
One of the most common mistakes is under- or over-lighting the tree. Too few lights make the tree look sparse; too many can overwhelm the ornaments. The general rule of thumb is 100 lights per foot of tree height. For example:
- A 6-foot tree needs approximately 600 lights.
- A 7-foot tree needs around 700 lights.
- For larger trees (8+ feet), consider 800–1,000 lights.
For a fuller, more dramatic look (especially with LED lights, which are less bright per bulb), you can increase this to 120–150 lights per foot. Always err on the side of slightly more—it’s easier to tuck in extra strands than to fix a dim tree.
Choosing the Right Color and Style
Color choice sets the mood. Consider your tree’s theme and room decor:
- Warm White: Timeless and elegant, works with any ornament style.
- Cool White: Crisp and modern, ideal for minimalist or contemporary themes.
- Multi-Color: Fun and festive, perfect for family rooms or children’s themes.
- Single-Color (e.g., blue, red, gold): Great for themed trees (e.g., “Winter Wonderland” or “Vintage Red”).
Also consider light shape and spacing. Mini lights with 6-inch spacing provide even coverage, while larger C7 or C9 bulbs (with 12-inch spacing) work better on very large trees or outdoor displays. For indoor trees, mini or micro LED lights are usually the best choice.
2. Preparing Your Tree and Lights
Inspect and Test Your Lights
Never assume your lights are working. Before you begin, test every strand by plugging them in. Check for:
- Dead bulbs (replace or remove if possible)
- Frayed wires or loose connections
- Flickering or dim sections
Use a light tester tool (available at hardware stores) to quickly identify bad strands or burnt-out bulbs. Replace any damaged lights—don’t risk a fire hazard or frustration mid-decorating.
Fluff and Shape the Tree
Artificial trees often come compressed in boxes. Before adding lights, spend 10–15 minutes fluffing the branches:
- Start from the bottom and work upward.
- Spread each branch outward and upward, mimicking natural growth.
- Adjust the tips to create a full, balanced silhouette.
For real trees, ensure the trunk is straight in the stand and the branches are evenly distributed. Trim any broken or sagging branches.
Organize Your Lights
Untangle all light strands and lay them out. Group them by length and type. For large trees, use light clips or zip ties to bundle strands together, making them easier to handle. Consider using extension cords with multiple outlets to avoid daisy-chaining too many strands (which can overload circuits).
Pro Tip: Use a light reel (a spool-like device) to store and dispense lights as you go. It prevents tangles and keeps your workspace clean.
Plan Your Power Strategy
Map out how you’ll power your lights. Avoid overloading a single outlet. Use:
- A timer to automatically turn lights on/off (saves energy and prevents burnout)
- A smart plug for voice or app control
- Surge protectors if using multiple strands
Keep cords tucked behind branches or along the tree trunk to minimize visibility.
3. The Step-by-Step Stringing Technique
Start from the Bottom, Work Upward
Begin at the base of the tree, about 6–8 inches from the floor. This ensures the trunk is well-lit and hides the first plug. Wrap the first strand around the trunk, then move outward to the tips of the lower branches. Use a zigzag pattern rather than spiraling straight up—this fills gaps and creates depth.
Key Tip: Don’t wrap lights tightly around branches. Instead, drape them gently, allowing the lights to hang slightly between branches. This prevents crushing needles (real trees) and maintains even spacing.
Use the “Layering” Method
Professional decorators use a layering technique for even light distribution:
- First Layer (Trunk & Inner Branches): Place lights close to the trunk, weaving them through the inner branches. This creates a warm, glowing core.
- Second Layer (Mid-Branches): Move outward, spacing strands 6–8 inches apart. Focus on the middle third of the tree—this is where the eye naturally rests.
- Third Layer (Outer Tips): Add a final layer near the tips of the branches. This adds sparkle and depth, making the tree look fuller from a distance.
For a 6-foot tree, use 3–4 strands for the first layer, 2–3 for the second, and 1–2 for the third. Adjust based on tree density.
Maintain Consistent Spacing
Use your hand as a guide. Aim for 6–8 inches between each strand as you move upward. If the tree looks sparse, add a strand; if it looks crowded, skip a level. Consistency is key—avoid random gaps or clusters.
Handle the Top and Star/Topper
As you reach the top, leave 6–8 inches of wire at the top branch to connect your tree topper. If using a star or angel, attach the topper first, then weave the final light strand around the base of the topper. This ensures the top is lit without visible wires.
Use Clips or Ties (When Needed)
On slippery artificial trees, use light clips (available in clear or green) to secure strands. Place clips every 12–18 inches to prevent sagging. For real trees, avoid clips that damage bark—drape lights instead.
4. Troubleshooting Common Lighting Problems
Dealing with Dark Spots
Dark areas are often caused by:
- Uneven light distribution
- Dead bulbs or faulty strands
- Overlapping strands that cancel each other out
Solutions:
- Use a flashlight to inspect dark zones—look for missing or dim bulbs.
- Add a short strand (e.g., 50–100 lights) to fill gaps.
- Adjust the angle of existing strands to cover blind spots.
Fixing Flickering or Intermittent Lights
Flickering often means a loose bulb or connection. Try:
- Wiggling bulbs to see if they flicker
- Replacing suspect bulbs (use a bulb tester)
- Checking for damaged sockets or wires
If a whole section flickers, the issue may be with the plug or wiring. Replace the strand if necessary.
Managing Tangled or Excess Wires
Excess cord at the base is unsightly and a tripping hazard. To fix:
- Coil extra wire and tuck it behind the tree trunk or into the tree stand.
- Use green zip ties to secure wires to the trunk.
- For real trees, bury wires under a tree skirt.
Preventing Overheating (Especially with Incandescent Lights)
Incandescent bulbs generate heat. To prevent fire risks:
- Never leave lights on unattended for long periods.
- Use a timer to limit runtime (e.g., 6 hours/day).
- Avoid wrapping lights around metal tree stands.
5. Advanced Tips for a Professional Look
Mix Light Types for Dimension
For a high-end look, combine light types:
- Use warm white mini lights as the base layer.
- Add a few strands of twinkle lights near the tips for sparkle.
- Drape net lights over the lower third for even coverage.
This creates depth and visual interest. Just avoid overmixing—stick to 2–3 types max.
Create a “Glow” Effect
To make your tree look professionally lit, focus on backlighting:
- Place lights deeper inside the tree, near the trunk.
- Let outer strands drape loosely, allowing light to diffuse through the branches.
- Use clear or frosted bulbs for a softer glow.
This mimics the look of a spotlight from within.
Use a Tree Light Stand or Rotator
For large trees, consider a light rotator stand. These slowly rotate the tree, ensuring even light exposure and reducing the need for constant adjustments. Great for parties or photo ops!
Coordinate with Ornaments
Plan your light placement around ornaments:
- Place larger ornaments where lights are slightly less dense.
- Use reflective ornaments (e.g., glass balls) to amplify light.
- Avoid placing lights directly behind dark ornaments—they’ll block the glow.
Take a Step Back (Literally)
After stringing lights, view the tree from across the room. Walk around it to check for blind spots, unevenness, or glare. Make adjustments as needed. This final check is crucial for a polished look.
6. Maintenance and Safety Throughout the Season
Daily and Weekly Checks
Once your tree is lit, perform regular checks:
- Every few days, scan for dead bulbs or flickering strands.
- Weekly, inspect cords for fraying or heat.
- For real trees, ensure the water reservoir is full—dry needles can ignite if lights overheat.
Energy and Cost Efficiency
LED lights use up to 80% less energy than incandescents. To save even more:
- Use a timer to limit runtime (e.g., 4–6 hours/day).
- Turn off lights when leaving the house or going to bed.
- Consider solar-powered or battery-operated lights for small trees or tabletop displays.
Fire Safety Precautions
Follow these safety tips:
- Never use damaged or frayed light strands.
- Don’t overload electrical outlets or extension cords.
- Keep trees away from heat sources (radiators, fireplaces).
- Unplug lights before replacing bulbs or making adjustments.
End-of-Season Care
When taking down the tree:
- Remove lights carefully to avoid damaging branches.
- Coil strands and store them on a reel or in a labeled container.
- Check for damaged bulbs and replace them before next year.
Proper storage extends the life of your lights and prevents tangles.
Data Table: Recommended Lights by Tree Size
| Tree Height | Recommended Lights (Mini/LED) | Light Spacing | Strands Needed (Avg.) | Best Light Type |
|---|---|---|---|---|
| 4–5 ft | 400–500 | 6–8 in | 4–5 | LED (Warm White) |
| 6 ft | 600–700 | 6–8 in | 6–7 | LED (Warm White or Multi) |
| 7 ft | 700–850 | 7–9 in | 7–8 | LED (Warm White) |
| 8 ft | 800–1,000 | 8–10 in | 8–10 | LED (Warm White + Twinkle) |
| 9–10 ft | 900–1,200 | 8–10 in | 9–12 | LED (Layered: Base + Twinkle) |
Stringing lights on an indoor Christmas tree doesn’t have to be a stressful ordeal. With the right tools, techniques, and a bit of patience, you can create a breathtaking display that captures the magic of the season. From choosing energy-efficient LED strands to mastering the layering method, this guide equips you with everything you need to light your tree like a professional decorator. Remember: consistency, even spacing, and a focus on depth are the keys to a stunning glow.
As you step back and admire your work, you’ll see more than just a tree—you’ll see a centerpiece of joy, tradition, and warmth. Whether you’re hosting a holiday party, enjoying a quiet night by the tree, or capturing family photos, a well-lit tree sets the perfect mood. So gather your lights, fluff those branches, and let the glow begin. With these pro tips, your tree won’t just shine—it will sparkle with pride.
Frequently Asked Questions
How do I string lights on an indoor Christmas tree without tangling them?
Start by testing your lights and laying them out straight. Begin at the base of the tree, weaving the lights inward and upward in a spiral pattern, keeping the bulbs spaced evenly to avoid clumps or gaps.
What’s the best way to hide Christmas light wires on an indoor tree?
Tuck the light strands slightly behind branches, nestling them close to the trunk. Use the natural gaps between branches to conceal cords and create a seamless look.
How many light strands do I need for my indoor Christmas tree?
As a rule of thumb, use 100 lights per foot of tree height (e.g., 500 lights for a 5-foot tree). For a fuller effect, especially on dense trees, add 20-30% more lights.
Should I string Christmas lights from top to bottom or bottom to top?
Always start at the bottom and work your way up. This method lets gravity assist in draping the lights naturally and reduces strain on the plugs and branches.
Can I use LED lights for stringing an indoor Christmas tree?
Absolutely! LED lights are energy-efficient, stay cool, and come in various colors and effects. They’re ideal for indoor trees and safer for extended use.
How do I string lights evenly on a pre-lit indoor Christmas tree?
If adding extra lights, focus on filling sparse areas by weaving strands into inner branches. Match the color and style of the existing lights for a cohesive look.

