Featured image for how to string lights on an outdoor christmas tree
Image source: bargainlow.com
Wrap your outdoor Christmas tree with lights safely and securely by starting at the base and working upward in a spiral pattern, ensuring each bulb is firmly clipped to branches for wind resistance. Use weatherproof, LED string lights rated for outdoor use to maximize brightness and energy efficiency throughout the 2026 holiday season. This method prevents tangles, ensures even coverage, and withstands winter elements for a dazzling, long-lasting display.
“`html
How to String Lights on an Outdoor Christmas Tree 2026
Key Takeaways
- Plan your layout: Sketch light placement before starting for even coverage.
- Use outdoor-rated lights: Ensure weatherproof, LED bulbs for durability and safety.
- Start from the bottom: Wrap lights upward in spiral layers for uniform brightness.
- Secure with clips: Attach lights to branches with insulated clips, not nails.
- Test before hanging: Check all bulbs work to avoid mid-decoration fixes.
- Layer for depth: Combine string and net lights for a fuller, dynamic look.
- Weatherproof connections: Use waterproof covers on plugs and timers for longevity.
Why This Matters / Understanding the Problem
Picture this: it’s late November, the air is crisp, and you’re standing in your yard staring at a bare evergreen. You’ve got your favorite holiday playlist on, a steaming mug of cocoa, and a box of brand-new lights. You’re ready to transform that tree into a glowing winter wonderland. But then reality hits—how do you actually how to string lights on an outdoor Christmas tree 2026 without tangling them, burning out circuits, or giving up halfway?
Let’s be honest. Outdoor tree lighting isn’t just about draping a few strands and calling it a day. Wind, cold, snow, and tree shape all play a role. And if you’re using last year’s lights, you might not even make it past the first branch. But here’s the good news: with the right approach, this task can be fun, safe, and stunning—especially when you do it right the first time.
Whether you’re lighting up a 6-foot pine in the front yard or a towering fir in the backyard, this guide will walk you through the entire process. We’ll cover tools, techniques, safety, and even how to make your display last through January. And yes, we’ll keep it simple, practical, and—most importantly—doable.
What You Need
Before we dive in, let’s gather everything. You don’t need fancy gear, but skipping essentials can lead to frustration (and possibly a trip to the ER). Here’s your checklist:
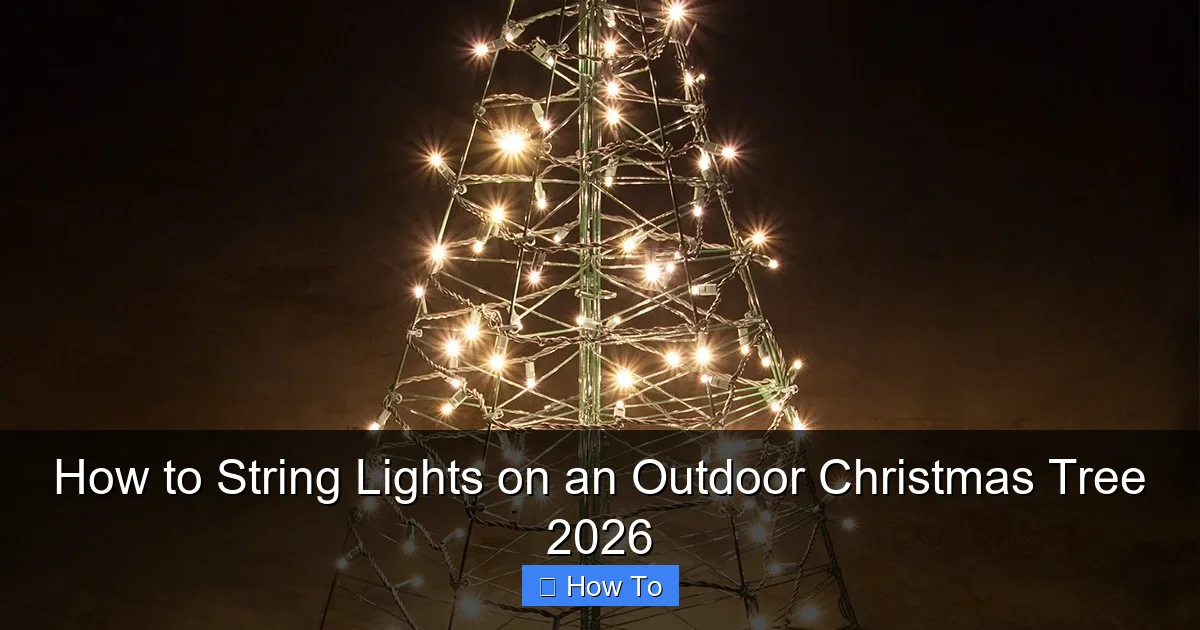
Visual guide about how to string lights on an outdoor christmas tree
Image source: cdn.christmaslightsetc.com
- Outdoor-rated LED Christmas lights (C7, C9, or mini string lights—more on that later)
- Extension cords rated for outdoor use (with GFCI protection)
- Light clips or outdoor zip ties (never nails or staples)
- Ladder (sturdy, non-conductive, with someone spotting you)
- Timer or smart plug (to avoid leaving lights on all night)
- Measuring tape (to calculate how many strands you need)
- Work gloves (to protect your hands from branches and cold)
- Bucket or tote (to carry lights and tools)
- Optional but helpful: a helper, a light tester, and a plan for power sources
Pro tip: Buy one extra strand of lights. You’ll thank me when you realize the last branch needs just a little more glow.
Now that you’re equipped, let’s talk about how to how to string lights on an outdoor Christmas tree 2026 without turning it into a holiday disaster.
Step-by-Step Guide to How to String Lights on an Outdoor Christmas Tree 2026
Step 1: Choose the Right Lights for Outdoor Use
Not all Christmas lights are created equal. Indoor lights won’t survive snow, wind, or temperature swings. You need outdoor-rated LED string lights—they’re more durable, energy-efficient, and safer in wet conditions.
- Mini string lights (5mm or 3mm): Great for smaller trees or a subtle glow. They’re lightweight and easy to wrap around branches.
- C7 or C9 bulbs: Bigger, brighter, and perfect for larger trees. C7s are about the size of a nightlight; C9s are closer to a golf ball. These give a classic, festive look.
- Net lights: A time-saver for broad trees. Just drape them like a blanket over sections. Ideal for lower branches.
Look for labels like “weatherproof,” “IP44,” or “outdoor use.” Avoid incandescent bulbs—they’re inefficient and more likely to burn out in cold weather.
💡 Pro Insight: I once used indoor lights on an outdoor tree. Within two days, half the strand was dead. Save yourself the heartbreak—go LED and go outdoor-rated.
Step 2: Measure Your Tree and Calculate Light Strands
You don’t want to run out of lights halfway up—or worse, have 10 extra strands with nowhere to go. Here’s how to estimate:
- Measure the height of your tree (from base to tip).
- Measure the width at the widest point (usually near the middle).
- Use this rule of thumb: 100 lights per foot of tree height for a full look.
For example, a 6-foot tree with a 3-foot width needs about 600 lights. That’s roughly 6 strands of 100-light mini lights, or 3 strands of 200-light C9s.
For a fuller effect (especially on dense trees), go up to 150 lights per foot. And remember: you’ll need more lights for wider trees. A 6-foot tree that’s 5 feet wide might need 900+ lights.
Don’t forget the trunk and lower branches—many people skip these, but they add depth and make the tree look grounded.
⚠️ Warning: Never connect more than 3–5 strands end-to-end unless the manufacturer says it’s safe. Overloading can trip breakers or start fires.
Step 3: Plan Your Lighting Pattern
Random draping looks sloppy. A thoughtful pattern makes all the difference. Here are three popular methods:
- Vertical wrapping: Start at the bottom and wrap lights up each major branch like a candy cane. Best for conical trees (firs, spruces).
- Spiral wrapping: Begin at the base and spiral the lights upward, keeping the strand snug against the trunk and branches. Gives a uniform glow.
- Layered sectioning: Divide the tree into 3–4 horizontal sections. Light each section separately, then connect them with a vertical strand. Great for large trees.
For the how to string lights on an outdoor Christmas tree 2026 method, I recommend the spiral for most trees. It’s easier to maintain spacing and hides connections better.
Sketch a quick plan on paper or visualize it. Where will the plug-in point be? Where will you hide the excess cord? A little planning saves hours of frustration.
Step 4: Start at the Bottom and Work Upward
Here’s where the real work begins. Start at the lowest point of the tree—usually the base of the trunk or the first major branch.
- Plug in one strand and secure the plug-end near the base using a light clip or zip tie.
- Begin wrapping the lights around the trunk in a spiral, moving upward at a 45-degree angle. Keep the strand tight but not so tight that it damages the bark.
- As you reach a major branch, wrap the lights around it, following its length outward. Then spiral back toward the trunk and continue upward.
- Maintain even spacing—about 6–8 inches between wraps. Use your hand as a guide.
Work in small sections. Don’t try to do the whole tree in one go. Take breaks. Stretch. Sip that cocoa.
For large trees, use a ladder with a helper. Always have someone spot you—especially when you’re 6+ feet off the ground.
💡 Pro Tip: I use a small bucket on the ladder to hold extra lights and clips. It keeps everything within reach and prevents me from climbing up and down constantly.
Step 5: Handle Branches and Dense Areas
Dense evergreens can be tricky. You don’t want lights buried in the foliage, but you also don’t want them all on the surface.
- For thick branches, wrap lights around the base of the branch (where it meets the trunk), then let the strand drape slightly into the foliage.
- Use mini lights for inner branches—they’re less bulky and easier to weave through.
- For sparse areas, use shorter wraps or double up in spots to fill gaps.
- For very dense trees, consider layered lighting: place some strands deeper in the tree, others on the surface.
Don’t overstuff. You want the tree to glow, not look like it’s wrapped in a net.
And here’s a secret: leave a little slack in the strand. Trees move in the wind. If the lights are too tight, they’ll snap or pull out.
Step 6: Connect Strands Safely and Neatly
Most trees need multiple strands. Connecting them wrong is a common mistake.
- Always connect strands end-to-end, not in parallel (unless the lights are designed for it).
- Use waterproof wire nuts or outdoor-rated connectors to seal connections. Never leave exposed wires.
- Route the plug-in point down the trunk to a ground-level outlet. Use clips to keep the cord secure and hidden.
- If you’re using a timer or smart plug, place it near the outlet and protect it from moisture.
For large trees, consider a hub system: run a main extension cord up the trunk, then connect multiple strands to it at different heights. Use a waterproof junction box if needed.
⚠️ Warning: Never use indoor extension cords outside. They’re not insulated for moisture and can become a fire hazard.
Step 7: Test and Adjust
Before you call it a night, plug everything in and step back. Look for:
- Dark spots or uneven lighting
- Flickering or dead sections
- Strands that are too loose or too tight
- Cords that are visible or dangling
Make adjustments. Add a strand here, tighten a section there. Tuck cords behind branches. Use extra clips to secure loose ends.
Check the lights at different times of day. Morning light shows gaps. Nighttime reveals brightness and color balance.
And don’t forget to set a timer. Leaving lights on all night wastes energy and shortens their life. A simple dusk-to-dawn timer or smart plug does the trick.
Step 8: Protect and Maintain Through the Season
Your lights are up—now keep them looking great. Here’s how:
- Check weekly for loose strands, broken bulbs, or water in connections.
- Clear snow gently—don’t yank or scrape. Use a soft broom or gloved hand.
- Inspect extension cords for cracks or fraying. Replace immediately if damaged.
- Trim overhanging branches that might snag the lights.
After the holidays, remove lights carefully. Don’t pull—untie or unclip. Store them in a cool, dry place, preferably in their original packaging or a labeled tote.
💡 Pro Insight: I keep a “light log” with notes on which strands I used, how many, and where I connected them. Makes next year’s setup a breeze.
Pro Tips & Common Mistakes to Avoid
After 15 years of lighting outdoor trees (including my own, my parents’, and a few for neighbors), I’ve learned what works—and what doesn’t.
- Don’t start at the top. Gravity pulls lights down, making the bottom look bare. Always start at the base.
- Skip the nails and staples. They damage the tree and create fire hazards. Use plastic clips or zip ties.
- Avoid overloading circuits. Most outdoor outlets are on 15-amp circuits. Max draw should be under 1,800 watts. LEDs use about 10 watts per 100 bulbs—so you’re usually safe, but check.
- Don’t ignore the trunk. Lighting the trunk adds depth and makes the tree look fuller, especially from a distance.
- Don’t forget the power source. Plan where the plug will go. Use a GFCI outlet (or a GFCI adapter) to protect against shocks.
- Don’t rush. Take your time. A well-lit tree is worth the extra effort.
One last thing: involve the family. Kids love helping wrap lights. It’s a great bonding activity—and you get extra hands.
💡 Real Talk: Last year, I tried to “wing it” with a 10-foot tree and no plan. I used 8 strands, overloaded the circuit, and had to redo half of it. This year, I’ll follow my own advice. Lesson learned.
FAQs About How to String Lights on an Outdoor Christmas Tree 2026
Q: How many strands of lights do I need for a 7-foot outdoor tree?
A: For a 7-foot tree, aim for 700–1,050 lights (100–150 per foot). That’s 7–10 strands of 100-light mini lights, or 3–5 strands of 200-light C9s. Wider trees need more.
Q: Can I use indoor lights on an outdoor tree?
A: Not recommended. Indoor lights aren’t weatherproof and can short out or fail in cold, wet conditions. Always use outdoor-rated lights for safety and longevity.
Q: What’s the best way to hide extension cords?
A: Run cords along the trunk and down to the outlet. Use light clips to secure them. For ground-level cords, bury them slightly in mulch or use cord covers. Never leave cords across walkways.
Q: How do I prevent lights from blowing out in winter?
A: Use LEDs (they handle cold better), avoid overloading circuits, and seal connections. Also, don’t leave lights on 24/7—use a timer. Cold itself rarely kills LED bulbs, but moisture and power surges can.
Q: Should I light the trunk or just the branches?
A: Both! Lighting the trunk adds a warm glow and makes the tree look more grounded. Wrap it in a spiral, just like the branches. It’s especially effective with warm white or amber lights.
Q: Can I use smart lights or app-controlled strands?
A: Absolutely. Smart LED strands let you change colors, set schedules, and even sync to music. Just make sure they’re outdoor-rated and your Wi-Fi reaches the tree. I use a mesh extender for my backyard setup.
Q: What if my tree has a lot of dead or broken branches?
A: Trim them first. A clean tree is easier to light and safer. Focus on healthy branches and use shorter wraps in sparse areas. Don’t force lights where they don’t fit.
Final Thoughts
Learning how to how to string lights on an outdoor Christmas tree 2026 isn’t just about following steps—it’s about creating a moment. A moment when your family gathers outside, sipping cocoa, admiring the glow. A moment when your house becomes the neighborhood highlight.
It’s not about perfection. It’s about effort, care, and a little holiday magic. So grab your lights, your ladder, and your favorite holiday playlist. Take your time. Make it personal. And don’t forget to step back and enjoy it.
When the lights shine through the frost, and the snowflakes catch the glow, you’ll know it was worth it. And next year? You’ll do it even better.
Now go light up that tree—your winter wonderland is waiting.
“`

