Featured image for how to string lights on an outdoor evergreen tree
Image source: st4.depositphotos.com
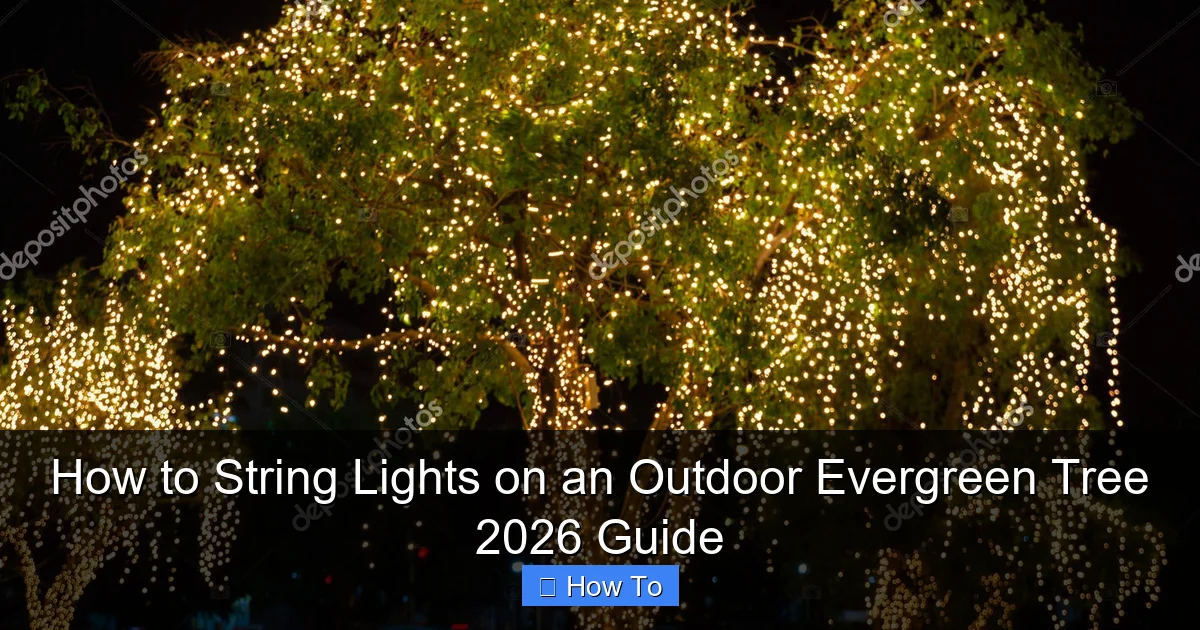
Wrap lights from the trunk outward in a spiral pattern to evenly illuminate your evergreen and avoid tangled wires—this method ensures maximum coverage and visual impact. Use outdoor-rated, LED string lights with secure clips or zip ties for a safe, long-lasting display that withstands winter weather and enhances your landscape all season.
How to String Lights on an Outdoor Evergreen Tree 2026 Guide
Key Takeaways
- Plan your layout: Sketch light placement before starting to ensure even coverage and avoid tangles.
- Use outdoor-rated lights: Choose weatherproof, LED lights for durability and energy efficiency.
- Start from the base: Wrap lights upward in a spiral, securing them gently to branches.
- Anchor lights properly: Use insulated clips or ties to prevent damage to tree bark.
- Test lights first: Check for burnt-out bulbs or faults before hanging to save time.
- Keep power sources safe: Place extension cords and outlets under cover to avoid hazards.
Why This Matters / Understanding the Problem
There’s something magical about an evergreen tree lit up at night. It feels like nature’s own holiday card—warm, inviting, and full of charm. But if you’ve ever tried how to string lights on an outdoor evergreen tree 2026 guide without a plan, you know it can quickly turn into a tangled mess.
I learned this the hard way. Last year, I spent two hours untangling lights, only to realize they were too short and unevenly spaced. The result? A lopsided glow that looked more “forgot to pay the electric bill” than “winter wonderland.”
Whether you’re decorating for the holidays, a wedding, or just want year-round ambiance, getting this right matters. Not only does it boost curb appeal, but it also brings joy—without the frustration. And with the right approach, you can avoid common pitfalls and make your evergreen shine like it’s straight out of a magazine.
The good news? You don’t need to be an electrician or a professional decorator. With a few simple tools and some smart techniques, anyone can do it. This guide walks you through how to string lights on an outdoor evergreen tree 2026 guide—step by step, mistake-proof, and stress-free.
We’ll cover everything from choosing the right lights to avoiding tripped breakers. And yes, we’ll even tackle those tricky branches that always seem to hide the plug.
So grab a cup of cocoa, and let’s make your tree the star of the block—without the headaches.
What You Need
Before you climb that ladder, let’s talk gear. Having the right tools makes all the difference. Think of this as your “evergreen lighting starter kit.” You don’t need anything fancy—just the essentials that work.
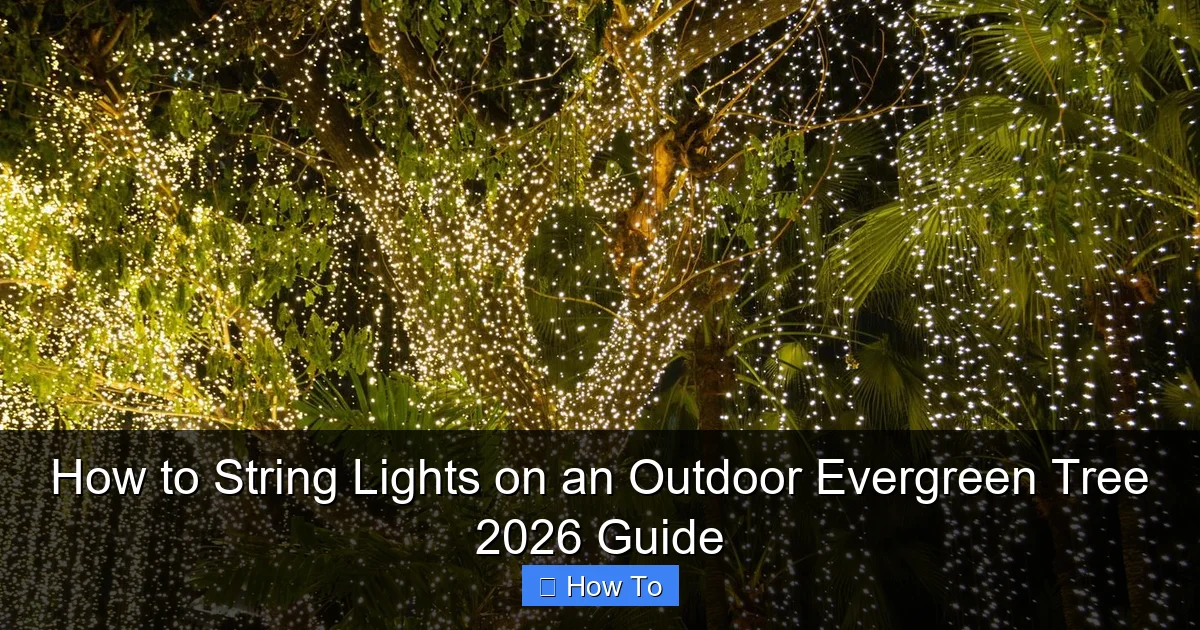
Visual guide about how to string lights on an outdoor evergreen tree
Image source: static.vecteezy.com
- Outdoor-rated LED string lights (more on why LEDs later)
- Measuring tape (to calculate how much you need)
- Extension cords (rated for outdoor use)
- Timer or smart plug (optional but highly recommended)
- Light clips or zip ties (for securing without damaging bark)
- Ladder (if needed) – stable, non-slip, and tall enough
- Gloves (for grip and protection from cold or sap)
- Work light or headlamp (if working in low light)
Pro tip: Always check your lights *before* hanging them. I once skipped this step and spent 30 minutes hanging a strand—only to find one bulb out. Total mood killer.
Also, consider the type of lights. For how to string lights on an outdoor evergreen tree 2026 guide, go for:
- LEDs: Energy-efficient, cool to the touch, and last 25,000+ hours
- Warm white: Cozy, classic glow (great for holidays and year-round)
- Clear or faceted bulbs: Faceted adds sparkle; clear is subtle
- Plug-in (not battery): More reliable and brighter
Avoid cheap indoor lights—they’ll fail in cold, wet weather. And don’t mix brands or styles unless you’re going for a quirky look. Consistency matters for a polished result.
One last thing: power source access. Can you reach an outdoor outlet? If not, plan for a weatherproof extension cord path (more on this later).
Got your kit? Great. Let’s get to work.
Step-by-Step Guide to How to String Lights on an Outdoor Evergreen Tree 2026 Guide
Step 1: Measure Your Tree and Plan Your Layout
Before you touch a light strand, take 5 minutes to measure. Wrap a tape measure around the tree’s trunk at chest height—this gives you the circumference. Then, estimate the tree’s height.
For a balanced look, plan to wrap the lights vertically (up and down the trunk) and horizontally (around the branches). This creates depth and avoids flat, two-dimensional lighting.
Rule of thumb: You’ll need about 100 lights per 1 foot of tree height. So a 10-foot tree? Around 1,000 lights. But don’t panic—you can use multiple strands.
Sketch a quick layout. Decide:
- Where the plug will go (ideally near the base, hidden behind foliage)
- How many wraps around the trunk (every 6–12 inches is ideal)
- Whether to light the branches too (yes, but we’ll do that after the trunk)
I like to start at the bottom and work up. That way, the plug stays accessible, and you avoid stepping on loose strands.
Bonus: Use painter’s tape to mark wrap points on the trunk. It’s removable and won’t hurt the bark.
Step 2: Choose the Right Light Placement Strategy
There are three main ways to hang lights on an evergreen. Each has pros and cons. Pick the one that fits your tree and style.
- Vertical Trunk Wrap + Horizontal Branch Spokes
The gold standard. Wrap the trunk vertically, then run lights from the trunk out along the main branches like spokes on a wheel. Gives a 3D effect and even coverage.
- Spiral Wrap (All Over)
Wrap lights in a continuous spiral from base to top. Fast, but can look flat if the tree is dense. Best for slender trees or if you want a minimal look.
- Branch-Only (No Trunk)
Skip the trunk and light only the outer branches. Great for large trees where trunk lighting feels overwhelming. But the base looks dark—add a ground light or lantern to balance it.
For most evergreens (like pines, spruces, or firs), I recommend the vertical + spokes method. It highlights the tree’s natural shape and feels intentional.
And for how to string lights on an outdoor evergreen tree 2026 guide, this method is the most forgiving if you make a mistake—you can adjust as you go.
Step 3: Start at the Base and Work Up
Here’s where the magic begins. But first: plug in your lights and test them. Seriously, do this now. I can’t tell you how many times I’ve skipped this and regretted it.
Once they’re lit, unplug and start at the base. Position the plug near the trunk, about 6 inches off the ground. Tuck it behind a branch or use a small rock to hide it.
Begin wrapping the trunk vertically—up and down, not around. Use light clips or zip ties every 6–8 inches to secure the strand. Keep tension even; don’t pull too tight or let it sag.
Why vertical? It follows the tree’s natural lines, avoids branch interference, and makes it easier to run lights out to the branches later.
Work in sections. Wrap 2–3 feet, secure, then move up. Use your ladder safely—always have someone spot you if you’re over 6 feet high.
Pro tip: If the strand feels stiff, lay it in the sun for 10 minutes before hanging. Cold plastic becomes brittle and breaks easily.
When you reach the top, leave a few feet of extra cord. You’ll use this to connect to the next strand (if needed) or run to the branches.
Step 4: Light the Branches (The Spoke Method)
Now for the fun part—making your tree sparkle from every angle. Take a new strand (or continue from the trunk), and run it out along the main branches, like spokes on a bicycle wheel.
Start with the lower branches. Run the light strand from the trunk to the tip of each branch. Secure with clips or zip ties every 4–6 inches. Keep the lights centered on the branch—not on top or underneath.
Work in a pattern: left, right, front, back. This ensures even coverage. For dense trees, focus on the outer branches. Inner branches get enough light from the trunk and outer layers.
Don’t overdo it. Too many strands = tangled mess. For a 10-foot tree, 8–12 “spokes” is plenty. Less is more.
And here’s a trick: alternate long and short branches. Light the longer ones fully, and just the first 1/3 of shorter ones. This adds depth without overwhelming.
If you run out of lights, connect a new strand at the trunk. Use a waterproof connector or electrical tape to seal the joint.
Remember: how to string lights on an outdoor evergreen tree 2026 guide isn’t about perfection—it’s about creating a warm, inviting glow. A few gaps? No one will notice in the dark.
Step 5: Secure the Power Source and Manage Cords
Now that the lights are up, let’s tackle the real headache: cords. A tangled mess of extension cords is an eyesore—and a tripping hazard.
First, use a weatherproof outdoor extension cord. Look for one with a GFCI plug (it cuts power if it gets wet). Run it from your outlet to the tree base.
Secure the cord along the ground with stakes, rocks, or cord clips. Keep it off walkways. I use old garden stakes with zip ties—simple and cheap.
At the tree base, connect the lights to the extension cord. Wrap the plug joint with electrical tape or use a weatherproof connector box. This keeps water out and prevents shorts.
Want to avoid cords altogether? Use a smart plug with a timer. Plug your lights into it, set the schedule (e.g., 5 PM to 11 PM), and forget about it. Bonus: You can control it from your phone.
For long-term setups, consider burying the cord under mulch or using a cord cover. But for seasonal use, surface routing is fine—just make it neat.
Pro tip: Label your cords with colored tape. Red for tree lights, blue for pathway lights. Saves time next year when you’re setting up again.
Step 6: Test, Adjust, and Fine-Tune
Time to step back and see your work. Plug everything in and walk around the tree. Look for:
- Dark spots (add a strand or adjust placement)
- Overlit areas (remove a strand or shift it slightly)
- Loose clips (tighten or add more)
- Exposed cords (tuck or cover them)
Ask a friend to help. A second pair of eyes catches things you miss. I once thought my tree was perfect—until my neighbor said, “Why is the back half dark?” Oops.
Adjust the brightness. If it’s too bright, use a dimmer (if your lights support it) or add a sheer fabric drape (like tulle) for a softer glow.
And check for safety:
- No frayed wires
- Cords not touching standing water
- No overloaded outlets (don’t daisy-chain more than 3 strands)
For how to string lights on an outdoor evergreen tree 2026 guide, this final check is crucial. A few minutes now prevents fires, shorts, or blown breakers later.
Step 7: Maintain and Store Properly
Once the season’s over, don’t just yank the lights down. That damages the tree and the strands.
Remove clips and zip ties carefully. Cut the zip ties—don’t pull. This prevents bark damage.
Coil the lights loosely. Use the “over-under” method: loop over your hand, then under, to prevent tangles. Store in a dry, cool place (like a garage or basement).
Check for damage. Replace broken bulbs or frayed wires before storing. I keep a small repair kit: spare bulbs, tape, and connectors.
Label your lights. Write “Evergreen Tree” on the box. Saves time next year.
And if you used a timer or smart plug, unplug it and store it indoors. Electronics don’t like freezing temperatures.
Pro Tips & Common Mistakes to Avoid
Let me share a few hard-earned lessons—so you don’t repeat my mistakes.
Pro Tip 1: Use light clips, not nails or screws. They grip the bark without harming the tree. I love the “Grip Clips” brand—they work on thick bark and stay put in wind.
Pro Tip 2: Avoid overloading circuits. Most outdoor outlets handle 15 amps. A 100-light LED strand uses ~0.5 amps. So max 30 strands. If you need more, use a second outlet.
Pro Tip 3: Don’t wrap lights around the trunk like a candy cane. It looks messy and hides the tree’s shape. Vertical + spokes = elegance.
Pro Tip 4: For multi-tiered trees, light from the bottom up. This ensures even coverage and avoids dark spots at the base.
Pro Tip 5: Use a ladder stabilizer if your tree is on a slope. I once nearly fell off a wobbly ladder—never again.
Now, the common mistakes:
- Ignoring the plug location: If the plug is at the top, you’ll need an extension cord running up the tree. Ugly and risky. Always start at the base.
- Using indoor lights: They’ll fail in cold, wet weather. Trust me, I’ve had strands die in January snow.
- Over-tightening clips: It damages bark and can girdle the tree. Loose but secure is the goal.
- Skipping the test: Always test lights before hanging. Save yourself the frustration.
- Forgetting the neighbors: If your tree faces a street, make sure it’s not blinding drivers. Angle lights downward slightly.
And one last thing: don’t rush. I once tried to finish in one evening. Result? Tired, frustrated, and a half-lit tree. Take breaks. Do it over two days if needed.
FAQs About How to String Lights on an Outdoor Evergreen Tree 2026 Guide
Q: How many lights do I need for my tree?
A: Rule of thumb: 100 lights per 1 foot of tree height. So a 6-foot tree? ~600 lights. But it depends on density. A spruce with thick branches might need more; a thin pine might need less. Measure and plan first.
Q: Can I leave the lights up all year?
A: Yes, but check local ordinances. Some towns have rules about holiday lights. Also, UV rays can degrade plastic. I leave mine up from November to January, then take them down. If you want year-round, use weatherproof LED strips—they’re more durable.
Q: What if my tree is too tall for a ladder?
A: Use a telescoping pole with a hook. You can hang lights from the ground. Or hire a professional. Safety first—no one wants a broken arm for a holiday display.
Q: How do I prevent lights from tangling?
A: When storing, use the “over-under” coiling method. Or wrap lights around a cardboard rectangle. I cut a piece of foam board into a “figure 8” and loop the lights around it. Works like a charm.
Q: Are solar lights a good option?
A: For how to string lights on an outdoor evergreen tree 2026 guide, solar is okay—but not ideal. They’re dimmer, less reliable in winter (less sun), and batteries die faster. Use them for small trees or as accents, not main lighting.
Q: Can I use colored lights?
A: Absolutely! Red and green for holidays, blue and white for a winter look, or multi-color for fun. But avoid mixing too many colors. Pick a palette and stick to it. Less chaos, more charm.
Q: What if a bulb burns out?
A: Most LED strands have “shunt technology”—if one bulb fails, the rest stay on. But check the strand. If many bulbs are out, replace the whole strand. Keep spares handy.
Final Thoughts
There you have it: your complete how to string lights on an outdoor evergreen tree 2026 guide. No fluff, no jargon—just real, practical advice from someone who’s been there.
Remember, it’s not about perfection. It’s about creating a moment of joy. Whether you’re lighting up for the holidays, a party, or just because, that glow means something.
Start small. Measure. Test. Plan. Then, take your time. The best displays are the ones that feel effortless—even if they took a little effort to get there.
And when you’re done? Step back. Turn off the porch light. Let the tree shine. Pour yourself a drink. You’ve earned it.
Now go make your evergreen the envy of the block—safely, beautifully, and without the stress.

