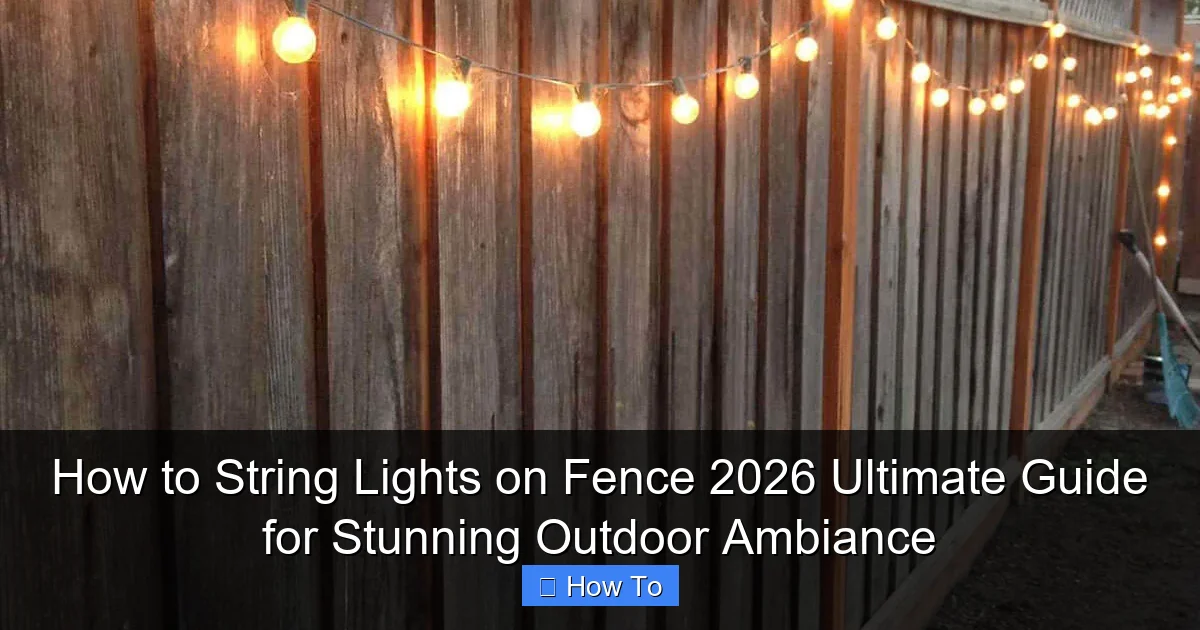
Featured image for how to string lights on fence
Image source: homebnc.com
Transform your outdoor space with perfectly strung fence lights using our proven 2026 guide. Learn easy, secure methods—from measuring and spacing to choosing weatherproof lights and avoiding sagging—for a stunning, long-lasting glow. Elevate your backyard ambiance with professional results in just a few simple steps.
“`html
How to String Lights on Fence 2026 Ultimate Guide for Stunning Outdoor Ambiance
Key Takeaways
- Plan your layout first: Sketch light placement for balanced, eye-catching fence coverage.
- Choose weatherproof lights: Ensure durability with UL-rated outdoor LED string lights.
- Use non-damaging clips: Attach lights with fence-friendly hooks or zip ties.
- Measure twice, hang once: Confirm spacing and length to avoid mid-installation shortages.
- Test before securing: Check light functionality prior to final installation for hassle-free setup.
- Layer for depth: Combine string lights with lanterns or path lights for ambiance.
Why This Matters / Understanding the Problem
Let’s be honest: your backyard or patio is more than just outdoor space—it’s an extension of your home. Whether you’re hosting a summer BBQ, enjoying a quiet evening with tea, or just unwinding after work, the right lighting can completely transform the mood.
That’s where learning how to string lights on fence 2026 ultimate guide for stunning outdoor ambiance comes in. It’s not just about hanging bulbs; it’s about creating a warm, inviting atmosphere that feels like a personal retreat.
I remember my first attempt—lights sagging, tangled wires, and one very frustrated me. I wanted that dreamy, Instagram-worthy glow, but instead got a messy eyesore. Sound familiar?
The good news? With the right approach, you can avoid the pitfalls and get it right the first time. This guide walks you through every step, from planning to plugging in, so your fence becomes a glowing centerpiece—not a DIY disaster.
What You Need
Before we dive in, let’s gather your tools and materials. You don’t need a full workshop—just a few essentials. Here’s what I use every time I tackle how to string lights on fence 2026 ultimate guide for stunning outdoor ambiance.
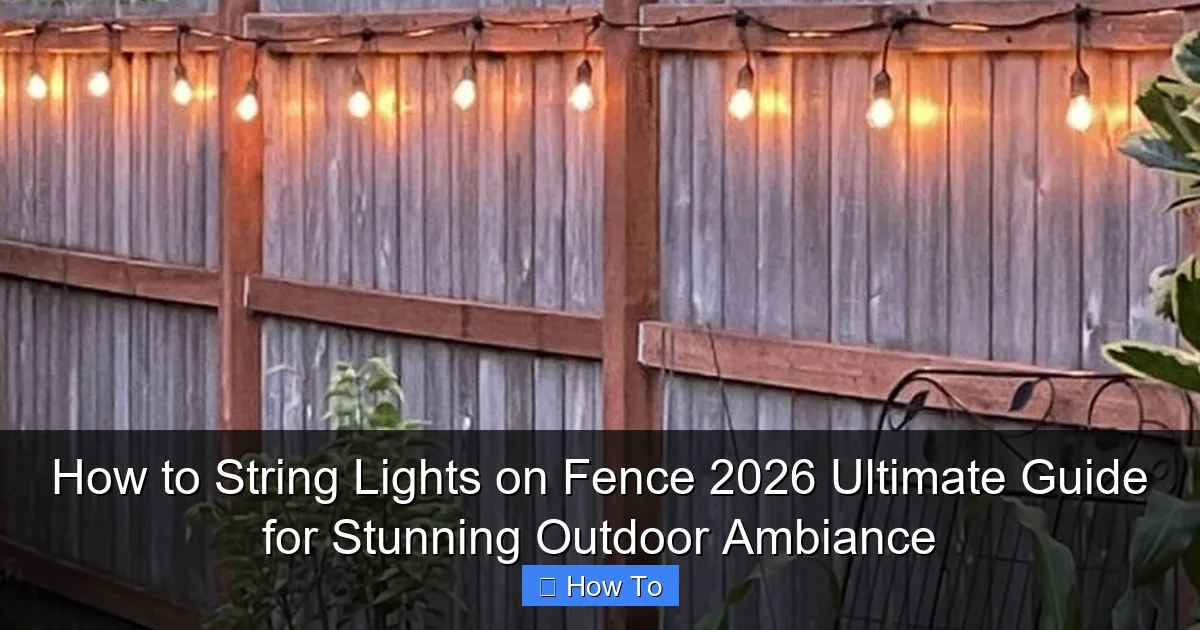
Visual guide about how to string lights on fence
Image source: jessicawellinginteriors.com
- String lights (LED, weather-resistant, outdoor-rated): I prefer warm white or soft amber for a cozy feel. Look for shatterproof bulbs and at least IP44 weather resistance.
- Measuring tape: To plan spacing and avoid overbuying or underbuying.
- Fence hooks or clips (screw-in, adhesive, or zip-tie style): Choose based on your fence material—wood, vinyl, metal, or chain-link.
- Extension cord (outdoor-rated, GFCI-protected): Safety first! A 25–50 ft cord gives you flexibility.
- Power source (nearby outdoor outlet): If you don’t have one, consider a weatherproof extension box or a low-voltage transformer.
- Ladder (if needed): For taller fences. Use a stable, non-slip model.
- Zip ties (optional): For extra security or managing excess cord.
- Timer or smart plug (optional but recommended): So your lights turn on at sunset and off at bedtime—no more forgetting!
- Gloves (optional): Protect your hands from splinters or sharp edges.
Pro Insight: I always buy 10–15% more lights than my measurements suggest. It’s better to have extra than to run short mid-installation. Trust me, I’ve been that person trying to stretch 10 feet of lights over 12 feet of fence—not fun.
Step-by-Step Guide to How to String Lights on Fence 2026 Ultimate Guide for Stunning Outdoor Ambiance
Step 1: Plan Your Layout and Measure Your Fence
Start with a sketch. Grab a notebook or use your phone to draw your fence. Mark where the power source is and how you want the lights to flow.
Ask yourself: Do you want a straight line along the top? A zigzag pattern? Or maybe a canopy effect over a seating area?
Now, measure the total length of your fence (or sections you’re lighting). Multiply by 1.1 (for 10% extra) to get your light length. For example, a 30-foot fence needs about 33 feet of lights.
Also, check bulb spacing. Most outdoor string lights have bulbs every 6–12 inches. Closer spacing = brighter, more even glow. Wider spacing = more dramatic, “twinkle” effect.
Pro tip: Use painter’s tape to mark start and end points on the fence. It’s temporary and won’t damage the surface—perfect for visualizing your layout before committing.
Step 2: Choose the Right Hanging Method for Your Fence Type
Not all fences are created equal. The method you use depends on your fence material. Here’s what I’ve learned from trial, error, and a few broken hooks:
- Wooden fences: Screw-in cup hooks or eye screws work great. They’re sturdy and blend in when painted. I like using small brass hooks—they’re rust-resistant and look classy.
- Vinyl or PVC fences: Avoid screws—they can crack the material. Use adhesive hooks (like 3M Command Outdoor) or zip-tie mounts. I’ve had great success with clear, heavy-duty zip ties looped through pre-drilled holes.
- Metal or chain-link fences: Use S-hooks or zip ties. S-hooks clip easily into chain links. For flat metal, adhesive hooks or magnetic hooks (for steel) are options.
- Wrought iron or decorative metal: Magnetic hooks or small clamps work well. Just make sure they don’t scratch the finish.
Warning: Never use nails or staples on vinyl or metal. They can damage the fence and void warranties. I learned this the hard way when I tried to staple lights to a vinyl fence—left permanent holes and a very grumpy HOA.
Step 3: Install Hooks or Clips Along the Fence
Now it’s time to install your mounting points. Spacing is key—every 2 to 3 feet is ideal for a balanced look. If your lights have built-in clips (some do!), use those instead.
For screw-in hooks: Pre-drill small pilot holes to avoid splitting wood. Then, gently screw in the hooks until they’re snug but not over-tightened.
For adhesive hooks: Clean the fence surface with rubbing alcohol. Let it dry. Apply the hook and press firmly for 30 seconds. Wait 24 hours before hanging lights—this ensures maximum hold.
For zip-tie mounts: Drill a small hole (if needed), thread the zip tie through, and secure. Cut the excess with scissors. I use clear zip ties so they’re nearly invisible at night.
Tip: Start at the end farthest from the power source. This way, you can drape the lights and work toward the plug-in point without tripping over cords.
Step 4: Hang the String Lights (Start at the Power End)
Here’s a golden rule: Always start at the end with the plug. Why? Because if you start at the far end, you’ll have to drag the plug across the yard, risking damage or tangles.
Unroll your lights gently. Don’t yank—this can break internal wiring. Lay them out on the ground in the shape of your layout (straight, zigzag, etc.).
Begin at the power end. Hook the first bulb socket (or loop) onto the first hook. Then, work your way along the fence, attaching each section to the next hook.
If you’re doing a zigzag pattern, attach the first end to the top hook, then drape down to a lower hook, up to the next top hook, and so on. Keep the tension even—no sagging, no pulling.
For a canopy effect: Run two parallel lines along the fence, then connect them with short horizontal runs between hooks. It looks like a glowing grid.
Use zip ties to secure loose cords or bundle excess wire. I like to tuck them behind the fence or under the string for a clean look.
Step 5: Connect to Power and Test
Once all lights are hung, plug in the extension cord and connect the string lights. Test them now—before you finalize everything.
Turn on the lights. Look for:
- Even brightness across all bulbs
- No flickering or dim sections
- Proper alignment and spacing
If a bulb is out or the strand isn’t lighting, check connections. Unplug first! Then, inspect the plug and socket. Try replacing the fuse (if it has one) or swap in a new bulb.
If the whole strand is dead, it might be a bad connection or internal break. Try a different outlet or swap the extension cord.
Once everything works, secure any loose cords with zip ties. I use small, clear ones so they blend in. Avoid over-tightening—you don’t want to damage the wire.
Step 6: Add a Timer or Smart Plug (Highly Recommended)
This step is a game-changer. Instead of manually turning lights on and off, use a timer or smart plug.
For a timer: Plug the extension cord into the timer, then plug the timer into the outlet. Set it to turn on at dusk and off at 10 PM (or your preferred time). No more running outside in your slippers!
For a smart plug: Use an app (like Alexa, Google Home, or TP-Link Kasa) to control your lights from your phone. You can even set schedules, dim the lights, or turn them on remotely.
I use a smart plug with sunset/sunrise sync. My lights turn on automatically when it gets dark—perfect for those early winter evenings when I forget to flip the switch.
Bonus: It saves energy and extends bulb life. Win-win.
Step 7: Maintain and Store (When Needed)
Even the best lights need care. At the end of the season (or if you want to switch styles), follow these steps:
- Unplug and remove lights gently.
- Detach hooks or clips (adhesive ones can be removed with a hairdryer to soften the glue).
- Coil lights loosely—don’t wrap them tightly around your hand. Use a reel or cardboard tube to prevent tangles.
- Store in a dry, cool place. I use a plastic bin with a lid and add a silica gel packet to absorb moisture.
- Inspect for damage before next use. Replace any frayed cords or broken bulbs.
Pro tip: Label your storage box with the year and type of lights. It makes next year’s setup so much easier.
Pro Tips & Common Mistakes to Avoid
After years of stringing lights (and fixing mistakes), here are my top insights for nailing how to string lights on fence 2026 ultimate guide for stunning outdoor ambiance.
- Don’t overload circuits: Most outdoor outlets can handle 15–20 amps. If you’re running multiple strands, check the wattage. I once tripped a breaker by daisy-chaining 5 sets. Not fun.
- Use GFCI outlets or breakers: These shut off power if they detect a fault—critical for outdoor safety. If your outlet isn’t GFCI, use a GFCI extension cord.
- Mind the wind: Loose lights can flap and break. Use extra clips or zip ties in windy areas. I add a clip every 18 inches on my seaside deck.
- Consider height: Lights hung too low can get in the way. Aim for 6–7 feet off the ground. If your fence is low, use taller hooks or run lights along the top rail.
- Mix styles for depth: Combine string lights with solar path lights or lanterns. It adds layers and makes the space feel more dynamic.
- Check local regulations: Some HOAs or cities have rules about outdoor lighting. Always verify before installing.
- Test before permanent install: Hang lights temporarily with tape or clips. Walk around at night. Adjust spacing or height if needed.
Common Mistake: Ignoring the power source. I once strung lights across a 50-foot fence, only to realize the nearest outlet was on the other side of the house. I ended up running a cord through the garage—ugly and unsafe. Plan your power path first!
Pro Tip: For a “floating” effect, use clear fishing line to suspend lights between hooks. It’s nearly invisible in daylight but glows beautifully at night. I use this trick on my pergola—looks magical.
FAQs About How to String Lights on Fence 2026 Ultimate Guide for Stunning Outdoor Ambiance
Q: Can I use indoor string lights on my fence?
A: Nope. Indoor lights aren’t weatherproof and can short out in rain or humidity. Always use outdoor-rated lights with IP44 or higher. I learned this when a storm fried my favorite set—lesson learned.
Q: How many hooks do I need for a 40-foot fence?
A: About 14–20 hooks, spaced every 2–3 feet. More hooks = more support, especially in wind. I use 16 hooks on my 40-footer—perfect balance.
Q: What if my fence is too tall to reach?
A: Use a ladder with a stabilizer bar (for safety) or a pole hook tool. Some lights come with extendable poles. Or, hire a friend—two sets of hands make it easier.
Q: Can I connect multiple strands end-to-end?
A: Only if the manufacturer says so. Most outdoor lights can connect 2–5 strands, depending on wattage. Check the packaging. I max out at 3 strands to avoid overloading.
Q: Do I need a permit for outdoor lighting?
A: Usually not for temporary or decorative lights. But if you’re installing permanent wiring (like buried cables), check with your local building department. Better safe than fined!
Q: How do I hide the extension cord?
A: Run it along the ground and cover with mulch, rocks, or a cord cover. Or, route it through a conduit. I use a black rubber cord cover—blends in with the soil.
Q: What’s the best color temperature for outdoor ambiance?
A: 2200K–2700K (warm white or soft amber). It mimics candlelight and feels cozy. Cool white (4000K+) feels harsh and clinical—save it for task lighting.
Final Thoughts
There you have it—my complete, no-BS guide to how to string lights on fence 2026 ultimate guide for stunning outdoor ambiance. It’s not rocket science, but it does take patience, planning, and a little creativity.
Remember: the goal isn’t perfection—it’s creating a space where you love to be. Whether you’re hosting friends or enjoying a solo moment, the right lighting can make your backyard feel like a sanctuary.
Start simple. Use what you have. Test as you go. And don’t stress if it’s not “perfect” the first time. I still tweak my setup every year—adding a new strand, changing the pattern, or swapping out bulbs.
Now, grab your lights, your hooks, and your favorite beverage. Your dreamy, glowing fence is just a few hours away. Light it up, and enjoy the magic.
And hey—if you mess up? That’s okay. We’ve all been there. Just take a breath, fix it, and try again. The glow is worth it.
“`

