
Featured image for how to string lights on indoor patio
Image source: m.media-amazon.com
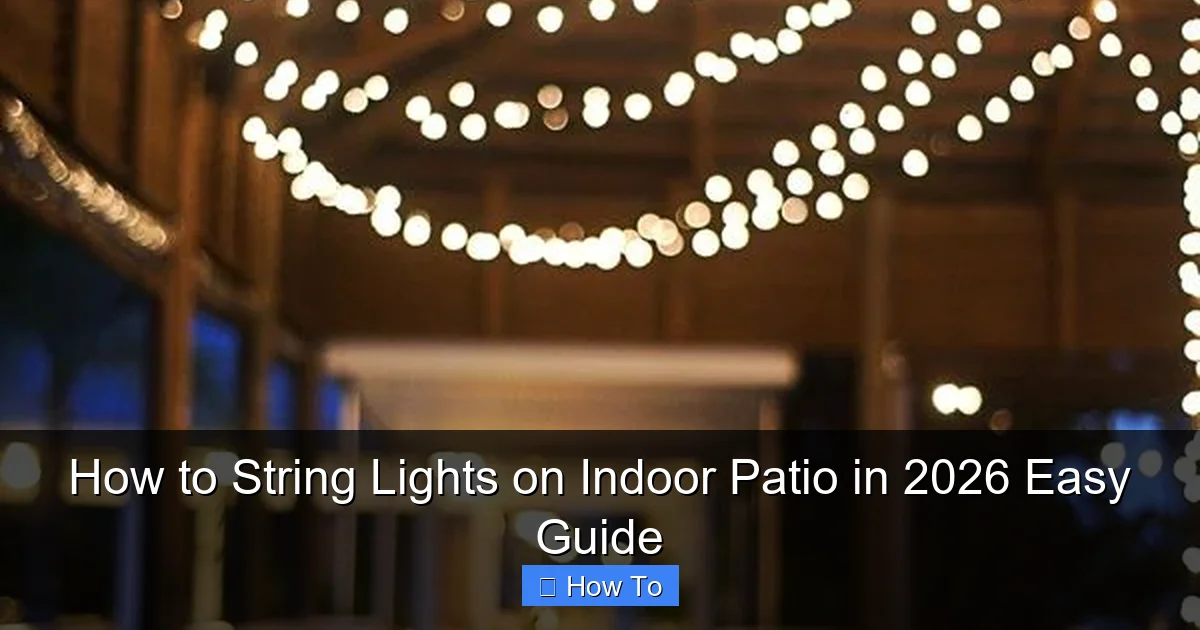
Transform your indoor patio into a cozy, inviting retreat by stringing lights along ceiling beams, walls, or railings—no outdoor wiring needed. In 2026, smart LED string lights with adhesive clips and app-controlled brightness make installation easier than ever, allowing customizable ambiance in minutes. Follow simple spacing guidelines and use non-damaging hooks to achieve a professional look that elevates any space.
“`html
How to String Lights on Indoor Patio in 2026 Easy Guide
Key Takeaways
- Plan your layout first: Sketch light placement to avoid over- or under-lighting.
- Use adhesive hooks: Secure lights without damaging walls or ceilings.
- Opt for LED lights: Energy-efficient and safe for enclosed spaces.
- Measure cord length: Ensure enough reach for outlets and desired coverage.
- Layer lighting: Combine string lights with lamps for balanced ambiance.
- Test before finalizing: Check brightness and placement early for adjustments.
- Anchor tightly: Prevent sagging with proper tension and support clips.
Why This Matters / Understanding the Problem
Let’s be honest—nothing transforms a space quite like the warm glow of string lights. Whether you’re hosting a cozy dinner, working late with coffee in hand, or just unwinding after a long day, lighting sets the mood. An indoor patio is that sweet spot between inside comfort and outside serenity. But here’s the catch: most of us either overcomplicate it or end up with tangled wires, drooping strands, or—worst of all—damaged walls.
I’ve been there. I once tried using nails to hang lights on my indoor patio, only to realize I’d cracked the drywall and had to patch it before my guests arrived. Oops. That’s when I learned that how you string lights matters just as much as why you’re doing it.
So, if you’re searching for the how to string lights on indoor patio in 2026 easy guide, you’re in the right place. This isn’t just about aesthetics—it’s about creating a safe, durable, and beautiful atmosphere without stress, damage, or wasted time. Whether your indoor patio is a sunroom, a converted garage, or a screened-in porch with a view, this guide will help you do it right—the first time.
And yes, we’ll cover modern solutions like adhesive clips, smart lights, and even energy-efficient LEDs that last longer and cost less to run. Because in 2026, we’re all about smart, sustainable, and simple.
What You Need
Before you start, let’s gather your tools. The good news? Most of what you need is either already in your home or easy to find at any hardware or home decor store.
Visual guide about how to string lights on indoor patio
Image source: deerpearlflowers.com
- String lights (LED recommended—cool to the touch, energy-efficient, and long-lasting)
- Measuring tape (to plan spacing and avoid running short)
- Adhesive hooks or clips (like 3M Command strips, removable and wall-safe)
- Ceiling or wall anchors (optional) (for heavier lights or permanent setups)
- Zip ties or twist ties (for bundling excess cord or securing loops)
- Extension cords or power strips (if needed) (check wattage to avoid overload)
- Smart plug or timer (optional) (for automatic on/off—great for ambiance without effort)
- Ladder or step stool (for high spots—safety first!)
- Level (optional) (if you’re a perfectionist like me)
Bonus: If you’re going for a smart lighting setup, consider Wi-Fi-enabled string lights that sync with voice assistants or apps. They’re not essential, but they’re a game-changer for convenience.
Now, a quick note: measure your space before buying lights. I once bought 20 feet of lights for a 30-foot span and had to improvise with extensions—not ideal. Measure the perimeter or layout you plan to follow, and add 10–15% extra for loops, corners, and slack.
Step-by-Step Guide to How to String Lights on Indoor Patio in 2026 Easy Guide
Step 1: Plan Your Layout and Choose the Right Lights
Start with a vision. Are you going for a canopy effect (lights crisscrossing the ceiling), a border (along the walls), or a draped look (from one point to another)? Sketch it out on paper or use a free app like Canva to visualize.
For indoor patios, LED string lights are your best friend. They’re safe near fabrics, don’t get hot, and come in warm white, cool white, color-changing, or even vintage Edison styles. In 2026, many brands offer smart string lights that can be dimmed, scheduled, or synced to music—perfect for mood lighting.
Pro tip: If your indoor patio has a ceiling fan, avoid long, low-hanging strands that could get caught. Instead, opt for a perimeter layout or higher ceiling mounts.
Warning: Avoid incandescent string lights indoors—they get hot, use more energy, and pose a fire risk near curtains or furniture. Stick with LEDs for safety and efficiency.
This step is crucial for the how to string lights on indoor patio in 2026 easy guide—because good planning saves time, money, and frustration later.
Step 2: Measure and Mark Your Mounting Points
Grab your measuring tape and decide where you’ll place your clips or hooks. For a perimeter layout, mark every 12–18 inches along the wall or ceiling edge. For a canopy, plan diagonal or crisscross lines and mark anchor points at intersections.
Use a pencil to lightly mark spots. If you’re using adhesive clips, clean the surface with rubbing alcohol first—dirt and dust reduce stickiness. For textured walls or ceilings, adhesive may not hold well. In that case, consider mini eye hooks (screwed in gently) or clear plastic clips designed for uneven surfaces.
For a symmetrical look, use a level or laser measure to ensure your marks are aligned. I once skipped this and ended up with a lopsided “S” pattern—not the elegant curve I wanted!
Remember: The how to string lights on indoor patio in 2026 easy guide isn’t just about hanging lights—it’s about precision and patience. A few minutes of measuring saves hours of redoing.
Step 3: Install Adhesive Clips or Hooks
Now it’s time to attach your mounting points. If you’re using 3M Command clips or similar adhesive hooks, press each one firmly onto the marked spot for 30 seconds. Let them sit for at least 1 hour before hanging lights—this gives the adhesive time to bond.
For permanent setups (like a dedicated entertainment space), screw-in mini hooks or ceiling anchors work better. Use a drill with a small bit for pilot holes to avoid cracking. For drywall, use drywall anchors if the lights are heavy (e.g., with large bulbs or multiple strands).
Pro tip: Use clear adhesive clips for a nearly invisible look. They blend into the wall and keep the focus on the lights, not the hardware.
And hey—don’t worry if you’re not handy with tools. Adhesive options are strong enough for most indoor patio setups, especially with lightweight LED strands.
Step 4: Hang the Lights—Start at the Power Source
Here’s a golden rule: always start hanging from the plug end. This prevents tension on the cord and makes it easier to reach an outlet.
Begin by clipping the plug end near the power source. Then, work your way along your planned path, gently guiding the string into each clip. Don’t pull too tight—you want a slight sag (about 1–2 inches) for a relaxed, natural look. Over-tightening can strain the cord or pull clips loose.
For corners or turns, use a clip at each bend to keep the line smooth. If you’re doing a canopy, drape the lights diagonally across the ceiling, using clips at each intersection. Use zip ties to secure any slack or loops.
For longer runs, connect multiple strands with a weatherproof extension cord (even indoors, it’s safer). Just make sure the total wattage doesn’t exceed your outlet’s capacity (check the light packaging).
This step is where the how to string lights on indoor patio in 2026 easy guide really shines—because a smooth, even hang makes all the difference in ambiance.
Step 5: Test, Adjust, and Secure
Plug in the lights and turn them on. Walk around and look at the setup from different angles. Are there any dark spots? Is the glow too harsh or too dim?
If a strand is too long, loop the excess and secure it with a zip tie behind a clip. If it’s too short, use a connector or extension. Adjust the sag—too much can look sloppy; too little can look stiff.
For a professional touch, use light clips with built-in cord management or hide wires behind trim or furniture. If you have baseboards, you can tuck cords behind them for a cleaner look.
Pro tip: If you’re using smart lights, download the app and test features like brightness, color, and scheduling. Set a timer so the lights turn on at sunset—no more fumbling in the dark!
Step 6: Manage Cables and Power (The Unsung Hero)
Let’s face it: tangled cords are a mood killer. Use adhesive cable clips or cord covers to route extension cords along the wall or baseboard. If your indoor patio has a door, avoid running cords under it—this can damage the cord and create a tripping hazard.
For a permanent setup, consider installing an outlet on the ceiling (if allowed by code). Or, use a floor-mounted power strip with a long cord, hidden behind a plant or furniture.
If you’re using multiple strands, use a smart power strip with individual outlets. This lets you turn off unused strands without unplugging everything.
Bonus: In 2026, solar-powered indoor string lights are gaining traction—especially for sunrooms. They charge during the day and glow at night. Not for everyone, but worth a try if you have good natural light.
Step 7: Add Finishing Touches
Now for the fun part: styling. Drape lights around a potted plant, frame a mirror, or create a “light curtain” with vertical strands. Use battery-powered fairy lights in glass jars for a whimsical touch.
For a romantic vibe, mix warm white with soft pink or amber. For a modern look, try cool white with geometric shapes. And if you have kids or pets, opt for shatterproof bulbs—safety first!
Consider adding a dimmer switch or smart plug. Being able to dim the lights from your phone? Yes, please.
This final step completes the how to string lights on indoor patio in 2026 easy guide—transforming a simple setup into a personalized sanctuary.
Pro Tips & Common Mistakes to Avoid
Pro Tip #1: Use a light tester before hanging. I once spent an hour installing a strand only to find a dead bulb in the middle. Test first, hang second!
Pro Tip #2: Label your strands. If you have multiple sets, use colored tape or tags at the plug. Makes troubleshooting and storage a breeze.
Pro Tip #3: For high ceilings, use a light hook with a hook-and-loop strap. You can hang it from a ladder, then adjust the length later.
Common Mistake #1: Overloading outlets. Never connect more than 3–4 standard LED strands to one outlet. Check the wattage—most LEDs use 10–20 watts per 20-foot strand.
Common Mistake #2: Skipping the test run. Always plug in and check the lights before final installation. Trust me, you don’t want to take down a strand to replace a bulb.
Common Mistake #3: Using outdoor lights indoors. Outdoor lights are heavier, brighter, and often not UL-listed for indoor use. Stick with indoor-rated or indoor/outdoor models.
Common Mistake #4: Ignoring heat sources. Keep lights away from vents, radiators, or space heaters. Even LEDs can degrade near high heat.
And one last thing: don’t rush. I know you want to see the glow tonight, but taking your time ensures a safe, beautiful, and long-lasting setup. The how to string lights on indoor patio in 2026 easy guide is about doing it right—not fast.
FAQs About How to String Lights on Indoor Patio in 2026 Easy Guide
Can I use adhesive hooks on painted walls or wallpaper?
Yes, but test a small area first. 3M Command hooks work great on most painted walls, but avoid using them on fresh paint (wait 2–3 weeks) or delicate wallpaper. If in doubt, use clear plastic clips or mini screws with wall anchors.
How do I hide the power cord?
Route it behind furniture, baseboards, or use adhesive cord clips along the wall. For a cleaner look, run the cord through a cord cover painted to match your wall. Or, use a smart plug with a long cord that tucks behind a plant.
Can I connect multiple strands of string lights?
Yes, but check the maximum connection limit on the packaging. Most LED strands allow 2–4 connected in series. Never exceed the wattage of your outlet—use a power strip with overload protection.
Are battery-powered string lights safe for indoor patios?
Absolutely. They’re great for spots without easy outlet access. Just make sure they’re indoor-rated and use lithium batteries for longer life. Rechargeable options are even better for sustainability.
What if my ceiling is sloped or uneven?
No problem. Use longer adhesive clips or adjustable hooks. For a sloped ceiling, hang lights in a zigzag or wave pattern to follow the contour. Use a level to keep it balanced, not perfectly straight.
How do I take them down without damaging the walls?
If you used adhesive hooks, pull them straight down (not outward) to release the strip. For screws, simply remove and patch with spackle. Most adhesive clips leave no residue—just a quick wipe with a damp cloth.
Can I use smart string lights with voice control?
Yes! Many 2026 models work with Alexa, Google Assistant, or Apple HomeKit. Just sync them with your hub or app. I use mine to say, “Hey Google, turn on patio lights,” and voilà—instant ambiance.
Final Thoughts
Stringing lights on your indoor patio isn’t just a DIY project—it’s an act of self-care. It’s about creating a space where you can breathe, relax, and feel at home. And with the how to string lights on indoor patio in 2026 easy guide, you now have the tools, tips, and confidence to do it beautifully.
Remember: Start with a plan, measure twice, test early, and embrace the imperfections. A little sag? A slight curve? That’s charm, not flaw. And if you make a mistake? No big deal. We’ve all been there. Just adjust, rehang, and keep going.
So grab your lights, invite a friend, and turn your indoor patio into a glowing oasis. Whether it’s for quiet nights, weekend brunches, or just because you deserve a little magic—this guide has your back.
And hey, when your guests walk in and say, “Wow, this feels amazing,” you’ll know it was worth every step. Happy lighting!
“`

