Featured image for how to string lights on large outdoor tree
Image source: themprojects.com
Transform your large outdoor tree into a dazzling nighttime centerpiece by using durable, weather-resistant lights and a reliable hanging method like the “wrap-and-weave” technique for even coverage. Prioritize safety and symmetry by starting from the trunk and working outward with zip ties or light clips, ensuring lights are spaced evenly and cords are secured to avoid tripping hazards. This 2026 guide delivers pro tips for a stunning, long-lasting display.
How to String Lights on Large Outdoor Tree 2026 Guide
Key Takeaways
- Plan your layout first: Sketch light placement to avoid gaps or overloading branches.
- Use commercial-grade lights: Choose durable, weather-resistant strands for long-term outdoor use.
- Anchor lights securely: Wrap strands around trunks and branches with UV-resistant zip ties.
- Prioritize even spacing: Maintain consistent gaps between lights for a balanced, professional look.
- Test before finalizing: Power up lights during installation to troubleshoot issues early.
- Opt for LED bulbs: They’re energy-efficient, cooler, and last longer in outdoor conditions.
Why This Matters / Understanding the Problem
Let’s be honest—there’s something magical about a large outdoor tree lit up with twinkling lights. It transforms your yard into a cozy, inviting space, perfect for summer nights, holiday gatherings, or just a little everyday joy. But if you’ve ever tried how to string lights on large outdoor tree 2026 guide, you know it’s not as simple as wrapping a string around a trunk and calling it a day.
I learned this the hard way. A few years ago, I spent three hours tangled in extension cords, climbing a ladder in the dark, and nearly losing a string of lights to a squirrel. My tree looked more like a bird’s nest than a winter wonderland. The truth? Large trees come with unique challenges: high branches, thick limbs, wind exposure, and the need for a clean, safe, and long-lasting setup.
That’s why this how to string lights on large outdoor tree 2026 guide is built on real experience—not just theory. Whether you’re lighting a 30-foot oak or a sprawling maple, I’ll walk you through what actually works, what doesn’t, and how to make your tree shine without the stress.
By the end, you’ll have a plan that’s safe, durable, and beautiful—no more tangled messes or flickering lights halfway through December.
What You Need
Before you start, let’s get your toolbox ready. You don’t need a professional crew—just the right gear. Here’s what I always pack for a successful tree-lighting project.
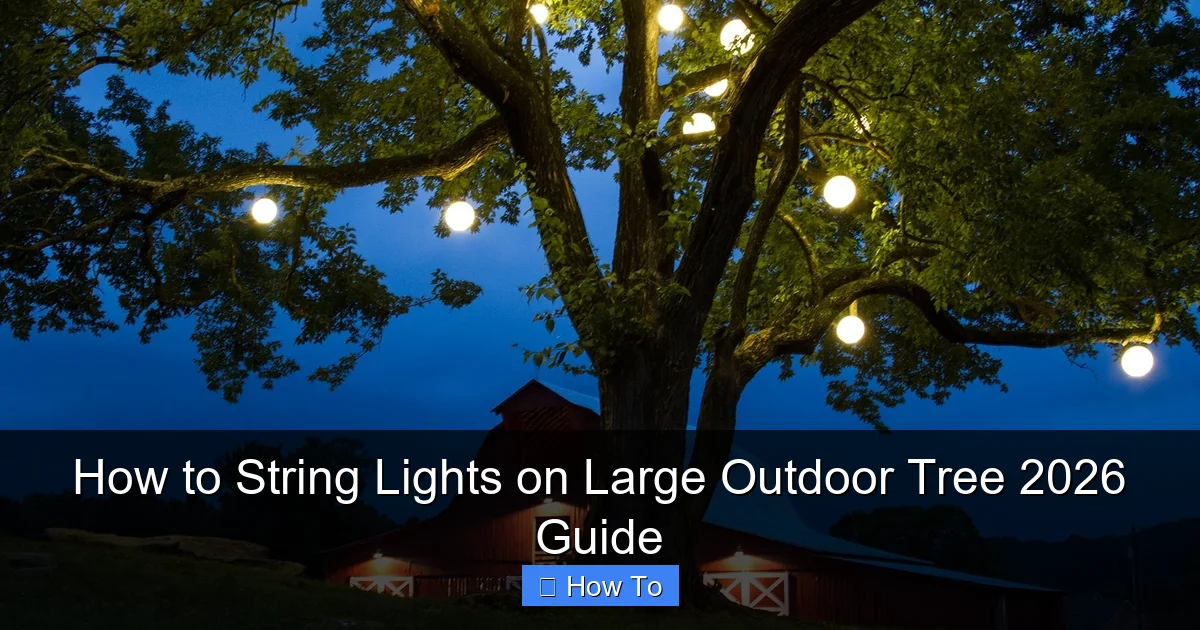
Visual guide about how to string lights on large outdoor tree
Image source: themprojects.com
- Outdoor-rated LED string lights – Look for UL-listed or ETL-certified for safety. LEDs save energy, last longer, and are safer for high branches.
- Extension cords (outdoor-rated, GFCI-protected) – Use heavy-duty 16-gauge cords. Avoid daisy-chaining more than three.
- Light clips or zip ties (UV-resistant) – Standard clips can crack in sun; go for silicone-coated or outdoor-rated plastic.
- Telescoping pole with light hook – A game-changer for tall trees. I use one that extends to 16 feet.
- Measuring tape – To calculate how many lights you need (more on that later).
- Ladder (sturdy, non-conductive) – A fiberglass step ladder is safest. Never use metal near power sources.
- Work gloves – Protect your hands from rough bark and sharp branches.
- Timer or smart plug – So your lights turn on at sunset and off at bedtime.
- Optional: Drone (with camera) – For spotting tricky branches or checking placement from above.
Pro Tip: Buy 20–30% more lights than you think you need. Trees are rarely symmetrical, and you’ll want extra for layering or wrapping trunks.
Step-by-Step Guide to How to String Lights on Large Outdoor Tree 2026 Guide
Step 1: Choose Your Lighting Style (Before Buying Lights)
Not all lighting styles work for every tree. The first step in how to string lights on large outdoor tree 2026 guide is deciding on your look. This affects how many lights you buy and how you install them.
- Trunk and limb wrapping – Classic and cozy. Best for trees with smooth, vertical trunks.
- Canopy drape (from top down) – Creates a “fairy light” effect. Works well for wide, spreading trees.
- Vertical stranding (up and down) – Great for tall, narrow trees. Looks like glowing ribbons.
- Layered combo – My favorite: wrap the trunk, then drape from the top. Gives depth and dimension.
Ask yourself: Do you want a warm, intimate glow or a bold, festive display? A maple with low-hanging branches might shine with a drape, while a tall pine could pop with vertical strands.
Step 2: Measure and Calculate Your Light Needs
Here’s where most people go wrong: they buy too few lights. A large tree isn’t just tall—it’s big. Let’s do the math.
Measure the circumference of the trunk at chest height (use a fabric tape). Then estimate the total branch length you plan to light. Add them together.
Example: Trunk = 6 feet, branches = 40 feet → Total = 46 feet.
Now, check your light spacing. Most outdoor LEDs have bulbs every 4–6 inches. So:
- 4-inch spacing = 3 bulbs per foot → 46 ft × 3 = ~140 bulbs
- 6-inch spacing = 2 bulbs per foot → 46 ft × 2 = ~92 bulbs
Buy a string with at least that many bulbs. I recommend starting with a 100-bulb string and adding a second for layering.
Warning: Don’t overload circuits. Most outdoor outlets handle 15 amps. A 100-bulb LED string uses ~0.5 amps. Max 25–30 strings per outlet.
Step 3: Plan Your Power Source and Path
This is critical for safety and ease. You need a clear path from your outlet to the tree—without tripping hazards.
- Use a GFCI outlet (ground-fault circuit interrupter). If you don’t have one, get a GFCI extension cord.
- Route cords along the ground, under mulch or behind shrubs. Never bury them.
- For trees far from the house, consider a weatherproof outdoor outlet box or a smart plug with range extender.
I once tried to run a cord across my lawn—bad idea. The dog chewed it, and my wife tripped. Now I use a low-profile cord cover or tuck it under the deck railing.
Also: plan where the plug will connect. The end of your light string should be near the outlet. Buy lights with long “lead wires” (the part before the first bulb) to reduce extension cord use.
Step 4: Prepare the Tree (Clean and Inspect)
Before hanging lights, give your tree a once-over. You’re working with nature—not a perfect studio prop.
- Remove dead branches or loose bark that could snag lights.
- Clear debris around the base (leaves, tools, toys).
- Check for nests, bees, or squirrels. I once found a wasp nest in a branch—yikes.
- Trim any low branches that might block your path or get tangled.
If your tree has rough bark, consider using light clips with soft pads to avoid damaging the trunk. Never nail or screw lights into the tree—it invites disease.
Pro Tip: Take a photo of your tree from all angles. Use it to sketch your lighting plan (trunk wrap, drape, etc.) before buying supplies.
Step 5: Install the Lights—Start from the Bottom
Now the fun begins! For most trees, I start at the base and work up. This keeps the cord path clear and makes adjustments easier.
For trunk wrapping:
- Begin at the base. Use a light clip or zip tie to secure the first bulb (not the plug end).
- Wrap the string in a spiral, moving upward. Keep tension even—don’t pull too tight.
- Every 2–3 feet, use a clip to secure the wire to the trunk. This prevents sagging.
- Stop wrapping when you reach a major branch or 8–10 feet high.
For canopy draping:
- Use your telescoping pole to place the first clip at the top of a main branch.
- Attach the light string and let it drape down like a curtain.
- Secure the end near the trunk or a lower branch.
- Repeat for 3–5 branches, spacing drapes evenly.
For vertical strands:
- Clip the top end of the string to a high branch using the pole.
- Let the string hang straight down. Secure the bottom to the trunk.
- Use clips every 4–5 feet to prevent swaying.
Always leave a little slack—wind and snow will add stress.
Step 6: Use the Telescoping Pole for High Branches
This tool is worth its weight in gold. I use a 16-foot pole with a rotating hook. Here’s how to use it safely:
- Stand on solid, level ground. Never extend the pole while on a ladder.
- Hook the light clip (not the bulb) and gently lift it to the branch.
- Push the clip into place—don’t force it. If it won’t go, reposition.
- For drapes, place clips at different heights to create depth.
I once tried to hang a light 25 feet up with a ladder—my back still hurts. The pole lets me work from the ground. Plus, I can adjust lights without climbing.
Warning: Never use metal poles near power lines. If your tree is near overhead wires, hire a pro.
Step 7: Secure and Test the Lights
Once all lights are up, it’s time to test and fine-tune.
- Plug in the first string. Check for flickering, dark sections, or overheating.
- Walk around the tree. Look for uneven spacing, sagging, or bulbs pointing the wrong way.
- Adjust clips or re-wrap sections as needed. It’s easier to fix now than in December.
- Use zip ties to bundle excess cord. Tuck them under branches or along the trunk.
I like to test at night—this is when you’ll notice gaps or hotspots. If a section is too dim, add a second strand or reposition bulbs.
For layered setups, I often add a second string with warmer bulbs for depth. It’s like makeup for your tree.
Step 8: Add a Timer and Protect the Setup
You don’t want to manually turn lights on and off every night. A timer saves time and energy.
- Plug your lights into a weatherproof outdoor timer or smart plug.
- Set it to turn on at dusk (use your phone’s sunset time) and off at 10–11 PM.
- For smart plugs, use an app to schedule or control lights remotely.
Now, protect your work:
- Cover all connections with waterproof electrical tape or silicone sealant.
- Use cord covers or bury extension cords under mulch (not soil).
- For long-term setups, consider light clips with UV protection to prevent cracking.
I learned this after a summer storm fried my timer. Now I use a surge protector and a plastic box to shield it.
Pro Tips & Common Mistakes to Avoid
Over the years, I’ve made every mistake in the book. Here’s what I wish I knew sooner—so you don’t have to.
- Don’t wrap too tightly. Tight wrapping can damage bark and restrict growth. Leave a finger’s width of space.
- Use the right clips. Cheap plastic clips crack in sun. I use Outdoor-rated silicone clips or zip ties with UV inhibitors.
- Layer, don’t overload. Two 100-bulb strings look better than one 200-bulb string. It’s easier to manage and repair.
- Mind the wind. In open areas, secure drapes with extra clips. I once lost a whole drape in a storm—lesson learned.
- Check local rules. Some HOAs restrict light types or brightness. A 100-bulb warm white string is usually safe.
- Store properly. When taking lights down, don’t just toss them in a box. Wrap around a cardboard tube or use a storage reel.
Pro Insight: For multi-year setups, use reusable light clips and label each string. I color-code mine: red for trunk, blue for drapes. Makes next year’s setup a breeze.
One big mistake: using indoor lights. They’re not waterproof and can spark in rain. Always check the label for “outdoor use.”
Another: forgetting the timer. I used to leave lights on all night—my neighbor’s dog barked at them, and my electricity bill spiked. A $20 timer fixed both.
FAQs About How to String Lights on Large Outdoor Tree 2026 Guide
Can I leave the lights up year-round?
Technically yes, but I don’t recommend it. Even outdoor lights wear out from sun, rain, and wind. I take mine down after the holidays and store them in a dry place. For permanent setups, use commercial-grade LED strips with weatherproof coatings.
What’s the best light color for a large tree?
It depends on your vibe! Warm white (2700K–3000K) is classic and cozy. Cool white (4000K+) feels modern and bright. For holidays, I mix warm white with red or blue accents. Avoid multicolor unless you’re going full festive.
How do I avoid tripping hazards with extension cords?
Use cord covers (like rubber ramps) or bury cords under mulch (not soil). I run mine along the edge of the deck or under a low fence. If the tree is far from the house, consider installing a weatherproof outlet box.
Can I use solar-powered lights?
Yes, but with limits. Solar lights work best on lower branches or in sunny spots. For tall trees, the top branches get shade, so lights won’t charge fully. I use solar for ground-level accents and plug-in for height.
What if my tree has no low branches?
No problem! Use the telescoping pole to place clips on the trunk. Or, drape lights from a nearby structure (like a pergola or fence) onto the tree. I once lit a palm tree this way—looked like a glowing palm frond!
How do I fix a section of dead bulbs?
Most LED strings have replaceable bulbs. Use a bulb tester to find the dead one. Unscrew it and replace it with a spare (keep extras!). If the whole section is out, check connections and fuses. Never cut the string—it voids safety ratings.
Is it safe to use a ladder on uneven ground?
Not really. If the ground is sloped or soft, use the telescoping pole instead. If you must climb, use a ladder stabilizer or have someone hold it. I once slipped on wet grass—never again.
Final Thoughts
Lighting a large outdoor tree isn’t just about looks—it’s about creating a moment. That first night when the lights come on, and the whole yard transforms? That’s magic.
The how to string lights on large outdoor tree 2026 guide isn’t just a set of steps. It’s a way to connect with nature, celebrate the seasons, and make memories with family and friends.
So grab your pole, pick your lights, and start simple. You don’t need perfection—just a little patience and a love for twinkling lights.
And remember: if a squirrel steals a bulb or a branch sags in the wind? That’s part of the charm. Trees grow, lights flicker, and life goes on.
Now go light up your tree. And when you do, take a photo and send it to me. I’d love to see your masterpiece.
Happy lighting!

