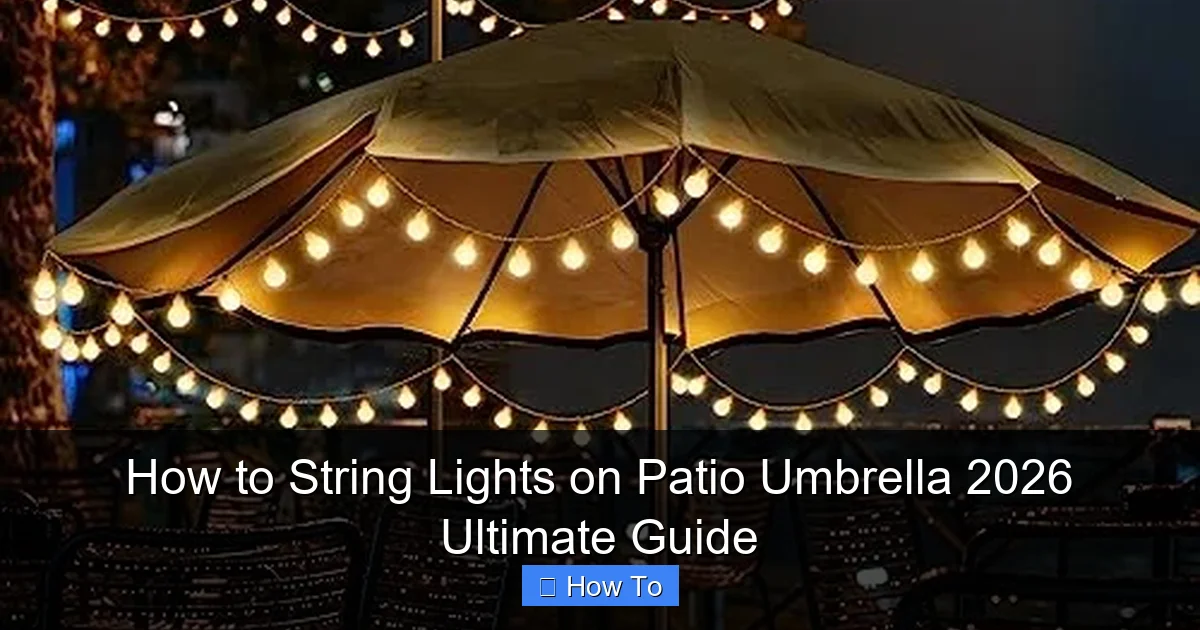
Featured image for how to string lights on patio umbrella
Image source: m.media-amazon.com
Transform your patio umbrella into a glowing evening retreat by securely attaching string lights using weather-resistant clips or zip ties for a seamless, professional look. This guide reveals the easiest methods to wrap lights evenly, prevent tangling, and ensure safe electrical connections—perfect for ambiance without damaging your umbrella. Whether you prefer a spiral, crisscross, or canopy-style pattern, our 2026 tips guarantee a stunning, long-lasting setup.
How to String Lights on Patio Umbrella 2026 Ultimate Guide
Key Takeaways
- Plan your layout: Sketch light placement before attaching to avoid gaps or tangles.
- Use weatherproof lights: Ensure durability with outdoor-rated LED or solar-powered strands.
- Secure with clips: Attach lights using non-damaging clips or zip ties for stability.
- Hide cords neatly: Route wires along umbrella ribs or poles for a clean look.
- Test before finalizing: Check brightness and connections prior to full installation.
- Opt for timers: Automate lighting with a programmable timer for effortless ambiance.
Why This Matters / Understanding the Problem
Picture this: It’s a warm summer evening, the sun’s just dipped below the horizon, and you’re sitting under your patio umbrella with a cold drink in hand. The air’s perfect, but the mood? Kinda flat. The space feels dim, almost unfinished—like it’s missing that *something* to make it feel magical.
That’s where how to string lights on patio umbrella 2026 ultimate guide comes in. String lights aren’t just about brightness—they’re about *ambiance*. They transform a simple outdoor setup into a cozy, inviting retreat. Whether you’re hosting a dinner party, enjoying a quiet night with your partner, or just trying to read a book after sunset, the right lighting makes all the difference.
But here’s the catch: Most people either skip it because they think it’s too hard or try and end up with tangled cords, sagging lights, or worse—lights that blow out in the first rain. Trust me, I’ve been there. I once spent 45 minutes trying to drape lights only to realize I’d created a bird’s nest of wires that looked more chaotic than charming.
The truth? With the right approach, how to string lights on patio umbrella 2026 ultimate guide is easier than you think. You don’t need fancy tools or a degree in electrical engineering. You just need a plan, the right gear, and a little patience. And that’s exactly what this guide delivers—no fluff, no overcomplication, just real, practical steps to get it done right the first time.
What You Need
Before we dive in, let’s make sure you’ve got everything you need. The good news? Most of this stuff is either already in your garage or easy to pick up at a hardware or home store.
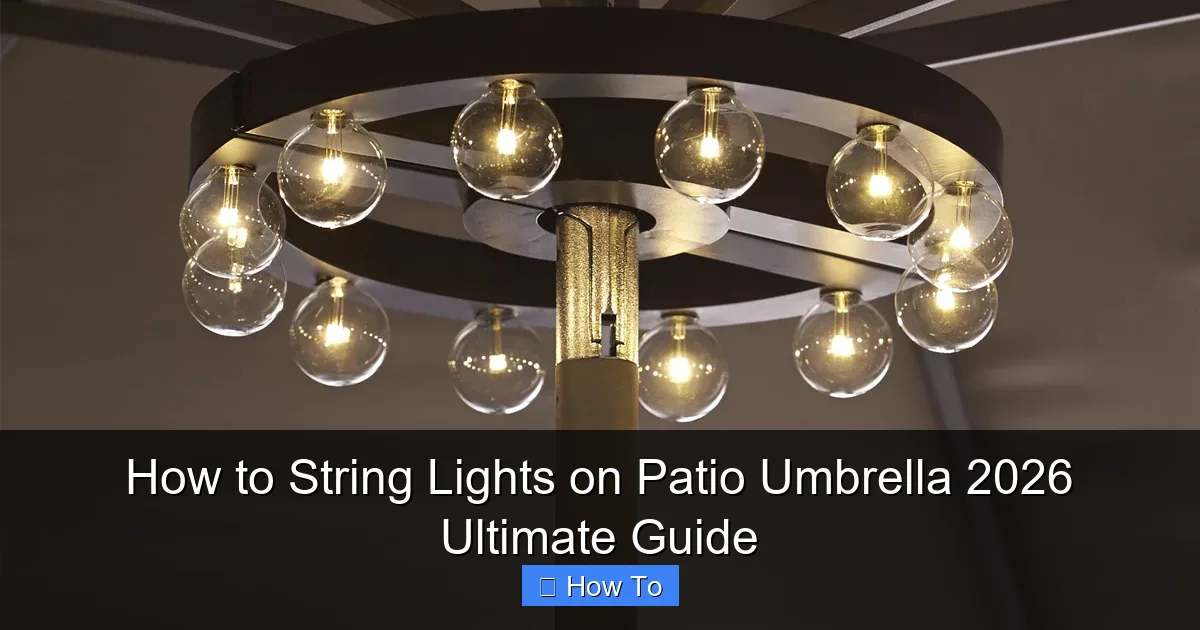
Visual guide about how to string lights on patio umbrella
Image source: thegreenhead.com
- String lights (LED, weatherproof, and preferably battery-powered or solar for flexibility)
- Patio umbrella (any size or shape—round, square, octagon)
- Zip ties or cable clips (UV-resistant, 6–8 inches long)
- Measuring tape (to avoid over- or under-stringing)
- Scissors or wire cutters (for trimming zip ties)
- Soft cloth or microfiber towel (to protect umbrella fabric)
- Optional: Command hooks or adhesive clips (if your umbrella has a fabric top)
- Optional: Extension cord or power strip (if using plug-in lights)
- Optional: Solar-powered lights with remote (great for no wires)
Pro insight: I always go with LED string lights—they’re energy-efficient, last longer, and stay cool to the touch. Plus, they’re less likely to melt your umbrella’s fabric if things get warm. Look for “wet-rated” or “outdoor-rated” labels. Trust me, you don’t want to learn this the hard way after a summer storm.
Also, consider the length of your lights. Measure the perimeter of your umbrella canopy (top edge) and add 10–15% extra for draping or overlap. For example, if your umbrella’s edge is 10 feet around, get 11–12 feet of lights. Better too long than too short—you can always tuck the excess.
Step-by-Step Guide to How to String Lights on Patio Umbrella 2026 Ultimate Guide
Step 1: Choose the Right Lights for Your Setup
This is where most people go wrong. Not all string lights are created equal—and the type you pick will make or break your project.
Start by asking: Where will the lights be plugged in? If you’re near an outlet, plug-in LED string lights work great. But if you’re in the middle of a patio with no nearby power, go for battery-powered or solar-powered lights. I’ve used solar fairy lights for years—they charge during the day and turn on automatically at dusk. No wires, no fuss.
Next, check the light spacing. For a patio umbrella, I recommend lights spaced 4–6 inches apart. Too close, and it looks like a Vegas marquee. Too far, and it looks sparse. Look for “warm white” LEDs (2700K–3000K)—they’re cozy, not clinical.
Finally, make sure they’re weatherproof. Check the IP rating: IP44 or higher is ideal for outdoor use. This means they can handle splashes, rain, and humidity—critical for a patio umbrella that sees all kinds of weather.
Personal note: I once bought cheap “outdoor” lights from a discount store. They looked great… for two weeks. Then a light drizzle hit, and the whole strand died. Lesson learned: spend a few extra bucks on quality. It’s worth it.
Step 2: Prep Your Patio Umbrella
Before you start hanging lights, give your umbrella a quick clean. Dust, pollen, and grime can weaken adhesive clips or make zip ties slip.
Use a soft cloth and mild soapy water to wipe down the fabric and ribs. Avoid harsh chemicals—they can degrade the fabric or coating. Let it dry completely. Even a slightly damp surface can cause lights to fall or create a short if you’re using plug-in models.
Now, inspect the structure. Are the ribs sturdy? Is the fabric taut? If your umbrella sags or has loose ribs, fix those first. Loose fabric can cause lights to droop or fall off mid-season.
Also, open the umbrella fully and lock it in place. You’re working with the canopy at its largest, so you need to see the full layout. Don’t try to install lights while it’s half-closed—trust me, it’s a recipe for uneven spacing.
Warning: Never use nails, staples, or glue on your umbrella. These can damage the fabric, void warranties, or create fire hazards with electrical lights. Stick to non-invasive methods like zip ties or clips.
Step 3: Plan Your Light Layout
This step is all about avoiding regret later. Take 5 minutes to sketch your plan.
Decide: Will the lights follow the ribs? Wrap around the edge? Drape from the center?
For most patios, I recommend running the lights along the ribs and the outer edge. This creates a balanced glow without overloading one area. Think of it like outlining a star—each rib gets a line of light, and the perimeter ties it all together.
Use your measuring tape to mark key points:
- Where each rib connects to the center hub
- The outer edge of the canopy
- Where the lights will start and end
Pro tip: Lay the lights on the umbrella (unplugged!) to visualize the flow. Adjust until it looks natural. You want soft curves, not sharp zigzags.
Real talk: I once skipped this step and just started wrapping. By the time I got halfway, I realized I was off-center. Had to take it all down and start over. Don’t be me. Plan first.
Step 4: Attach the Lights to the Ribs
Now the fun begins. Start at the center hub—that’s the top where all the ribs meet.
Take your first zip tie and gently loop it around the hub, just below where the ribs connect. Don’t cinch it too tight—you don’t want to damage the mechanism. Slide the light strand under the zip tie so it’s snug but not crushed.
Move to the first rib. Run the lights down the top side of the rib (not the underside). This keeps them visible and protects them from water pooling underneath. Use a second zip tie every 12–18 inches to hold the lights in place.
As you go, keep the spacing even. If the lights sag, add another zip tie. If they’re too tight, loosen slightly—you don’t want to pull the rib out of alignment.
When you reach the end of the rib (the outer edge), loop the lights around the tip. Use a zip tie to secure them to the metal tip or fabric hem. Then, run the lights along the outer edge of the canopy, connecting to the next rib.
Repeat for each rib, working in a clockwise or counterclockwise direction. Keep the tension consistent. This is where patience pays off—rushing leads to uneven lighting.
Pro tip: Use different colored zip ties (like blue for ribs, red for edge) so you can easily identify which ties to remove if you need to adjust later.
Step 5: Secure the Outer Edge (The Perimeter)
The outer edge is where your lights really shine—literally. This ring of light frames your space and adds depth.
Start at the end of one rib and run the lights along the canopy’s edge. Use zip ties every 8–10 inches to hold them in place. Make sure the ties go through the fabric hem or around the metal tip—never pierce the main canopy fabric.
If your umbrella has a fabric valance (a decorative trim), you can tuck the lights behind it for a cleaner look. Just be gentle—don’t pull the valance loose.
For extra stability, use adhesive-backed cable clips (like 3M Command hooks) on the underside of the edge. These hold the wires without damaging the fabric. I use these on my own umbrella—they’ve lasted three seasons and counting.
When you return to your starting point, overlap the lights by 6–8 inches. Use a zip tie to bundle the ends together. Trim any excess with scissors, but leave a little slack in case you need to adjust later.
Common mistake: Don’t wrap the lights too tightly around the edge. This can cause the fabric to pucker or create hot spots if the lights generate heat. Keep it loose and natural.
Step 6: Connect to Power (Safely!)
This is where safety matters most. Never drape cords over sharp edges or leave them in high-traffic areas.
If you’re using battery-powered lights, place the battery box in a waterproof container (like a ziplock bag or small plastic box) and tuck it under the umbrella or in a nearby planter. I use a decorative ceramic dish—it blends in and keeps the box dry.
For plug-in lights, run the cord down the umbrella pole. Use zip ties to secure it every 12 inches. At the base, coil any excess and store it in a cord organizer or under a table. Never leave cords dangling—they’re a tripping hazard and can get damaged.
If you’re using an extension cord, make sure it’s outdoor-rated and GFCI-protected. Plug it into a GFCI outlet (the kind with “Test” and “Reset” buttons). This cuts power instantly if there’s a short—critical for outdoor use.
Solar lights? Just make sure the solar panel gets at least 6 hours of direct sun. I place mine on a nearby table or railing. Some models have panels on the battery box—just angle it toward the sun.
Warning: Never use indoor extension cords outdoors. They’re not built for moisture or UV exposure. One rainstorm can ruin them—or worse, cause a fire.
Step 7: Test & Adjust
Turn on the lights. Step back. Take it all in.
Do they glow evenly? Is there any flickering? Do any sections look too bright or too dark?
If a section is too dim, check the connections. A loose zip tie or frayed wire can cause weak spots. If the lights flicker, inspect the battery contacts or plug connections.
Adjust the layout as needed. Maybe the center is too bright—try moving some lights to the ribs. Or maybe the edge looks sparse—add a few extra clips.
Let them run for 30 minutes. Watch for overheating. If any part feels hot to the touch, turn them off and reposition. Most LED lights stay cool, but it’s good to check.
Once you’re happy, trim all zip tie ends with scissors. Leave about 1/4 inch to avoid sharp edges.
Personal insight: I test mine at dusk, when the ambient light is low. This gives the best sense of how they’ll look at night. Daytime testing is misleading—the sun washes out the glow.
Pro Tips & Common Mistakes to Avoid
After years of trial, error, and a few “why did I do that?” moments, here are my top insights—straight from the field.
- Don’t overdo the lights. More isn’t always better. A few well-placed strands beat a chaotic mess. I once tried wrapping every inch of my umbrella—it looked like a Christmas tree. Now I keep it simple: ribs + edge.
- Use UV-resistant zip ties. Regular plastic ties turn brittle in the sun. I’ve had them snap after one season. Look for “UV-stabilized” or “outdoor-grade” ties. They cost a bit more but last years.
- Label your battery boxes. If you have multiple lights, label each box (e.g., “Umbrella – Front”). Saves time when replacing batteries or troubleshooting.
- Store lights properly in winter. If you live where it snows, take down the lights. Wrap them loosely in paper (not plastic) to prevent tangles. Store in a dry, cool place.
- Check local rules. Some HOA communities or cities have rules about outdoor lighting. Make sure your setup is compliant.
- Use dimmers or timers. Solar and battery lights often have built-in timers (e.g., 6 hours on, 18 off). This saves power and extends bulb life. I set mine to turn on at 7 PM and off at 1 AM.
- Don’t ignore the pole. If your umbrella has a decorative pole, consider adding a few lights there too. It creates a vertical glow that draws the eye upward.
Biggest mistake: Skipping the test phase. I’ve seen people spend hours installing lights, only to realize the battery died or the cord was frayed—after they’d already trimmed all the zip ties. Test early, test often.
And one last thing: embrace imperfection. A little sagging? A slightly uneven glow? That’s part of the charm. Outdoor lighting isn’t about precision—it’s about creating a mood. If it feels warm and inviting, you’ve nailed it.
FAQs About How to String Lights on Patio Umbrella 2026 Ultimate Guide
Q: Can I leave the lights up all year?
A: Only if you live in a mild climate and use weatherproof lights. In areas with snow, ice, or extreme heat, I recommend taking them down in winter. The cold can crack batteries, and ice can damage wires. For year-round use, invest in commercial-grade outdoor lights and store them in a garage or shed during harsh weather.
Q: What if my umbrella doesn’t have metal tips?
A: No problem! Use adhesive clips or zip ties around the fabric hem. Just avoid piercing the main canopy. I’ve used 3M Command hooks on fabric umbrellas—they hold well and leave no residue. Test a small area first to make sure the adhesive doesn’t stain.
Q: Are solar lights bright enough?
A: Yes—if you pick the right ones. Look for solar strings with high-lumen LEDs (20+ lumens per bulb) and large solar panels. I use a 100-bulb solar string with a separate panel—it’s bright enough to read by. Just make sure the panel gets full sun during the day.
Q: How do I hide the cords?
A: The key is strategic routing. Run cords down the umbrella pole and along the base of your table or chairs. Use zip ties to keep them tidy. For extra stealth, wrap the pole with a decorative cord cover (available at hardware stores). Or, use battery-powered lights—no cords to hide!
Q: Can I use smart lights?
A: Absolutely! I’ve used Wi-Fi-enabled LED strings that I control with my phone. You can change colors, set schedules, or sync with music. Just make sure they’re outdoor-rated and your Wi-Fi reaches the patio. One caveat: they use more power, so battery life may be shorter.
Q: What’s the best spacing for the lights?
A: For ambient glow, space bulbs 4–6 inches apart. For a “starry” effect, go 8–10 inches. I like 6 inches—it’s cozy without being overwhelming. If your umbrella has 8 ribs, you’ll need about 8–10 feet of lights total (including the edge).
Q: How do I fix a broken bulb?
A: Most LED strings are parallel-wired, so one dead bulb won’t kill the whole strand. Just replace it with the same model. If the whole strand fails, check the battery, fuse, or plug first. If it’s a manufacturing defect, contact the seller—many offer warranties.
Final Thoughts
There you have it—your how to string lights on patio umbrella 2026 ultimate guide. No magic, no mystery, just practical steps to turn your outdoor space into a warm, inviting oasis.
Remember, this isn’t about perfection. It’s about creating moments—laughing with friends under a soft glow, watching the stars with a glass of wine, or just enjoying the quiet after a long day. The lights are just the tool. You’re the one who makes it special.
So grab your lights, your zip ties, and your measuring tape. Take your time. Test early. Adjust as needed. And when it’s all done, sit back, flip the switch, and let the magic happen.
And hey—if you mess up? That’s okay. I’ve redone my setup three times. Each time, it got better. The goal isn’t flawless installation. It’s a space that feels like you.
Now go light up your nights. Your patio—and your soul—will thank you.

