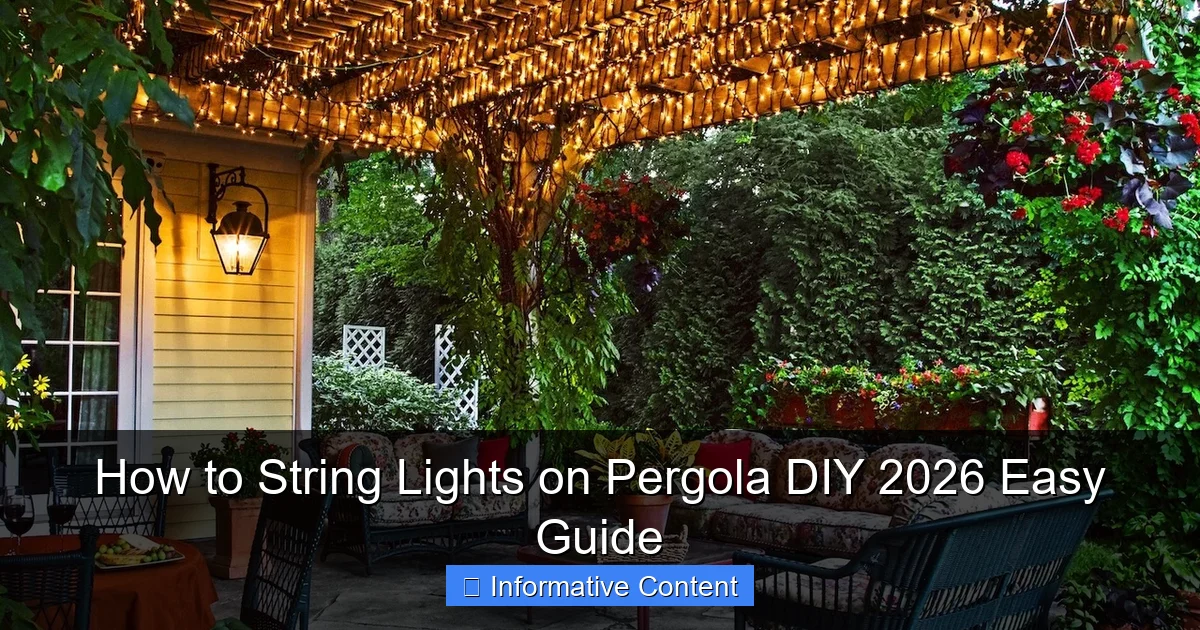
Featured image for how to string lights on pergola diy
Image source: 66.media.tumblr.com
Transform your pergola into a stunning nighttime retreat by stringing lights with this simple, step-by-step DIY guide perfect for 2026 outdoor trends. From measuring and spacing to secure mounting and weatherproofing, learn how to create a professional-looking glow without hiring an electrician—ideal for enhancing ambiance, safety, and curb appeal.
Key Takeaways
- Plan your layout first: Sketch light placement to avoid uneven spacing or overhangs.
- Use durable clips or hooks: Ensure secure, weather-resistant attachments for long-lasting setups.
- Measure twice, install once: Double-check distances to prevent excess or shortage of lights.
- Opt for LED string lights: Energy-efficient and safer for extended outdoor use.
- Test lights before mounting: Confirm functionality to avoid rework after installation.
- Anchor wires properly: Prevent sagging with tensioners or zip ties for a clean look.
- Follow safety protocols: Turn off power when handling electrical connections.
📑 Table of Contents
How to String Lights on Pergola DIY 2026 Easy Guide
Imagine this: a warm summer evening, the sun just dipping below the horizon, and your backyard transformed into a magical retreat. Soft, glowing lights drape gently across your pergola, casting a warm, inviting ambiance. Friends and family linger longer, sipping drinks under the twinkling canopy, and you can’t help but feel proud. This dream isn’t reserved for high-end landscape designers—it’s something you can achieve yourself with a little planning and a few tools. Stringing lights on your pergola is one of the most satisfying DIY projects you can tackle, and the best part? It’s easier than you think.
Whether you’re hosting a backyard barbecue, creating a romantic dinner spot, or just want to elevate your outdoor space, string lights on a pergola add instant charm. But before you grab the first set of lights and start hammering nails, there’s a bit of strategy involved. From choosing the right lights to avoiding common pitfalls like sagging wires or tangled cords, this guide will walk you through every step. We’ll cover planning, installation, safety, and even how to make your setup look professional without spending a fortune. So, grab your coffee (or lemonade), and let’s dive into how to string lights on pergola DIY—2026 style.
1. Planning Your Pergola Lighting Setup
Assess Your Pergola Structure
Before buying a single bulb, take a good look at your pergola. Is it made of wood, metal, or vinyl? Is it free-standing or attached to your house? These details matter because they determine how and where you can safely attach lights. For example, wooden pergolas are great for screws and hooks, while metal ones may require magnetic mounts or specialized clamps. If your pergola has open beams, you’ll have more flexibility than one with solid roofing.
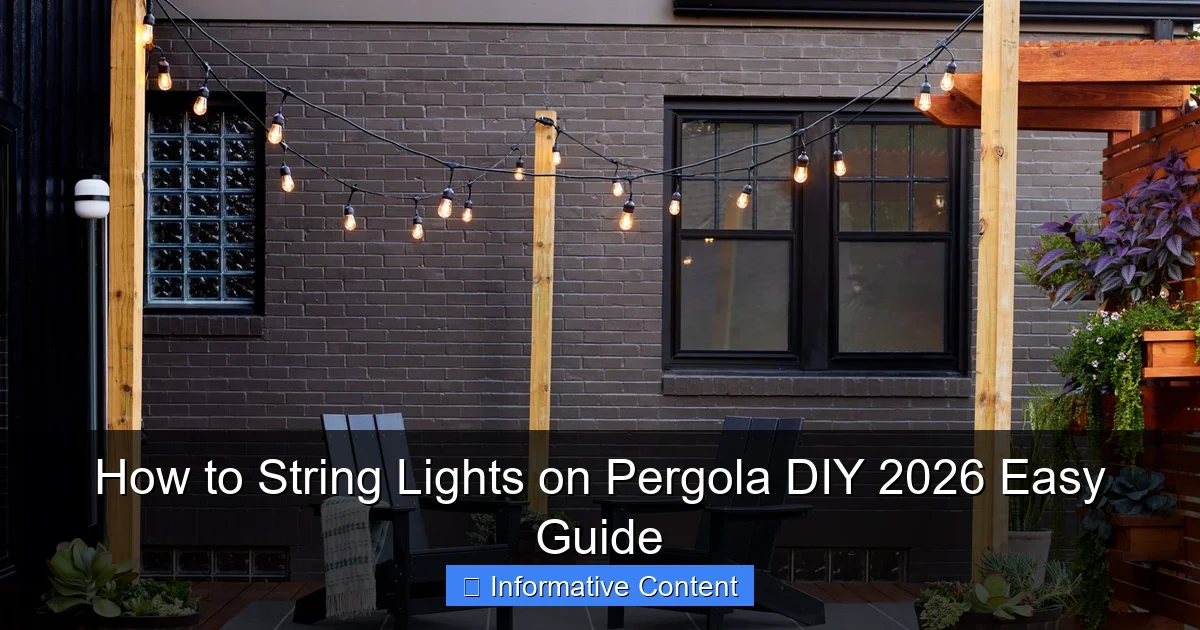
Visual guide about how to string lights on pergola diy
Image source: bhg.com
Measure the perimeter and height. Use a tape measure to get the total linear feet of the beams and crossbars where you plan to hang the lights. This helps you estimate how much lighting you’ll need—no one wants to run out halfway through installation. Pro tip: Add 10–15% extra length to your estimate to account for curves, overlaps, or unexpected gaps.
Choose the Right Type of String Lights
Not all string lights are created equal. Here’s a quick breakdown to help you pick the best fit:
- LED string lights: Energy-efficient, long-lasting, and cooler to the touch. Great for year-round use. Look for weatherproof (IP65 or higher) ratings.
- Incandescent lights: Warmer glow but less efficient and shorter lifespan. Best for temporary setups.
- Solar-powered lights: Eco-friendly and easy to install—no wiring needed. But they may not shine as brightly or last as long on cloudy days.
- Smart lights: Can be controlled via app or voice assistant (e.g., Alexa). Great for changing colors or setting schedules, but more expensive.
For most DIYers, LED string lights with a 24–36 ft length are the sweet spot—long enough to cover a section, short enough to avoid tangling. If your pergola is large, consider connecting multiple sets with end-to-end connectors (check manufacturer specs first).
Decide on the Lighting Pattern
How do you want the lights to look? This is where creativity comes in. Here are three popular styles:
- Linear (straight lines): Hang lights along the perimeter or across the beams in parallel lines. Simple, clean, and modern.
- Crisscross (X-pattern): Create a web-like effect by weaving lights diagonally across the pergola. Adds depth and visual interest.
- Hanging (draped or cascading): Let lights hang down like a curtain. Perfect for intimate spaces or romantic vibes.
For beginners, I recommend starting with a linear pattern. It’s easier to install and adjust. Once you’re comfortable, you can experiment with more complex designs. Sketch a rough layout on paper or use a free design app to visualize the look before you start.
2. Gather Tools and Materials
Essential Tools
You don’t need a full workshop, but having the right tools makes the job much smoother. Here’s what I used for my own pergola project:
- Measuring tape: For accurate spacing.
- Drill with screwdriver bits: For wood pergolas (use a cordless drill for ease).
- Stud finder (optional): Helps locate solid wood for secure mounting.
- Ladder (extension or step): Safety first—make sure it’s stable.
- Wire cutters/strippers (if modifying lights): Only if you’re splicing or shortening cords.
- Level (optional): Ensures straight lines.
For metal pergolas, swap the drill for magnetic hooks or zip ties. Vinyl pergolas may require adhesive clips to avoid damage.
Materials Checklist
Here’s a complete list of materials you’ll likely need:
- LED string lights (weatherproof, 24–36 ft per set)
- Screw-in hooks, eye screws, or cup hooks (stainless steel for rust resistance)
- Zip ties (heavy-duty, UV-resistant)
- Extension cords (outdoor-rated, GFCI-protected)
- Timer or smart plug (optional, for automatic on/off)
- Decorative elements (optional: sheer fabric, fairy light clips, etc.)
Pro tip: Buy extra hooks and zip ties. You’ll always find a spot where one extra hook saves the day. Also, check that your extension cord is long enough to reach your nearest outdoor outlet—don’t daisy-chain multiple cords, as this can overload the circuit.
Safety Gear
DIY projects are fun, but safety should never be an afterthought. Wear:
- Gloves: Protects hands from splinters and sharp edges.
- Eye protection: Especially when drilling or using a ladder.
- Non-slip shoes: Prevents falls on wet or uneven ground.
And remember: If your pergola is tall or you’re using an extension ladder, have someone spot you. Better safe than sorry!
3. Step-by-Step Installation Guide
Step 1: Mark Mounting Points
Using your sketch or plan, mark where you’ll attach hooks or clips. For a linear pattern, space hooks every 12–18 inches along the beams. For a crisscross pattern, mark diagonal lines at consistent intervals (e.g., every 2 ft). Use a pencil or chalk for easy removal later.
Pro tip: If you’re worried about spacing, use a template. Cut a piece of cardboard to 18 inches and slide it along the beam to mark each point. It’s a game-changer for even spacing!
Step 2: Install Hooks or Clips
For wood pergolas, pre-drill small holes (1/8 inch) to prevent splitting, then screw in hooks. Use stainless steel hooks—they won’t rust and can hold up to 10 lbs. For metal pergolas, use magnetic hooks or zip ties. For vinyl, adhesive clips are your best friend (look for outdoor-rated ones).
Install hooks on the underside of the beams if you want a “floating” look, or on the top for a more industrial vibe. Test each hook by gently pulling on it—if it wiggles, tighten it or add a dab of outdoor-rated glue.
Step 3: Hang the Lights
Start at the end closest to your power source. Unroll the lights and drape them over the first hook. Work your way around the pergola, securing each section with a hook or zip tie. For straight lines, keep the lights taut but not stretched—this prevents sagging and reduces strain on the cord.
For a crisscross pattern, start at one corner and weave the lights diagonally across the pergola, securing each intersection with a zip tie or hook. Use a helper to hold the other end while you adjust the tension.
If your lights have a plug at both ends, position the male plug near the outlet and the female plug facing away. This lets you connect multiple sets later if needed.
Step 4: Manage Cords and Power
Nothing ruins the look of beautiful lights like messy cords. Here’s how to keep things tidy:
- Hide cords under beams: Use zip ties to secure cords to the underside of beams.
- Use cord covers: For cords running along the ground, use outdoor-rated cord covers or bury them under mulch (if safe).
- Plug into a GFCI outlet: This protects against shocks and trips the circuit if there’s a fault.
Plug in the lights to test them before finalizing. If any bulbs are out or the lights flicker, check connections and replace faulty bulbs. Most LED sets have replaceable bulbs—don’t toss the whole strand!
4. Pro Tips for a Flawless Finish
Avoid Common Mistakes
Even seasoned DIYers make these errors. Here’s how to avoid them:
- Overloading circuits: Never connect more than 3–4 light strands end-to-end. Check the manufacturer’s wattage rating.
- Sagging lights: If your lights droop, add more hooks or use a support wire (like fishing line) behind the lights.
- Uneven spacing: Use a measuring tape or template—eyeballing often leads to gaps.
- Ignoring weather: If you live in a rainy or snowy area, ensure all connections are waterproof. Use silicone sealant on outdoor plugs if needed.
Enhance the Ambiance
Once the lights are up, take it up a notch:
- Add sheer fabric: Hang lightweight white or ivory fabric between the lights for a soft, diffused glow.
- Mix light types: Combine string lights with fairy lights or lanterns for texture.
- Use dimmers: A dimmer switch or smart plug lets you adjust brightness for different moods.
- Highlight focal points: Wrap lights around pillars or hang a statement fixture (like a chandelier) under the pergola.
Seasonal Adjustments
Your lighting setup doesn’t have to be static. Try these ideas:
- Summer: Go for warm white lights with a relaxed, open pattern.
- Fall/Winter: Add orange, red, or multicolored lights for a festive touch.
- Spring: Use pastel-colored lights or floral accents.
Store lights in a dry, cool place when not in use. Wrap them around a cardboard tube or use a light reel to prevent tangles.
5. Maintenance and Troubleshooting
Regular Checks
Like any outdoor setup, your lights need occasional TLC:
- Inspect monthly: Look for frayed cords, loose hooks, or water damage.
- Clean bulbs: Wipe with a dry cloth to remove dust and cobwebs.
- Check connections: Tighten loose plugs and replace corroded hooks.
If you notice flickering, unplug immediately and check for loose wires or water ingress. Most issues can be fixed with a simple repair kit.
When to Replace Lights
Even the best lights don’t last forever. Here are signs it’s time to upgrade:
- More than 20% of bulbs are out
- Cords are cracked or brittle
- Frequent circuit trips
- Color temperature is uneven (e.g., some bulbs look yellow, others blue)
When replacing, consider newer models with features like app control, motion sensors, or solar charging.
6. Cost and Time Estimates
Data Table: Project Costs and Time
| Item | Cost Range (USD) | Time Required | Notes |
|---|---|---|---|
| LED String Lights (24–36 ft) | $15–$50 per set | — | Weatherproof, IP65+ rating recommended |
| Screw-in Hooks (20-pack) | $8–$15 | — | Stainless steel, 1/2 inch size |
| Extension Cord (25 ft) | $10–$25 | — | Outdoor-rated, GFCI protection |
| Zip Ties (50-pack) | $5–$10 | — | UV-resistant, 12-inch |
| Smart Plug | $20–$40 | — | Optional, for automation |
| Total (Basic Setup) | $40–$100 | 2–4 hours | For a 10×10 ft pergola |
| Total (Advanced Setup) | $100–$200 | 4–6 hours | Includes smart lights, fabric, etc. |
Most DIYers can complete a basic setup in a weekend. The key is pacing yourself—don’t rush the planning or installation. A little extra time upfront saves headaches later.
Final Thoughts: Your Pergola, Your Paradise
Stringing lights on your pergola isn’t just about adding brightness—it’s about creating a space where memories are made. Whether it’s a quiet night with a book or a lively gathering with friends, the right lighting transforms your backyard into an extension of your home. And the best part? You did it yourself. There’s something deeply satisfying about stepping back and admiring a project you planned, built, and perfected.
Remember, the goal isn’t perfection—it’s progress. If your first attempt isn’t Pinterest-worthy, that’s okay. Adjust the hooks, tweak the spacing, or try a new pattern next year. The beauty of DIY is that you can always improve. So, take photos, share your journey, and don’t be afraid to ask for help. Your pergola lights aren’t just a project—they’re a reflection of your creativity and care.
Now, go ahead—string those lights, plug them in, and watch your outdoor space come alive. The 2026 summer nights are waiting. And this time, you’ll be ready.
Frequently Asked Questions
How do I string lights on a pergola without damaging the wood?
Use adhesive hooks, zip ties, or outdoor-rated clips designed for pergolas to avoid drilling into the wood. These methods securely hold lights while preserving the structure’s integrity. Always check the weight limit of your chosen hardware.
What type of lights work best for a pergola DIY setup?
LED string lights are ideal for pergolas due to their energy efficiency, low heat output, and weather resistance. Opt for commercial-grade or outdoor-rated lights with a warm white or color temperature to enhance ambiance.
How to string lights on pergola in a crisscross pattern?
Anchor lights to pergola posts or beams using hooks, then weave them diagonally across the structure for a crisscross effect. Use a measuring tape to ensure even spacing and maintain tension for a polished look.
Can I install pergola string lights without an electrical outlet nearby?
Solar-powered or battery-operated string lights are excellent alternatives for pergolas without nearby outlets. For longer runs, consider a low-voltage transformer or extension cords rated for outdoor use.
How do I secure string lights on a pergola in windy areas?
Use heavy-duty hooks, stainless steel wire, or cable ties to anchor lights tightly to beams. Double up on fasteners in high-wind zones and leave minimal slack to prevent swaying or tangling.
What’s the best spacing for string lights on a pergola DIY project?
Space lights 6–12 inches apart for balanced illumination, depending on bulb size and brightness. For a layered look, combine multiple strands at varying heights or use a zigzag pattern for even coverage.

