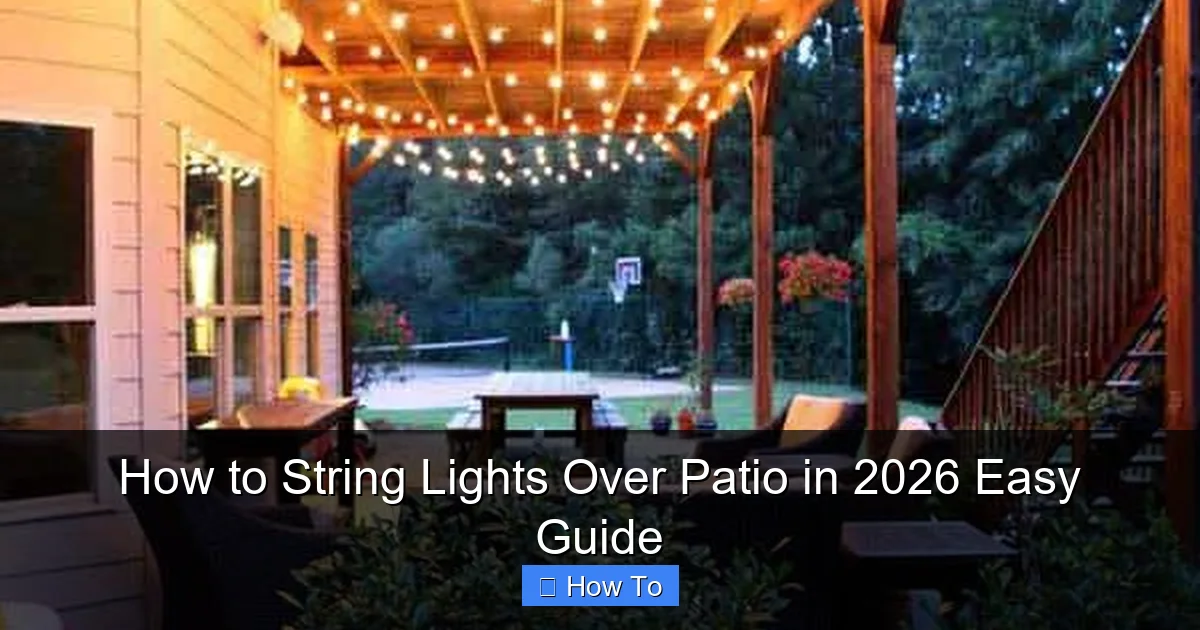
Featured image for how to string lights over patio
Image source: woohome.com
Transform your patio into a stunning nighttime retreat by stringing lights securely between sturdy anchor points like walls, posts, or trees. Use weather-resistant LED string lights and proper mounting hardware—such as hooks, eye screws, or zip ties—to ensure a safe, professional look that lasts through every season. This simple DIY upgrade adds instant ambiance with minimal effort.
“`html
How to String Lights Over Patio in 2026 Easy Guide
Key Takeaways
- Plan layout first: Sketch your patio design before hanging lights for optimal spacing and coverage.
- Use weatherproof lights: Choose UL-listed outdoor lights to ensure durability and safety in all conditions.
- Anchor securely: Install heavy-duty hooks or eye screws to support light weight and prevent sagging.
- Hide cords neatly: Conceal wires with cord covers or clips for a clean, professional look.
- Test before finalizing: Check light functionality and placement before securing all connections permanently.
- Add dimmers or timers: Enhance ambiance and save energy with smart controls for automatic operation.
Why This Matters / Understanding the Problem
You’ve spent hours perfecting your patio—comfy chairs, a fire pit, maybe even a grill. But at night? It feels flat. Too dark. Too quiet. That’s where how to string lights over patio in 2026 easy guide comes in. It’s not just about lighting; it’s about transforming your outdoor space into a cozy, inviting haven.
I learned this the hard way. Last summer, I hosted a backyard BBQ and realized my guests were huddled near the kitchen window, straining to see. The patio? A shadowy void. I vowed to fix it. After a few trial runs (and one near-miss with a ladder), I cracked the code: string lights done right make all the difference.
But here’s the catch: it’s not just about hanging lights. It’s about how you hang them. Poor planning leads to sagging wires, tangled messes, or lights that barely last a season. In this guide, I’ll walk you through every step—no guesswork, no frustration—so you can enjoy your patio, day or night.
What You Need
Before you start, gather your gear. Trust me: having everything ready saves time and headaches. Here’s your checklist:
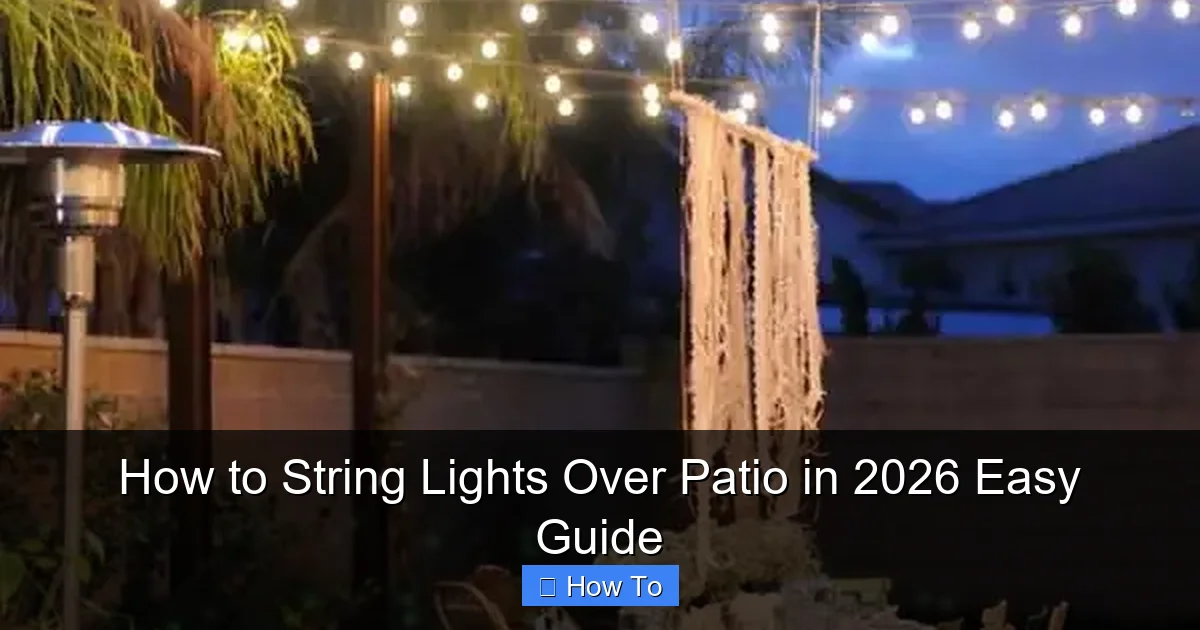
Visual guide about how to string lights over patio
Image source: woohome.com
- String lights: LED or incandescent, weatherproof (look for IP44 or higher rating).
- Measuring tape: Measure your patio’s length and width. You’ll need this for spacing and light count.
- Hanging hardware: Screw-in hooks, eye hooks, or adhesive clips (choose based on your patio material).
- Drill or screwdriver: For installing hooks in wood or concrete.
- Ladder: A stable, non-slip one—safety first!
- Extension cords and power strips: Outdoor-rated with GFCI protection.
- Zip ties or wire clips: For securing loose wires.
- Timer or smart plug (optional): Automate your lights for convenience.
Pro tip: Buy 10–20% extra lights than you think you need. It’s easier to adjust spacing than to run back to the store.
Step-by-Step Guide to How to String Lights Over Patio in 2026 Easy Guide
Step 1: Plan Your Layout
First, decide how you want your lights to look. A grid? A crisscross? A simple perimeter? Sketch it on paper or use a free app like SketchUp. This step is crucial—it’s the blueprint for your entire setup.
For example: I have a 12×16 ft patio. I went with a “grid” layout (3 rows long, 4 rows wide) for even coverage. But if you have a pergola, a crisscross pattern adds drama.
Warning: Don’t skip this step. Without a plan, you’ll end up with uneven spacing or lights that don’t reach the outlet.
Step 2: Choose Your Hanging Method
Your patio’s structure determines how you hang the lights. Here are the most common setups:
- Pergola or Gazebo: Use screw-in hooks on beams. Space them 4–6 ft apart.
- House to Fence/Post: Install hooks on the house’s eave and fence posts. Use tension wire for longer spans.
- Free-Standing Posts: Use metal poles with ground stakes (great for open patios).
- Concrete or Stone Walls: Use masonry anchors and screws. Drill carefully to avoid cracks.
I used tension wire between my house and a tree. It’s sturdy, invisible, and handles heavy lights. But if you’re renting, adhesive clips (like Command Outdoor Hooks) work—no drilling!
Step 3: Install the Hardware
Now, install your hooks, anchors, or posts. Here’s how:
- Measure and mark: Use your layout plan to mark hook positions. For a grid, mark every 4–6 ft.
- Drill pilot holes (if needed): Prevents wood from splitting. For concrete, use a masonry bit.
- Secure the hooks: Tighten them snugly. Test each with a gentle tug—no wobbling!
Pro tip: Use a laser level to ensure hooks are aligned. Slight misalignments become obvious when lights are up.
Step 4: Hang the Tension Wire (If Needed)
For spans over 15 ft, tension wire is a game-changer. It prevents sagging and supports heavy lights. Here’s how:
- Attach turnbuckles to hooks at both ends.
- Run galvanized steel wire between them.
- Tighten the turnbuckles until the wire is taut (but not over-tightened).
I used a 1/8-inch wire for a 20-ft span. It held 30 ft of lights with zero sag. Just remember: tension wire is for support, not hanging lights directly. Use clips or zip ties to attach the lights to the wire.
Step 5: String the Lights
Now, the fun part! Here’s how to do it without tangling:
- Unbox the lights: Lay them out flat. Untangle any knots before hanging.
- Start at the power source: Hang the plug end near your outlet. This avoids excess cord at the end.
- Attach lights to hooks/wire: Use zip ties, clips, or hooks. Space them evenly—don’t bunch them up.
- Work section by section: Don’t try to hang the whole string at once. It’s easier to adjust as you go.
For my grid layout, I hung one row at a time. I clipped the first light to the hook, then stretched the string to the next, clipping as I went. Smooth and simple.
Step 6: Secure Loose Wires
After hanging, check for loose wires. They’re trip hazards and can snag. Here’s how to tidy them:
- Use zip ties to bundle wires every 2–3 ft.
- Clip excess ties with wire cutters.
- For vertical wires, use adhesive clips or hooks to keep them taut.
I used black zip ties on dark beams—they’re nearly invisible. For white wires, I used clear clips.
Step 7: Test and Adjust
Plug in the lights. Do they work? Is the spacing even? Make adjustments now:
- Move hooks: If lights are too close/far, adjust hook positions.
- Add/remove lights: Too bright? Take out a few bulbs. Too dim? Add a second string.
- Check for glare: If lights shine in your eyes, tilt them downward or add shades.
I had to move two hooks after testing. One was too close to a chair, causing glare. Small tweaks made a big difference.
Step 8: Add Power and Control
Finally, connect to power. For safety:
- Use outdoor-rated extension cords.
- Protect outlets with weatherproof covers.
- Plug into a GFCI outlet (or use a GFCI adapter).
For convenience, I added a smart plug. I can turn lights on/off from my phone or set a timer. No more fumbling in the dark!
Pro Tips & Common Mistakes to Avoid
After years of trial and error, here’s what I wish I knew earlier:
Pro Tip 1: Buy lights with a plug-in end (not a socket end). It makes hanging and adjusting way easier.
Pro Tip 2: Use dimmable lights. You can adjust brightness for different moods—bright for parties, soft for relaxing.
Pro Tip 3: Leave a 1–2 ft slack at each end. It gives you room to adjust tension later.
Now, the mistakes to avoid:
- Ignoring weather ratings: Cheap lights fade or short out in rain. Spend a bit more for IP44+.
- Overloading circuits: Too many lights can trip your breaker. Check your outlet’s amperage (usually 15–20A).
- Using indoor lights outdoors: They’ll melt or spark. Only use lights labeled “outdoor.”
- Skipping the timer: Leaving lights on all night wastes energy. A timer or smart plug saves money.
One summer, I used indoor lights on my patio. Big mistake. After a rainstorm, the bulbs popped and the cord melted. Learned my lesson!
FAQs About How to String Lights Over Patio in 2026 Easy Guide
Q: Can I string lights without a pergola or roof?
A: Absolutely! Use free-standing posts or attach hooks to trees/fences. I did this on my open patio with metal poles. Just ensure they’re secure and won’t tip.
Q: How far apart should I space the lights?
A: 4–6 ft for a grid or perimeter. Closer spacing (2–3 ft) for a “twinkling” effect. I use 5 ft—it’s bright without being overwhelming.
Q: Can I leave string lights up all year?
A: Only if they’re weatherproof and durable. I leave mine up, but I take them down before winter storms. Check your lights’ rating—some can’t handle snow or ice.
Q: What if my patio is uneven or has obstacles?
A: Get creative! Use different heights (e.g., higher on one side) or zigzag patterns to work around plants, furniture, or steps. My patio has a fire pit in the middle—I wrapped lights around it for a cool glow.
Q: How do I hide the cords?
A: Use cord covers (like raceways) or tuck wires behind beams/furniture. I ran cords under my outdoor rug—no one notices!
Q: Can I use solar-powered lights?
A: Yes! Great for areas without outlets. Just place the solar panel where it gets 6+ hours of sun. I use solar fairy lights on my garden path—no wiring hassle.
Q: How do I fix a burnt-out bulb?
A: Most string lights have replaceable bulbs. Unscrew the bad one and pop in a new one. Keep spares! If the whole strand fails, check the fuse (usually in the plug).
Final Thoughts
There you have it—a no-nonsense, step-by-step how to string lights over patio in 2026 easy guide. It’s not about perfection; it’s about creating a space where you and your loved ones feel at home.
Start small. Even a simple perimeter of lights makes a difference. Then, as you get comfortable, experiment with patterns, colors, or smart controls. Your patio is a blank canvas—let it shine.
And remember: this isn’t a one-time project. Adjust as needed. Swap lights with the seasons (warm white for fall, multicolor for holidays). The goal is to enjoy your space, not stress over it.
So grab your lights, invite a friend, and get started. Your dream patio is just a few clips away. And when you flip that switch? That’s the magic moment. Trust me—you’ll never look back.
“`

