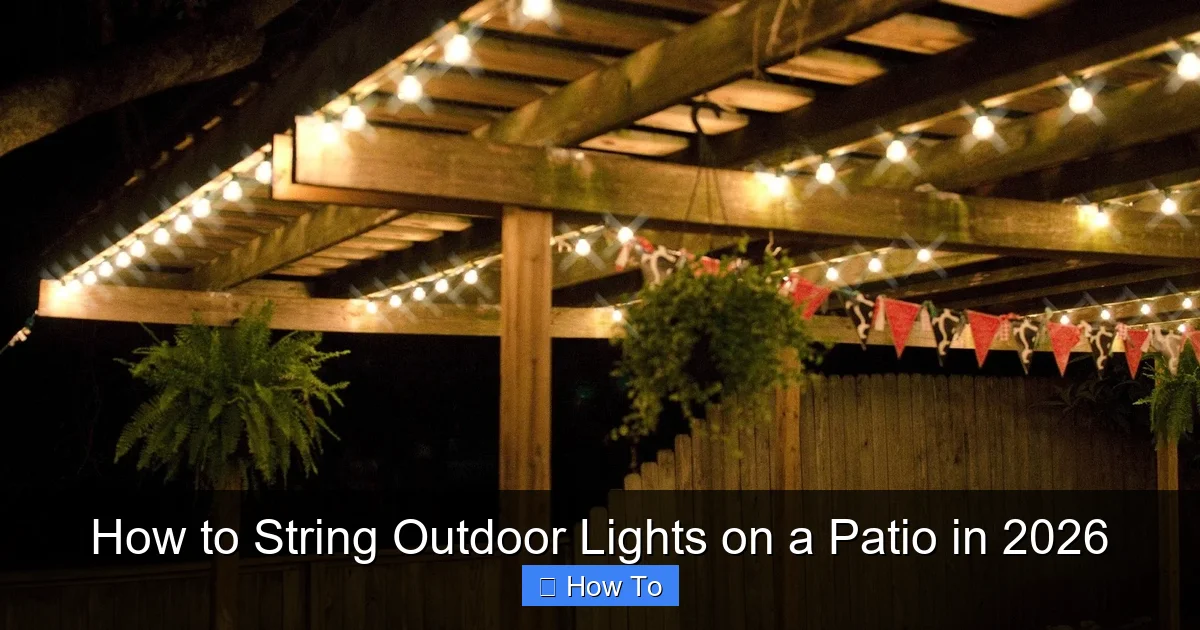
Featured image for how to string outdoor lights on a patio
Image source: themprojects.com
Transform your patio into a stunning nighttime retreat by securely anchoring weather-resistant lights to durable fixtures or structures using stainless steel cables, hooks, or specialized mounting clips designed for 2026’s smart outdoor lighting systems. Plan your layout for even spacing and easy access to power sources, whether using solar-powered LEDs or low-voltage plug-in options, to ensure a seamless, safe, and energy-efficient glow all year long.
How to String Outdoor Lights on a Patio in 2026
Key Takeaways
- Plan your layout first: Sketch light placement to avoid over- or under-lighting key patio areas.
- Use weatherproof lights: Choose outdoor-rated bulbs and cords for safety and longevity.
- Anchor lights securely: Install hooks, clips, or poles to withstand wind and weather damage.
- Hide cords discreetly: Route wires along beams or edges for a clean, professional look.
- Test before finalizing: Check connections and brightness to fix issues early.
- Add a timer: Automate lighting for convenience and energy efficiency.
Why This Matters / Understanding the Problem
Let’s be real—nothing beats unwinding on your patio after a long day. But when the sun sets, that cozy vibe can fade fast. That’s where how to string outdoor lights on a patio in 2026 comes in.
I learned this the hard way last summer. I bought a set of string lights, excited to host a backyard dinner. But after two hours of tangled cords and crooked hooks, I gave up. The lights looked like a spiderweb, and my guests were more focused on not tripping than the conversation.
Sound familiar? You’re not alone. Many people struggle with getting outdoor lighting just right. Too dim? It feels like a cave. Too bright? It’s like a parking lot. And if the setup isn’t secure, a single breeze can turn your dreamy ambiance into a dangling mess.
The good news? With the right approach, you can create a warm, inviting space that’s both functional and beautiful. In 2026, outdoor lighting isn’t just about aesthetics—it’s about smart design, durability, and ease of use. Whether you’re hosting a BBQ, reading a book, or stargazing, the right lights make all the difference.
So, let’s fix that. This guide walks you through how to string outdoor lights on a patio in 2026—step by step, with real tips from someone who’s been there, tangled the cords, and finally got it right.
Pro Insight: The key isn’t just buying the fanciest lights. It’s planning your layout, choosing the right tools, and installing them with care. A little prep now saves hours of frustration later.
What You Need
Before you start, gather your tools and materials. Trust me—rushing to the hardware store mid-project is a mood killer.
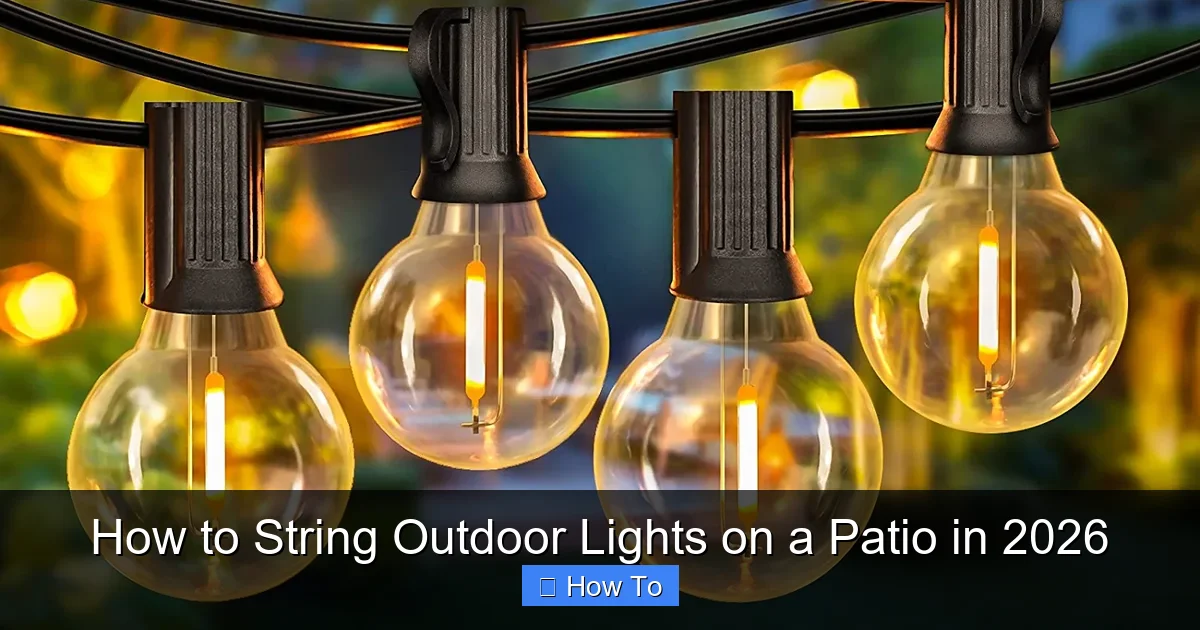
Visual guide about how to string outdoor lights on a patio
Image source: cactus.pk
- Outdoor-rated string lights (LED is best—energy-efficient, long-lasting, and cool to the touch)
- Measuring tape (for planning your layout)
- Drill and drill bits (if attaching to wood or masonry)
- Outdoor-rated hooks, screws, or eyelets (stainless steel or coated to resist rust)
- Zip ties or outdoor-rated cable clips (for securing wires)
- Ladder (if your patio has high walls or a pergola)
- Extension cords (outdoor-rated) (with GFCI protection for safety)
- Voltage tester (optional, but smart for checking outlets)
- Smart plugs or timers (optional, for automatic on/off control)
- Weatherproof sealant (for sealing screw holes if needed)
Pro tip: Check if your lights are connectable—some sets let you link multiple strands without overloading a single outlet. This is a game-changer for larger patios.
And don’t forget: how to string outdoor lights on a patio in 2026 isn’t just about hardware. It’s about choosing lights that match your space. Think about:
– The color temperature (2700K–3000K for warm, cozy glow; 4000K+ for brighter, modern look)
– Bulb type (globe, Edison, or mini lights—each creates a different mood)
– Length and spacing (measure your patio first to avoid running out or having too many)
Step-by-Step Guide to How to String Outdoor Lights on a Patio in 2026
Step 1: Plan Your Layout (Before You Buy a Single Light)
Start with a sketch. I use a piece of paper or a free app like SketchUp Free to map my patio.
- Measure the perimeter of your patio, pergola, or fence.
- Note where outlets are located. You’ll want to minimize extension cord use.
- Decide on the lighting pattern: crisscross, zigzag, perimeter-only, or canopy-style (like a tent).
- Mark where you’ll attach lights—corners, posts, eaves, or railings.
For a 10’x12’ patio, I usually go with a crisscross pattern. It gives even light without looking cluttered. But if you have a pergola, a canopy (lights strung from post to post) feels magical at night.
Warning: Don’t just eyeball it. I once skipped this step and ended up with lights that only lit half the space. A simple sketch saves time and money.
Step 2: Choose the Right Lights for Your Space
Not all string lights are created equal. In 2026, look for:
- Weatherproof rating (IP44 or higher for outdoor use)
- LED bulbs (they last 25,000+ hours and use 80% less energy)
- Connectable strands (so you can add more without overloading)
- Smart features (app control, dimming, or voice compatibility via Alexa/Google)
I love smart LED string lights—they let me set a schedule (e.g., on at sunset, off at 11 PM) and adjust brightness from my phone. No more fumbling with a switch in the rain.
Also, check the plug type. Some lights have a built-in plug, while others need a separate one. If your outlet is under a roof, make sure the plug won’t get wet.
For how to string outdoor lights on a patio in 2026, I recommend starting with 2–3 strands of 25–50 feet each. This gives you flexibility without overwhelming the space.
Step 3: Mark and Install Your Mounting Points
Now, it’s time to get physical. But first—measure twice, drill once.
- Use a pencil to mark where you’ll install hooks or screws.
- Space them 3–6 feet apart, depending on your light pattern.
- For wood surfaces: Use stainless steel eye hooks or outdoor-rated screws.
- For masonry (brick, stucco): Use masonry screws or toggle bolts.
- For metal railings: Use zip ties or magnetic clips (no drilling needed).
I once tried to screw hooks into stucco without the right bit. Big mistake. The wall cracked, and I had to patch it later. Learn from my pain: use a carbide-tipped masonry bit and go slow.
Pro tip: Install hooks at a slight downward angle. This helps water drip off and prevents pooling.
Step 4: Test Your Lights (Before Hanging Them)
Don’t hang them yet! Plug in your lights and test them.
- Check for burnt-out bulbs or frayed wires.
- Ensure the plug isn’t overheating (a sign of a faulty strand).
- If using smart lights, connect them to your app and test dimming/on-off.
I once hung a whole set before realizing one strand had a dead bulb. It was frustrating to take it all down just for one bulb. Test first—it’s worth the 5 minutes.
Step 5: String the Lights (Start from the Power Source)
Now, the fun part. But follow these rules:
- Start at the outlet and work outward. This prevents tangles.
- Hang the first light strand, then connect the next, and so on.
- Use zip ties or cable clips to secure wires to posts or railings. Keep them snug but not too tight—you don’t want to damage the cord.
- For crisscross patterns: Use a helper or a long pole to drape lights between hooks.
- Keep slack between bulbs. Don’t stretch the string—it can break the wires.
I use a lightweight ladder with a hook to hang lights on high pergolas. It keeps me steady and saves my back.
Pro Tip: Leave a little extra cord at each end. If a bulb goes out or a wire frays, you can cut and re-splice without replacing the whole strand.
Step 6: Manage Cords and Outlets (Keep It Tidy and Safe)
Nothing ruins the vibe like a mess of cords. Here’s how to hide them:
- Use outdoor-rated extension cords with a GFCI plug (protects against shocks).
- Run cords along railings, under furniture, or behind planters.
- Use cord covers (like those from Gardner Bender) to protect wires from foot traffic.
- For smart lights: Use a smart plug to control them remotely.
I once ran a cord across a walkway. My neighbor tripped on it and spilled her wine. Not my finest moment. Now I use cord clips to run wires along the base of the fence.
Also, never daisy-chain more than 3 strands unless the manufacturer says it’s safe. Overloading can cause fires.
Step 7: Adjust and Fine-Tune for the Perfect Look
Once everything’s up, step back and evaluate.
- Are there dark spots? Add a strand or adjust spacing.
- Are lights too bright? Try dimming or swapping to a warmer color.
- Do the cords look messy? Add more clips or reposition.
- Test in different weather (wind, rain) to ensure stability.
I like to test my setup at dusk. The light changes as the sun sets, and I can see exactly where it’s too dim or too harsh.
For how to string outdoor lights on a patio in 2026, I recommend a layered approach: string lights for ambient light, plus a small LED lantern or two for task lighting (like reading).
Step 8: Maintain Your Lights (So They Last for Years)
Outdoor lights aren’t “set it and forget it.” A little maintenance goes a long way.
- Wipe bulbs with a dry cloth every few months to remove dust.
- Check for loose hooks or frayed wires after storms.
- Store lights indoors during extreme weather (hail, heavy snow).
- Replace bulbs promptly—a dark strand looks worse than no lights at all.
I keep a spare set of bulbs in a labeled box. When one goes out, I swap it in seconds.
Warning: Don’t use regular household bulbs in outdoor strings. They’re not weatherproof and can shatter.
Pro Tips & Common Mistakes to Avoid
Let’s talk real talk. Here’s what I’ve learned the hard way:
- Don’t skip the GFCI. I once used a regular extension cord. A storm came, and the outlet sparked. GFCI plugs cut power instantly if they detect moisture—saving your lights and your house.
- Use the right hook for the surface. I used plastic hooks on my stucco wall. They lasted two weeks before falling off. Stainless steel or masonry screws are worth the extra cost.
- Plan for wind. In windy areas, use tighter spacing or a crisscross pattern. I once had lights blow into my neighbor’s yard. Not cool.
- Don’t overdo it. More lights aren’t always better. A few well-placed strands create a cozy glow. A dozen strands look like a carnival.
- Label your strands. If you have multiple, label them with tape. Trust me—trying to find the one with a dead bulb in a dark yard is a nightmare.
Personal Insight: I used to think “more lights = better party.” Then I realized subtlety is key. A warm, dim glow feels more intimate than a full-on rave. Less is more.
FAQs About How to String Outdoor Lights on a Patio in 2026
Here are the questions I get most—answered honestly.
Can I use regular indoor string lights outside?
Short answer: no. Indoor lights aren’t weatherproof. Moisture can damage the wires, and the bulbs might shatter in cold weather. Always use outdoor-rated lights. They’re built to handle rain, wind, and temperature swings.
How many strands can I connect together?
Check the manufacturer’s label. Most LED strings can handle 3–5 strands in a chain. But don’t guess—overloading can cause overheating or fire. If in doubt, use a timer or smart plug to cycle power.
What’s the best way to hang lights on a pergola?
I love the “canopy” look. String lights from post to post in a grid pattern. Use stainless steel eye hooks on each post, then run the lights diagonally or straight. For extra drama, add a few strands in a crisscross.
Can I leave my lights up year-round?
You can, but I don’t recommend it. Harsh weather (hail, ice, UV rays) shortens their life. I take mine down in winter and store them in a dry, cool place. They last 2–3 years longer this way.
Are solar-powered string lights worth it?
For small patios or shady areas, yes. But solar needs direct sunlight to charge. If your patio gets shade after 4 PM, you’ll have dim lights at night. I use solar for accent lighting, but plug-in for main ambiance.
How do I fix a broken bulb?
Most LED strings have replaceable bulbs. Unscrew the old one and pop in a new one. If the whole strand is dead, check for frayed wires or a blown fuse in the plug. I keep a repair kit with spare bulbs, electrical tape, and a fuse.
What’s the ideal spacing for string lights?
For a cozy glow, space bulbs 4–6 inches apart. For a brighter look, go 2–3 inches. I use 4 inches for a balanced look. But it’s personal—test a small section first.
Final Thoughts
There you have it—your complete guide to how to string outdoor lights on a patio in 2026. It’s not just about hanging lights. It’s about creating a space that feels like home.
Remember: start with a plan, choose quality lights, and take your time with installation. A little effort now means years of magical evenings under the stars.
And don’t stress if it’s not perfect the first time. I’ve redone my setup twice. Each time, it gets better. The goal isn’t perfection—it’s ambiance.
So grab your lights, a ladder, and a friend. Turn on that playlist, pour a drink, and light up your patio. You’ve got this.
And when someone says, “Wow, your patio looks amazing,” you’ll know it’s not just the lights. It’s the time and care you put into making it right.
Now go make some memories—one bulb at a time.

