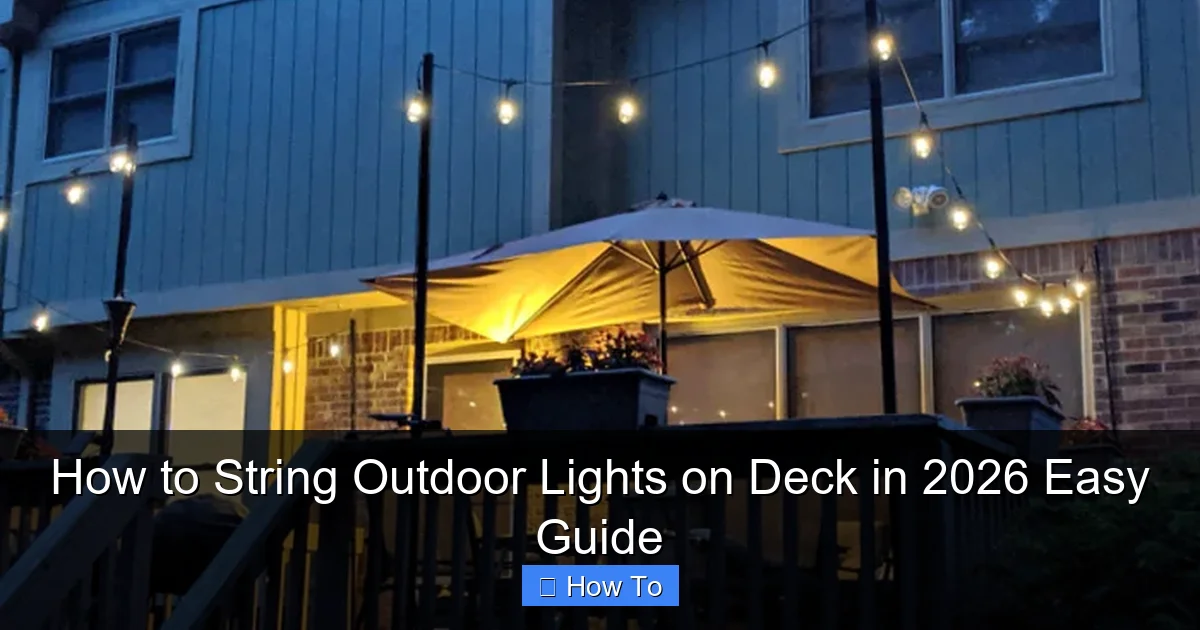
Featured image for how to string outdoor lights on deck
Image source: chaosisbliss.com
Transform your deck into a stunning nighttime retreat by securely stringing outdoor lights along railings, posts, or overhead beams using weather-resistant hardware and LED bulbs. This 2026 guide simplifies the process with easy-to-follow steps, ensuring a safe, professional look without damaging your deck’s structure. Plan your layout, use insulated clips, and connect to a GFCI outlet for a bright, energy-efficient glow all season long.
“`html
How to String Outdoor Lights on Deck in 2026 Easy Guide
Key Takeaways
- Plan your layout first: Sketch light placement to avoid uneven spacing or overloading circuits.
- Use weatherproof lights: Choose IP65-rated or higher for durability against rain and UV exposure.
- Secure with removable clips: Install adhesive or screw-in hooks to protect deck surfaces.
- Hide cords creatively: Tuck wires under railings or use cable covers for a clean look.
- Test before finalizing: Check connections and brightness prior to permanent installation.
- Opt for smart controls: Use timers or app-based dimmers for effortless ambiance management.
Why This Matters / Understanding the Problem
Let’s be honest—nothing beats the cozy glow of outdoor lights strung across a deck on a summer evening. Whether you’re hosting a BBQ, enjoying a quiet night with a book, or just want to extend your outdoor living space, lighting sets the mood. But here’s the thing: how to string outdoor lights on deck in 2026 easy guide isn’t just about hanging bulbs and calling it a day. It’s about doing it safely, stylishly, and in a way that lasts through wind, rain, and seasonal changes.
I’ve tried the DIY route more times than I’d like to admit. Once, I used cheap zip ties that snapped in a storm. Another time, I tangled myself in a web of extension cords. After a few “lessons learned,” I finally cracked the code—and I’m here to share it with you. This guide isn’t about flashy trends or overpriced kits. It’s about real, practical solutions that work in 2026, whether you have a small balcony or a sprawling backyard deck.
By the end, you’ll know how to string outdoor lights on deck in 2026 the easy way—without tripping over cords, damaging your deck, or spending a fortune. And yes, it’s easier than you think.
What You Need
Before we dive in, let’s gather your toolkit. You don’t need a contractor’s license or a full hardware store haul. Just a few essentials—most of which you might already own.
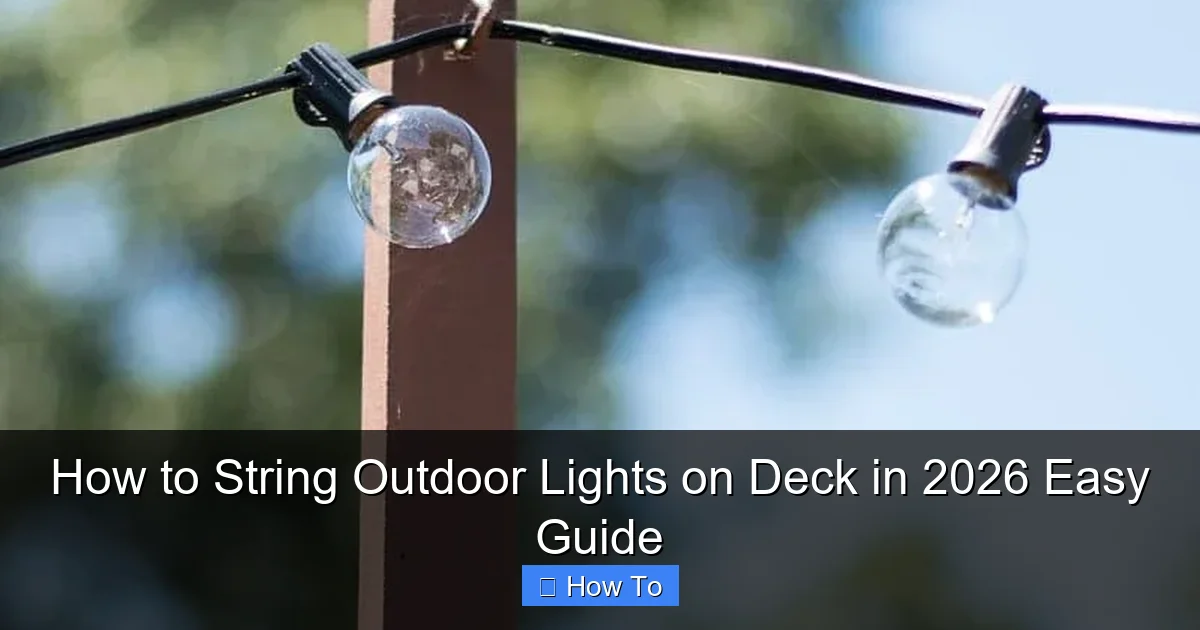
Visual guide about how to string outdoor lights on deck
Image source: jennakateathome.com
- Outdoor-rated string lights: Look for IP44 or higher waterproof ratings. LED options save energy and last longer.
- Weatherproof extension cords: Use outdoor-rated cords with GFCI protection (more on that later).
- Mounting hardware:
- Stainless steel hooks or eye screws (for wood decks)
- Adhesive clips (for metal or composite decks—no drilling!)
- Zip ties (UV-resistant, heavy-duty)
- Measuring tape: To plan spacing and avoid guesswork.
- Drill with small drill bit (if using screws): Or a hammer and nail for pilot holes.
- Timer or smart plug (optional but highly recommended): For hands-off lighting control.
- Voltage tester (optional): To check for electrical safety if splicing wires.
- Ladder (if needed): Make sure it’s stable and on level ground.
Pro tip: Buy 10% more lights than you think you’ll need. Trust me, you’ll thank yourself when you hit that last corner and still have a few feet to spare.
Warning: Never use indoor-rated lights or cords outdoors. Moisture, UV rays, and temperature swings will ruin them—and could create a fire hazard. Always check the label for “outdoor use” or “damp/wet location” ratings.
Step-by-Step Guide to How to String Outdoor Lights on Deck in 2026 Easy Guide
Step 1: Plan Your Layout (Before You Buy or Drill)
Before you start stringing, take 10 minutes to sketch your deck. Use a measuring tape to note key points: railing height, post spacing, overhangs, and any furniture you’ll keep in place.
- Decide on a lighting pattern:
- Linear: Along railings or beams (great for ambiance).
- Grid or crisscross: For larger decks (creates a “ceiling” effect).
- Canopy style: From a central post or tree to deck edges (perfect for entertaining).
- Measure the total length you’ll need. Add 10% extra for slack and curves.
- Identify your power source: Is your outlet on the deck, in the house, or under the deck? This affects cord routing.
This step is crucial for how to string outdoor lights on deck in 2026 easy guide because a good plan saves time, money, and frustration. I once skipped this and ended up with a zigzag mess that looked like a spider’s web. Don’t be me.
Step 2: Choose the Right Mounting Method for Your Deck
Your deck material determines how you’ll attach the lights. Here’s the lowdown:
- Wood decks: Use stainless steel eye screws or cup hooks. They’re strong, rust-resistant, and blend in. Drill a pilot hole first to avoid splitting the wood.
- Composite or PVC decks: These materials can crack under pressure. Use adhesive-backed clips (like Command Outdoor Light Clips) or UV-resistant zip ties. No drilling = no warranty issues.
- Metal railings: Use adhesive clips or magnetic hooks (for steel). Avoid drilling—it can void warranties.
- Concrete or stone: Use concrete anchors with eye hooks. Pre-drill with a masonry bit.
For a seamless look, place mounts every 12–18 inches. Closer spacing prevents sagging, especially with heavier lights.
Pro tip: If you’re unsure about drilling, start with adhesive clips. You can always upgrade to screws later. I used clips on my composite deck for years—no damage, no regrets.
Step 3: Install Mounts (Safely and Strategically)
Now, it’s time to install your mounts. Here’s how to do it right:
- Mark your spots: Use a pencil to mark where each mount goes. For a grid pattern, use a laser level or chalk line to keep lines straight.
- Pre-drill holes (for screws): Use a bit slightly smaller than the screw. This prevents wood from cracking. For metal or concrete, use the appropriate bit.
- Insert mounts: Screw in eye hooks until they’re snug. Don’t over-tighten—this can strip the wood or damage composite.
- Test stability: Gently tug each mount. If it wiggles, add a dab of outdoor-rated wood glue (for wood) or tighten slightly.
For adhesive clips, clean the surface with rubbing alcohol first. Press firmly for 30 seconds, then wait 24 hours before hanging lights.
This step is the backbone of how to string outdoor lights on deck in 2026 easy guide—get it right, and your lights will stay put for years.
Step 4: Test Your Lights (Before Hanging)
Don’t skip this. Plug in your lights indoors and check:
- All bulbs work (replace any burnt-out ones).
- No frayed wires or loose connections.
- The cord is long enough to reach your outlet with slack.
If you’re using multiple strands, test them together. Some lights have end-to-end connectors, but they can fail in wet conditions. I learned this the hard way when half my lights went dark during a party. Now, I always test first.
Step 5: String the Lights (The Fun Part!)
Now, the magic begins. Here’s how to hang them like a pro:
- Start at the power source: Plug in the first strand near your outlet. Leave 6–12 inches of slack for adjustments.
- Hang lights on one side first: Use S-hooks, carabiners, or the light’s built-in loops to attach to mounts. For zip ties, thread through the mount and light’s socket base.
- Keep tension even: Pull gently to avoid sagging, but don’t over-tighten. Lights should have a slight curve—not a tight line.
- Connect multiple strands (if needed): Use outdoor-rated connectors. Avoid daisy-chaining more than 3–4 strands (check manufacturer limits to prevent overload).
- Route cords neatly: Use cord clips or zip ties to secure cords to railings or beams. Keep them off the ground to avoid tripping.
For a grid pattern, start with one horizontal line, then cross with vertical lines. Use a helper to hold the other end—it’s much easier.
Warning: Never staple or nail lights directly to wood. It can damage wires and create fire hazards. Always use mounts or clips.
Step 6: Secure and Conceal Cords
Visible cords ruin the vibe. Here’s how to hide them:
- Under railings: Tuck cords behind balusters or use cord covers.
- Along beams: Use adhesive cord clips to run cords vertically or horizontally.
- Under deck: If your deck is elevated, run cords through joists or use conduit. Add a drip loop (a U-shaped bend) to prevent water from flowing into outlets.
- Smart plugs: Plug cords into a weatherproof box with a timer or smart plug. I use a Wi-Fi plug so I can turn lights on via app—no more fumbling with switches in the dark.
This step is key for how to string outdoor lights on deck in 2026 easy guide because a clean setup looks intentional, not accidental.
Step 7: Test and Adjust
Turn on the lights and walk around. Check for:
- Sagging or drooping (tighten mounts or add support).
- Glare or uneven brightness (adjust spacing or use diffusers).
- Tripping hazards (re-route cords).
Make small tweaks until it feels “just right.” I once spent an hour adjusting a single strand to avoid a shadow from a plant—worth it.
Pro Tips & Common Mistakes to Avoid
After years of trial and error, here’s what I’ve learned:
Pro Tip #1: Use a GFCI outlet (or adapter). Outdoor outlets should have ground-fault protection. If yours doesn’t, plug into a GFCI adapter. It cuts power if it detects a short—saving you from shocks or fires.
Pro Tip #2: Choose warm white lights (2700K–3000K). Cool white (5000K+) feels sterile and harsh. Warm white mimics candlelight—perfect for cozy nights.
Pro Tip #3: Go solar for remote areas. No outlet? Use solar-powered string lights. They charge during the day and turn on at dusk. I use them on my pergola—no cords, no fuss.
Common Mistake #1: Overloading circuits. Too many lights on one outlet can trip the breaker. Check wattage limits (usually 15–20 amps for outdoor circuits). If in doubt, use separate circuits.
Common Mistake #2: Ignoring weatherproofing. Even “outdoor” lights can fail if connectors aren’t sealed. Use silicone sealant on plugs and wrap joints in electrical tape.
Common Mistake #3: Poor spacing. Too far apart? The deck looks dark. Too close? It’s blinding. Aim for 12–18 inches between bulbs for balanced glow.
And one last thing: don’t rush. Take your time. A well-lit deck is a joy for years—not just one summer.
FAQs About How to String Outdoor Lights on Deck in 2026 Easy Guide
Can I leave outdoor lights up year-round?
It depends on your climate and lights. Most outdoor-rated LED lights can stay up in mild winters, but extreme cold, snow, or ice can damage sockets and cords. I take mine down after fall and store them in a dry place. If you’re in a mild climate (like California or Florida), leaving them up is fine—just check for wear every few months.
How do I hide the cords without drilling?
Use adhesive cord clips, zip ties, or tuck them under furniture or planters. For railings, try cord covers that snap onto the top rail. I also love using tall planters to block cord visibility from the ground.
What if my deck has no nearby outlet?
No problem! Use a weatherproof extension cord from a nearby outdoor outlet. Run it along the ground (with a cord cover) or under the deck. Or, go solar—solar string lights are brighter and more reliable than ever.
Are battery-powered lights worth it?
For small areas or rentals, yes. But for full-deck lighting, they’re a pain. Batteries die quickly, and replacing them is expensive. I use battery lights for accent spots (like under a bench), but rely on plug-in or solar for the main setup.
How do I prevent lights from sagging?
Three words: support, spacing, tension. Use mounts every 12–18 inches. Don’t over-tighten—lights should have a gentle curve, not a straight line. For long runs, add an extra mount in the middle.
Can I use smart bulbs with outdoor string lights?
Yes, but check compatibility. Some smart bulbs aren’t rated for outdoor use or extreme temps. I use Philips Hue Outdoor String Lights—they connect to my app and change colors with a tap. Just make sure your Wi-Fi reaches your deck!
How often should I check the lights?
At least twice a year—spring and fall. Look for frayed cords, loose connections, or damaged sockets. Replace bulbs as needed. A quick 10-minute check can prevent bigger issues.
Final Thoughts
Stringing outdoor lights isn’t just about aesthetics—it’s about creating a space where memories happen. Whether you’re roasting marshmallows with kids or sipping wine with friends, the right lighting makes all the difference.
This how to string outdoor lights on deck in 2026 easy guide is your roadmap to a safe, beautiful, and long-lasting setup. Remember: plan first, test early, and keep it simple. You don’t need fancy tools or a big budget. Just a little patience and the right approach.
So grab your lights, fire up the drill (or adhesive clips), and get started. Your dream deck is just a few steps away. And when you’re done? Pour yourself a drink, sit back, and enjoy the glow. You’ve earned it.
Happy stringing!
“`

