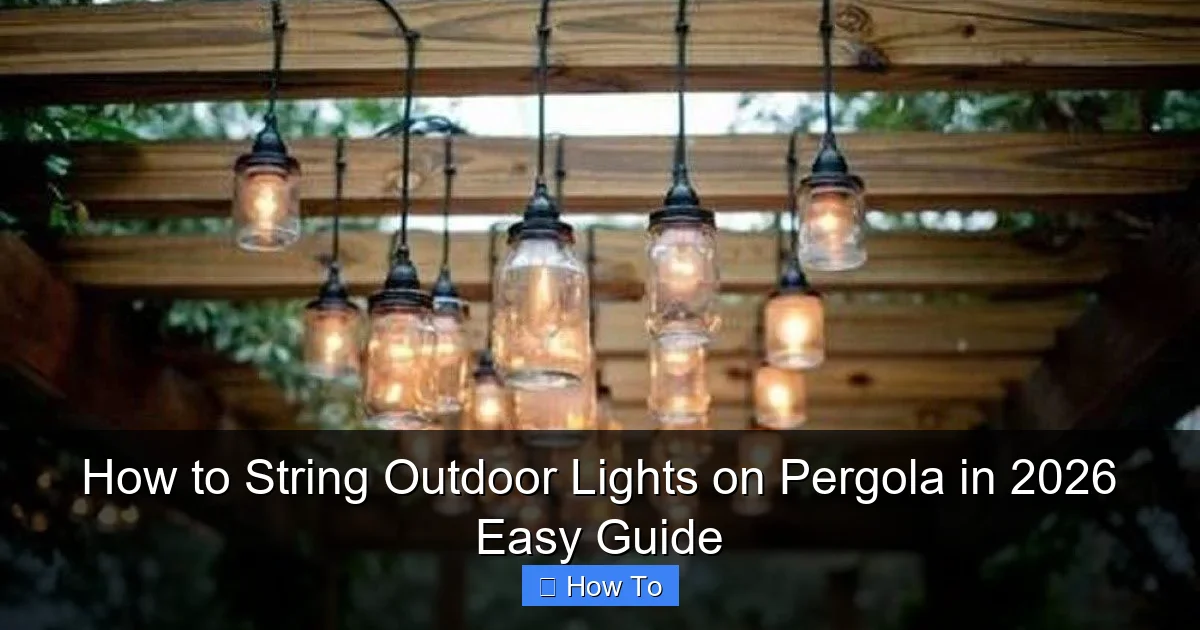
Featured image for how to string outdoor lights on pergola
Image source: i.pinimg.com
Transform your pergola into a stunning nighttime retreat by strategically stringing outdoor lights along the beams using weather-resistant LED strands and secure mounting clips. Follow a simple plan—measure, drape, and fasten—to create a balanced, inviting glow that enhances ambiance without damaging your structure. This 2026 guide makes installation quick, safe, and stylish for any outdoor space.
“`html
How to String Outdoor Lights on Pergola in 2026 Easy Guide
Key Takeaways
- Plan your layout first: Sketch light placement to avoid uneven spacing or gaps.
- Use weatherproof lights: Choose UL-listed outdoor-rated strings for safety and durability.
- Anchor securely: Install hooks or clips every 12–18 inches for stable support.
- Hide cords neatly: Route wires along beams or use clips to keep them tidy.
- Test before hanging: Check all bulbs and connections to prevent mid-install fixes.
- Opt for dimmers: Add a dimmer switch for adjustable ambiance and energy savings.
Why This Matters / Understanding the Problem
Picture this: it’s a warm summer evening, you’re sipping lemonade, and your pergola is bathed in a soft, warm glow. The mood is perfect—until you realize the lights you hung last year are sagging, flickering, or worse, dangling by a thread. If you’ve ever tried to figure out how to string outdoor lights on pergola in 2026 easy guide without turning it into a DIY disaster, you know it’s not just about hanging bulbs. It’s about creating ambiance, safety, and longevity—all while avoiding the “I should’ve planned this better” moment.
Whether you’re setting up for a party, a romantic dinner, or just want to enjoy your backyard after dark, lighting a pergola the right way matters. Poorly hung lights can droop, short out, or look messy. But with the right approach, you can create a stunning, durable setup that lasts through seasons. This guide walks you through the entire process—step by step—so you can skip the trial and error and get it right the first time.
What You Need
Before you climb that ladder, let’s make sure you’ve got everything you need. No one wants to be halfway through and realize they’re missing a key tool. Here’s your checklist:
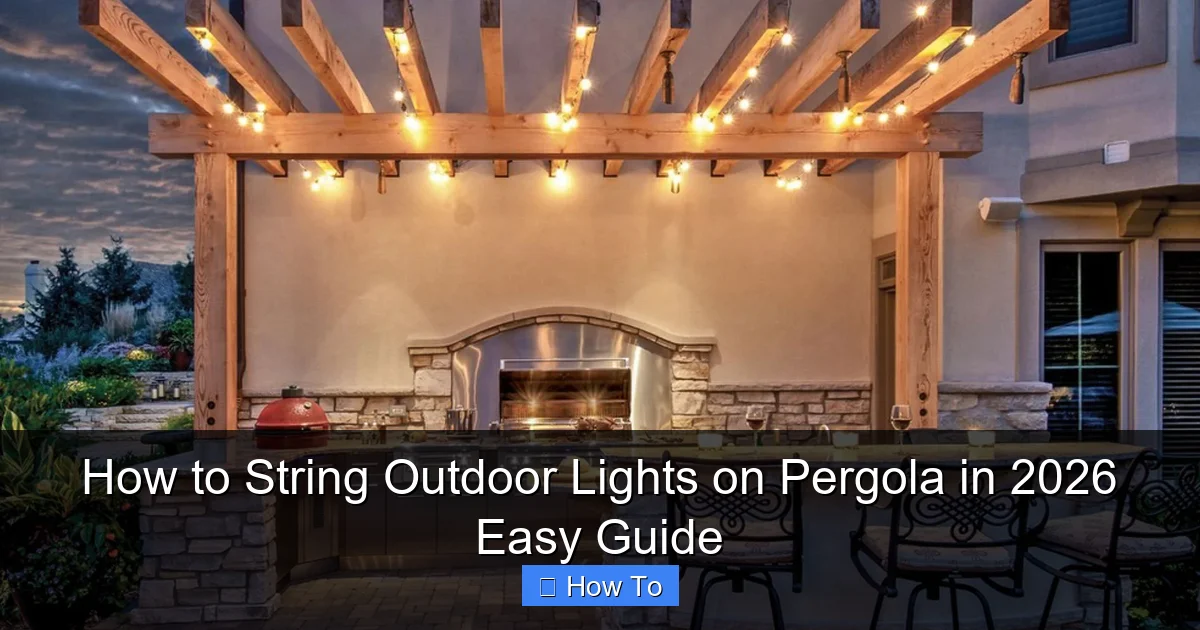
Visual guide about how to string outdoor lights on pergola
Image source: shadefxcanopies.com
- Outdoor-rated string lights (LED, weatherproof, with proper IP rating—IP44 or higher)
- Measuring tape (to avoid guesswork)
- Drill and drill bits (for wood or metal pergolas)
- Stainless steel screws or eye hooks (rust-resistant is a must)
- Zip ties (outdoor-rated, UV-resistant) (great for temporary or quick setups)
- Light clips or hooks (specifically designed for string lights)
- Ladder or step stool (sturdy and tall enough)
- Extension cords (outdoor, GFCI-protected) (safety first)
- Power source plan (outlet location, surge protector, or solar options)
- Optional: dimmer switch or smart plug (for mood control)
Pro tip: Buy a few extra clips and zip ties. You’ll thank yourself later when one breaks or you want to tweak the layout.
Step-by-Step Guide to How to String Outdoor Lights on Pergola in 2026 Easy Guide
Step 1: Plan Your Layout and Power Source
Before touching a single wire, take a walk around your pergola. Where do you want light? Over the seating area? Along the edges? Maybe a zigzag pattern for drama?
Sketch a quick layout on paper or use a garden app to visualize. Decide if you want:
- A straight line along the beams
- An X or crisscross pattern
- Vertical drops from the top
- A combination
Now, figure out where your power source is. You’ll need an outdoor GFCI outlet within reach. If not, use a heavy-duty extension cord (rated for outdoor use) from an indoor outlet—but never run it under a door or window seal. For a cleaner look, consider a weatherproof outdoor power box or even solar-powered lights if you’re in a sunny area.
Tip: Always test your lights indoors first. There’s nothing worse than hanging 50 feet of lights only to find a dead strand.
Step 2: Choose the Right Type of String Lights
Not all lights are created equal. For your pergola, go with:
- LED string lights (energy-efficient, cool to touch, long-lasting)
- Weatherproof (IP44 or higher) (protects against rain, dust, and UV)
- Plug-in or solar-powered (solar is great if you have consistent sun; plug-in offers more brightness)
- Warm white or soft amber tones (creates a cozy vibe—avoid harsh white)
Avoid cheap, indoor-only lights. They’ll fade, corrode, or short out in a month. Look for brands with good reviews for outdoor durability—like GE, Brightech, or Luminoodle.
For how to string outdoor lights on pergola in 2026 easy guide, we recommend connectable LED strands (you can link multiple sets without overloading a circuit). Just make sure the total wattage stays under 80% of your outlet’s capacity.
Step 3: Install Mounting Points (Screws, Hooks, or Clips)
This is where many people cut corners—and regret it later. You need secure, rust-resistant anchors.
For wooden pergolas:
- Use stainless steel eye hooks or cup hooks (they won’t rust or stain the wood)
- Drill pilot holes to prevent splitting (especially with hardwoods)
- Space hooks every 12–18 inches along the path of your lights
For metal pergolas:
- Use magnetic hooks or metal-safe zip ties
- Avoid drilling into thin metal unless you’re using self-tapping screws designed for it
- Consider adhesive outdoor light clips (3M makes some great ones)
For vinyl or composite pergolas:
- Use UV-resistant zip ties or specialty vinyl-safe clips
- Don’t over-tighten—vinyl can warp
Warning: Never use nails or staples. They can damage wires and create fire hazards. Also, avoid anything that pierces the light cord itself.
Step 4: Measure and Cut (If Needed)
Measure the distance between your mounting points. Most string lights are sold in 10–25 ft strands. If your pergola is 20 feet long, you might need two 10-ft strands or one 25-ft with slack.
Most LED lights can be cut at designated points (look for scissors icon on the wire). But—only cut if the manufacturer says it’s safe. Cutting the wrong spot can ruin the whole strand.
If you can’t cut, use zip ties to bundle extra wire neatly. Tuck it behind beams or under the pergola to keep it out of sight.
Step 5: Hang the Lights (Start from the Power Source)
Always start hanging lights from the end closest to the power source. This prevents tangles and reduces strain on the cord.
Here’s how:
- Plug in one end and run the cord to your first hook.
- Use a light clip or loop the cord over the hook (don’t tie a knot—use a figure-eight loop for easy removal).
- Work your way across, securing every 12–18 inches.
- For zigzag patterns, run lights diagonally between opposite hooks, creating an “X” effect.
- For vertical drops, hang a light strand from the top beam down to a lower point (great for lantern-style lights).
Keep tension even—not too tight (can stretch wires) or too loose (looks sloppy). Aim for a gentle curve, like a smile.
Step 6: Secure and Conceal Wires
Now for the finishing touch: hiding the “ugly” parts.
- Use outdoor-rated wire clips to tuck cords along beams
- Bundle excess wire with velcro ties (easier to adjust than zip ties)
- Run cords behind lattice or planters to keep them out of sight
- If using extension cords, secure them to the ground with staples or cable clips (don’t trip over them!)
For a pro look, paint the cord or clips to match your pergola (use outdoor spray paint).
Step 7: Test, Adjust, and Enjoy
Plug everything in and step back. Look for:
- Even spacing
- No sagging
- No flickering (could mean a loose connection)
- Proper brightness (not too dim or blinding)
Make small adjustments with zip ties or clips. Turn on at dusk to see how it looks in real lighting conditions.
Add a smart plug or timer so lights turn on at sunset and off at 11 PM. No more forgetting to switch them off!
Pro Tips & Common Mistakes to Avoid
After hanging lights on a dozen pergolas (including my own), here are the real-deal insights—the stuff no one tells you until you’ve messed it up.
Pro Tip #1: Use a “light hanger” tool (like a long pole with a hook) to reach high spots without a ladder. Saves your back—and your patience.
Pro Tip #2: For a romantic look, hang lights in a “canopy” pattern—run them across the top beams, then drape down the sides like a tent. Perfect for date nights.
Pro Tip #3: If your pergola has a roof (retractable or solid), consider LED rope lights along the edges. They’re flexible and give a modern glow.
Common Mistake #1: Overloading a single outlet. Most outdoor circuits can handle 15–20 amps. If you’re using multiple strands, plug them into a power strip with surge protection—not daisy-chained extension cords.
Common Mistake #2: Ignoring weatherproofing. Even “outdoor” lights can fail if water pools in sockets. Angle sockets downward and use waterproof caps on unused plugs.
Common Mistake #3: Hanging lights too close to plants or furniture. Give bulbs at least 6 inches of clearance to prevent overheating or fire risk.
Common Mistake #4: Using indoor extension cords. They’re not rated for UV or moisture. One storm, and you’ve got a hazard.
For how to string outdoor lights on pergola in 2026 easy guide, remember: less is more. A few well-placed strands create more impact than a tangled mess of lights. Quality over quantity.
FAQs About How to String Outdoor Lights on Pergola in 2026 Easy Guide
Q: Can I leave my string lights up all year?
A: It depends. If they’re outdoor-rated, UV-resistant, and stored properly (dry, no snow load), many people do. But I recommend taking them down in winter if you get heavy snow or ice. It prolongs their life. Or, use all-season LED strands designed for year-round use.
Q: How do I hang lights without drilling into my pergola?
A: Great question! Use zip ties, adhesive clips, or magnetic hooks (for metal). For wood, try outdoor-rated command hooks (like 3M Outdoor Strips). They hold up to 5 lbs and leave no damage. Just make sure the surface is clean and dry before applying.
Q: What’s the best way to hide extension cords?
A: Tuck them behind planters, under railings, or use outdoor cord covers (plastic channels that blend with the deck). For a permanent fix, run the cord through a PVC conduit painted to match your pergola. It looks clean and protects the wire.
Q: Can I use solar lights on a pergola?
A: Absolutely! Solar string lights are a great low-maintenance option. Just make sure they get at least 6 hours of direct sunlight during the day. Place the solar panel in a sunny spot—even if it’s not on the pergola. Some models let you detach the panel and place it elsewhere.
Q: How many lights do I need for my pergola?
A: A good rule: 1 strand per 10–15 linear feet. For a 20-ft pergola, two 10-ft strands or one 25-ft with slack works. For patterns, add 20% extra for diagonal runs. Measure first—don’t guess.
Q: My lights keep flickering. What’s wrong?
A: Usually a loose connection or water in the socket. First, unplug and check all plugs and sockets. Dry them with a hair dryer if wet. Then, ensure all connections are tight. If it persists, one bulb might be loose—try replacing it. Still flickering? The strand might be damaged. Time to replace it.
Q: Can I connect different brands of string lights?
A: Not always. Most brands use proprietary connectors. But if both are standard Edison-base (E26) or plug-and-socket style, and the voltage matches, you can often link them. Always check the manual. Never connect more than 3 strands unless the manufacturer says it’s safe.
Final Thoughts
Hanging lights on your pergola isn’t rocket science—but it does take a little planning, the right tools, and attention to detail. The goal isn’t just to light up the space; it’s to create a vibe. A place where you want to linger, laugh, and make memories.
By following this how to string outdoor lights on pergola in 2026 easy guide, you’re not just avoiding sagging wires or blown fuses—you’re building an outdoor oasis that lasts. Use quality materials, plan your layout, and don’t skip the safety checks.
And remember: it’s okay to start small. Hang one strand this weekend. See how you like it. Add more later. Lighting is flexible—like a good conversation.
Now go grab your ladder, plug in those lights, and enjoy your backyard like never before. Your perfect outdoor moment is just a few bulbs away.
One last tip: Take a photo when it’s done. You’ll want to remember this glow—and maybe even inspire your neighbor to do the same.
“`

