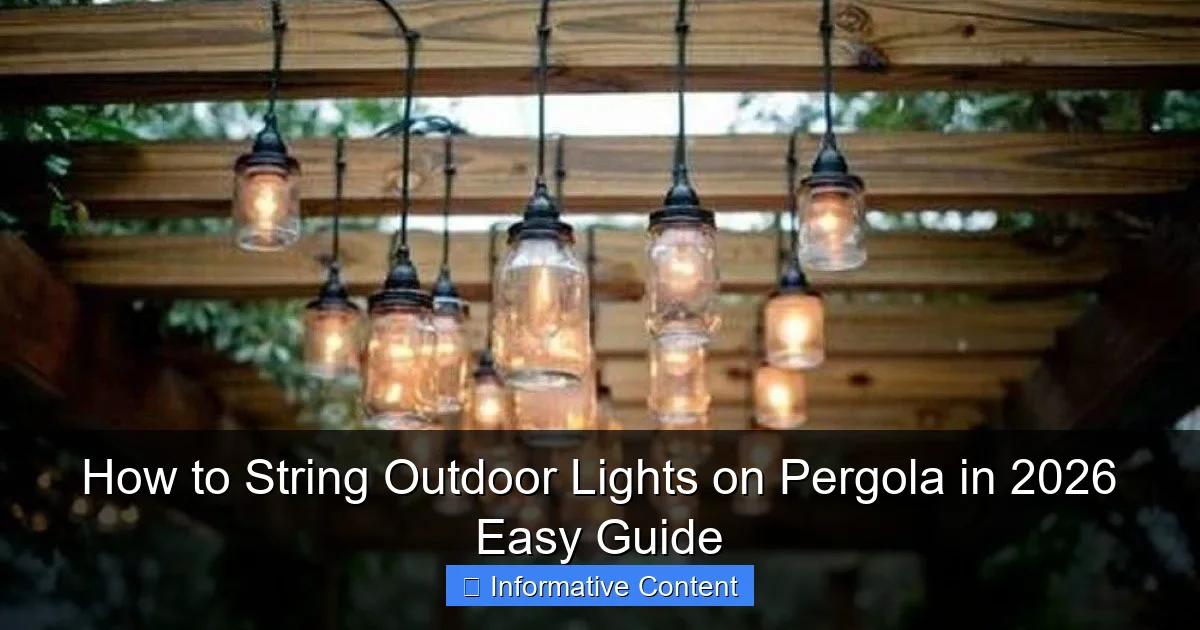
Featured image for how to string outdoor lights on pergola
Image source: i.pinimg.com
Transform your pergola into a stunning nighttime retreat by choosing durable, weather-resistant LED string lights and securing them with heavy-duty hooks or zip ties every 12–18 inches. Ensure a clean, professional look by running lights parallel to beams or weaving them in a crisscross pattern—always connect to a GFCI outlet for safety. This 2026 lighting trend combines ambiance, functionality, and smart-home compatibility for effortless outdoor entertaining.
Key Takeaways
- Plan your layout first: Sketch light placement to ensure even coverage and avoid overloading circuits.
- Use weatherproof lights: Choose UL-listed outdoor lights to withstand rain, wind, and UV exposure.
- Secure with proper hardware: Install hooks, zip ties, or clips rated for outdoor weight and conditions.
- Hide cords neatly: Run wires along beams or under cover for a clean, professional look.
- Test before finalizing: Check all bulbs and connections before permanently securing the string lights.
- Opt for smart controls: Use timers or app-controlled switches for effortless ambiance and energy savings.
📑 Table of Contents
- Why Stringing Lights on Your Pergola Is a Game-Changer
- Choosing the Right Outdoor Lights for Your Pergola
- Planning Your Light Layout and Design
- Tools, Materials, and Safety Precautions
- Step-by-Step Installation Guide
- Maintenance, Troubleshooting, and Long-Term Care
- Final Thoughts: Creating Your Outdoor Oasis
Why Stringing Lights on Your Pergola Is a Game-Changer
There’s something magical about stepping into your backyard at night, only to be greeted by a warm, inviting glow from your pergola. Whether you’re hosting a summer BBQ, enjoying a quiet evening with a book, or stargazing with your family, outdoor string lights instantly transform a simple structure into a cozy, Instagram-worthy retreat. I learned this the hard way—after years of underutilizing my pergola, I finally strung up some lights and was shocked at how much time we suddenly spent outside.
But here’s the thing: how to string outdoor lights on pergola isn’t always as simple as it looks. I’ve tangled cords, sagging lines, and even had a bulb explode after one rainy night. Over time, I’ve picked up practical tips, learned from my mistakes, and discovered what really works. In this guide, I’ll walk you through every step—from choosing the right lights to installing them securely and beautifully. Whether you’re a DIY newbie or a seasoned home improver, this 2026 guide will help you create a stunning outdoor space that’s functional, safe, and full of charm.
Choosing the Right Outdoor Lights for Your Pergola
Types of Outdoor String Lights
Not all outdoor lights are created equal. The first step in learning how to string outdoor lights on pergola is picking the right kind. Here are the most popular options:
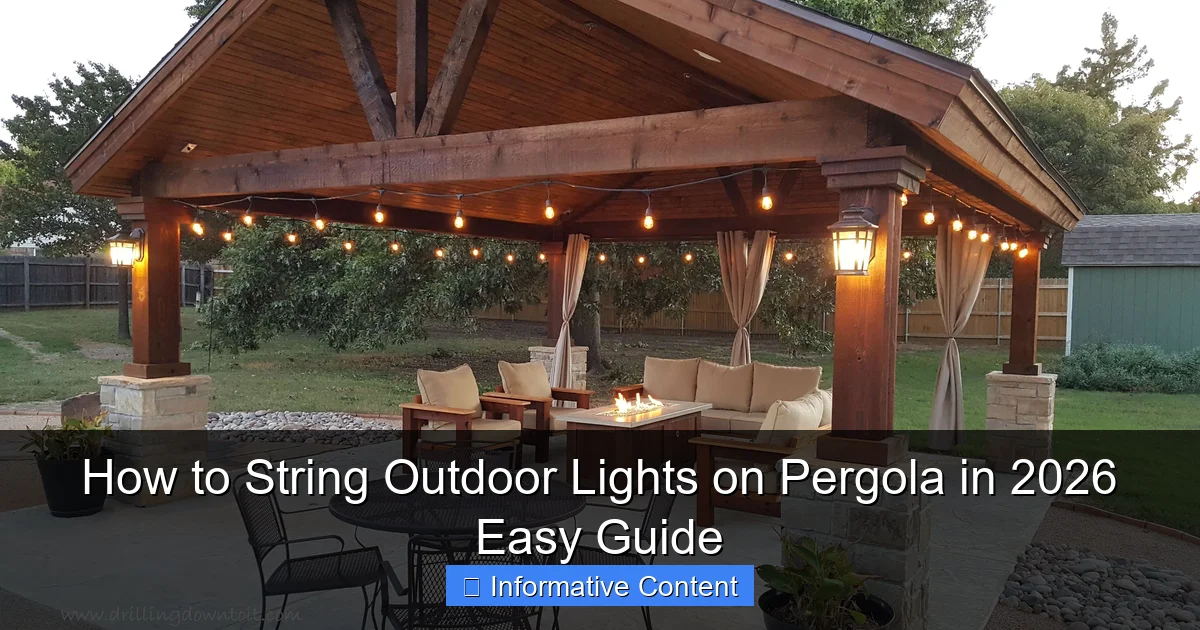
Visual guide about how to string outdoor lights on pergola
Image source: i.pinimg.com
- Solar-powered string lights: Great for eco-conscious homeowners. They charge during the day and turn on automatically at dusk. No wiring needed, but they may not shine as brightly on cloudy days.
- Plug-in LED string lights: These are my personal favorite. They’re energy-efficient, last years, and come in warm white, color-changing, or even vintage Edison styles. You’ll need an outdoor-rated outlet or extension cord.
- Hardwired LED strips: For a permanent, sleek look, consider installing LED strips under the pergola beams. These require an electrician but offer a clean, modern glow.
- Smart lights: Want to control your lights with your phone or voice? Smart bulbs or Wi-Fi-enabled strings (like Philips Hue or LIFX) let you change colors, brightness, and even set schedules.
I started with solar lights because I thought they’d be easiest. They were—until I realized they barely lit up our pergola. After that, I switched to plug-in LEDs and never looked back. The brightness and consistency were worth the extra effort.
Weather Resistance and Durability
Your lights will face sun, rain, wind, and maybe even snow. That’s why weather resistance is non-negotiable. Look for:
- IP65 or higher rating: This means the lights are dust-tight and protected against water jets. IP67 is even better—it can handle temporary immersion.
- UV-resistant materials: Cheap plastic can yellow and crack in sunlight. Go for silicone or rubber-coated bulbs.
- Stainless steel or aluminum sockets: These resist rust and corrosion.
One summer, I bought a cheap set from a discount store. Within three months, half the bulbs were out and the cord was frayed. Lesson learned: invest in quality. Brands like Brightech, Twinkle Star, and Enbrighten consistently get high marks for durability.
Choosing the Right Bulb Style and Color Temperature
This is where your personal style comes in. Think about the mood you want:
- Warm white (2700K–3000K): Cozy, inviting, perfect for dining or relaxation. My go-to for pergola lighting.
- Cool white (4000K–5000K): Bright and crisp—great for task lighting, like cooking or reading.
- Color-changing or RGB: Fun for parties or holidays, but can feel gimmicky if overused.
- Edison-style bulbs: Vintage charm with a retro flair. They cast a soft, diffused glow.
Pro tip: Mix styles! I use warm white LEDs for general lighting and add a few Edison bulbs near the seating area for ambiance. It’s like having two lighting zones in one space.
Planning Your Light Layout and Design
Assessing Your Pergola Structure
Before you buy anything, take a good look at your pergola. Measure the length, width, and height of the beams. Note where the posts are, where outlets are nearby, and whether your pergola is attached to your house or freestanding.
Here’s what I did: I used painter’s tape to mark where I thought the lights should go. Then I stepped back and walked around at different times of day. This helped me visualize the lighting and avoid awkward shadows or glare.
Ask yourself:
- Do you want lights along the perimeter, across the rafters, or both?
- Will you drape them in a zigzag, crisscross, or straight line?
- Are there any obstacles (plants, furniture, gutters) that might interfere?
Popular String Light Patterns
There’s no “right” way to hang lights—but some patterns work better than others. Here are a few tried-and-true designs:
- The Classic Perimeter: String lights around the outer edges of the pergola. Simple, elegant, and great for defining the space. I used this for our first attempt—it looked clean and modern.
- Crisscross (or “X” pattern): Run lights diagonally from one corner to another, creating a web-like effect. This adds depth and drama. Just make sure the lines are taut to avoid sagging.
- Zigzag or Wave: Alternate lights up and down the rafters. It’s playful and great for covering large areas.
- Canopy or “Cloud” Effect: Hang multiple strands close together, slightly overlapping. It looks like a glowing ceiling. Best with dimmable lights so it’s not too bright.
For our pergola, I combined the perimeter with a subtle crisscross in the center. It gives us ambient light around the edges and a focal point above the table.
Calculating the Number of Lights and Power Needs
Don’t guess how many strands you need. Measure your layout and add 10% extra for slack and connections.
Example: If your pergola is 12 feet wide and 10 feet long, and you’re doing a perimeter + crisscross:
- Perimeter: (12 + 10) x 2 = 44 feet
- Two diagonal crisscross lines: ~16 feet each (using Pythagorean theorem: √(12² + 10²) ≈ 15.6)
- Total: 44 + 16 + 16 = 76 feet
- Add 10%: ~84 feet
Now check the length of each string light. If your strands are 24 feet long, you’ll need at least 4 strands (96 feet total). But remember: most outdoor lights can only be connected in series up to 3–5 strands (check manufacturer’s limit). So you might need two separate circuits.
Also, calculate total wattage. Most LED strings use 5–10 watts per strand. A standard outdoor outlet can handle about 1,800 watts. So 10 strands at 10 watts = 100 watts—well within safe limits.
Tools, Materials, and Safety Precautions
Essential Tools and Supplies
You don’t need a full toolbox, but here’s what I keep in my “pergola lighting kit”:
- Measuring tape: For accurate layout planning.
- Outdoor-rated extension cords: With GFCI protection (more on that below).
- Light clips or hooks: Look for UV-resistant, rust-proof options like Ook or Command Outdoor Hooks.
- Zip ties (optional): For securing loose cords. Use outdoor-rated, UV-stabilized ones.
- Drill and screws (if hardwiring): For permanent installations.
- Step ladder or scaffolding: Safety first—don’t lean over the edge of your roof.
- Wire cutters and electrical tape: For repairs or custom connections.
I once tried using regular picture hooks—they rusted and fell off within a month. Now I only use marine-grade stainless steel or plastic clips designed for outdoor use.
Electrical Safety: GFCI and Waterproofing
This is critical. Outdoor electrical work can be dangerous if done wrong. Here’s what you must do:
- Use a GFCI outlet or adapter: Ground Fault Circuit Interrupter outlets shut off power if they detect a ground fault (like water contact). They’re required by code for outdoor use. I plug my lights into a GFCI outlet or a GFCI-protected extension cord.
- Weatherproof connections: Never leave plugs exposed. Use outdoor-rated power boxes or cover connections with silicone sealant or waterproof caps.
- Avoid daisy-chaining too many cords: It increases fire risk and voltage drop. Use a power strip with a built-in GFCI if you need multiple outlets.
- Turn off power during installation: Even if using low-voltage lights, treat every connection with caution.
One winter, a heavy rainstorm hit, and my extension cord plug got soaked. The GFCI tripped instantly—saving me from potential electrocution. That’s when I invested in a waterproof outdoor power box. Worth every penny.
Working at Height: Ladder Safety Tips
Most pergolas are 7–8 feet high. That’s high enough to cause injury. Follow these safety rules:
- Always have a spotter.
- Use a sturdy, level ladder with non-slip feet.
- Don’t overreach—move the ladder instead.
- Wear slip-resistant shoes.
- Install during daylight hours.
I learned this after nearly toppling off while trying to reach a far beam. Now my wife holds the ladder, and I work in small sections.
Step-by-Step Installation Guide
Step 1: Test Your Lights First
Unpack your lights and plug them in—before hanging. Check for burnt-out bulbs, flickering, or loose connections. I once installed a whole strand only to realize one bulb was out. Took me an hour to fix it up there!
Step 2: Attach Mounting Hooks or Clips
Space your clips every 12–18 inches. For wooden beams, use small screws or outdoor-rated adhesive hooks. For metal or vinyl, use magnetic hooks or zip ties.
Tip: Use a level to keep lines straight. I used a laser level for the perimeter—it made a huge difference in how professional it looked.
Step 3: String the Lights
Start at the power source. Hang one end, then work your way across, clipping as you go. Keep the line taut—but not so tight it strains the wire.
For crisscross patterns:
- Anchor one end to a corner post.
- Run the string diagonally to the opposite corner.
- Use a carabiner or hook to secure the end.
- Repeat for the second diagonal.
I recommend using light clips with adjustable tension. They let you tighten or loosen the line without removing everything.
Step 4: Manage Cords and Hide Wires
Nobody likes a messy cord. Here’s how to keep it clean:
- Run extension cords along beams, not across walkways.
- Use cable clips or zip ties to secure cords to the structure.
- Hide the main cord behind plants, furniture, or a decorative sleeve.
- For a permanent look, run cords through conduit or under decking.
We have a climbing jasmine vine on one side of our pergola. I trained it to grow over the cord—now it’s completely hidden!
Step 5: Test, Adjust, and Enjoy
Turn on the lights at dusk. Walk around and check for:
- Sagging lines
- Uneven brightness
- Glare or shadows
- Exposed cords
Make adjustments as needed. I had to reposition two clips because the lights were too low and blocked our view from the table.
Maintenance, Troubleshooting, and Long-Term Care
Routine Cleaning and Inspection
Outdoor lights need love. Every few months:
- Turn off and unplug the lights.
- Wipe bulbs and cords with a damp cloth.
- Check for frayed wires, loose clips, or water damage.
- Replace any burnt-out bulbs immediately.
I keep a spare set of bulbs and a small toolkit in a waterproof container under the pergola. Makes repairs easy.
Dealing with Common Issues
Here’s how to fix the most common problems:
| Problem | Likely Cause | Solution |
|---|---|---|
| Half the strand is dark | Loose bulb or broken wire | Check each bulb; replace if needed. Use electrical tape to seal small wire cuts. |
| Lights flicker | Wet connection or voltage drop | Dry the connection; shorten cord length or use a thicker gauge extension. |
| Sagging lines | Too much weight or loose clips | Re-tighten clips; add extra support in the middle. |
| Solar lights not charging | Dirty panel or shade | Wipe the panel with soapy water; relocate if shaded. |
Seasonal Storage (If Needed)
If you live in a snowy or stormy area, consider removing lights in winter. Otherwise, high-quality LEDs can stay up year-round—just inspect them after extreme weather.
I leave mine up all year, but I do a full inspection after winter. Last year, a squirrel chewed a small section of cord. Easy fix with a waterproof splice kit.
Final Thoughts: Creating Your Outdoor Oasis
Learning how to string outdoor lights on pergola isn’t just about aesthetics—it’s about creating a space where memories are made. I’ll never forget the first night we lit up our pergola. My daughter danced under the stars, my husband grilled burgers, and I just sat back, amazed at how something so simple could feel so special.
You don’t need to be an electrician or a designer. With the right lights, a solid plan, and attention to safety, you can transform your pergola into a magical nighttime retreat. Whether you go for a minimalist glow or a dazzling canopy, the key is to enjoy the process—and the results.
So grab your ladder, pick out some warm, weatherproof LEDs, and get started. Your backyard is waiting. And when the sun goes down and your pergola lights up, you’ll know it was worth every minute.
Frequently Asked Questions
How do I string outdoor lights on a pergola without damaging the wood?
Use removable hooks, zip ties, or adhesive clips designed for outdoor use to avoid drilling into the wood. These options provide secure hold while preserving the pergola’s finish and structure.
What type of lights work best for a pergola in 2026?
LED string lights or solar-powered Edison bulbs are ideal for pergolas in 2026, offering energy efficiency and weather resistance. Choose dimmable or smart lights for adjustable ambiance and easy control.
Can I install pergola string lights without professional help?
Yes, stringing outdoor lights on a pergola is a DIY-friendly project with basic tools like hooks, a ladder, and a measuring tape. Follow a step-by-step guide to plan spacing and secure connections safely.
How far apart should I space lights when stringing a pergola?
Space lights 6–12 inches apart for even illumination, adjusting based on bulb size and pergola dimensions. Test spacing with painter’s tape before final installation to ensure balanced brightness.
Are there weatherproof options for outdoor pergola lights?
Absolutely—look for lights rated IP65 or higher to withstand rain, wind, and UV exposure. Silicone-sealed bulbs and waterproof connectors enhance durability for year-round use.
How do I hide cords when stringing outdoor lights on a pergola?
Route cords along beams using zip ties or cord covers, or tuck them behind decorative trim. For a cleaner look, opt for battery-powered or solar string lights to minimize visible wiring.

