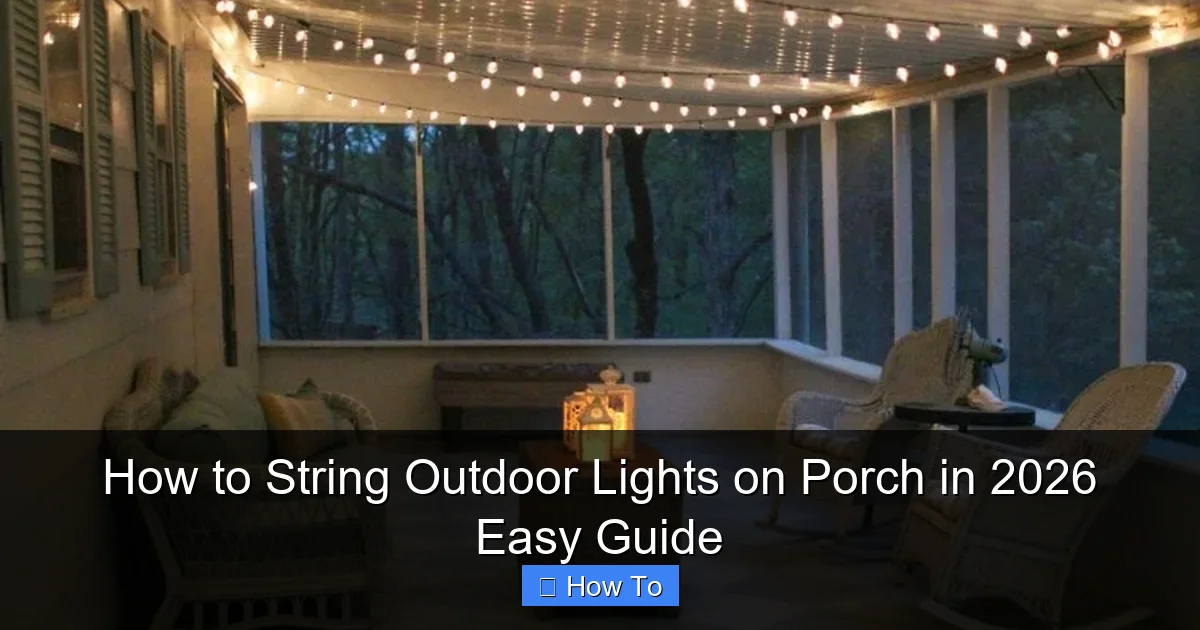
Featured image for how to string outdoor lights on porch
Image source: lovelyetc.com
Transform your porch into a stunning nighttime retreat by securely mounting outdoor lights along railings, beams, or eaves using weather-resistant hooks or clips. For a seamless 2026 setup, choose energy-efficient LED string lights and plan your layout to minimize extension cords while maximizing visual impact. Always prioritize safety—use outdoor-rated fixtures, check for frayed wires, and install a timer for effortless ambiance all season long.
How to String Outdoor Lights on Porch in 2026 Easy Guide
Key Takeaways
- Plan your layout first: Sketch light placement to avoid mistakes and ensure even coverage.
- Use weatherproof lights: Choose UL-listed outdoor-rated lights for safety and durability.
- Secure with hooks or clips: Install stainless steel hardware to prevent sagging or damage.
- Measure voltage needs: Avoid overloads by checking wattage and using proper extension cords.
- Hide cords creatively: Use trim, gutters, or planters to keep wires neat and safe.
- Test lights before installing: Ensure all bulbs work to save time and effort later.
Why This Matters / Understanding the Problem
Let’s be honest—your porch is that one spot you love but rarely get to enjoy at night. Maybe you’ve hosted a few barbecues, only to watch the sun dip behind the trees and the mood dim faster than your enthusiasm.
You’re not alone. Many of us dream of twinkling lights, cozy evenings, and a space that feels like an extension of the living room. But when it comes to how to string outdoor lights on porch in 2026 easy guide, it’s easy to get overwhelmed.
You’ve probably seen Pinterest boards with lights strung like a fairy tale, but the reality? Tangled cords, sagging strands, or lights that die after one season. And don’t even get me started on the fear of drilling into your house or dealing with weather damage.
The good news? It doesn’t have to be hard. With the right approach, your porch can go from “meh” to magical in just a few hours—without calling an electrician or breaking the bank. This guide walks you through a simple, reliable method that works in 2026 (and beyond), whether you’re lighting a small front stoop or a wraparound porch.
We’ll cover the tools, the techniques, and the little-known tricks that pros use to keep lights looking great year after year. No fluff, no overpriced kits—just real, practical advice from someone who’s learned the hard way (and fixed it the smart way).
What You Need
Before we dive in, let’s talk about what you’ll need. The goal here is to keep things simple, affordable, and long-lasting. You don’t need a full toolkit or a degree in electrical engineering. Here’s the real list:
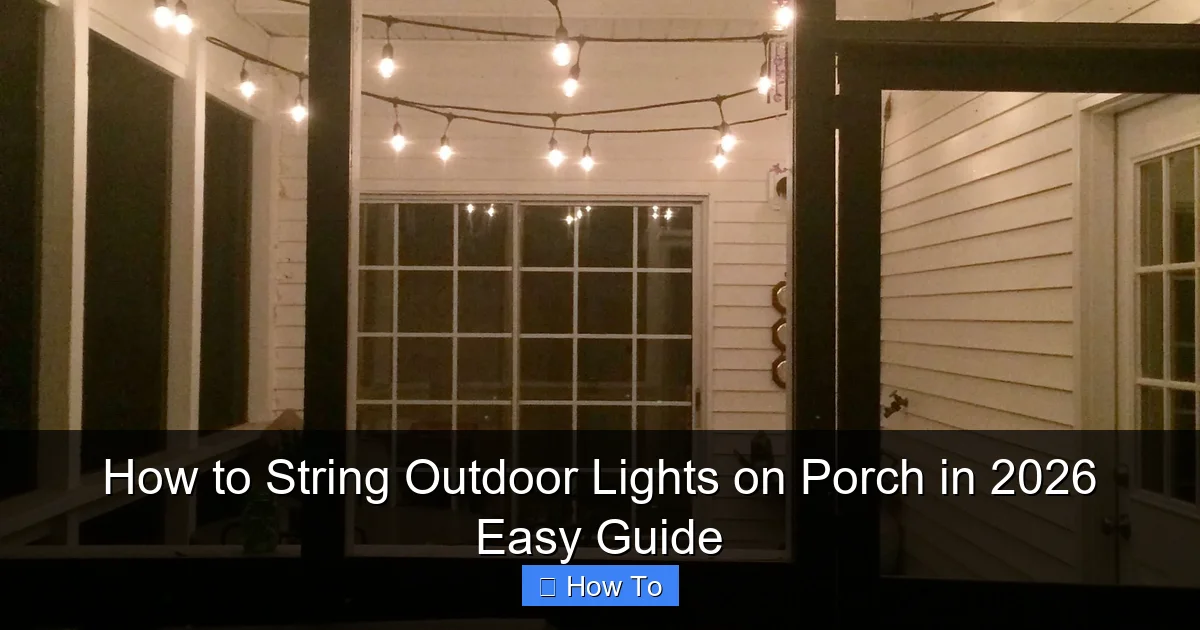
Visual guide about how to string outdoor lights on porch
Image source: charlestoncrafted.com
- Outdoor-rated string lights – Look for “wet-rated” or “weatherproof” labels. LED bulbs are best—they last longer, use less power, and don’t burn out like incandescents.
- Weather-resistant extension cords – If your outlet is far, get a heavy-duty, outdoor-rated cord. Avoid indoor cords—they’ll crack in the sun and become a safety hazard.
- Outdoor-rated hooks or clips – I prefer screw-in hooks (like cup hooks or eye hooks) or adhesive outdoor clips (like Command Outdoor Hooks or Zip Tie Mounts). Avoid nails or staples—they damage wood and don’t hold well in wind.
- Measuring tape – For planning spacing and avoiding awkward gaps.
- Drill or screwdriver – If using screw-in hooks. A cordless drill makes it faster, but a screwdriver works fine.
- Ladder – Only if your porch has a high ceiling or overhang. A sturdy step stool works for lower areas.
- Zip ties (optional) – For securing loose cords or managing extra slack.
- Timer or smart plug (optional but highly recommended) – So your lights turn on at dusk and off at bedtime without you lifting a finger.
Pro tip: Buy 10–15% more lights than you think you need. It’s better to have a little extra than to run short and have to buy another set that doesn’t match.
And a note on power: Most outdoor outlets are GFCI-protected (they have “test” and “reset” buttons). That’s great for safety, but if you plug in too many lights, you might trip the breaker. Stick to one strand per outlet unless the manufacturer says otherwise. If you need more, use a multi-outlet outdoor power strip (rated for wet locations).
Step-by-Step Guide to How to String Outdoor Lights on Porch in 2026 Easy Guide
Alright, let’s get to the good stuff. This method works whether your porch has a roof, open rafters, or just a railing. The key is planning, spacing, and using the right hardware. No guesswork. No frustration.
Step 1: Plan Your Layout (Before You Buy Anything)
Start by sketching your porch. Not an artist? Don’t worry—just draw a rough rectangle with key features: door, railings, columns, roof edges, and outlets.
Now, decide where you want the lights. Most people string them along the railing, roofline, or ceiling beams. But you can also drape them between posts or hang them in a zigzag pattern.
Here’s what to consider:
- Where’s the power source? Your lights need to reach an outlet. Measure the distance from your outlet to the farthest point where you want lights.
- How long are the light strands? Most are 10–25 feet. If your porch is 30 feet wide, you’ll need two strands (or one with a plug-in extension).
- Will they drape or stay straight? For a soft glow, let them hang slightly. For a clean look, keep them taut.
Example: My 12-foot-wide porch has a railing and a low roof. I ran lights along the roofline (12 feet), then down the side posts (2 feet each), and connected them to an outlet near the door. Total run: about 16 feet. I used two 10-foot strands with a 6-foot extension cord.
This step is crucial for the how to string outdoor lights on porch in 2026 easy guide—it saves you from buying the wrong lights or running out of power.
Step 2: Choose the Right Mounting Method
Now, decide how you’ll attach the lights. This depends on your porch’s material and your comfort level with tools.
Here are the most common (and reliable) options:
- Screw-in hooks (best for wood or vinyl) – These go into the wood, vinyl, or composite material. They’re strong, weatherproof, and won’t pull out in wind. Use a drill or screwdriver to install them every 12–16 inches.
- Adhesive outdoor clips (great for metal, glass, or painted wood) – Brands like Command Outdoor or 3M make clips that stick to smooth surfaces. They’re removable and won’t damage paint. Just make sure the surface is clean and dry before applying.
- Zip tie mounts (for railings or posts) – These little plastic bases screw or stick to posts, and you loop zip ties through them to hold the lights. Super secure and easy to adjust.
- Clips that snap onto gutters (if you have them) – Some light kits come with gutter clips. They’re quick to install, but only work if your porch has gutters and they’re in good shape.
Warning: Avoid nails, staples, or tape. Nails damage wood and can cause rot. Staples can pierce the wire insulation and cause shorts. Tape (even outdoor tape) dries out and falls off in a few months.
I once used duct tape on my porch lights. Big mistake. By December, half the lights were dangling like sad tinsel. Learned my lesson: use proper clips or hooks.
Step 3: Install the Hooks or Clips
Now it’s time to install your hardware. Start at the outlet end and work your way out.
Here’s how:
- Measure and mark – Use a measuring tape to space hooks every 12–16 inches. This prevents sagging and keeps the lights looking even.
- Drill pilot holes (for screw-in hooks) – If you’re using screws, drill a small pilot hole first. This prevents wood from splitting, especially in older porches.
- Install the hooks – Screw them in firmly, but don’t over-tighten. The hook should be snug, not buried in the wood.
- Press adhesive clips (if using) – Clean the surface with rubbing alcohol, let it dry, then press the clip firmly for 30 seconds. Wait 1–2 hours before hanging lights—this lets the adhesive bond.
Pro tip: Install a hook right next to the outlet. This is where you’ll plug in the first strand. It keeps the plug from dangling and reduces strain on the cord.
For railings, install hooks on the top rail or side posts, depending on where you want the lights. I prefer the top rail—it keeps the lights visible from the yard.
Step 4: Hang the Lights (The Fun Part)
Now for the magic. Unpack your lights and plug them in to make sure they work before hanging. (I’ve learned this the hard way—nothing worse than hanging a strand only to find a dead bulb.)
Start at the outlet end:
- Hang the first hook – Loop the light’s plug end over the hook closest to the outlet. Don’t plug it in yet.
- Work your way along – Hang each bulb socket or wire loop over the next hook. Keep the lights taut but not stretched.
- Use zip ties for extra support (optional) – If you have long runs or live in a windy area, add a zip tie around the wire and hook every few feet.
- Connect additional strands – If you need more than one strand, plug the second into the first. Make sure the connection is secure and not dangling.
For a draped look, let the lights hang in gentle “U” shapes between hooks. For a straight line, pull them tight.
If you’re going up a post or around a corner, use a hook at the turn to guide the lights. This prevents kinking and keeps the flow smooth.
Step 5: Manage Cords and Power
Nothing ruins the look like a tangled mess of cords. Here’s how to keep it clean:
- Use an outdoor-rated extension cord – Run it along the porch edge or under a rail. Secure it with zip ties or clips every 2–3 feet.
- Hide the plug connection – If you’re connecting two strands, tuck the plug into a small plastic box (like a waterproof outlet cover) or use a cord concealer.
- Plug into a timer or smart plug – Set it to turn on at sunset and off at 10 PM. No more forgetting to turn the lights off!
I use a smart plug with a sunset schedule. It’s a game-changer. The lights turn on automatically, and I never have to worry about energy waste.
For long runs, consider a low-voltage landscape transformer (if your lights are compatible). It powers multiple strands safely and reduces the load on your outlet.
Step 6: Test, Adjust, and Enjoy
Now plug everything in and test the lights. Walk around the porch and check for:
- Sagging wires – Add more hooks if needed.
- Twisted strands – Gently untwist them by hand.
- Dark spots – Reposition bulbs or add a second strand if the coverage is uneven.
Make small adjustments until the look is just right. It’s like tuning a guitar—tiny tweaks make a big difference.
Then? Sit back, pour a drink, and enjoy your cozy, glowing porch. You’ve just mastered the how to string outdoor lights on porch in 2026 easy guide—and it only took a few hours.
Pro Tips & Common Mistakes to Avoid
After hanging lights on three different porches (and fixing two disasters), here’s what I’ve learned:
- Don’t overhang the lights – If they drape too low, they’ll get in the way when you walk or sit. Keep them at least 7–8 feet above the ground.
- Use the right bulbs – LED lights are brighter, cooler, and last 10x longer than incandescent. Warm white (2700K) gives a cozy glow. Cool white (4000K) feels more modern.
- Check the IP rating – For outdoor lights, look for IP44 or higher. This means they’re protected from rain and dust.
- Avoid daisy-chaining too many strands – Most manufacturers say 2–3 max. Exceeding this can overload the circuit and cause fire hazards.
- Store lights properly in winter – If you live in a snowy area, take the lights down or use a weatherproof storage bag. Don’t leave them up—ice and snow can damage the wires.
Personal insight: I once left my lights up all winter. By spring, the plastic coating was cracked, and half the bulbs were dead. Now I take them down and store them in a labeled bin. Saves me $50 every year.
Another common mistake? Not planning for wind. If your porch is exposed, use extra hooks or zip ties. Wind can whip the lights and pull out weak clips.
And if you’re using adhesive clips, check them every few months. Heat, cold, and rain can weaken the bond. I reapply mine in spring and fall.
FAQs About How to String Outdoor Lights on Porch in 2026 Easy Guide
Let’s answer the questions I get all the time:
Can I leave outdoor lights up all year?
It depends. If you have weatherproof, wet-rated lights and a covered porch, you can leave them up. But if you get heavy snow, ice, or strong winds, it’s safer to take them down in winter. I do—it extends their life and keeps my porch looking clean.
Do I need an electrician to install outdoor lights?
Nope! If you’re using standard plug-in lights and your outlet is already installed, you don’t need an electrician. Just plug and play. Only call one if you’re hardwiring lights (running wires through walls) or adding a new outlet.
What if my porch has no outlet?
You’ve got options. Run a heavy-duty outdoor extension cord from your house (use a cord cover if it crosses a walkway). Or, install a solar-powered outlet (they’re getting better every year). Some even have USB ports for charging.
How do I keep the lights from sagging?
More hooks! Space them every 12 inches for straight runs, or 8 inches if you want a draped look. Use zip ties for extra support. And avoid cheap, flimsy lights—they stretch over time.
Can I use regular indoor lights outside?
No. Indoor lights aren’t rated for moisture, UV rays, or temperature changes. They’ll crack, short out, or become a fire hazard. Always use outdoor-rated lights for the how to string outdoor lights on porch in 2026 easy guide.
How do I fix a dead strand?
First, check the plug and outlet. Then, test each bulb (some are removable). If one bulb is out, the whole strand might be dead. For LED strands, look for a “fuse” in the plug—replace it with a small screwdriver. If it’s still dead, it’s time to replace the strand.
Can I string lights on a metal railing?
Yes! Use adhesive outdoor clips or zip tie mounts. Avoid magnetic clips—they can rust and fall off. I use 3M VHB tape clips on my metal railing, and they’ve held for 4 years.
Final Thoughts
Stringing outdoor lights on your porch isn’t just about looks—it’s about creating a space where you actually want to be. Whether it’s a quiet evening with a book or a party with friends, the right lighting sets the mood.
This how to string outdoor lights on porch in 2026 easy guide is designed to be simple, safe, and long-lasting. No fancy tools, no expensive kits. Just smart planning, the right materials, and a few pro tricks.
Start small. Try one strand along the railing. See how it feels. Then expand to the roofline or posts. You’ll be surprised how fast it comes together—and how much joy it brings.
And remember: the best lights are the ones you enjoy, not the ones that win a contest. So hang them with care, test them with pride, and savor every glowing moment on your porch.
Now go light up your life—literally.

