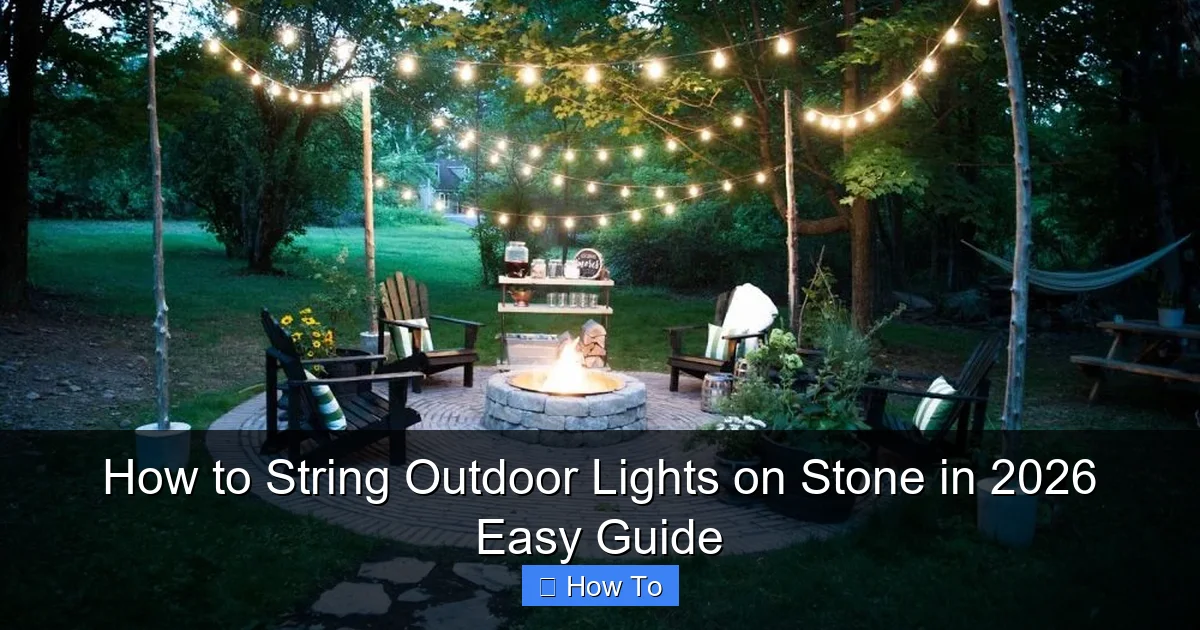
Featured image for how to string outdoor lights on stone
Image source: cdn.homedit.com
Stringing outdoor lights on stone is easier than ever in 2026 with innovative, damage-free mounting solutions designed specifically for masonry surfaces. Use heavy-duty adhesive hooks or silicone-based clips that securely hold lights without drilling, preserving your stone’s integrity while withstanding weather and time. This guide walks you through a fast, reliable setup for a stunning, professional-looking glow all season long.
How to String Outdoor Lights on Stone in 2026 Easy Guide
Key Takeaways
- Plan your layout first: Sketch light placement to avoid over- or under-lighting stone surfaces.
- Use non-damaging clips: Opt for adhesive or tension-based clips to protect stone integrity.
- Choose weatherproof lights: Ensure lights are rated for outdoor use and stone surface safety.
- Hide wires discreetly: Tuck cords into stone grooves or use camouflaged channels for a clean look.
- Test lights before installing: Verify functionality prior to final mounting for hassle-free setup.
- Secure connections safely: Use outdoor-rated extension cords and keep plugs elevated off wet ground.
Why This Matters / Understanding the Problem
Imagine this: It’s a warm summer evening, the air is still, and you’re sitting on your patio, sipping iced tea. You want to add that cozy, magical glow to your stone walls, columns, or garden pathways—but you’re stuck. Nails? Nope. Drilling into stone feels like a crime. Tape? It fails after a week. So, how do you how to string outdoor lights on stone in 2026 easy guide without damaging the surface or making a mess?
That’s exactly what we’re tackling today. Whether it’s a natural stone facade, a retaining wall, or a modern stone fireplace, I’ve been there—trying (and failing) with flimsy clips and tape that peeled off in the rain. After years of trial, error, and a few “why did I do that?” moments, I’ve cracked the code. This guide is your shortcut to a beautifully lit stone feature—no stress, no damage, and no ugly holes.
We’ll focus on permanent-looking results with non-invasive methods that work in 2026’s weather extremes (hello, climate shifts). From tools to pro tricks, this is how to do it right—without the guesswork.
What You Need
Before we dive in, let’s gather your gear. Nothing fancy, but having the right tools makes all the difference. Here’s your checklist:
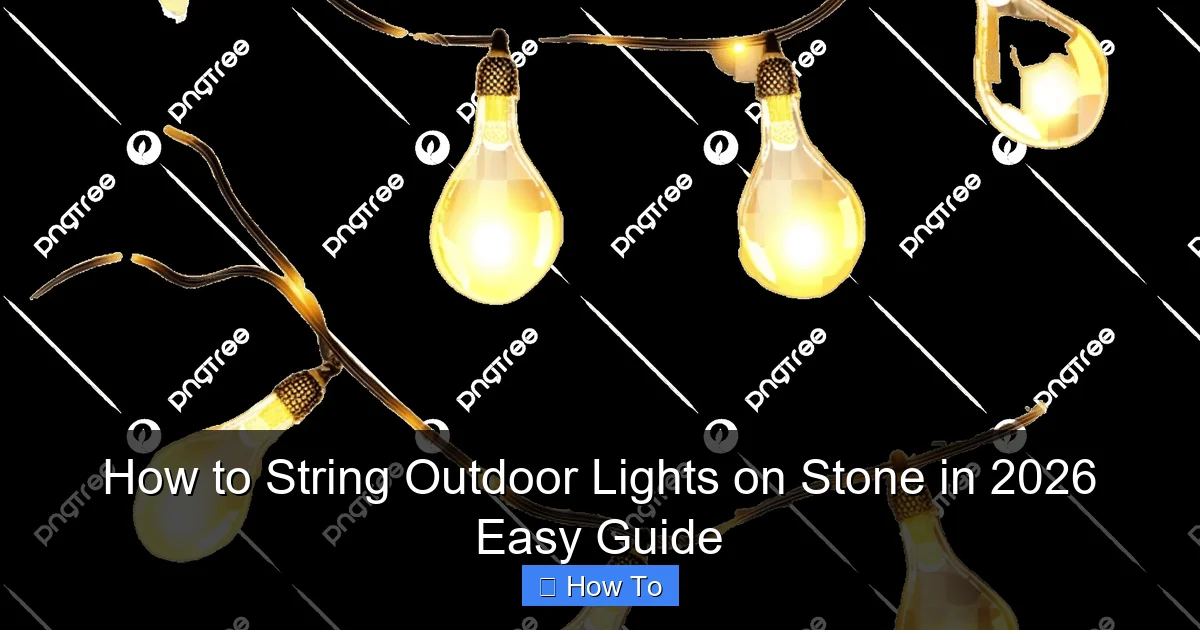
Visual guide about how to string outdoor lights on stone
Image source: png.pngtree.com
- Outdoor-rated string lights (LED, preferably with a warm white glow; avoid incandescent for stone—they get hot)
- Stone-friendly mounting hardware (we’ll cover the best types below)
- Measuring tape (a 25-foot roll is perfect)
- Level (a small bubble level or a phone app works)
- Soft cloth or microfiber towel (to clean the stone surface)
- Rubbing alcohol or stone-safe cleaner (for prep)
- Zip ties (optional, for extra support)
- Extension cord (if needed) with outdoor-rated outlet
- Timer or smart plug (optional, but highly recommended)
Pro tip: Skip the cheap adhesive hooks. They’ll fail in humidity or temperature swings. Instead, invest in stone-specific clips or tension systems—they’re designed for this. Think of it like choosing the right shoes for hiking: you wouldn’t wear flip-flops on a trail, right?
Step-by-Step Guide to How to String Outdoor Lights on Stone in 2026 Easy Guide
Alright, let’s get into the nitty-gritty. This is your how to string outdoor lights on stone in 2026 easy guide, broken down into simple, doable steps. No prior experience needed.
Step 1: Clean the Stone Surface
First things first—clean the area where your lights will go. Dirt, dust, and grime weaken any adhesive or clip. Use a soft cloth and a stone-safe cleaner (like a mix of water and mild dish soap). For stubborn spots, rubbing alcohol on a cloth works wonders.
Why this matters: A clean surface means better adhesion and grip. I learned this the hard way after my first set of lights fell off during a storm—turns out, the stone was dusty from a recent rain. Lesson learned: clean first, hang second.
Pro tip: If you’re working on a textured stone (like limestone or travertine), use a soft brush to get into the crevices. Don’t scrub hard—stone can be surprisingly delicate.
Step 2: Plan Your Light Layout
Grab your measuring tape and sketch a rough layout. Decide where you want the lights: along a wall, around a column, or in a zigzag pattern. Use a level to ensure your lines are straight—especially if you’re going horizontal.
Here’s a trick: Lay the lights out on the ground first, then hold them up to the stone. Adjust the spacing. For a cozy feel, space lights 6–8 inches apart. For a dramatic look, go wider—up to 12 inches.
Also, plan your power source. Where’s the outlet? Can you hide the cord? If not, use a cord cover or run it behind plants. The goal: beautiful lights, invisible cords.
Warning: Avoid wrapping lights directly around stone columns or corners. It creates hotspots and looks messy. Use clips or tension rods instead.
Step 3: Choose the Right Mounting Method
This is where most people mess up. Not all clips work on stone. Here are your best options for the how to string outdoor lights on stone in 2026 easy guide:
- Stone clips with rubber padding: These grip the surface without scratching. Look for ones with silicone or EPDM rubber. Brands like StoneGrip or Outdoor Clips Pro are great.
- Tension rods or wire systems: Install horizontal rods (stainless steel or powder-coated) between two anchor points (like columns). String lights along the wire. No drilling needed.
- Adhesive hooks with stone-rated backing: 3M Outdoor Mounting Tape (rated for stone and concrete) is a game-changer. It holds up to 15 lbs and survives -40°F to 150°F.
- Zip ties with protective sleeves: Use clear, UV-resistant zip ties with felt or foam sleeves. Attach them to existing fixtures (like railings or brackets).
My personal favorite? Rubber-padded stone clips. They’re reusable, weatherproof, and look clean. Plus, they’re easy to adjust if you want to change the layout later.
Step 4: Install the Mounting Hardware
Now, attach your clips or hardware. For rubber-padded clips:
- Press firmly for 10–15 seconds to activate the grip.
- Space them every 12–18 inches for support.
- For vertical runs, add a clip at the top, middle, and bottom.
For adhesive hooks:
- Clean the spot again with rubbing alcohol.
- Peel off the backing and press for 30 seconds.
- Wait 24 hours before hanging lights (yes, really—this is crucial).
For tension systems:
- Measure the distance between anchor points.
- Install the rods (follow the manufacturer’s instructions).
- Tighten the wire until it’s taut but not overstretched.
Pro tip: Use a laser level or chalk line to keep your clips perfectly aligned. A crooked line ruins the vibe.
Step 5: Hang the Lights
Now, the fun part! Start at the power source and work outward. Clip or hook the lights into place, following your layout. Don’t pull too hard—LEDs can break if stressed.
For tension systems:
- Attach the lights to the wire with small carabiners or S-hooks.
- Space them evenly, adjusting as needed.
For clips:
- Loop the light socket into the clip’s cradle.
- Secure the cord with a small zip tie if it dangles.
Pro tip: Leave a little slack in the cord between clips. This prevents tension during temperature changes (stone expands and contracts).
Step 6: Test and Adjust
Plug in the lights. Do they work? Great! Now, step back and look. Are the lights level? Is the spacing even? Adjust the clips or tension if needed.
Check for shadows or hotspots. If a section is too bright, move a light or add a diffuser (like a frosted bulb cover). If it’s too dim, add a second strand.
Also, inspect the cords. Are they tucked away? Can a guest trip? Fix any tripping hazards with cord covers or clips.
Warning: Never daisy-chain more than three light strands. Overloading can cause fires or damage. Check your manufacturer’s guidelines.
Step 7: Secure Cords and Add Finishing Touches
Now, make it look polished. Use zip ties or cord clips to hide excess wire. Tuck cords behind plants, railings, or into crevices.
Add a timer or smart plug. Set it to turn on at dusk and off at midnight. No more forgetting to switch them off!
For extra magic, add a dimmer. Many LED lights are dimmable—just make sure your timer or switch supports it.
Finally, take a photo. You’ve just mastered the how to string outdoor lights on stone in 2026 easy guide—and your space looks amazing.
Pro Tips & Common Mistakes to Avoid
Let’s talk real talk. Here are the things I wish I knew before I started—plus the mistakes you can avoid.
Pro Tips
- Use LED lights with a “stone-safe” rating: Some LEDs get hot. Look for ones labeled “low heat” or “stone-safe.” I use Luminara Outdoor LEDs—they’re cool to the touch and last 25,000 hours.
- Install a drip loop: If your cord runs down to an outlet, create a U-shaped loop near the ground. This prevents water from running into the socket.
- Check the weather rating: Your lights and clips must be rated for “wet” or “outdoor” use. Look for IP65 or IP67 ratings.
- Use a light meter app: Apps like Light Meter (free on iOS/Android) help you balance brightness. No more “too bright” or “too dim” guesswork.
- Add a motion sensor (optional): For security, use motion-activated lights. They turn on when someone approaches—great for pathways.
Common Mistakes to Avoid
- Using indoor lights outdoors: They’ll melt, crack, or fail in a month. Always buy outdoor-rated.
- Ignoring temperature swings: Stone expands in heat and contracts in cold. Use flexible cords and leave slack.
- Overloading the circuit: Check your outlet’s wattage limit. Most outdoor outlets handle 15–20 amps. Use a power strip if needed.
- Forgetting to clean the stone: Dusty surfaces = weak grip. Clean before every install.
- Skipping the timer: Manual switches are easy to forget. A timer saves energy and keeps your lights on schedule.
My biggest mistake? I once used cheap plastic clips on a limestone wall. They cracked in the sun and my lights fell during a party. Embarrassing. Now, I only use rubber-padded or metal clips. Lesson: invest in quality.
FAQs About How to String Outdoor Lights on Stone in 2026 Easy Guide
Let’s tackle the questions I get all the time—straight and simple.
Can I drill into stone to hang lights?
Technically, yes—but don’t. Drilling into natural or decorative stone can crack it, void warranties, or ruin the look. Use clips or tension systems instead. If you must drill, use a diamond-tip bit and masonry anchor—but it’s a last resort.
What if my stone is textured or uneven?
No problem! Rubber-padded clips work best here. The padding conforms to the texture. Avoid flat adhesive hooks—they won’t stick well.
How do I hide the cords?
Use cord covers, tuck them behind plants, or run them through conduit (plastic pipe). For stone walls, use clips to run cords along the edge. Pro tip: Paint conduit to match the stone color.
Can I leave the lights up year-round?
Yes, but check the manufacturer’s guidelines. Most outdoor LED lights are weatherproof, but extreme cold or UV exposure can shorten their life. If you live in a harsh climate, take them down in winter or use a cover.
What’s the best way to store the lights?
Wind them around a cord reel or cardboard tube. Store in a cool, dry place. Avoid tangling—it’s a pain to fix later. I use a labeled plastic bin with silica gel packs to keep them dry.
Do I need a professional?
Not unless you’re doing a huge installation (like a 50-foot wall). This how to string outdoor lights on stone in 2026 easy guide is DIY-friendly. But if you’re unsure, hire an electrician to check your outlet and wiring.
How often should I clean the lights?
Every 3–6 months. Wipe them with a damp cloth and mild soap. Check the clips for wear. Replace any that are cracked or loose.
Final Thoughts
So, there you have it—your complete how to string outdoor lights on stone in 2026 easy guide. No magic, no expensive tools, just smart, simple steps that work. Whether you’re lighting up a backyard, a front porch, or a garden path, this method keeps your stone looking pristine and your lights shining bright.
Remember: clean first, plan carefully, and use the right hardware. Skip the shortcuts. Invest in quality clips and outdoor-rated lights. And don’t forget the timer—it’s the secret to a stress-free setup.
Now, grab your gear, put on some music, and give it a try. In a few hours, you’ll have a space that feels like a dream. And when your friends ask, “How’d you do that?”—just smile and say, “I followed a simple guide.”
You’ve got this. Light it up!

