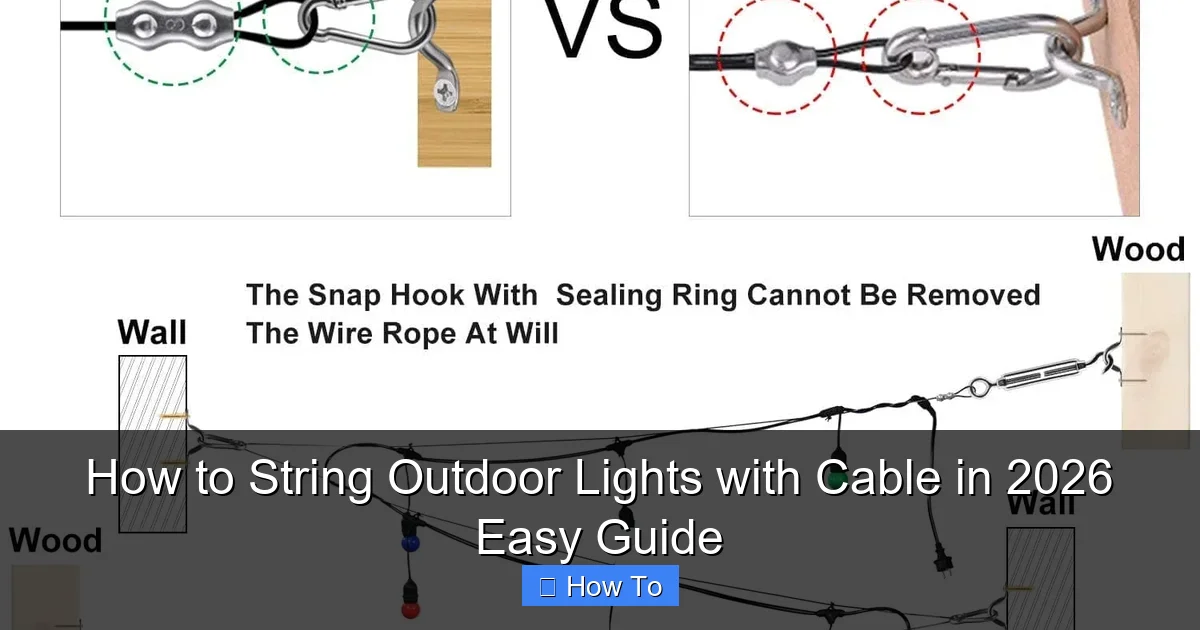
Featured image for how to string outdoor lights with cable
Image source: sunbrightlighting.com
Stringing outdoor lights with cable in 2026 is easier than ever thanks to durable, weather-resistant materials and smart tensioning systems that prevent sagging. Follow a clear plan—measure, secure anchor points, and use cable-rated clips—to create a safe, professional-looking display that enhances your outdoor space year-round.
“`html
How to String Outdoor Lights with Cable in 2026: Easy Guide
Key Takeaways
- Plan your layout first: Map light spacing and cable path to avoid mid-install mistakes.
- Use weatherproof cables: Always choose outdoor-rated cables for safety and durability.
- Secure anchors tightly: Install eye hooks or turnbuckles every 4–6 feet for stability.
- Test lights before hanging: Check bulbs and connections to troubleshoot early.
- Maintain slack in cables: Allow slight sag to prevent tension damage in heat or cold.
- Hide cables discreetly: Run lines along fences or trees for a clean, professional look.
Why This Matters / Understanding the Problem
Imagine this: It’s a warm summer night, you’ve got friends over, and the backyard is *almost* perfect—except the lighting. Too dim, too harsh, or just… missing. You want that cozy, Instagram-worthy glow without tripping over extension cords or dealing with flickering LEDs.
That’s where knowing how to string outdoor lights with cable in 2026 easy guide comes in. Whether you’re lighting a patio, pergola, or garden path, using a cable system gives you stability, safety, and that dreamy, professional look. No more saggy strings or lights dangling in the wind. Just clean, reliable ambiance.
But here’s the catch: Most DIY guides skip the why behind the method. You don’t just hang lights—you create a system. And in 2026, with better weather-resistant gear and smarter design, there’s no reason your setup shouldn’t last 5+ years.
This guide walks you through the entire process—step by step—with real-world tips from someone who’s fixed sagging wires, battled windstorms, and learned the hard way (so you don’t have to).
What You Need
Before we dive in, let’s talk tools and materials. You don’t need a contractor’s license, but you *do* need the right gear to avoid headaches later.
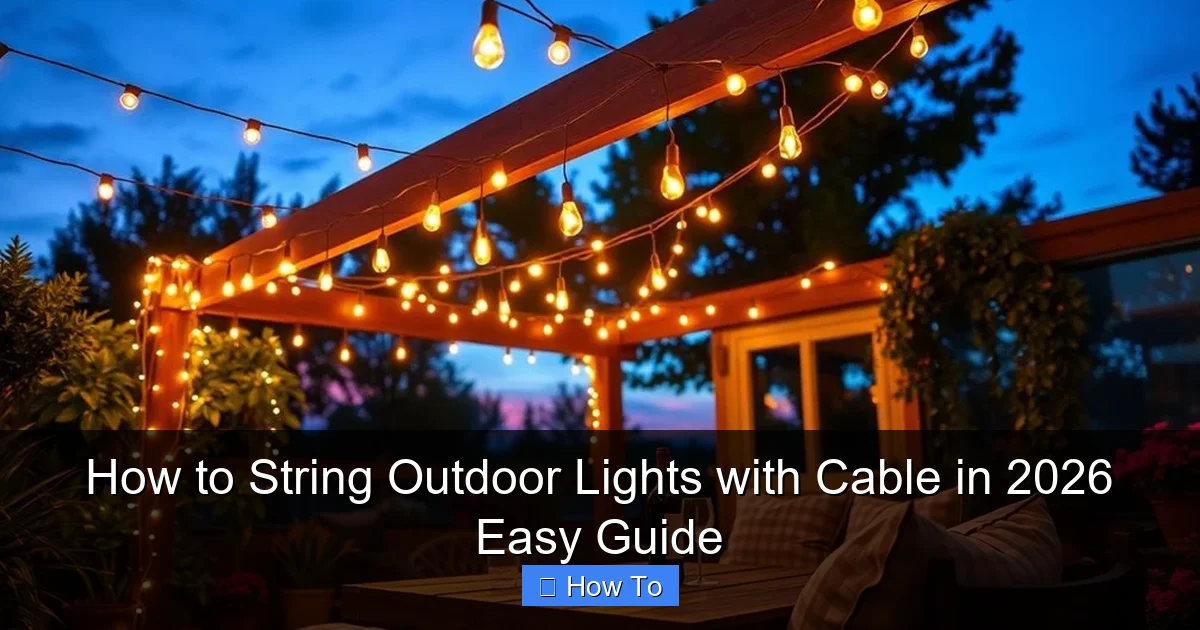
Visual guide about how to string outdoor lights with cable
Image source: aluxurylifestyle.com
- Outdoor-rated cable (30-50 ft): Use galvanized steel aircraft cable (1/8″ or 3/16″ diameter) or stainless steel for coastal areas. Avoid nylon—it stretches and sags.
- Turnbuckles (2–4): For tensioning. Choose zinc-plated or stainless steel.
- Cable clamps (4–8): To secure cable ends. Use wire rope clips (not zip ties).
- Eye bolts or screw eyes (4+): Installed on walls, trees, or posts. Use stainless steel for longevity.
- Outdoor-rated LED string lights: Look for IP65 or higher weatherproof rating. Solar? Only if you want dim, inconsistent lighting.
- Light clips or hooks (10–20): Use plastic-coated or stainless steel S-hooks or J-hooks. Avoid bare metal—it can corrode.
- Drill with masonry/wood bits: For installing eye bolts.
- Measuring tape, level, and ladder: Basic but essential.
- Wire cutters and wrench: For trimming cable and tightening turnbuckles.
- Weatherproof sealant (optional): For sealing screw holes in wood or masonry.
Pro Insight: Buy 10–15% more cable than you think you need. You’ll use extra for loops, tensioning, and mistakes. And always test lights before hanging—nothing’s worse than installing a dead strand.
Step-by-Step Guide to How to String Outdoor Lights with Cable in 2026 Easy Guide
Step 1: Plan Your Layout (Measure Twice, Hang Once)
Start by sketching your space. Where are the anchor points? Trees, pergola posts, eaves, or walls? Measure the distance between them. This tells you how much cable you need.
- For spans under 20 ft, 1/8″ cable works fine.
- For 20–30 ft, use 3/16″ cable to prevent sagging.
- For longer runs, consider mid-span supports (like a tree or pole).
Next, decide the light pattern. Do you want a straight line, crisscross, or a canopy? For most backyards, a parallel line setup (2–4 cables) works best—it’s clean and holds multiple light strands.
Real Talk: I once tried a single cable for a 25-ft span. By summer’s end, it sagged 18 inches. My lights looked like a sad, droopy smile. Don’t be me. Use thicker cable or add a center support.
Step 2: Install Anchor Points (The Foundation of Your System)
Your cable is only as strong as its anchors. Weak points = wobbly lights.
- Mark spots: Use a pencil to mark where eye bolts go. Aim for sturdy structures—wood beams, concrete walls, or thick trees (at least 12″ diameter).
- Drill pilot holes: For wood, drill slightly smaller than the bolt. For masonry, use a hammer drill and wall anchors.
- Install eye bolts: Screw them in until snug. For trees, use tree-friendly eye bolts (they don’t damage bark). For masonry, apply sealant around the hole to prevent water ingress.
- Check alignment: Use a level. Misaligned anchors cause uneven tension.
Warning: Never anchor to gutters, siding, or flimsy structures. They can’t handle the pull. And avoid drilling into old or rotting wood—it’ll fail under load.
Step 3: Thread and Secure the Cable
Now for the cable. This is where your system takes shape.
- Cut cable to length: Add 2–3 ft extra for knots and turnbuckles.
- Attach one end: Loop the cable through the eye bolt. Use two cable clamps to secure it. Tighten with a wrench—clamps should be snug but not crushing the cable.
- Run the cable: Feed it to the opposite anchor. Don’t pull it tight yet.
- Attach the turnbuckle: Hook one end of the turnbuckle to the eye bolt, the other to the cable. Leave it loose.
- Secure the cable to the turnbuckle: Loop the cable through the turnbuckle’s hook and clamp it with two more clamps.
Pro Tip: Always install turnbuckles facing downward. This lets rain drip off and prevents water pooling inside the threads.
Step 4: Tension the Cable (The Key to a Sag-Free Look)
This step separates pros from amateurs. Proper tension prevents sagging and wind wobble.
- Use a level: Place it under the cable. It should be straight—not dipping or rising.
- Tighten turnbuckles: Turn them clockwise to pull the cable taut. Stop when there’s minimal sag (about 1–2″ over 10 ft).
- Check tension: Gently press down on the cable. It should resist but not feel rigid. Over-tightening can stress anchors.
- Recheck clamps: Vibration can loosen them. Tighten if needed.
Real-Life Fix: My first cable was too tight. After a winter freeze, the cable contracted and pulled the eye bolt out of the wall. Now I leave a little slack for thermal expansion.
Step 5: Hang the Lights (Where the Magic Happens)
Now for the fun part: adding the lights.
- Attach light clips: Space them every 12–18″ along the cable. Use S-hooks or J-hooks—they’re easy to install and remove.
- Hang the lights: Clip the light strand into the hooks. Start from one end and work your way across.
- Secure loose ends: Use zip ties (cut the tails) or hooks to keep cords from flapping.
- Plug in and test: Turn them on. Fix any dead bulbs or flickering sections.
Smart Move: Use plug-in timers or smart plugs to automate lights. No more forgetting to turn them off at 2 a.m.
Step 6: Add Mid-Span Supports (For Longer Runs)
Spans over 20 ft? You’ll need extra support to prevent sag.
- Use a tree or post: Install an eye bolt at the midpoint. Attach a short cable segment from the main cable to the support.
- Or use a tensioner: A small turnbuckle at the center adds adjustable support.
This keeps the cable level and reduces strain on end anchors.
Step 7: Weatherproof and Maintain
Outdoor lights face rain, wind, and UV rays. Protect your system.
- Seal anchor points: Use silicone sealant around screw holes in wood or masonry.
- Inspect annually: Check for rust, loose clamps, or frayed cable. Replace worn parts.
- Trim vegetation: Keep branches from rubbing the cable or lights.
- Remove in winter (optional): In harsh climates, take down lights to extend their life.
My Routine: Every spring, I spend 20 minutes checking cables, tightening clamps, and cleaning lights. It’s saved me from costly repairs.
Pro Tips & Common Mistakes to Avoid
After 10+ years of outdoor lighting projects, here’s what I wish I knew sooner:
✅ Pro Tips
- Use a laser level: For long spans, it’s more accurate than a bubble level.
- Color-code cables: If you have multiple lines, use different colored clips to track which is which.
- Add a backup power source: A small solar battery pack keeps lights on during outages.
- Choose warm white LEDs (2700K–3000K): They’re cozier than cool white. Trust me.
- Leave slack in cords: Don’t pull light strands tight. Let them drape slightly for a natural look.
❌ Common Mistakes
- Using zip ties as anchors: They degrade in UV light. Use metal clamps instead.
- Ignoring wind load: In windy areas, use thicker cable and add extra anchors.
- Overloading circuits: Check your power supply. Most outdoor outlets support 100–150 ft of LED lights.
- Skipping maintenance: A little yearly care prevents big failures.
- Hanging lights before the cable is tight: It’s harder to adjust later.
Hard Lesson Learned: I once used plastic cable ties to secure a 30-ft run. By fall, they’d cracked and the cable was dragging on the ground. Metal lasts.
FAQs About How to String Outdoor Lights with Cable in 2026 Easy Guide
Can I use this system for solar lights?
You can, but I wouldn’t recommend it. Solar lights need direct sunlight to charge. Hanging them under a pergola or in shade means dim, short-lived light. For reliability, use plug-in LEDs with a timer. Save solar for pathways or accent spots.
How much weight can the cable hold?
A 1/8″ galvanized cable holds 400 lbs when properly installed. That’s plenty for lights, but not for heavy decor. For planters or signs, use a secondary support system.
What if my anchor points aren’t straight?
No problem! Use a zig-zag pattern or add a mid-span support. Just keep the cable tension even. I once lit a crooked pergola—looked amazing, no one noticed the angles.
Can I run multiple light strands on one cable?
Absolutely. Space clips 6–12″ apart. But don’t overload the cable—stick to 3–4 strands max. And use a power strip with surge protection.
How do I remove the system in winter?
Loosen turnbuckles first, then unclip lights. Store cables coiled and dry. Remove eye bolts if they’re in a high-traffic area. Otherwise, leave them—they’ll last years.
Are there alternatives to eye bolts?
Yes! Use tree straps (for large trees), concrete anchors, or clamps for metal posts. Avoid nails or screws—they can’t handle tension.
What’s the best time to install?
Spring or early fall. Temperatures are mild, and you’ll have time to adjust before summer parties. Avoid rainy or windy days—safety first.
Final Thoughts
Knowing how to string outdoor lights with cable in 2026 easy guide isn’t just about hanging lights—it’s about creating a space where memories happen. Whether it’s a birthday party, a quiet night with a book, or just enjoying your garden after dark, the right lighting transforms your yard.
Start small. Test one span first. Learn from mistakes (we all make them). And remember: This system is adjustable. You can add more cables, change light patterns, or even switch to smart LEDs later.
So grab your tools, measure your space, and give it a try. Your backyard deserves to shine—safely, beautifully, and for years to come. And when your friends ask, “How’d you do that?”—just smile and say, “I followed the easy guide.”
“`

