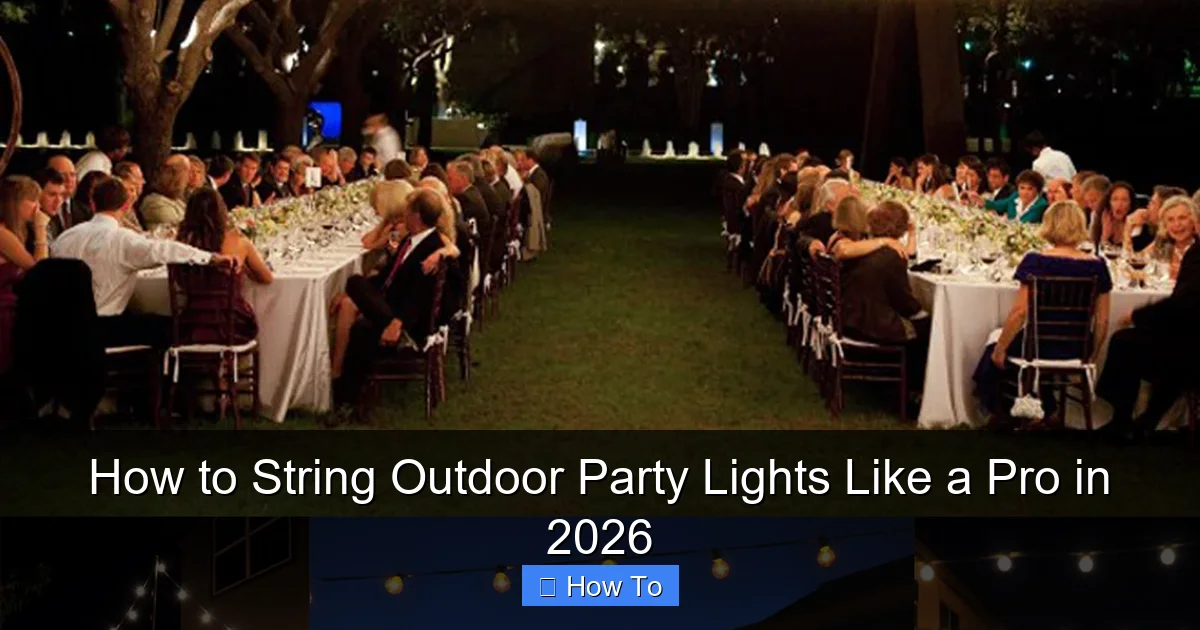
Featured image for how to string outdoor party lights
Image source: hawk-haven.com
Plan your layout and choose weather-resistant, LED string lights to ensure a safe, stunning display that lasts all season. Use sturdy mounting hardware—like eye hooks or zip ties—and maintain proper spacing to avoid sagging or overloading circuits. For a pro finish in 2026, integrate smart controls and layer lighting for depth and ambiance.
How to String Outdoor Party Lights Like a Pro in 2026
Key Takeaways
- Plan your layout first: Sketch the area to avoid overbuying or misplacing lights.
- Use durable, weatherproof lights: Choose LED or solar-powered options for longevity and safety.
- Secure with proper hardware: Install hooks or clips, not nails, to protect surfaces and wires.
- Keep spacing consistent: Maintain even gaps between bulbs for a polished, professional look.
- Test before finalizing: Power up the lights early to troubleshoot issues or gaps in coverage.
- Hide cords strategically: Tuck wires along edges or under decor for a clean, seamless appearance.
- Use timers or smart controls: Automate on/off times to save energy and enhance convenience.
Why This Matters / Understanding the Problem
You’ve planned the perfect outdoor gathering—friends, food, music, and a warm summer breeze. But when the sun sets, the mood dims too. That’s when how to string outdoor party lights like a pro in 2026 becomes more than just a handy skill—it’s your secret weapon for transforming a regular backyard into a magical, Instagram-worthy space.
I’ve been there. A few years ago, I tried hanging string lights for a birthday party. I ended up with tangled wires, sagging lines, and one bulb that sparked like a mini fireworks show. My guests laughed, but I was sweating. It wasn’t just about aesthetics—it was about ambiance, safety, and making sure my setup didn’t look like a DIY disaster.
Fast-forward to today. I’ve hosted over 50 outdoor events and learned what works—and what doesn’t. Whether you’re lighting up a small patio, a sprawling backyard, or a tree-lined garden, the goal is the same: create a warm, inviting glow that lasts through the night, without tripping breakers or risking a fire hazard.
The good news? You don’t need to be an electrician or spend a fortune. With the right approach, how to string outdoor party lights like a pro in 2026 is totally doable—even if you’ve never hung a single light before.
What You Need
Before you start, let’s gather your gear. No need for a full hardware store run. Here’s what you’ll actually use—plus a few extras that make life easier.
- Outdoor-rated string lights (LEDs preferred—they’re energy-efficient and cool to the touch)
- Weatherproof extension cords (rated for outdoor use, with GFCI protection)
- Light clips or hooks (plastic or metal, depending on surface)
- Measuring tape (to plan your layout)
- Zip ties (for securing loose wires)
- Drill and anchors (if mounting on wood, stucco, or brick)
- Ladder (for high areas—safety first!)
- Timer or smart plug (optional, but a game-changer for automation)
- Power strip with surge protection (for multiple light sets)
- Marker or chalk (to mark anchor points)
Pro tip: Always check the wattage or amperage of your lights and extension cords. Most outdoor circuits can handle 15 amps. If you’re using more than 100 watts of lights, consider splitting the load across multiple outlets or circuits to avoid tripping the breaker.
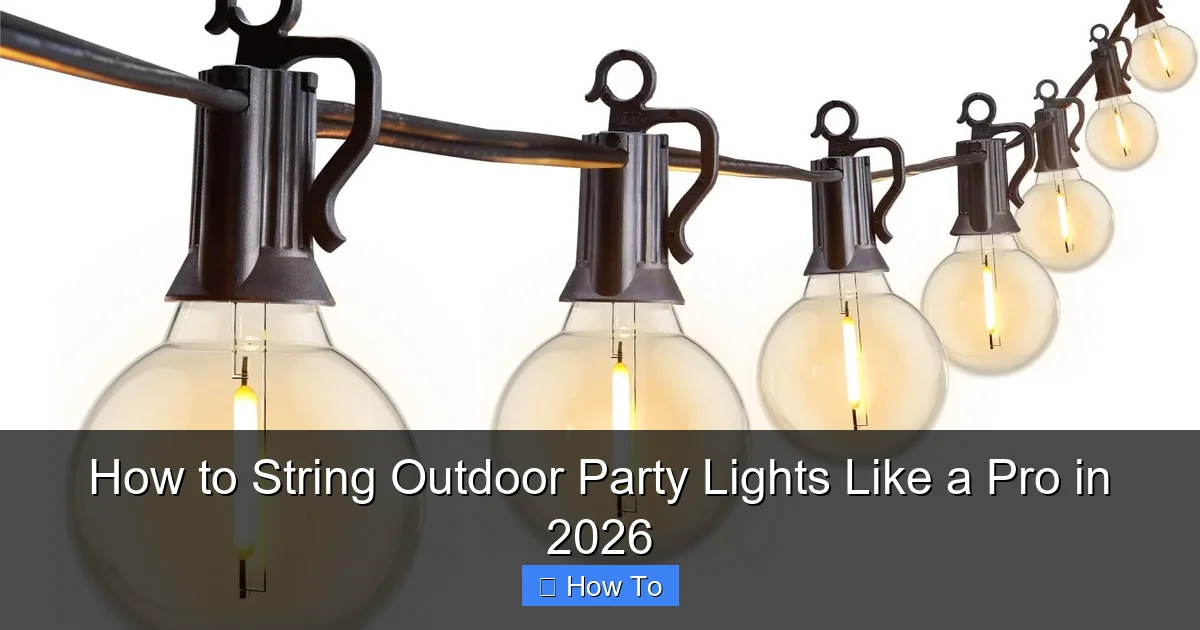
Visual guide about how to string outdoor party lights
Image source: m.media-amazon.com
And one more thing: don’t buy indoor string lights. They’re not rated for moisture, UV exposure, or temperature swings. Outdoor lights have thicker insulation, waterproof sockets, and UV-resistant coatings. Trust me—I learned that the hard way after my “bargain” set melted in the sun.
Step-by-Step Guide to How to String Outdoor Party Lights Like a Pro in 2026
Step 1: Plan Your Layout (Before You Buy or Hang)
Before you even open the box, sketch out your space. Grab paper and a pencil, or use a simple app like SketchUp Free or Google’s “My Maps.”
Ask yourself:
- Where are the anchor points? (Trees, posts, eaves, fences, pergolas)
- How do you want the lights to flow? (Straight lines, zigzags, crisscross, canopy effect)
- Where will the power source be? (You don’t want to stretch cords across walkways)
For example, if you’re lighting a backyard patio, you might run lights from the house eaves to a pergola, then drape them down to the fence. Or, for a tree-heavy yard, you could create a canopy by running lines between trees in a grid pattern.
Measure the distances between each anchor point. Add 10–15% extra length to your total for slack and adjustments. This helps you buy the right number of light sets.
Real talk: I once bought lights based on my “eyeball estimate.” They were 6 feet too short. I had to splice in an extra set—messy, unsafe, and not waterproof. Always measure twice, buy once.
This step is crucial for how to string outdoor party lights like a pro in 2026—because planning saves time, money, and headaches.
Step 2: Choose the Right Mounting Method
Not all surfaces are created equal. The way you attach your lights depends on what you’re hanging them from.
- Wood (deck posts, pergolas, fences): Use plastic or metal light clips screwed directly into the wood. No drilling? Use zip ties around posts or beams.
- Masonry (brick, stucco, concrete): Use plastic wall anchors and screws. Drill pilot holes first to avoid cracking.
- Metal (gutters, railings): Use magnetic clips (for steel) or zip ties with protective sleeves to avoid scratching.
- Trees: Use tree-friendly clips or soft zip ties that won’t girdle the bark. Avoid nails or screws—they damage the tree.
- Gutters: Use gutter hooks that clip onto the edge. They’re cheap and won’t require drilling.
Warning: Never use nails, screws, or wire directly into trees. It opens them up to disease and pests. I’ve seen neighbors ruin their oaks with “temporary” hooks. Not worth it.
Pro tip: For a clean, professional look, space your clips every 12–18 inches. This prevents sagging and keeps the lines taut.
Step 3: Install Anchors and Clips (Dry Run First)
Now it’s time to mark and install your mounting points.
- Use a measuring tape and marker to mark where each clip will go.
- For wood: Pre-drill small holes (1/8 inch) and screw in the clips.
- For masonry: Drill with a masonry bit, insert plastic anchors, then screw in clips.
- For trees: Wrap soft zip ties around the trunk or branch at the desired height.
Do a dry run—run a string or rope between the clips to test your layout. Adjust spacing if needed. This helps you spot issues before you’re up on a ladder with hot glue in your hair (yes, that happened).
My mistake: I once installed clips on a pergola without testing the line tension. When I added the lights, the whole structure bowed slightly. Not dangerous, but not pretty. Dry runs prevent this.
This step is key to how to string outdoor party lights like a pro in 2026—because proper anchoring means no sagging, no falling, and no mid-party repairs.
Step 4: Connect and Test Your Lights
Before hanging, plug in your lights and test them. Look for:
- Burnt-out bulbs (common in older sets)
- Loose sockets
- Flickering or dim sections
If you find issues, replace bulbs or swap out the set. Don’t hang faulty lights—it’s a fire hazard.
Now, connect your light sets. Most outdoor lights have end-to-end connectors, but:
- Don’t exceed the manufacturer’s recommended number of connected sets (usually 3–4 for 50-light strings).
- Use weatherproof connector covers to protect joints from rain.
Plug the first set into a GFCI-protected outlet. These outlets cut power instantly if they detect a ground fault—essential for outdoor safety.
Pro tip: Use a smart plug or timer so your lights turn on at sunset and off at 10 p.m. automatically. No more fumbling with switches in the dark.
Step 5: Hang the Lights (Start from the Power Source)
Here’s the fun part.
- Start at the power source (e.g., the outlet on your house).
- Clip the first light into the nearest anchor.
- Work your way outward, clipping each bulb or socket into the next anchor.
- Keep the line taut but not stretched—like a guitar string, not a rubber band.
- For long runs, use a second person to help guide the lights and prevent tangles.
If you’re creating a canopy or crisscross pattern:
- Use a ladder or pole hook to lift and position the lights.
- Secure the center point first (e.g., a tree or post), then run lines to the edges.
- Use zip ties to secure crossing points and prevent swaying in the wind.
Real-life example: For a wedding, I strung lights in a “starburst” pattern from a central tree to six surrounding posts. I used fishing line to temporarily hold the shape, then replaced it with permanent clips. Looked stunning—and didn’t fall during a 20 mph gust.
Step 6: Manage Power and Cables
This is where amateurs and pros differ.
- Keep cords off the ground—run them along fences, railings, or under decking.
- Use zip ties or cable clips to secure cords every 12–18 inches.
- Don’t drape cords over walkways or seating areas—trip hazard!
- Use a power strip with surge protection if you’re running multiple sets.
- For long distances, consider a weatherproof junction box to split power.
If you must run a cord across the yard:
- Use a cord cover or bury it shallowly (with conduit).
- Or, use a battery-powered light set for remote areas.
My lesson: I once left a cord coiled on the grass. My dog chewed through it. Sparks flew. I learned: always manage cables like they’re live wires—because they are.
This step is vital for how to string outdoor party lights like a pro in 2026—because safety and tidiness go hand in hand.
Step 7: Test, Adjust, and Enjoy
Now, plug everything in and step back.
Check:
- Are all bulbs lit?
- Are lines straight and taut?
- Are cords hidden and secure?
- Is the glow even? (No dark spots or hot zones)
Make small adjustments:
- Loosen a clip here, tighten a zip tie there.
- Add a filler light in a dark corner.
- Use a dimmer (if your lights support it) to soften the glow.
Then—enjoy! Invite friends over. Light the grill. Pour a drink. Let the magic happen.
Pro Tips & Common Mistakes to Avoid
Let’s talk about what most people get wrong—and how to avoid it.
- Mistake: Overloading circuits. I’ve seen 10 light sets plugged into one outlet. That’s 1500+ watts—way over the 15-amp limit. Solution: Use multiple outlets or a dedicated outdoor circuit.
- Mistake: Using indoor lights. They fail in rain, heat, or cold. Solution: Only use UL-listed outdoor lights with IP65 or higher rating.
- Mistake: Sagging lines. Looks cheap and can stress sockets. Solution: Use more clips or add a center support (e.g., a pole or tree).
- Mistake: Ignoring wind. Loose lights flap and wear out. Solution: Secure every bulb, and use zip ties at crossings.
- Mistake: Poor power placement. Cords across patios = tripping hazard. Solution: Run power along edges or use battery lights.
Pro tip: Use fairy lights or net lights for bushes and railings. They’re easier to install and give a soft, diffused glow.
Pro tip: For a “floating” effect, run lights above seating areas—like a canopy. Use taller poles or trees to elevate the lines.
Pro tip: Store your lights properly. Coil them around a cardboard tube or light reel. Label each set. You’ll thank yourself next year.
And one last thing: don’t leave lights up year-round unless they’re rated for permanent installation. Sun, rain, and wind degrade sockets and wires. Take them down after the season—or at least inspect and clean them annually.
FAQs About How to String Outdoor Party Lights Like a Pro in 2026
Can I leave my outdoor string lights on all night?
You can, but it’s not ideal. LEDs are safe and cool, but leaving them on 24/7 shortens their lifespan. Plus, it wastes energy. Use a timer or smart plug to turn them on at dusk and off at 10 or 11 p.m. It’s safer, cheaper, and just as magical.
How do I hang lights without drilling holes?
Great question! Use zip ties on railings, posts, or trees. Gutter hooks clip onto eaves. Adhesive clips work on smooth surfaces like stucco (but test first). For a temporary setup, fishing line tied to existing structures works too.
What if my lights keep flickering?
First, check the bulbs. Loose or burnt-out bulbs cause flickering. Tighten them or replace them. If it’s a whole section, check the socket for corrosion. Clean with a cotton swab and isopropyl alcohol. If the whole string flickers, the cord might be damaged—replace it.
Can I connect different brands of lights?
It’s not recommended. Voltage, wattage, and connector types vary. Mixing brands can cause overheating or failure. Stick to one brand and type. If you must mix, use a separate power source for each set.
How do I hide the power cord?
Run it along the edge of your deck, under railings, or behind plants. Use cord covers for walkways. Or, bury it shallowly (with conduit) and mark the path. For a clean look, use battery-powered lights in remote areas.
Are solar-powered string lights worth it?
For small areas (like a balcony or garden path), yes. They’re easy to install and eco-friendly. But they’re dimmer and less reliable on cloudy days. For large events, stick with plug-in lights. Use solar for accents, not main lighting.
How do I prevent tangles when storing?
Coil them around a cardboard tube, light reel, or empty paper towel roll. Wrap the plug end last. Store in a dry, cool place. No knots, no mess—next year, they’ll unroll like new.
Final Thoughts
So, there you have it—my full guide to how to string outdoor party lights like a pro in 2026. No magic tricks, no overpriced kits. Just smart planning, the right tools, and a little patience.
You don’t need to be an electrician. You don’t need a huge budget. You just need to care about creating a space where people feel happy, safe, and a little bit enchanted.
Start small. Try one line of lights from your house to a tree. Get the hang of it. Then expand. Before you know it, you’ll be the one friends call for lighting advice.
And remember: the goal isn’t perfection. It’s ambiance. It’s connection. It’s that moment when someone says, “Wow, this feels like a movie.”
So grab your lights, your ladder, and your favorite playlist. String them with pride. Test them with care. And when the sun sets, flip that switch—and let the magic begin.
You’ve got this. And if you ever get stuck? Just think of that friend who’s done it 50 times—me. I’m here. Now go make your backyard shine.

