Featured image for how to string outdoor patio lights
Image source: realsimple.com
Transform your outdoor space in 2026 with perfectly strung patio lights by following this expert guide to safe, stylish, and weather-resistant installations. Choose durable, commercial-grade LED string lights and secure them with tension cables or hooks to ensure a professional look that lasts through seasons—no sagging or shorts. Master spacing, power sources, and smart controls for a custom ambiance that wows.
“`html
How to String Outdoor Patio Lights in 2026: A Complete Guide
Key Takeaways
- Plan your layout first: Sketch light placement to avoid mid-project changes.
- Use weatherproof lights: Ensure all fixtures are rated for outdoor use.
- Secure with proper hardware: Use hooks, clips, or cables designed for outdoor tension.
- Test lights before hanging: Check connections and bulbs to save time later.
- Maintain safe spacing: Keep lights 6-8 feet apart for balanced illumination.
- Hide cords strategically: Use conduit or clips to conceal wires for a clean look.
Why This Matters / Understanding the Problem
Picture this: it’s a warm summer night, you’ve got friends over, the grill is sizzling, and the mood is perfect—until the sun sets and your patio turns into a shadowy cave. You want ambiance, not a game of flashlight tag.
That’s where how to string outdoor patio lights in 2026: a complete guide comes in. Whether you’re creating a cozy nook for two or a lively space for weekend BBQs, string lights can transform your outdoor area into a magical retreat.
But here’s the thing: it’s not just about hanging lights and calling it a day. Poor planning can lead to droopy wires, tripping hazards, or lights that burn out in a month. And let’s be honest—no one wants to climb a ladder every other weekend to fix a sagging strand.
This guide walks you through the process step by step, with real-world tips, practical tools, and a few hard-earned lessons I’ve learned after stringing up lights for my own patio, my parents’ deck, and even a friend’s backyard wedding. We’ll cover everything from planning to power, so your setup is safe, stylish, and lasts all season.
What You Need
Before you start, gather these essentials. I’ve broken them down into *must-haves* and *nice-to-haves*, so you don’t waste time or money on things you won’t use.
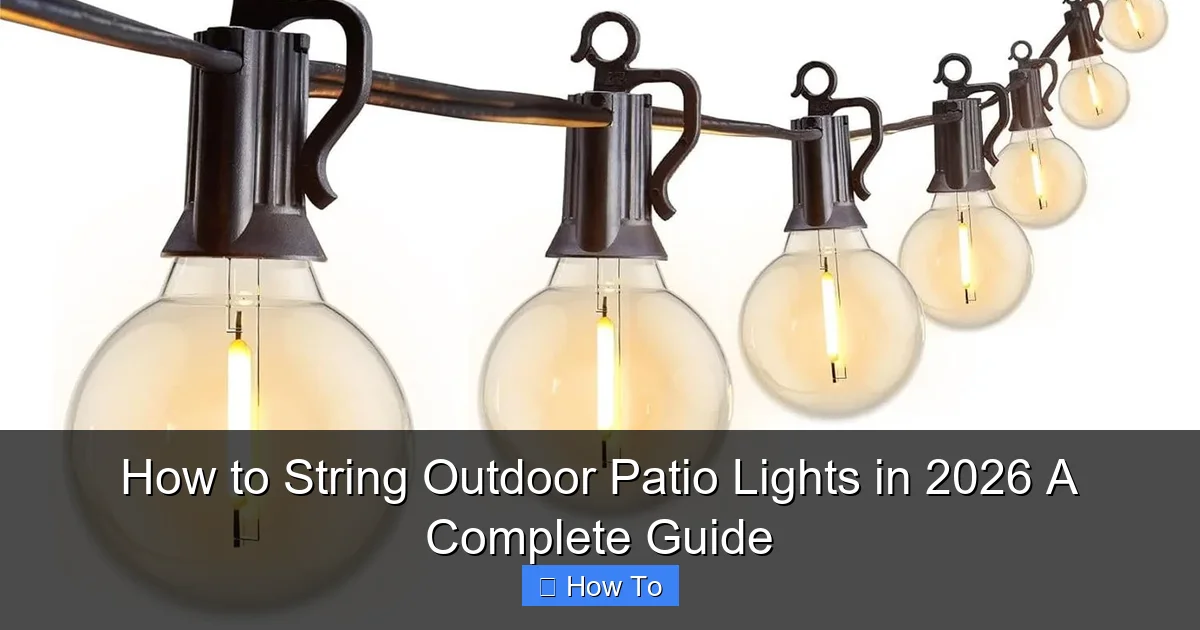
- Outdoor-rated string lights: Look for weatherproof (IP44 or higher) and LED for energy efficiency and longevity. I prefer Edison-style bulbs for a warm, vintage glow, but globe or fairy lights work too.
- Measuring tape: You’ll need this to map your layout. A 25-foot tape is usually enough.
- Drill and screws or hooks: For permanent mounting. Use stainless steel or coated hooks to resist rust.
- Zip ties or outdoor-rated adhesive clips: Great for temporary or semi-permanent setups. I use 100+ of these every year.
- Extension cords and outdoor-rated power strips: Make sure they’re UL-listed for outdoor use. Never daisy-chain more than three cords.
- Timer or smart plug (optional but recommended): Set lights to turn on at sunset. Saves energy and keeps the vibe consistent.
- Level (optional): Helps keep lines straight, especially on long runs.
- Gloves and ladder: Safety first. I’ve learned the hard way that gloves save your hands from sharp hooks.
- Sketch paper or phone app: To map your design before drilling.
Pro insight: I once skipped the measuring tape and just “eyeballed” my first string. Result? A lopsided mess that looked like a drunk spider’s web. Measure twice, hang once.
Step-by-Step Guide to How to String Outdoor Patio Lights in 2026: A Complete Guide
Step 1: Plan Your Layout Like a Designer
Start with a rough sketch. Walk around your patio and imagine where you want light. Do you want a canopy over a dining table? A frame around a seating area? Or a zigzag pattern across a pergola?
Use your measuring tape to note distances between anchor points—walls, posts, trees, or columns. I like to mark these with chalk or small flags so I can visualize the path.
For a how to string outdoor patio lights in 2026: a complete guide, the key is balance. You don’t want lights so low they get in the way, or so high they look like distant stars. Aim for 8–10 feet off the ground for most areas.
Warning: Avoid placing lights directly above grills or fire pits. Heat can melt plastic covers or shorten bulb life. Keep at least 3 feet of clearance.
Step 2: Choose the Right Mounting Method
This is where most people go wrong. The mounting method depends on your space and how permanent you want it to be.
- For permanent setups (walls, eaves, pergolas): Use eye hooks or screw-in hooks. Drill pilot holes to prevent wood splitting. I use 1-inch stainless steel hooks for durability.
- For temporary or renter-friendly options: Try adhesive outdoor clips (like Command Outdoor Hooks) or zip ties on railings, fences, or trees. These work great for seasonal displays.
- For trees or posts: Wrap a tree-friendly strap around the trunk (never nail into the bark). Use a ratchet strap with a soft sleeve to avoid damaging the tree.
I once nailed hooks into a maple tree—bad idea. The tree started weeping sap and I felt terrible. Now I always use straps or clips for trees.
Step 3: Measure and Cut Your Light Strand (If Needed)
Most string lights come in 25- or 50-foot lengths. If your run is longer, you’ll need to connect multiple strands—but never exceed the manufacturer’s recommended max connection limit (usually 3–5 strands).
Measure your path from hook to hook, then add 10–15% extra for slack and curves. I always cut the cord with a little extra so I can adjust tension later.
Pro tip: Buy one extra strand. You’ll probably need it for a corner or backup.
Step 4: Install Your Anchor Points
Now it’s time to put in the hooks or clips. Start at one end and work your way around. Use a level if you want perfectly straight lines—especially for long runs over 20 feet.
For eye hooks, drill a pilot hole slightly smaller than the screw diameter. Screw in the hook until it’s snug but not over-tightened (this can strip the wood).
If using adhesive clips, clean the surface with rubbing alcohol first. I’ve seen clips fall off after a week because the wall was dusty or oily.
Personal note: I once installed hooks on a windy day. The ladder swayed, my hands were cold, and I dropped a hook into a bush. Pick a calm, dry day. You’ll thank yourself.
Step 5: Hang the Lights (With the Right Tension)
Start at the end with the plug. Hang one bulb socket on the first hook, then stretch the strand toward the next anchor point. Don’t pull too tight—lights should have a gentle catenary curve (like a smiley face).
Too tight? The cord can snap or pull hooks out. Too loose? It sags and looks sloppy.
For long runs, I use a turnbuckle or bungee cord in the middle to adjust tension. It’s like tuning a guitar—just the right amount of give.
Clip each bulb socket to a hook or use zip ties every 12–18 inches for support. This prevents strain on the cord.
Step 6: Manage Power Sources and Cords
This is where safety matters most. Never run extension cords under rugs, furniture, or through doorways where they can get pinched.
Use a grounded outdoor outlet and plug your lights into a GFCI-protected circuit (most outdoor outlets have this built-in). If not, use a GFCI adapter.
Hide cords with:
- Cord covers (plastic or rubber channels)
- Zip ties along railings or posts
- Paintable cord clips that blend into the wall
I run my cords along the edge of the patio, then tuck them behind a planter. It’s invisible from the seating area.
Step 7: Add a Timer or Smart Control (Optional)
Set your lights to turn on at dusk and off at midnight. I use a dusk-to-dawn timer or a smart plug (like TP-Link Kasa) that I can control from my phone.
This saves energy and means I never forget to turn them off. Bonus: you can sync them with other smart devices—like turning on the lights when you unlock the patio door.
For a how to string outdoor patio lights in 2026: a complete guide, smart controls are a game-changer. No more fumbling with switches in the dark.
Step 8: Test and Adjust
Plug everything in and walk around. Check for:
- Flickering bulbs
- Sagging sections
- Cords in high-traffic areas
- Glare in seating zones
Replace any burnt-out bulbs (most LED strings are modular). Tighten loose hooks or re-clip sagging sections.
I always do a “test night” with my partner. We sit outside, sip wine, and point out what we love (or hate). It’s like a soft launch for your lighting design.
Step 9: Weatherproof and Maintain
Even the best lights need care. Here’s how to keep them running all season:
- Inspect monthly: Look for frayed cords, loose hooks, or water in sockets.
- Clean bulbs: Wipe with a dry cloth to remove dust or bugs.
- Store properly: In winter, take down lights and coil them loosely in a dry box. Avoid tight wrapping—it can damage internal wires.
I keep a small toolkit (extra bulbs, zip ties, hooks) in my garage so I can fix issues fast.
Pro Tips & Common Mistakes to Avoid
After years of trial and error, here are the things I wish I knew earlier:
Tip #1: Use warm white LEDs (2700K–3000K). They mimic candlelight and make people look better. Cool white (5000K+) feels clinical and harsh.
Tip #2: Layer your lighting. Combine string lights with path lights and spotlights for depth. It’s like painting with light.
Tip #3: Buy lights with replaceable bulbs. If one goes out, you don’t have to replace the whole strand.
Mistake #1: Overloading circuits. I once plugged in five strands and tripped the breaker. Now I check the wattage and never exceed 80% of the circuit’s capacity.
Mistake #2: Using indoor lights outdoors. They’re not weatherproof. I learned this when my $50 “bargain” lights melted in the rain.
Mistake #3: Ignoring wind. In windy areas, use shorter runs or add extra clips. I lost a strand last spring when a storm yanked it off the hooks.
Pro insight: For renters, use magnetic hooks on metal railings or freestanding light posts. No drilling required.
FAQs About How to String Outdoor Patio Lights in 2026: A Complete Guide
Can I leave my outdoor lights up all year?
It depends. If your lights are rated for extreme weather (IP65 or higher) and you live in a mild climate, yes. But in areas with snow, ice, or high winds, I recommend taking them down in winter. Even “all-weather” lights can degrade over time.
For a how to string outdoor patio lights in 2026: a complete guide, seasonal removal is safer and extends the life of your lights.
How do I hide the cords?
Use cord covers, tuck them behind furniture or planters, or paint them to match your walls. I’ve even used fake vines to camouflage cords on a pergola. The key is to plan cord routing during installation, not after.
What’s the best way to connect multiple strands?
Use a multi-outlet adapter or a Y-splitter cord designed for outdoor lights. Never splice wires yourself—this is a fire hazard. Stick to manufacturer-approved connectors.
And remember: most strings max out at 3–5 connected strands. Check the box!
Are solar string lights worth it?
They’re great for remote areas (like a garden path) where power isn’t available. But they’re dimmer and less reliable in cloudy weather. I use solar for accents and plug-in for main areas.
How high should I hang the lights?
For dining areas: 8–10 feet. For walkways: 7–8 feet. For pergolas: 10–12 feet. Always leave 3 feet of clearance from the ground for people and furniture.
I once hung lights too low—my friend walked into one and knocked it off. Oops.
Can I use smart bulbs in outdoor string lights?
Yes, but only if the string is smart-compatible and the bulbs are rated for outdoor use. I use Philips Hue Outdoor Strings, which let me change colors and set scenes from my phone. Just don’t use regular smart bulbs—they’re not waterproof.
What if I don’t have a power source nearby?
Options: use solar lights, battery-powered strands, or run a heavy-duty extension cord from an indoor outlet (but only if it’s GFCI-protected and the cord is rated for outdoor use). I’ve used a 100-foot cord for a backyard party—worked like a charm.
Final Thoughts
Stringing outdoor patio lights isn’t just about illumination—it’s about creating a mood, a memory, a moment. Whether you’re hosting a party or just enjoying a quiet night under the stars, the right lighting makes all the difference.
This how to string outdoor patio lights in 2026: a complete guide gives you the tools, tips, and confidence to do it right. Start small if you’re new. Try a single strand over your dining table. Then expand as you learn what works for your space.
And remember: it’s okay to make mistakes. I’ve hung lights too low, used the wrong clips, and even tripped my own breaker. But each time, I learned something new.
So grab your tools, sketch your design, and light up your patio like a pro. Your next great outdoor evening starts with a single bulb.
Now go make some magic.
“`

