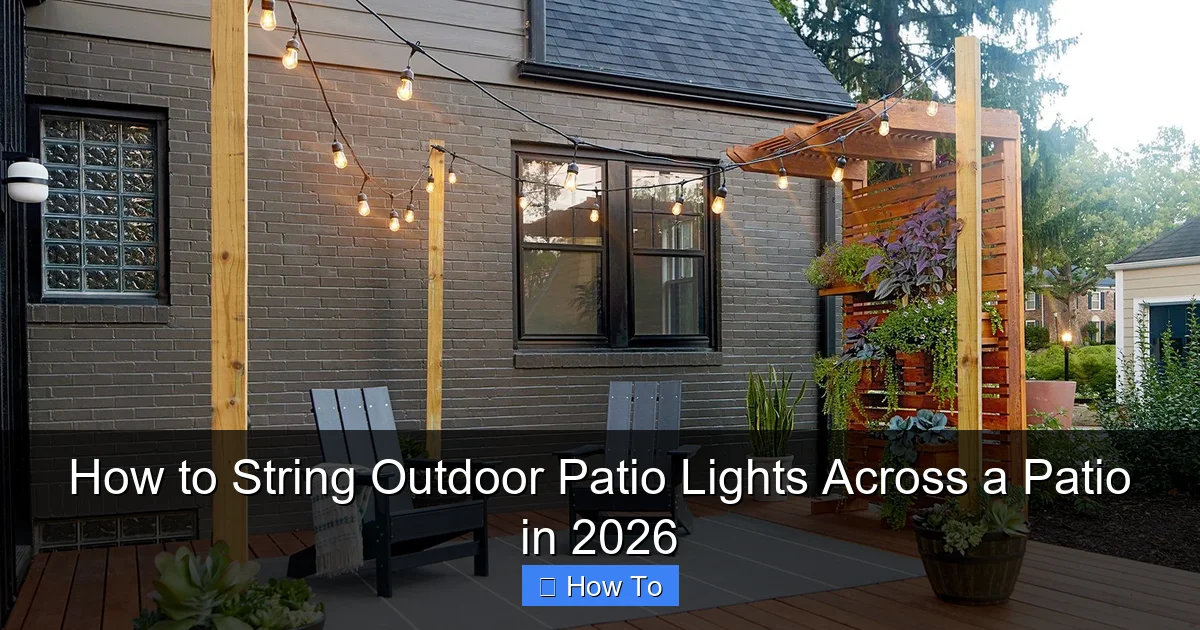
Featured image for how to string outdoor patio lights across a patio
Image source: bhg.com
Transform your patio into a glowing oasis in 2026 by securely anchoring lights to walls, posts, or overhead beams using weather-resistant hardware and a tensioned guide wire for a clean, professional look. Plan your layout with even spacing and plug placement in mind, then use LED string lights or durable festoon strands rated for outdoor use to ensure long-lasting brilliance. With smart spacing, proper support, and a weatherproof design, your patio lighting will dazzle all season long.
How to String Outdoor Patio Lights Across a Patio in 2026
Key Takeaways
- Plan your layout first: Sketch light placement to avoid overbuying or gaps.
- Choose weather-resistant lights: Ensure durability with IP65-rated or outdoor-rated fixtures.
- Use tension cables for support: Prevent sagging with steel cables or guide wires.
- Secure with proper hardware: Use eye hooks, zip ties, or clips for safe installation.
- Test before finalizing: Check connections and spacing before permanent mounting.
- Opt for smart timers: Automate on/off schedules for convenience and energy savings.
Why This Matters / Understanding the Problem
You’ve got the perfect patio—maybe with a grill, a cozy seating area, or even a fire pit—but at night, it feels a little… dark. You want that warm, inviting glow that makes your backyard feel like an extension of your home, not just a concrete slab under the stars.
That’s where how to string outdoor patio lights across a patio in 2026 comes in. It’s not just about aesthetics. Good lighting boosts safety, extends your outdoor time, and turns your yard into a social hub.
I learned this the hard way after hosting a summer BBQ. Halfway through, the sun dipped, and my guests were squinting at their plates. One even tripped on a step. Not exactly the vibe I was going for.
But after some trial, error, and a few too many tangled strings of lights, I cracked the code. Now, my patio glows like a dream—and so can yours. Whether you’re working with a small balcony or a sprawling backyard, this guide will walk you through the process with real-world tips, common pitfalls, and the tools you actually need.
By the end, you’ll know exactly how to hang lights safely, beautifully, and in a way that lasts through seasons. No more duct-taping wires to trees or using flimsy hooks that fall in the first windstorm.
What You Need
Before we dive in, let’s talk tools and materials. I’ve made the mistake of starting a project without the right gear—don’t be like me. Here’s what you’ll need for how to string outdoor patio lights across a patio in 2026:
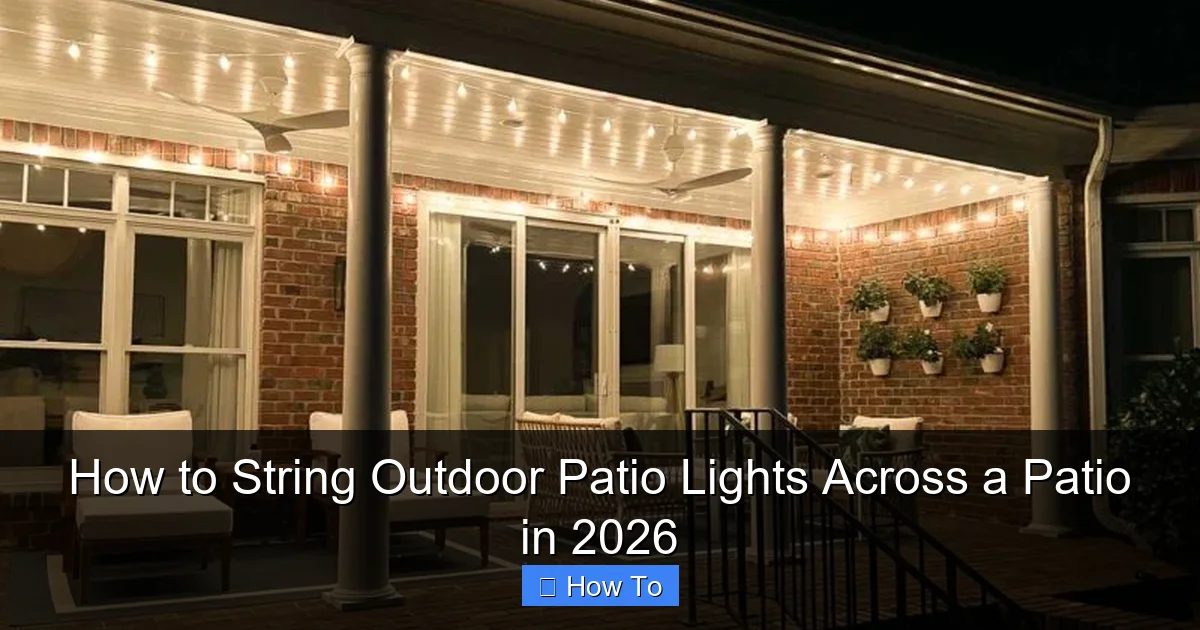
Visual guide about how to string outdoor patio lights across a patio
Image source: drivenbydecor.com
- Outdoor-rated string lights – Look for “wet location” or “damp location” ratings. LED bulbs are energy-efficient and last longer.
- Measuring tape – To plan spacing and avoid overbuying.
- Drill and drill bits – For concrete, brick, or wood surfaces (use masonry bits for hard surfaces).
- Eye hooks, screw eyes, or wall anchors – Choose stainless steel or galvanized to resist rust.
- Zip ties or cable clips – For securing wires along railings or beams.
- Extension cords (outdoor-rated, GFCI-protected) – Safety first. Never use indoor cords outside.
- Voltage tester – Optional but smart if you’re near electrical outlets or wiring.
- Ladder (if needed) – For high ceilings or second-story overhangs.
- String light clips or hooks – Some lights come with these; others need separate purchase.
- Weatherproof sealant (optional) – For sealing screw holes in wood or masonry to prevent water damage.
Pro tip: Buy 10–15% more lights than you think you need. It’s way easier to have extras than to run out mid-installation and wait for shipping.
Step-by-Step Guide to How to String Outdoor Patio Lights Across a Patio in 2026
Step 1: Plan Your Layout (The Secret to a Pro Look)
Before you touch a drill, sketch out your patio on paper or use a free design app. Think about where you want light—over dining tables, around seating areas, or along railings.
Ask yourself: Where do people walk? Where do they sit? Where do shadows fall at dusk?
For how to string outdoor patio lights across a patio in 2026, aim for even spacing. A good rule: lights should be 12–18 inches apart, and 7–8 feet above the ground. That’s high enough to avoid head bumps but low enough to cast warm, usable light.
If your patio has a roof or overhang, you can hang lights from the ceiling. If it’s open, you’ll need posts, trees, or poles at each end.
Example: My 12×16 ft patio has a pergola. I ran two parallel lines of lights from one corner to the opposite, forming a grid. It looked like a cozy outdoor room.
Step 2: Choose Your Mounting Method
Your mounting style depends on your patio’s structure. Here are the most common options:
- Ceiling or beam mounting – Use eye hooks screwed into wood beams or ceiling joists. Great for covered patios.
- Wall or post mounting – Use wall anchors or screw eyes on brick, stucco, or wood posts.
- Freestanding poles – Use metal or PVC poles anchored in planters or weighted bases. Ideal for open spaces.
- Tree or fence mounting – Use tree straps (never nails or screws) or zip ties on fence posts.
I once tried nailing hooks into a cedar post. Big mistake. The wood split, and the lights sagged. Now I use stainless steel eye hooks with a pilot hole—no splitting, no rust.
For masonry (brick, concrete), use a hammer drill with a masonry bit. Drill slowly to avoid cracking. Insert wall anchors, then screw in the hook.
Step 3: Install Mounting Points
Now it’s time to drill. Measure and mark where each hook or anchor will go. Use a level to keep lines straight.
For parallel lines (like a grid), use a long board or string line to ensure all hooks are aligned. Nothing looks worse than crooked lights.
Install one hook at each corner, plus every 3–5 feet in between. If you’re spanning a wide area (over 10 feet), add a center support to prevent sagging.
Pro tip: For long spans, use a tightrope method. Run a strong nylon or steel wire between the end points, then hang lights from that. It reduces strain on your mounting points and keeps the line taut.
Step 4: Test Your Lights Before Hanging
Before you start hanging, plug in your string lights and check every bulb. I can’t tell you how many times I’ve hung a whole line only to find a dead bulb at the end.
Most LED strings have replaceable bulbs or fuses. If one bulb goes out, it doesn’t always kill the whole strand—but it’s easier to fix on the ground than 8 feet up.
Also, test the length. Lay the lights out along your planned path. Do they reach? Are there awkward gaps? Adjust your layout now, not later.
Step 5: Hang the Lights
Start at the power source. That’s usually an outdoor outlet or extension cord. Work outward from there.
Attach the first light to the first hook. Don’t stretch it tight—leave a little slack (about 2–3 inches) at each connection point. This gives room for movement in wind and prevents stress on the wiring.
For how to string outdoor patio lights across a patio in 2026, use the built-in hooks or clips on the lights. If they don’t have any, use small zip ties or S-hooks.
For a grid pattern: Hang one horizontal line, then run vertical lines from it to the opposite side. Use a level to keep everything square.
If using a wire support, clip the lights to the wire with carabiners or plastic clips. This keeps them secure and easy to remove for storage.
Step 6: Manage Power and Wires
Outdoor electrical safety is non-negotiable. Use only GFCI-protected outlets or extension cords. These cut power if they detect a fault—like water or a short.
Route cords along walls, railings, or under furniture. Use cable clips or zip ties to keep them neat and out of foot traffic.
Never daisy-chain more than three light strands unless the manufacturer says it’s safe. Overloading causes overheating and fire risk.
For long runs, use a power distribution box or a multi-outlet outdoor strip. It keeps everything organized and reduces cord clutter.
I once ran a cord across the lawn. Big mistake. It got caught in the lawnmower. Now I use a weatherproof cord cover or bury it shallowly under mulch (with warning tape).
Step 7: Secure and Weatherproof
Once lights are up, go over every connection. Tighten loose hooks. Replace any damaged bulbs.
For wood surfaces, apply a dab of clear silicone sealant around screw holes. It prevents water from seeping in and rotting the wood.
For masonry, use exterior-grade caulk around anchors. It keeps moisture out and extends the life of your setup.
If you live in a windy area, add extra zip ties or clips every 2 feet. Wind can whip lights loose, especially if they’re lightweight.
And if you’re in a cold climate, avoid leaving lights up through winter unless they’re rated for freezing temps. Ice and snow can damage wiring.
Step 8: Test and Adjust
Plug everything in. Walk around the patio. Look for dark spots, glare, or uneven brightness.
Adjust hook positions if lights are too tight or too loose. Tilt bulbs slightly downward if they’re shining in people’s eyes.
For a cozy vibe, aim for 2700K–3000K color temperature (warm white). Avoid cool white (4000K+)—it feels more like a parking lot than a patio.
I like to test at different times. How does it look at 7 PM? 10 PM? With the fire pit on? Adjust until it feels just right.
Pro Tips & Common Mistakes to Avoid
Pro Tip: Use smart outdoor lights with a timer or app control. I use Philips Hue Outdoor—set them to turn on at sunset and off at 11 PM. No fumbling with switches.
Pro Tip: For renters or temporary setups, use adhesive outdoor hooks (like 3M Outdoor). They hold up to 5 lbs and remove cleanly. No drilling, no damage.
Warning: Never use indoor string lights outside. They’re not weatherproof and can short out or catch fire. Always check the label: “Suitable for wet locations.”
Common Mistake: Over-tightening lights. It stresses the wires and can cause internal breaks. Leave a little “give” at each hook.
Common Mistake: Ignoring wind load. If your lights flap in the breeze, they’ll wear out faster. Add extra supports or use heavier-gauge wire.
Pro Insight: I used to hang lights in straight lines. Then I tried a zigzag or crisscross pattern. Game-changer. It adds depth and feels more organic. Great for irregularly shaped patios.
Pro Insight: Use light dimmers or smart plugs to adjust brightness. Sometimes you want full glow; other times, just a soft shimmer. Flexibility is key.
One last thing: Think about maintenance. I clean my lights every spring with a soft cloth and mild soap. It keeps them bright and prevents grime buildup.
And if you’re using planters as bases for poles, fill them with sand or gravel—not just soil. It adds weight and stability.
FAQs About How to String Outdoor Patio Lights Across a Patio in 2026
Q: Can I leave my outdoor string lights up year-round?
A: It depends. If they’re rated for “all-weather” or “wet location” and your area doesn’t get extreme snow or ice, yes. But I recommend taking them down in winter if you’re in a cold climate. Ice can weigh them down and damage wiring. For how to string outdoor patio lights across a patio in 2026, seasonal removal extends their life.
Q: How high should I hang the lights?
A: 7 to 8 feet is ideal. Any lower, and people might bump their heads. Any higher, and the light feels too distant. If you have a high ceiling (like a pergola), you can go up to 9 feet—but use a ladder and a helper to install.
Q: What if my patio has no roof or overhang?
A: Use freestanding poles or attach to nearby trees or fences. I’ve used 8-foot metal poles anchored in large planters filled with sand. They look great and are sturdy. Just make sure the poles are secure—no wobbling.
Q: Can I use solar-powered lights?
A: Yes! Solar string lights are great for areas without outlets. But they need direct sunlight to charge. If your patio is shaded, they might not glow as brightly or last as long. I use solar for accent lighting (like around a garden path), but plug-in for main areas.
Q: How do I prevent lights from sagging in the middle?
A: Add a center support. Install a third hook or pole in the middle of the span. Or use the tightrope method I mentioned earlier—run a support wire first, then hang lights from it. It keeps everything taut.
Q: Are there lights that don’t require drilling?
A: Absolutely! Use adhesive outdoor hooks, magnetic mounts (for metal railings), or clamp-style hooks for pergolas. For renters or temporary setups, these are perfect. Just make sure the surface is clean and dry before applying.
Q: What’s the best way to store lights in the off-season?
A: Coil them loosely (never tightly) and store in a plastic bin with silica gel packs. Keep them in a dry, cool place. I use a labeled bin in my garage. No tangles, no moisture damage.
Final Thoughts
Stringing outdoor patio lights isn’t rocket science—but it is an art. It’s about balance: light and shadow, safety and style, permanence and flexibility.
When done right, how to string outdoor patio lights across a patio in 2026 transforms your space. It’s not just about seeing better at night. It’s about creating a feeling—warmth, welcome, and wonder.
I’ve hosted dinners, movie nights, and even surprise proposals under my lights. They’ve become part of the story of my home.
So grab your tools, sketch your layout, and start small. You don’t need a huge budget or a fancy setup. Just a few good lights, a little planning, and the courage to try.
And if you mess up? That’s okay. I’ve had tangled wires, sagging lines, and one memorable night where a raccoon chewed through a cord. (True story.) But every mistake taught me something.
Now it’s your turn. Turn on the lights, invite someone over, and enjoy your patio—day or night. You’ve earned it.
And hey, if you run into a snag, just remember: the best lighting isn’t perfect. It’s the one that makes you smile.

