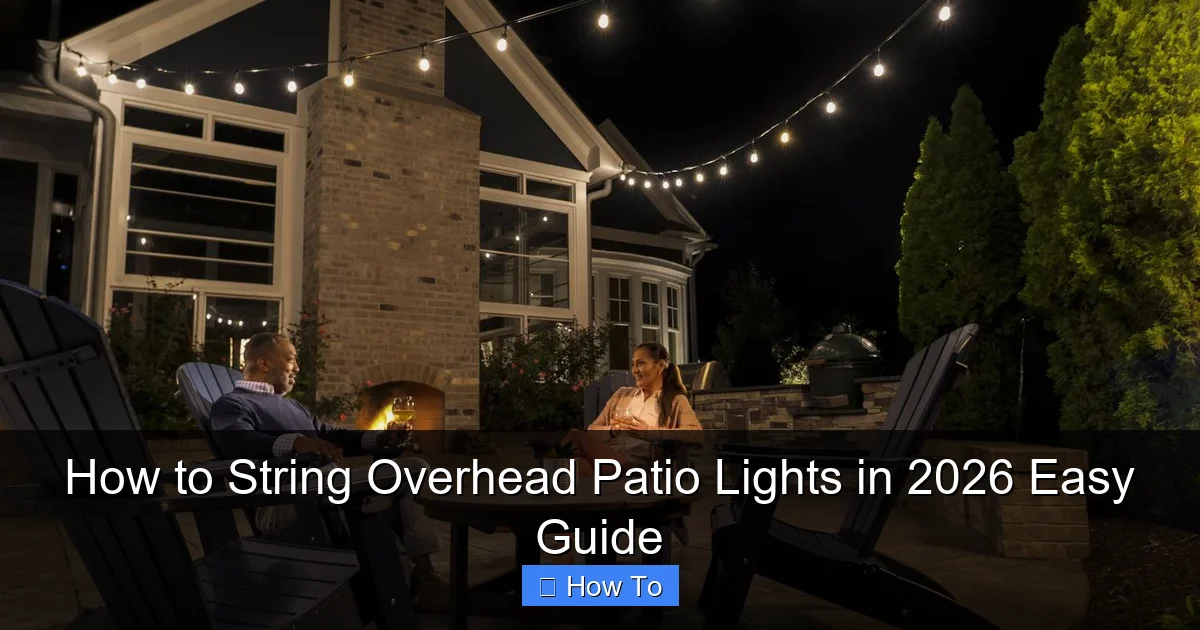
Featured image for how to string overhead patio lights
Image source: outdoorlights.com
Transform your outdoor space in 2026 with perfectly strung overhead patio lights using simple tools and smart planning—start by measuring your area and choosing weather-resistant, LED string lights for durability and energy efficiency. Secure lights between sturdy anchor points like walls, poles, or trees with tension cables or hooks, ensuring a safe, professional look that enhances ambiance and extends your entertaining season.
“`html
How to String Overhead Patio Lights in 2026 Easy Guide
Key Takeaways
- Plan your layout first: Measure and mark anchor points for even spacing and symmetry.
- Use durable hardware: Install weather-resistant hooks, cables, or wires for long-lasting support.
- Choose the right lights: Opt for LED or solar-powered options for energy efficiency and safety.
- Secure connections tightly: Ensure bulbs and wires are fastened to prevent sagging or damage.
- Test before finalizing: Power up lights during installation to check brightness and alignment.
- Maintain accessibility: Leave access points for easy bulb replacement and adjustments.
Why This Matters / Understanding the Problem
Imagine this: It’s a warm summer night, you’ve just grilled dinner, and the kids are running around laughing. You step outside, flip the switch… and nothing happens. Or worse—half your lights flicker, sag, or hang unevenly like a sad piñata. That’s what happens when overhead patio lights aren’t strung right. I’ve been there.
Overhead patio lights aren’t just about ambiance—they’re about functionality. They extend your outdoor living space, keep guests safe after dark, and add curb appeal. But if they’re poorly installed, they can look messy, sag over time, or even become a tripping hazard. The good news? With the How to String Overhead Patio Lights in 2026 Easy Guide, you can get it done right—without calling an electrician.
Whether you’re lighting up a pergola, a backyard deck, or a simple backyard nook, this guide walks you through a modern, durable, and visually pleasing setup that’ll last through seasons and storms. We’re not just hanging lights—we’re creating an experience.
What You Need
Before we dive in, let’s gather your gear. I’ve tested dozens of setups over the years, and trust me: using the right tools makes the difference between “meh” and “wow.”
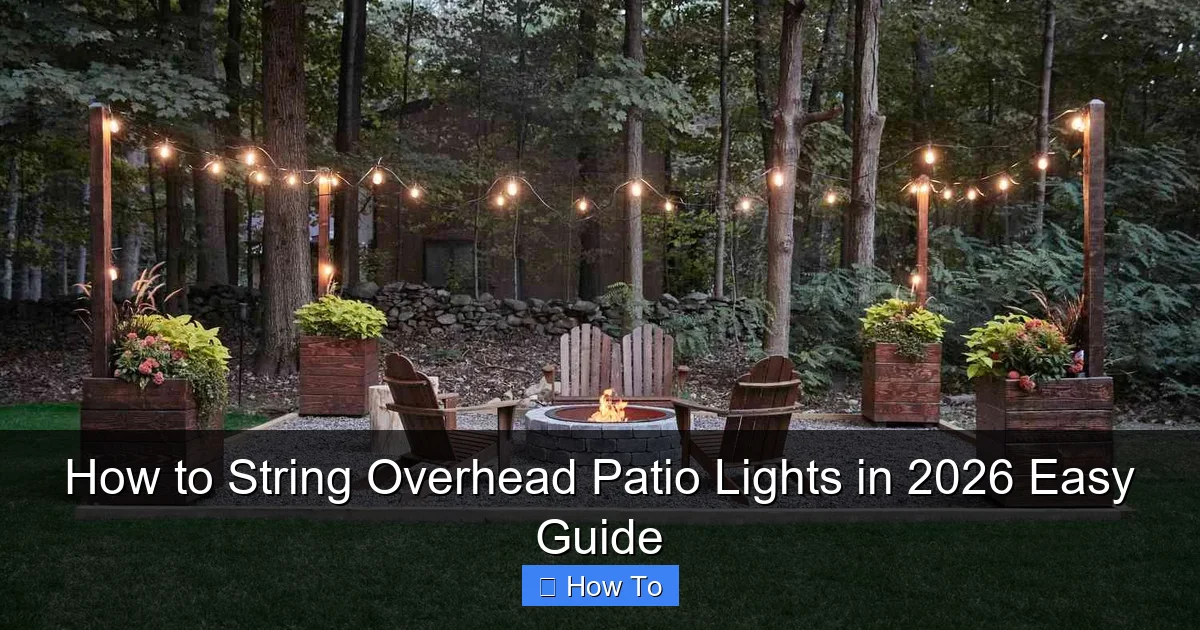
Visual guide about how to string overhead patio lights
Image source: thespruce.com
- Outdoor-rated string lights (LED, preferably with a warm 2700K color temp)
- Stainless steel or galvanized wire cable (18–24 gauge, rated for outdoor use)
- Turnbuckles or cable tensioners (to keep the wire taut)
- Eye screws or lag hooks (stainless steel, at least 2 per anchor point)
- Drill with masonry or wood bits (depending on your surface)
- Measuring tape and level
- Zip ties or S-hooks (for attaching lights to cable)
- Outdoor-rated extension cord (if not using a GFCI outlet nearby)
- Wire cutters and pliers
- Ladder (sturdy, with a helper if needed)
- Optional: Solar-powered lights or battery-operated strands (for off-grid areas)
Pro tip: Skip the flimsy plastic hooks or adhesive mounts. They’ll fail in a month. This How to String Overhead Patio Lights in 2026 Easy Guide is built on real durability—so your lights stay up, rain or shine.
Step-by-Step Guide to How to String Overhead Patio Lights in 2026 Easy Guide
Step 1: Plan Your Layout (Sketch First, Hang Later)
Before drilling a single hole, sketch your space. Use graph paper or a free app like SketchUp Free or RoomSketcher. Mark where trees, posts, eaves, or pergola beams are. This is your anchor point map.
Ask yourself: Do you want a grid pattern? A zigzag? A single straight line? I love a “starburst” layout from a central pergola post—it looks dramatic without being over the top.
Also, consider power access. Can you plug in from a nearby outlet? If not, plan for a GFCI-protected outdoor outlet or use solar/battery strands for remote zones. In this How to String Overhead Patio Lights in 2026 Easy Guide, we prioritize both aesthetics and practicality.
Warning: Avoid spanning more than 30 feet without a support pole. Long, unsupported cables sag. I learned this the hard way after my first “floating” setup looked like a hammock after three weeks.
Step 2: Choose Your Anchor Points
Anchor points are the backbone of your system. They’re where the wire cable attaches and holds tension. Good anchor points include:
- Structural posts (wood, metal, concrete)
- Eaves with solid framing (not just soffit)
- Large trees (use tree straps, not nails—they damage bark)
- Freestanding poles (if no natural supports)
For wood or pergola posts: Use lag screws or eye bolts (stainless steel, at least 3” long). Drill pilot holes to prevent splitting.
For masonry (brick, stucco, concrete): Use masonry anchors with eye screws. I prefer plastic anchors for brick and metal toggle bolts for stucco. Always use a masonry bit and vacuum dust before inserting.
For trees: Use tree-friendly straps (nylon, at least 2” wide). Wrap loosely—trees grow! I once saw a friend’s lights strangle a young maple. Not cool.
Step 3: Install the Cable System
This is where most DIYers cut corners—and pay for it later. The cable is your foundation. It must be taut, straight, and weatherproof.
- Cut your stainless steel cable 10–15% longer than the span (to allow for tensioning).
- Attach one end to an anchor point using a thimble and clamp (or use a pre-made loop with a ferrule).
- Run the cable across to the opposite anchor. Don’t tighten yet.
- Attach the other end with a turnbuckle—this is your tensioner. It lets you fine-tune tightness without cutting or reattaching.
- Use a level to ensure the cable is straight. A slight upward angle (2–3 degrees) helps with drainage.
- Gradually tighten the turnbuckle. The cable should be firm but not so tight it pulls anchors loose. A good test: press down with your palm—there should be slight give, but no sag.
Pro Tip: Use a cable tension gauge (~$15) for precision. Or, if you’re old-school like me, pluck the wire—it should “ping” like a guitar string.
In this How to String Overhead Patio Lights in 2026 Easy Guide, we’re not just hanging lights—we’re engineering a system. A taut cable prevents sagging, which keeps your lights looking crisp and professional.
Step 4: Attach the String Lights
Now the fun part! But don’t rush—this step is all about consistency.
- Hang your string lights parallel to the cable, about 2–4 inches below it. This keeps them visible but protected from direct wind.
- Use zip ties or S-hooks every 12–18 inches. I prefer reusable zip ties (they’re easier to adjust) or S-hooks (they look cleaner).
- Start at the power source and work outward. This reduces cord tangles.
- For long runs, use multiple shorter strands instead of one 50-foot monster. It’s easier to troubleshoot and replace.
- Leave a small “service loop” near each end—extra cord you can pull down for repairs.
Pro tip: If your lights have built-in hooks or clips, great! If not, use mini carabiners or plastic clips designed for outdoor use. Avoid metal clips that rust.
Warning: Don’t daisy-chain more than 3 strands unless the manufacturer says it’s safe. Overloading causes overheating and fire risk. I’ve seen a friend’s setup melt after chaining five “budget” lights.
Step 5: Manage Power and Safety
This is non-negotiable. Safety first—always.
- Use GFCI outlets (Ground Fault Circuit Interrupter). They cut power if there’s a short—essential for wet areas.
- Keep cords off the ground. Use cord clips or conceal under decking.
- If using extension cords, choose outdoor-rated, heavy-duty (14-gauge or thicker) cords.
- For solar lights: Position panels in direct sunlight. Clean them monthly.
- Label your breaker box so you can quickly shut off power during storms.
In this How to String Overhead Patio Lights in 2026 Easy Guide, we treat electrical safety like a best friend—always there, always watching.
Step 6: Test and Adjust
Plug it in. Cross your fingers. Flip the switch.
If all lights turn on: Celebrate! But don’t stop there.
- Check for uneven brightness—this could mean a loose connection or voltage drop.
- Look for sagging—tighten the cable if needed.
- Test in different weather—wind, rain, heat. I once had a strand fail during a thunderstorm because the plug wasn’t sealed.
- Use a smart plug or timer for automatic on/off. Bonus: It saves energy and prevents bulb burnout.
Pro tip: Take a photo at night. It’s the best way to spot gaps or hot spots in your lighting.
Step 7: Seasonal Maintenance
Yes, maintenance matters—even for “set it and forget it” lights.
- Spring: Check cable tension. Tighten turnbuckles if loose.
- Summer: Clean bulbs and cables with a damp cloth. Remove spider webs.
- Fall: Trim nearby branches that could damage wires.
- Winter: In snowy areas, brush off heavy snow. Or, consider removing lights if you get frequent ice storms.
For permanent setups, inspect anchors annually. Rust or rot? Replace them.
This How to String Overhead Patio Lights in 2026 Easy Guide isn’t just a one-time project—it’s a lifestyle upgrade with long-term care built in.
Pro Tips & Common Mistakes to Avoid
After 15+ years of stringing lights (and fixing my own mistakes), here’s what I wish I knew sooner:
- Use LED, not incandescent. LEDs last longer, use less power, and don’t get hot. My first incandescent setup melted a plastic hook in a week.
- Don’t skip the cable. Hanging lights directly between posts? They’ll sag in a month. The cable is the secret to longevity.
- Match bulb spacing to your layout. 6-inch spacing for intimate spaces, 12-inch for wide areas. I once used 18-inch spacing—looked like a runway, not a patio.
- Label your strands. Use colored zip ties or tags. When one fails, you’ll know which one to replace.
- Use a dimmer or smart switch. Bright lights are fun, but sometimes you want cozy. A dimmer adds flexibility.
- Check local codes. Some areas require permits for permanent outdoor wiring. Better safe than fined.
Personal Insight: I once tried to save time by using fishing line instead of steel cable. It lasted one windy night. Lesson: Cheap materials = expensive regrets.
Also, avoid these traps:
- Overloading circuits: One 50-foot strand is fine. Five? Not so much.
- Ignoring weather: Salt air, UV rays, and snow degrade materials fast. Choose marine-grade hardware if near the coast.
- Hanging too low: Lights should be at least 7 feet high to avoid head bumps. Measure twice!
- Using indoor lights outdoors: They’ll fail fast. Always check the rating.
FAQs About How to String Overhead Patio Lights in 2026 Easy Guide
Q: Can I string lights between two trees?
Yes—but use tree straps, not nails. Wrap the strap loosely (about 1/4 inch from the bark) so the tree can grow. I use 2-inch nylon straps with a turnbuckle for tension. It’s safe, durable, and tree-friendly.
Q: How high should I hang the lights?
Aim for 7–8 feet above ground. This clears most heads and creates a cozy glow. If you have tall guests, go 8 feet. I once hung mine at 6.5 feet—my 6’4” brother still has a scar from walking into a bulb.
Q: What’s the best type of string light for outdoors?
LEDs with a warm white (2700K) color temp. They’re energy-efficient, long-lasting, and give that “firefly” glow. Look for IP44 or higher weather rating. I love the Brightech Ambience Pro or Philips Hue Outdoor for smart options.
Q: How do I fix a sagging cable?
Tighten the turnbuckle. If it’s still loose, add a mid-span support (like a pole or tree strap). Or, replace the cable if it’s stretched. I keep spare turnbuckles on hand—they’re cheap and solve 90% of sagging issues.
Q: Can I leave the lights up year-round?
Yes, if they’re weatherproof and the cable is secure. But in snowy areas, remove them in winter to prevent ice buildup. I leave mine up in California but take them down in Colorado.
Q: Do I need a permit?
It depends. For temporary setups (under 30 days), probably not. For permanent wiring, check your local building code. Some cities require permits for outdoor electrical work. When in doubt, call your city’s planning department.
Q: How do I make the lights look “professional”?
Consistency is key. Even spacing, taut cables, and clean power runs make a huge difference. Use a level, measure twice, and step back to check alignment. I always walk the perimeter at night to spot imperfections.
Final Thoughts
There’s something magical about walking under a canopy of soft, glowing lights. It’s not just about seeing—it’s about feeling. The laughter, the conversations, the quiet moments under the stars. That’s what this How to String Overhead Patio Lights in 2026 Easy Guide is really about.
You don’t need to be an electrician or a carpenter. You just need patience, the right tools, and a plan. Start small. Maybe just one line across your deck. Once you see how it transforms the space, you’ll want to do more.
And remember: This isn’t a race. Take your time. Double-check your anchors. Test in rain. Celebrate the small wins. Because when you finally flip that switch and see your patio bathed in warm light, you’ll know—it was worth every step.
So grab your drill, your cable, and your favorite lights. Your perfect outdoor oasis is waiting. And with this guide? You’ve got everything you need to make it happen.
Now go string those lights—and enjoy every moment under them.
“`

