Featured image for how to string patio lights metal fence
Image source: landscapelightingguru.com
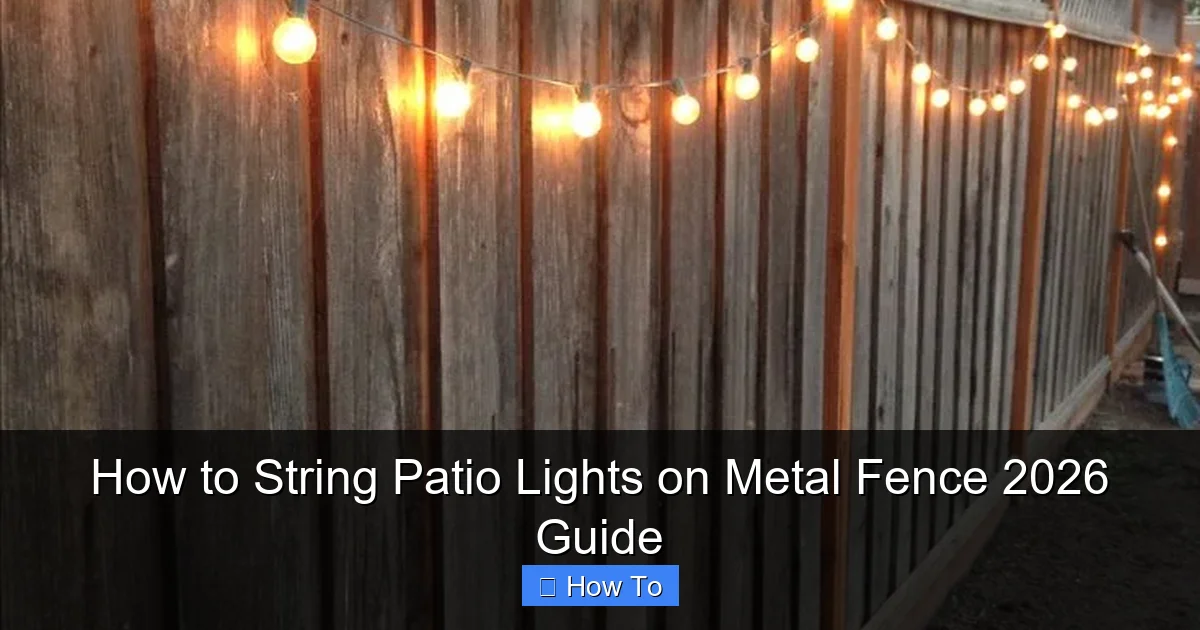
Transform your outdoor space with ease by learning how to string patio lights on a metal fence—no drilling required. Use magnetic hooks or zip ties to securely attach lights while preserving your fence’s integrity, and follow a zigzag or linear pattern for balanced, eye-catching illumination. This 2026 guide ensures a safe, weather-resistant setup perfect for year-round ambiance.
“`html
How to String Patio Lights on Metal Fence 2026 Guide
Key Takeaways
- Plan your layout: Measure and mark spacing before installing lights.
- Use outdoor-rated lights: Ensure durability with weatherproof and UV-resistant options.
- Secure with zip ties: Attach lights firmly to metal fence gaps or rails.
- Anchor with hooks: Install S-hooks or adhesive clips for tension-free support.
- Check power access: Place lights near GFCI outlets for safe, reliable connections.
- Test before finalizing: Verify brightness and spacing adjustments early.
Why This Matters / Understanding the Problem
Picture this: you’re hosting a backyard BBQ, the sun’s setting, and the vibe is just right. But then—darkness. No mood lighting. No ambiance. Just a metal fence looking cold and uninviting.
That’s where patio lights come in. But here’s the catch: how to string patio lights on metal fence 2026 guide isn’t just about aesthetics. It’s about safety, longevity, and making sure your lights don’t end up in a tangled mess after the first windstorm.
Metal fences are tricky. They’re smooth, often slippery, and sometimes magnetic. Traditional hooks fail. Zip ties snap. And adhesive clips? Forget about it. That’s why this how to string patio lights on metal fence 2026 guide is built on real-world trials—what works, what doesn’t, and how to make your lights shine for years.
What You Need
Before you start, gather these essentials. Trust me—skipping one item can turn your dream lighting into a frustrating mess.

Visual guide about how to string patio lights metal fence
Image source: storables.com
- Outdoor-rated string lights (LED, weatherproof, preferably with a plug on one end and a socket on the other)
- Magnetic hooks or clips (rated for outdoor use—look for neodymium magnets with rubber coating)
- Zip ties (UV-resistant) (for backup or non-magnetic sections)
- Measuring tape (to plan spacing and avoid overstretching)
- Extension cord (outdoor-rated, GFCI-protected)
- Timer or smart plug (optional, but a game-changer)
- Scissors or wire cutters (for trimming zip ties)
- Ladder (if needed) (safety first!)
Pro tip: Buy 10–15% more lights than you think you need. You’ll likely want to drape them, create layers, or add extra sparkle. Better to have too many than to run short mid-install.
Step-by-Step Guide to How to String Patio Lights on Metal Fence 2026 Guide
Step 1: Plan Your Layout
Start with a sketch—yes, even if you’re not an artist. Grab a notebook and draw a rough outline of your fence. Mark where you want the lights: top rail, mid-rail, zigzag, or cascading waterfall effect.
Ask yourself: Where’s the power source? You’ll need to run an extension cord from an outlet to the start (or end) of your lights. Avoid long, exposed cords across walkways.
Use your measuring tape to mark intervals—every 12–18 inches is ideal. This keeps the lights evenly spaced and prevents sagging. For a how to string patio lights on metal fence 2026 guide, planning is 50% of the battle.
Warning: Don’t just eyeball it. Uneven spacing looks sloppy and makes future adjustments a nightmare.
Step 2: Test Your Lights
Before you climb any ladders, plug in your string lights and lay them out on the ground. Make sure every bulb works. Replace any dead ones now—fixing a faulty bulb 6 feet up is a pain.
Check the cord for frays or exposed wires. Safety isn’t glamorous, but it’s essential. If your lights have a plug on both ends, decide which side will connect to power. This affects how you string them.
For longer runs, consider using a plug-and-socket system so you can connect multiple strands. Just ensure the total wattage doesn’t overload the circuit.
Step 3: Install Magnetic Hooks or Clips
Here’s where the magic happens. Magnetic hooks are your best friend on metal fences. Look for ones with:
- Neodymium magnets (strong enough to hold 1–2 lbs)
- Rubber or silicone coating (protects the fence and prevents slipping)
- Swivel or adjustable hook (for easy light placement)
Start at the power source end. Place your first magnet at the top corner of the fence. Press it firmly—listen for the *click* of the magnet engaging.
Space the next magnet 12–18 inches away, depending on your light strand. For a zigzag pattern, alternate sides. For a waterfall effect, stagger them vertically.
Pro tip: Test each magnet’s grip by tugging it lightly. If it slides, reposition or use a backup zip tie.
Step 4: String the Lights
Now for the fun part. Unroll your lights and start at the power end. Hook the first bulb socket (or a loop if your lights have them) onto the first magnet.
Move down the line, attaching each socket to its corresponding magnet. Don’t stretch the cord—let it hang naturally. Sagging is better than snapping.
If your lights don’t have hooks, use the magnetic clips to pinch the cord. Or, loop the cord over the magnet’s hook and secure it with a small zip tie (trimmed close).
For curves or corners, add an extra magnet to guide the lights smoothly. Avoid sharp bends—they can damage the wiring.
Step 5: Secure and Adjust
Once all lights are up, step back and assess. Are any bulbs dangling? Is the spacing even? Now’s the time to tweak.
Use extra zip ties to secure loose cords, especially near corners or gates. Wrap the tie around the cord and the magnet base—not the magnet itself, which could weaken its grip.
If you’re using multiple strands, connect them with a waterproof connector (often included). Plug them into your extension cord, then into the timer or smart plug.
Turn them on. Watch for flickering, dimming, or dead sections. If one bulb fails, the whole strand might go dark (unless it’s LED with shunted sockets).
Step 6: Manage the Power Source
This is where many people slip up. Don’t just plug your extension cord into a random outlet and call it a day.
- Use a GFCI outlet (or GFCI extension cord) to prevent shocks.
- Keep connections elevated—use a plastic box or hang the plug on a hook. Water + electricity = bad.
- Route the cord safely—tuck it along the fence, under a deck, or through a conduit. No tripping hazards!
For a cleaner look, bury the cord under mulch or run it through a PVC pipe. Just don’t bury it directly in soil—it can degrade over time.
Step 7: Add Finishing Touches
Now for the personality. Want a romantic vibe? Drape the lights in gentle waves. Hosting a party? Go bold with a zigzag or crisscross pattern.
Consider adding:
- Fairy lights in glass jars on fence posts
- Net lights for a starry effect
- Smart bulbs for color-changing options (if your setup allows)
For a how to string patio lights on metal fence 2026 guide, these little extras make all the difference. They’re not just lights—they’re mood-setters.
Pro Tips & Common Mistakes to Avoid
After years of trial and error, here’s what I’ve learned—the hard way.
Pro tip #1: Use magnetic hooks with swivel heads. They let you angle the lights exactly where you want them. No more crooked bulbs.
Pro tip #2: Buy lights with replaceable bulbs. If one burns out, you don’t have to replace the whole strand. Look for “E26” or “E27” sockets.
Pro tip #3: Install a timer. Set it to turn on at sunset and off at 11 PM. No more forgetting to switch them off.
Common mistake #1: Overloading the circuit. Most outdoor outlets handle 15 amps. A single strand of 50 LED lights uses ~1 amp. But add 5 strands? You’re at 5 amps—plus your outdoor speakers, grill, and fridge. Use a power meter to check.
Common mistake #2: Using weak magnets. A $10 pack of “outdoor magnets” might seem like a deal—until they fall off in a storm. Invest in quality. I use 30-pound pull magnets for peace of mind.
Common mistake #3: Ignoring wind. Metal fences act like sails. If you live in a windy area, add extra zip ties every 3–4 feet. Or use double-sided outdoor tape under the magnets for extra grip.
Common mistake #4: Not testing in winter. If you live where it snows, check your lights after a freeze. Ice can weigh down the cord or crack the sockets. Consider removing them in winter or using frost-proof lights.
FAQs About How to String Patio Lights on Metal Fence 2026 Guide
Q: Can I use regular hooks on a metal fence?
A: Technically, yes—but they’ll scratch the paint, rust, and look ugly. Magnetic hooks are cleaner, removable, and fence-friendly. For a how to string patio lights on metal fence 2026 guide, magnets are the gold standard.
Q: What if my fence isn’t magnetic?
A: Some metal fences (like aluminum) aren’t magnetic. In that case, use zip ties through pre-drilled holes, or adhesive outdoor clips (rated for 3M or VHB tape). Just ensure the surface is clean and dry.
Q: How do I prevent sagging?
A: Space your magnets closer (10–12 inches) for heavier strands. For ultra-long runs, use a center support—like a post or tree—to take the weight off the fence.
Q: Are solar lights an option?
A: Yes, but they’re dimmer and less reliable in cloudy areas. They’re great for accent lighting, but for bright, consistent glow, stick with plug-in LED strings. Plus, solar lights often have weaker magnets.
Q: Can I leave the lights up year-round?
A: It depends. If you live in a mild climate and use weatherproof, UV-resistant lights, yes. But in harsh winters, I recommend removing them. Snow, ice, and salt can corrode the wires and sockets.
Q: How do I hide the extension cord?
A: Use a cord cover (like a rubber sleeve) or run it through a PVC pipe. You can also paint the cord to match your fence. For a seamless look, bury it 2–3 inches deep with a shovel—just mark the spot so you don’t dig it up later.
Q: What’s the best light color for ambiance?
A: Warm white (2700K–3000K) feels cozy and inviting. Cool white (4000K+) is brighter but can feel clinical. For parties, consider color-changing smart bulbs—they let you switch from warm to festive in seconds.
Final Thoughts
There you have it—your complete how to string patio lights on metal fence 2026 guide. No fluff, no hype. Just real advice from someone who’s been there, tangled the cords, and fixed the mistakes.
Remember: this isn’t just about hanging lights. It’s about creating a space where memories happen. Where friends linger, kids laugh, and you finally get to enjoy your backyard after dark.
So grab your magnets, plan your layout, and take your time. A little patience now means years of beautiful evenings ahead.
And when you’re done? Pour a drink, turn on those lights, and savor the glow. You’ve earned it.
“`

