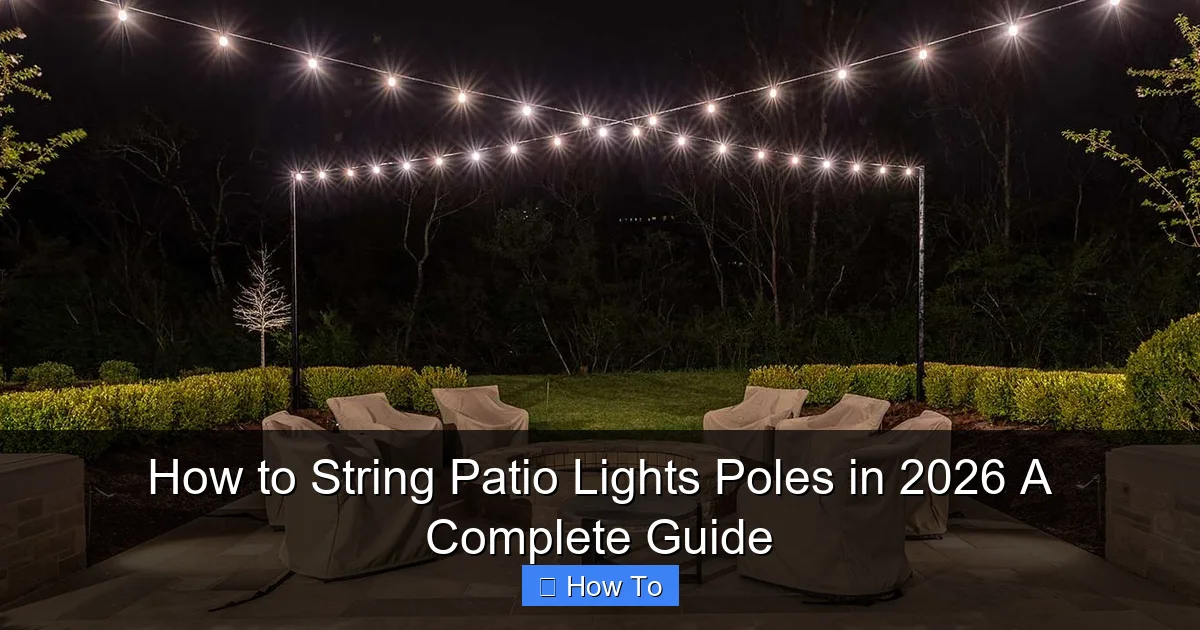
Featured image for how to string patio lights poles
Image source: lightupnashville.com
Stringing patio lights on poles in 2026 is easier than ever with modern, weather-resistant materials and smart spacing techniques. Ensure poles are securely anchored and spaced 8–10 feet apart for optimal support and visual appeal, using adjustable hooks or tension cables to maintain a clean, professional look. Always follow manufacturer guidelines and integrate smart lighting controls for effortless ambiance.
“`html
How to String Patio Lights Poles in 2026: A Complete Guide
Key Takeaways
- Plan spacing first: Measure and mark pole positions for even light distribution.
- Use weatherproof materials: Choose UV-resistant strings and rust-proof poles for durability.
- Secure poles properly: Anchor them with concrete or weighted bases for stability.
- Test lights before hanging: Ensure all bulbs work to avoid mid-installation fixes.
- Keep wires tidy: Use zip ties or clips to prevent tripping hazards.
- Adjust height for ambiance: Hang lights 7–8 feet high for optimal glow.
- Follow local codes: Check electrical and zoning rules for outdoor installations.
Why This Matters / Understanding the Problem
Let’s be real—nothing ruins a summer evening like a dark, uninviting patio. You’ve got the grill fired up, the playlist is perfect, but the space feels meh without that soft, ambient glow. That’s where string lights come in. But if you’ve ever tried to hang them between poles and ended up with a droopy mess, you’re not alone. Learning how to string patio lights poles in 2026 isn’t just about aesthetics—it’s about creating a space that feels warm, safe, and truly yours.
Over the years, I’ve learned that the secret isn’t just in the lights themselves, but in how you string them. Whether you’re using existing posts or building new ones, the technique matters. In this guide, I’ll walk you through the entire process—from planning to final adjustments—so you can achieve a professional-looking setup without the frustration. This isn’t just a tutorial; it’s a complete guide built on real-world trial, error, and a few “why didn’t I think of that?” moments.
What You Need
Before we dive in, let’s gather everything. I’ve made the mistake of starting without the right gear, only to realize halfway through that I’m missing a key tool. Don’t be like me. Here’s your patio lights pole setup checklist:
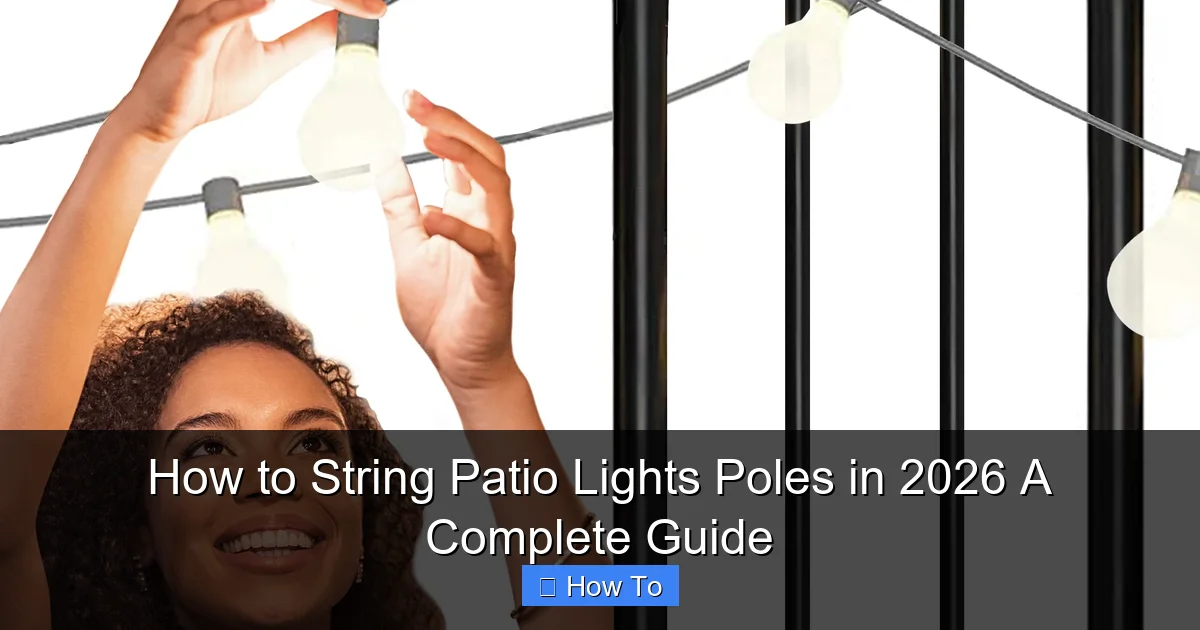
Visual guide about how to string patio lights poles
Image source: m.media-amazon.com
- String lights (LED, weatherproof, preferably with a plug at one end)
- Support poles (metal, wood, or PVC; 8–12 ft tall, depending on your space)
- Anchor system (ground sleeves, concrete footings, or auger anchors)
- Turnbuckles or cable tensioners (to prevent sagging)
- Eye hooks or lag screws (for attaching lights to poles)
- Measuring tape and string (for layout planning)
- Drill and drill bits (for pilot holes and anchors)
- Level (to ensure poles are straight)
- Wire clips or zip ties (for clean, secure runs)
- Extension cords (outdoor-rated) and timer (optional but highly recommended)
Pro tip: If you’re not building permanent poles, consider using existing structures like trees, pergolas, or fences—just make sure they can handle tension. But for a clean, modern look, dedicated poles are worth the effort.
Step-by-Step Guide to How to String Patio Lights Poles in 2026 A Complete Guide
Step 1: Plan Your Layout (Measure Twice, Hang Once)
Start by sketching your patio area on paper or using a digital tool like Google SketchUp or even a napkin (I’ve done it!). Decide where you want the poles—usually at the corners of a seating area or along a walkway. The goal is to create a “room” with light.
Measure the distance between poles. For standard string lights (10–20 ft runs), keep spans under 15 feet to avoid sagging. If your space is larger, add a center pole. Use string and stakes to mark pole locations on the ground. This helps visualize the setup before you commit.
Warning: Avoid placing poles too close to high-traffic areas. You don’t want someone walking into a pole at night. Aim for at least 7 ft of clearance around each.
Step 2: Choose and Install Your Poles
Now comes the heavy lifting—literally. You’ve got a few options:
- Metal T-posts or rebar: Affordable, easy to install. Use ground sleeves for quick setup.
- Wooden 4x4s: More rustic. Seal with exterior-grade stain and use concrete footings.
- PVC conduit: Lightweight and weather-resistant, but less sturdy in wind.
For permanent installations, dig holes 18–24 inches deep and 6–8 inches wide. Place the pole, fill with concrete, and use a level to ensure it’s straight. Let cure for 24–48 hours. For temporary setups, auger anchors or ground sleeves work well—no digging needed.
Pro tip: If using wood, drill pilot holes for eye hooks to prevent splitting. For metal, weld or bolt on eyelets, or use heavy-duty U-bolts.
Personal insight: I once used untreated wood poles in a rainy climate. After one season, they warped and cracked. Lesson learned: always use pressure-treated wood or metal for longevity.
Step 3: Mark and Install Attachment Points
With poles in place, it’s time to mark where the lights will attach. Most string lights have clips or loops every 6–12 inches. Plan your attachment points to match these intervals. Use a measuring tape and mark spots with a pencil or tape.
Install eye hooks or lag screws at each mark. For wood, pre-drill and screw in at a slight upward angle to help shed water. For metal, use a drill with a metal bit and secure with lock washers. If your poles have pre-drilled holes, use those—just make sure they’re aligned across all poles.
Common mistake: Installing hooks too low. Aim for 7–8 ft above ground to keep lights out of headspace but still within reach for maintenance.
Step 4: String the Lights (The Fun Part!)
Now for the magic. Start by plugging in your lights and testing them. There’s nothing worse than finishing a setup only to find a bulb is out. Use zip ties or wire clips to attach the first light to the starting pole’s eye hook. Pull the string taut but not stretched—think “snug,” not “straining.”
Move to the next pole, guiding the lights through each hook. For longer runs, use a turnbuckle or tensioner in the middle to prevent sagging. I like to attach the turnbuckle to a center hook and run the lights through it—this lets me adjust tension later.
If you’re connecting multiple light strands, use outdoor-rated extension cords. Avoid daisy-chaining more than 3 strands to prevent overload. Use a timer (smart or mechanical) to automate on/off times—no more forgetting to turn them off!
Pro tip: For a “floating” effect, run lights in a zigzag or crisscross pattern between poles. Just ensure each segment has its own tensioner to avoid pulling on adjacent runs.
Step 5: Secure and Tension the Lights
Once all lights are strung, it’s time to fine-tune. Walk the entire length and check for:
- Sagging: Adjust turnbuckles or add more clips for support.
- Twisting: Rotate bulbs to face downward for optimal light.
- Loose connections: Tighten zip ties or clips.
For permanent setups, use weatherproof sealant on screw threads to prevent rust. If you’re in a windy area, consider adding a secondary support line (like a thin cable) beneath the lights for extra stability.
Real-life example: Last year, I skipped tensioning and woke up to a light “web” after a storm. Now I always test the setup with a gentle tug—if it moves more than an inch, I adjust.
Step 6: Power and Automation
Plug your lights into an outdoor GFCI outlet (safety first!). Use a weatherproof outlet cover to protect connections. If your patio is far from a power source, bury a conduit or use a heavy-duty extension cord rated for outdoor use.
For convenience, add a smart timer or Wi-Fi plug. I use one that turns the lights on at sunset and off at midnight—no fumbling in the dark. Bonus: it syncs with my phone, so I can control it from inside.
Step 7: Final Check and Maintenance Plan
Before you celebrate, do a full inspection:
- Are all bulbs working?
- Are poles stable?
- Are wires hidden or secured (no tripping hazards)?
Create a maintenance schedule: clean bulbs monthly, check for loose screws quarterly, and inspect for weather damage before each season. For permanent setups, replace bulbs as needed—LEDs last years, but they’re not immortal.
Personal insight: I keep a spare bulb and zip ties in a labeled outdoor box. It’s saved me more than once during a party!
Pro Tips & Common Mistakes to Avoid
After years of trial and error, here’s what I’ve learned:
- Use LED lights: They’re energy-efficient, cool to the touch, and last 10x longer than incandescent.
- Plan for growth: Leave extra wire or pole space if you might add more lights later.
- Think about light color: Warm white (2700K–3000K) creates a cozy vibe; cool white (4000K+) feels modern but can feel harsh.
- Don’t over-tension: Too much pull can bend poles or break clips. Aim for a gentle curve, not a straight line.
- Use a laser level: When installing multiple poles, a laser level ensures they’re perfectly aligned.
Warning: Avoid using zip ties on metal poles long-term—sunlight degrades the plastic. Use stainless steel clips instead.
And a final thought: how to string patio lights poles in 2026 isn’t just about the hardware. It’s about creating a mood. Don’t rush the design phase. Play with different layouts, test light angles, and involve your family or friends. The best setups feel intentional, not accidental.
FAQs About How to String Patio Lights Poles in 2026 A Complete Guide
Q: Can I use existing trees instead of poles?
A: Absolutely! Just wrap lights around the trunk or use tree-friendly clips. But remember—trees grow and sway, so check tension seasonally. For a stable, even glow, poles are still the gold standard.
Q: How do I prevent lights from sagging in the middle?
A: Use a turnbuckle, tensioner, or add a center support pole. I like to run a thin cable between poles and attach lights to it—like a suspension bridge. Works like a charm.
Q: What’s the best way to power lights if there’s no outlet nearby?
A: Bury a conduit with outdoor-rated wiring, use a heavy-duty extension cord (rated for wet locations), or consider solar-powered lights. Solar is great for low-power setups but may not be bright enough for large areas.
Q: Are there lights designed for pole installations?
A: Yes! Look for “pole-mounted” or “outdoor linear” lights. Some brands sell kits with built-in tensioners and mounting hardware. They’re pricier but save time and hassle.
Q: How do I take down the lights for winter?
A: If your setup is semi-permanent, leave the poles and just remove the lights. Store them in a dry place. For full removal, unscrew clips and coil lights loosely (no tight knots!). Use a storage reel or bag.
Q: Can I use string lights for a pergola or gazebo?
A: Definitely. Run lights along the beams or between posts. For a “canopy” effect, string them in a crisscross pattern. Just ensure the structure can handle the weight and tension.
Q: What if I have a sloped yard?
A: Adjust pole heights to create a level “plane” for the lights. Use a laser level to mark equal heights on each pole. It’s worth the extra effort for a polished look.
Final Thoughts
There you have it—a complete guide to transforming your patio into a glowing retreat. Mastering how to string patio lights poles in 2026 isn’t just about following steps; it’s about creating a space that invites connection, relaxation, and joy. Whether you’re building a permanent setup or a seasonal display, take your time. The best results come from thoughtful planning and a little patience.
Remember: start small. Try one pole run first, then expand. And don’t stress about perfection. A few sags or twists add character—what matters is that you love the result. So grab your tools, call a friend, and get stringing. Your dream patio is just a few clips away.
And when you’re done? Pour yourself a drink, turn on those lights, and enjoy the magic. You’ve earned it.
“`

