Featured image for how to string up outdoor patio lights
Image source: optic.nordarchitecture.com
Transform your outdoor space in minutes by choosing durable, weather-resistant LED string lights designed for 2026’s top patio trends. Mount them securely using adjustable hooks or tension cables along railings, pergolas, or fences, ensuring even spacing and a professional look—no electrician needed. Always connect to a GFCI outlet and use a timer for safety, energy savings, and effortless ambiance all season long.
“`html
How to String Up Outdoor Patio Lights in 2026 Easy Guide
Key Takeaways
- Plan your layout: Sketch the area to optimize spacing and coverage.
- Choose weatherproof lights: Select durable, outdoor-rated string lights for longevity.
- Use secure anchors: Install hooks or eye bolts for safe, stable mounting.
- Measure carefully: Account for bulb spacing and extension cord reach.
- Test before installing: Check lights for defects to avoid mid-installation issues.
- Follow safety guidelines: Avoid overloading circuits and use GFCI outlets.
Why This Matters / Understanding the Problem
Let’s be honest—nothing ruins a summer evening like realizing your patio is too dark for a simple dinner under the stars. I’ve been there. Last year, I hosted a backyard barbecue, and halfway through, we were squinting at our plates like we were dining in a cave.
That’s when I decided to learn how to string up outdoor patio lights in 2026 easy guide—not just for ambiance, but for real, functional outdoor living. Whether you’re hosting a party, enjoying a quiet night, or just want to make your backyard feel more inviting, the right lighting changes everything.
But here’s the catch: it’s not as simple as hanging a few strings and calling it a day. Poor placement, sagging lights, or tangled cords can turn your dreamy setup into a safety hazard. The good news? With a little planning and the right approach, you can create a magical, safe, and long-lasting outdoor lighting system—no electrician required.
This guide walks you through every step, from picking the right lights to securing them safely. Whether you’re a DIY newbie or a weekend warrior, this how to string up outdoor patio lights in 2026 easy guide is designed to be your go-to resource for a stress-free, beautiful result.
What You Need
Before you start, gather your tools and materials. Trust me, nothing kills momentum like running to the hardware store mid-project.
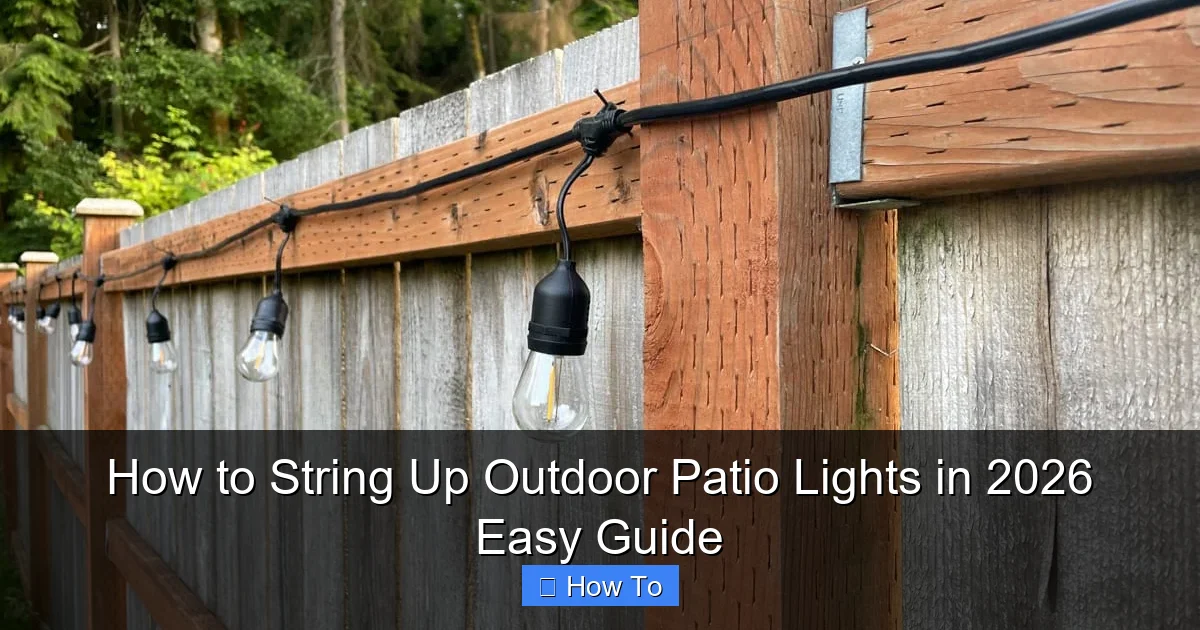
Visual guide about how to string up outdoor patio lights
Image source: jessicawellinginteriors.com
- Outdoor-rated string lights: Look for LED, weatherproof, and with a UL or ETL safety rating. I prefer warm white (2700K–3000K) for a cozy glow.
- Measuring tape: Essential for planning spacing and avoiding overbuying.
- Drill and drill bits: For installing hooks, anchors, or eye screws.
- Stainless steel or outdoor-rated hooks/eye screws: Avoid rust-prone materials.
- Zip ties or cable clips: For securing cords and preventing sagging.
- Ladder (if needed): For reaching eaves or high points.
- Extension cords (outdoor-rated): With built-in surge protection.
- Timer or smart plug: So your lights turn on at sunset and off at bedtime.
- Optional: Light clips or gutter hooks: Great for metal or vinyl gutters.
Pro Tip: Buy 10–15% more lights than you think you need. You’ll likely want to adjust spacing or add a few extra strands for full coverage.
Step-by-Step Guide to How to String Up Outdoor Patio Lights in 2026 Easy Guide
Step 1: Plan Your Layout (Measure, Sketch, and Think)
Before you touch a light, grab a notebook or use a free app like SketchUp Free or Google’s Floor Plan Creator. Sketch your patio, marking trees, posts, eaves, and any obstacles.
Ask yourself: Where do people gather? Where do I want to see clearly? Dining areas, seating zones, and pathways benefit most from lighting.
Then, measure the distance between anchor points. For example, if you’re stringing from a pergola post to a tree 15 feet away, you’ll need at least that length in lights—plus extra for sag (we’ll cover that in a sec).
Warning: Don’t assume your lights are long enough. I once bought a 25-foot strand for a 20-foot span—and it barely reached. Always add 10% extra for slack and connections.
Step 2: Choose the Right Lights for Your Space
Not all outdoor lights are created equal. Here’s what I’ve learned after testing five different brands:
- LED vs. Incandescent: LED wins every time. They’re cooler, use 75% less energy, and last 25,000+ hours. Incandescents burn out faster and get hot.
- Bulb Shape: Edison-style bulbs give a vintage feel. Globe lights are softer. Choose based on mood, not trends.
- Connectability: Some lights plug into each other (end-to-end). Others need separate power sources. If your patio is large, go for connectable strands to minimize outlets.
- Weather Resistance: Look for IP44 or higher. IP44 means it’s splash-proof; IP65 is fully waterproof. For areas with rain or snow, aim for IP65.
For a 20×15 ft patio, I recommend 3–4 strands of 25-foot LED lights (warm white, Edison-style, connectable). That gives even coverage without overdoing it.
Real Talk: I tried solar lights last year—they looked great at first, but by 9 p.m., they were dim or off. Stick with plug-in for consistent brightness.
Step 3: Install Anchor Points (The Foundation of a Tight, Safe Setup)
This is where many people skip ahead and regret it later. Sagging lights? That’s often because anchor points are weak or too far apart.
For wood surfaces (fences, pergolas, eaves), use stainless steel eye screws (1.5–2 inches long). Drill a pilot hole first to prevent splitting. Space them 4–6 feet apart. For longer spans (10+ feet), add a center support to prevent drooping.
For brick, stucco, or concrete, use masonry anchors and hooks. Drill slowly with a masonry bit. I use a laser level to keep hooks aligned—no crooked lines!
On metal gutters? Use gutter clips. They grip the edge without drilling. Just snap them on.
For trees, use tree-friendly straps or adjustable hooks. Never wrap lights directly around a tree trunk—it can damage bark and restrict growth.
Pro Tip: Use a level to make sure your hooks are even. A 1-inch drop over 10 feet is noticeable. A level saves you from “why are the lights crooked?” complaints.
Spacing Matters
For a balanced look, keep anchor points 4–6 feet apart. Closer spacing = tighter, more dramatic look. Wider spacing = softer, more open feel. I like 5 feet for most patios—it’s the Goldilocks zone.
Step 4: Hang the Lights (Start at the Power Source)
Here’s a golden rule: start at the power source. Plug in the first strand near an outdoor outlet. Then, work outward.
Attach the first hook, drape the light strand, and move to the next. Don’t stretch the lights—let them hang naturally. A little sag (10–15%) is normal and even desirable. Too tight = stress on cords and hooks.
If you’re connecting multiple strands, plug them in before hanging. That way, you can test each one and avoid surprises.
For corners or turns, use a hook at the vertex. Loop the cord gently—don’t kink it. If the light has a built-in hook or loop, use it. If not, a zip tie around the cord (not the wire!) works.
Warning: Never hang lights while they’re plugged in. I learned this the hard way when I got a mild shock from a frayed cord. Unplug, hang, then plug in.
Step 5: Secure Cords and Prevent Tripping Hazards
Exposed cords are a tripping risk—and a pet or kid hazard. I’ve seen dogs chew through extension cords (RIP, Mr. Wiggles’ favorite chew toy).
Use zip ties, cable clips, or raceways to run cords along walls, under railings, or through conduit. For ground-level cords, use cord covers or bury them in mulch (not soil—moisture kills insulation).
If you’re running cords across a walkway, use a ramp-style cord cover. They’re low-profile and safe for foot traffic.
For long runs, consider a junction box or weatherproof outlet box to connect strands safely. No daisy-chaining more than 3–4 strands—check your light’s manual.
Step 6: Test, Adjust, and Fine-Tune
Once everything’s up, turn on the lights at dusk. Walk around. Look for:
- Uneven brightness (a sign of voltage drop—add a new power source)
- Sagging (tighten or add a center hook)
- Glare (angle lights downward or use diffusers)
- Dark spots (add a small spotlight or extra strand)
I like to test for a week before finalizing. Weather changes everything—wind can shift lights, rain can expose weak spots.
Pro Tip: Use a smart plug with a sunset-to-sunset timer. I use a Kasa smart plug—it syncs with local sunrise/sunset times. No more forgetting to turn lights on.
Step 7: Maintain for Longevity (Yes, It Matters)
Good news: LED string lights can last 5–10 years if you care for them. Bad news: neglect shortens that fast.
Seasonal maintenance:
- Spring: Check for frayed cords, loose hooks, and bulb burnout. Replace any damaged strands.
- Summer: Clean bulbs with a dry cloth. Remove leaves or debris that could trap moisture.
- Fall: Trim branches near lights. Wind can whip branches and break bulbs.
- Winter: In snowy climates, remove lights or use weatherproof covers. Snow load can break hooks.
If you leave lights up year-round, invest in a light storage bag for off-season. I use a breathable canvas bag—no mold, no tangles.
Pro Tips & Common Mistakes to Avoid
After stringing up lights for my patio, my sister’s, and three neighbors, I’ve seen it all. Here’s what separates a pro setup from a DIY disaster:
Pro Tips
- Use a laser level: It’s a $20 tool that saves you hours of “is it straight?” doubt.
- Go modular: Use connectable strands with separate power sources. If one fails, you’re not in the dark.
- Layer your lighting: Combine string lights with path lights or uplights. It adds depth.
- Think about shadows: Lights behind furniture create cozy pockets. Lights overhead are better for visibility.
- Use a dimmer: Some LED strands are dimmable. It’s perfect for setting the mood.
Common Mistakes
- Overloading outlets: One outdoor outlet should handle no more than 1,500 watts. Most LED strands use 10–20 watts. Do the math.
- Ignoring voltage drop: Long runs of lights get dimmer toward the end. Add a new power source every 3–4 strands.
- Using indoor lights outside: They’ll fail fast. Always check the rating.
- Hanging in wind: Wind can snap hooks or tangle cords. Wait for a calm day.
- Skipping the timer: Manual on/off is a pain. A timer is a game-changer.
Real Story: My neighbor hung lights with zip ties directly on his wooden fence. By winter, the UV had weakened the ties, and the lights crashed down in a storm. Stainless steel hooks > zip ties.
FAQs About How to String Up Outdoor Patio Lights in 2026 Easy Guide
Can I leave outdoor string lights up year-round?
You can, but it’s not ideal. In snowy or rainy climates, moisture can damage cords and shorten lifespan. I recommend taking them down in winter or using weatherproof covers. In mild climates (like coastal California), leaving them up is fine—just check for wear every few months.
How many strands can I connect together?
Check your light’s manual. Most LED strands let you connect 3–5. Never exceed the manufacturer’s limit. Overloading can cause overheating or fire. For large patios, use multiple power sources instead of daisy-chaining.
What’s the best way to hang lights on a pergola?
Use eye screws on the crossbeams. Space them 4–6 feet apart. For a “canopy” look, run lights in a grid pattern. For a “draped” look, hang them in parallel lines. I prefer parallel—it’s cleaner and less cluttered.
Can I use solar-powered outdoor lights?
Solar lights are eco-friendly but inconsistent. They depend on sunlight, and in cloudy areas, they may only glow for 2–3 hours. Use them for accent lighting (pathways, garden beds), not main patio illumination. For reliable brightness, stick with plug-in.
How do I prevent lights from sagging?
Use closer anchor points (4–5 feet), add a center support for spans over 10 feet, and avoid over-stretching. A little sag is normal—aim for a 10–15% drop. For a super-tight look, use tension wire (like a clothesline) and attach lights to it.
Are LED string lights safe for pets and kids?
Yes, if installed correctly. LEDs run cool, so no burn risk. But cords can be a chewing hazard. Use cord covers or run them out of reach. Also, ensure bulbs are securely attached—no loose parts to swallow.
Can I install outdoor lights without drilling?
Yes! Use:
- Gutter clips (for metal/vinyl gutters)
- Adhesive hooks (for smooth, clean surfaces)
- Tree-friendly straps (for trees)
- Weighted bases (for free-standing poles)
Just remember: adhesive hooks may fail in extreme heat or cold. Test one first.
Final Thoughts
Learning how to string up outdoor patio lights in 2026 easy guide isn’t just about hanging bulbs—it’s about creating a space where memories happen. I’ve had countless conversations under my lights, from family dinners to late-night talks with friends.
The key? Plan, use quality materials, and don’t rush. A well-lit patio isn’t just functional—it’s emotional. It says, “Welcome. Stay a while.”
Start small. Try one strand. Test it. Adjust. Then expand. And remember: the best lighting is the kind that feels effortless. With this guide, you’re not just installing lights—you’re building an atmosphere.
Now go grab your tools, pick a calm evening, and light up your outdoor life. Your patio—and your guests—will thank you.
“`

