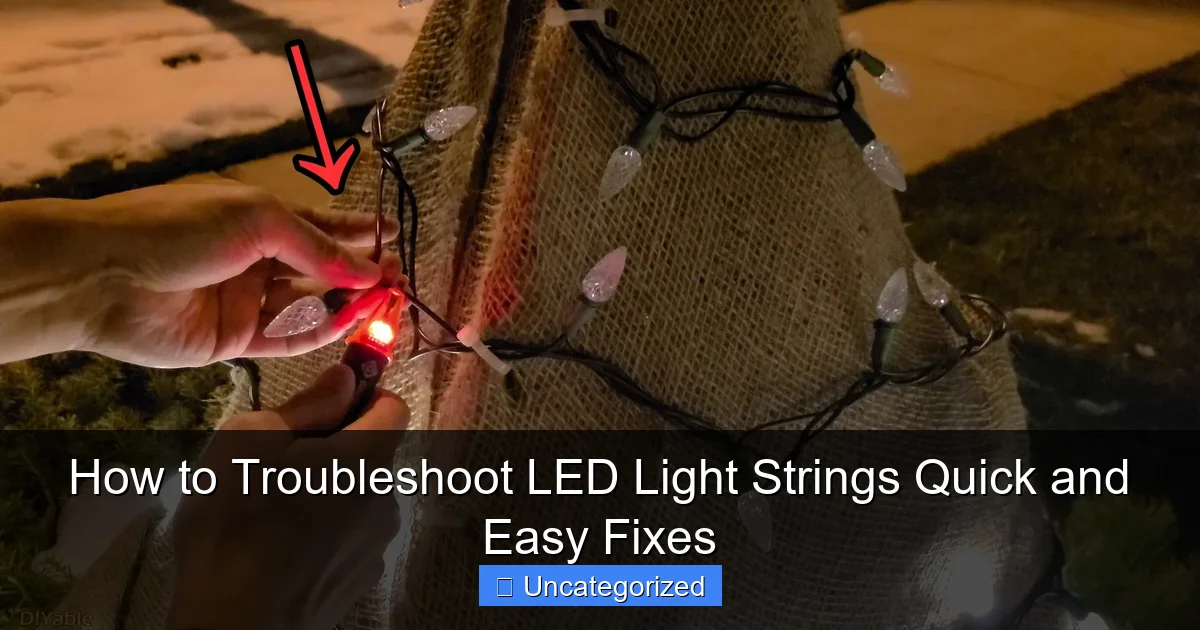
Featured image for how to troubleshoot led light strings
Image source: diyable.com
Most LED light string issues stem from loose bulbs or faulty connections—always check these first for a quick fix. Learn to identify common problems like flickering, partial outages, or complete failure using simple tools like a bulb tester or spare fuses. With basic troubleshooting steps, you can revive your lights in minutes without replacing the entire set.
How to Troubleshoot LED Light Strings Quick and Easy Fixes
Key Takeaways
- Check power sources first: Ensure plugs and batteries are functional and properly connected.
- Inspect for damaged bulbs: Replace any cracked, loose, or burnt-out LEDs immediately.
- Test with a multimeter: Verify voltage levels to pinpoint circuit issues accurately.
- Look for frayed wires: Repair or replace damaged sections to restore full functionality.
- Use a spare controller: Swap remotes to rule out control unit malfunctions.
- Store properly post-use: Prevent tangles and wire damage for longer lifespan.
Why This Matters / Understanding the Problem
It’s the holiday season, or maybe you’re setting up mood lighting for a party, and suddenly—your LED light strings go dark. One section flickers, another stays off, and you’re left wondering if you need to toss the whole strand. But here’s the good news: most LED light string issues are fixable, and you don’t need to be an electrician to solve them.
Whether it’s a burned-out bulb, a loose connection, or a faulty power supply, learning how to troubleshoot LED light strings quick and easy fixes can save you time, money, and frustration. These lights are more durable than old incandescent strands, but they still have weak points. The key is knowing where to look and what to do.
Unlike traditional holiday lights, LED strings use semiconductor diodes that last longer and use less energy. But their wiring, sockets, and control boxes can still fail. The good news? Most problems are isolated and easy to identify. This guide walks you through the most common issues and gives you practical, step-by-step solutions.
By the end, you’ll know exactly how to troubleshoot LED light strings quick and easy fixes—whether it’s for indoor decor, outdoor displays, or seasonal decorations. No guesswork. No wasted trips to the store. Just clear, actionable steps.
What You Need
Before you start, gather these basic tools and supplies. You probably already have most of them at home.
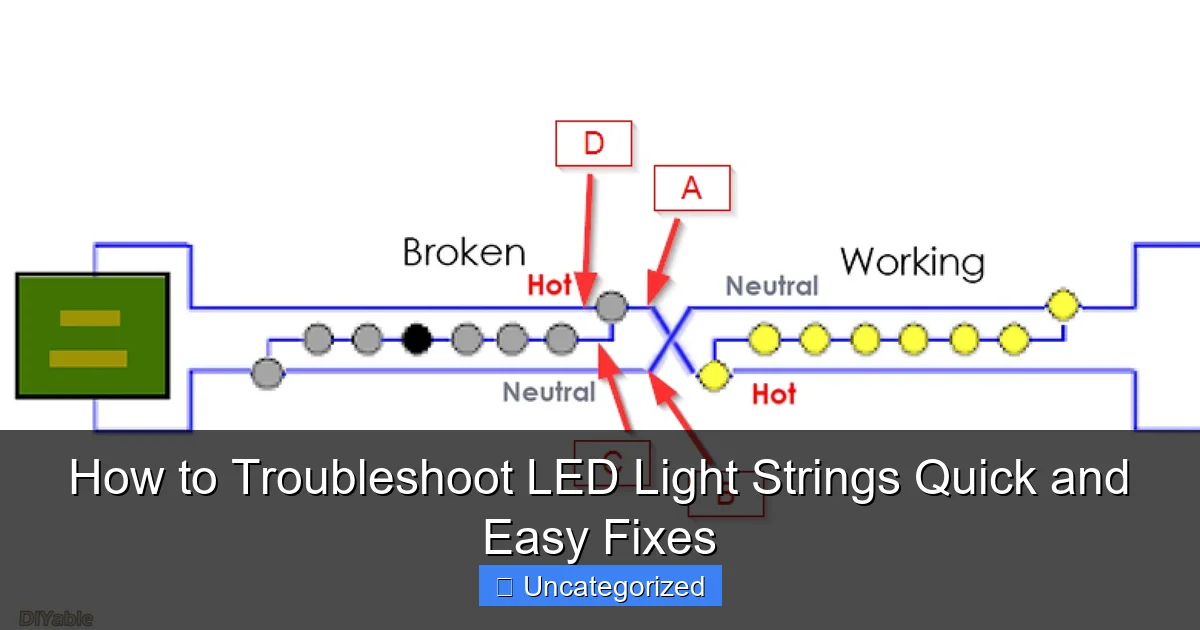
Visual guide about how to troubleshoot led light strings
Image source: diyable.com
- LED light string (the one you’re fixing)
- Replacement LED bulbs (if available; check the model number)
- Multimeter (optional but helpful for testing voltage and continuity)
- Needle-nose pliers (for gently removing bulbs)
- Small flathead screwdriver (for opening sockets or control boxes)
- Electrical tape (for securing loose wires)
- Wire cutters/strippers (if you need to cut and re-solder)
- Magnifying glass (to inspect tiny solder joints or cracks)
- Work light or flashlight (to see clearly in dark areas)
- Notepad and pen (to track which section is faulty)
Pro tip: If you don’t have a multimeter, many auto parts stores or hardware shops rent or lend them for free. Or, use a simple continuity tester—cheap and effective for basic checks.
You don’t need high-tech gear to fix LED light strings. The goal is to keep it simple. The tools above will help you diagnose and repair 90% of common issues. And remember: how to troubleshoot LED light strings quick and easy fixes starts with having the right tools on hand.
Step-by-Step Guide to How to Troubleshoot LED Light Strings Quick and Easy Fixes
Step 1: Unplug and Inspect the Power Source
Always start by unplugging the light string from the outlet. Safety first. Even if the lights are off, there could be residual current.
Check the plug, power adapter (if it’s a low-voltage string), and the first few feet of the cord. Look for:
- Burn marks or melted plastic
- Frayed or exposed wires
- Loose connections at the plug or transformer
If you see damage, stop here. A frayed power cord is a fire hazard. Either repair it with electrical tape (temporarily) or replace the string.
Warning: Never use LED light strings with exposed or cracked power cords. It’s not worth the risk.
For low-voltage LED strings (common in indoor decor), check the adapter. Make sure it’s the correct voltage (e.g., 12V, 24V) and that the output matches the string’s requirement. Using the wrong adapter can fry the lights or cause flickering.
This step is crucial in how to troubleshoot LED light strings quick and easy fixes—often, the problem starts at the source, not the bulbs.
Step 2: Identify the Faulty Section
LED light strings come in two main types: series and parallel wiring. This affects how you diagnose problems.
- Series: If one bulb goes out, the whole string may go dark (less common in modern LEDs).
- Parallel: Most modern strings use this. One bad bulb won’t kill the whole strand, but it might cause flickering or dimming in a section.
To find the faulty section, look for:
- A section that’s completely dark while others work
- Flickering in a specific area
- Dim or discolored bulbs in a cluster
Use the “section test”: Plug in the string and walk along it. Note where the lights stop working. If the first 20 bulbs work and the next 10 don’t, the issue is likely in that middle segment.
Real-life tip: If you have a 100-bulb string with 25-bulb sections, unplug and reconnect each section. This helps isolate which block is failing.
Some LED strings have a “fuse” in the plug. If the whole string is out, check if the fuse is blown. You’ll see a tiny wire inside the plug—if it’s broken or blackened, replace it with the spare fuse (usually included in the plug housing).
Knowing how to isolate the problem is a big part of how to troubleshoot LED light strings quick and easy fixes.
Step 3: Test the Bulbs (One by One)
Now, focus on individual bulbs. Even in parallel strings, a single bad bulb can cause issues—especially if it’s shorted or has a loose base.
Start at the beginning of the faulty section. Use your needle-nose pliers to gently twist and remove each bulb. Look for:
- Blackened or cracked plastic on the bulb
- Loose or corroded base (the metal part that touches the socket)
- Broken filament (rare in LEDs, but possible)
Replace any suspect bulbs with spares. If you don’t have replacements, borrow one from a working section (just temporarily).
Important: Don’t force bulbs out. They’re usually held in with a small twist-lock. Turn counterclockwise gently.
After replacing a bulb, plug in the string and see if the section lights up. If it does, you’ve found the culprit. If not, keep testing.
For strings without removable bulbs (common in mini LED sets), skip to Step 4. But many holiday LED strings have replaceable bulbs—check the packaging or manufacturer’s website.
This step is often the fastest fix in how to troubleshoot LED light strings quick and easy fixes. A single bad bulb can make an entire section appear dead.
Step 4: Check the Sockets and Wiring
If bulbs look fine, the problem might be in the socket or wiring. This is where a multimeter comes in handy.
First, inspect the sockets:
- Are the metal contacts clean and straight?
- Is the socket cracked or warped?
- Is there green corrosion (a sign of moisture damage)?
Use a cotton swab and a drop of vinegar or contact cleaner to clean corroded contacts. Let it dry before testing.
Next, check the wires between bulbs. Look for:
- Kinks, cuts, or pinched insulation
- Loose solder joints (tiny metal blobs connecting wire to socket)
- Frayed strands near the base of bulbs
If you see a break, you’ll need to repair it. For small cuts, wrap with electrical tape. For longer breaks, cut out the damaged section and splice the wires using a wire nut or solder and heat-shrink tubing.
Pro tip: If you solder, use rosin-core solder and a low-wattage iron (25–40W). Too much heat can damage the plastic housing.
For loose solder joints, reheat the joint with a soldering iron and add a small amount of solder to secure it. A magnifying glass helps here.
Wiring issues are common in outdoor LED strings exposed to wind, rain, or snow. This step is essential in how to troubleshoot LED light strings quick and easy fixes, especially for long-term use.
Step 5: Examine the Control Box and Fuses
Many LED strings have a control box (also called a driver or transformer) that manages brightness, color, or flashing patterns. It’s usually near the plug.
Open the control box (use a small screwdriver). Look inside for:
- Burnt components or blackened circuit board
- Loose wires or broken solder points
- A blown fuse (a tiny glass or ceramic tube with a wire inside)
If the fuse is blown, replace it with an identical one. Check the amperage and voltage rating (e.g., 250V, 0.5A). Never use a higher-rated fuse—it’s a fire risk.
If the circuit board looks damaged, you might need to replace the entire control box. Some brands sell replacements. Search by model number.
For smart LED strings (Wi-Fi or app-controlled), the control box may have a reset button. Press it and re-pair the device.
Warning: Don’t touch the circuit board with wet hands or metal tools. Static electricity can damage components.
This step is critical for strings with remote controls or timers. A faulty control box can mimic bulb or wiring problems. Mastering this part is a key part of how to troubleshoot LED light strings quick and easy fixes.
Step 6: Test with a Multimeter (For Advanced Users)
If you have a multimeter, use it to confirm your diagnosis. This tool measures voltage, current, and continuity (whether electricity flows).
First, set the multimeter to “continuity” mode (usually a buzzer symbol). Plug in the string, then:
- Touch one probe to the metal base of a bulb socket
- Touch the other to the corresponding wire or contact
If the meter beeps, the circuit is complete. If not, there’s a break.
Next, test voltage. Set the meter to DC volts (for low-voltage strings) or AC volts (for 120V strings). Touch the probes to the socket contacts while the string is plugged in. You should see the expected voltage (e.g., 3V per bulb in a 120V string with 40 bulbs).
Low voltage? The issue is in the wiring or control box. No voltage? The fuse or power source is faulty.
Real-life tip: If you’re testing a 120V string, be careful. Use insulated probes and avoid touching metal parts.
A multimeter takes the guesswork out of repairs. It’s especially useful for identifying intermittent faults (lights that work sometimes but not others). This step elevates your how to troubleshoot LED light strings quick and easy fixes from trial-and-error to precision.
Step 7: Reassemble and Test
Once you’ve fixed the issue, reassemble everything:
- Reinsert bulbs and twist them in
- Close the control box and secure it with screws
- Wrap spliced wires with electrical tape or heat-shrink tubing
- Coil the string neatly to avoid kinks
Now, plug in the string. Test all functions: steady light, flashing, color changes (if applicable). Let it run for 10–15 minutes to ensure it doesn’t overheat or flicker.
If it works, great! If not, go back to the previous steps. Sometimes, multiple issues exist (e.g., a bad bulb and a loose wire).
Pro tip: Take a photo of the working string. It helps if the problem returns later.
This final test confirms your fix. It’s the last step in how to troubleshoot LED light strings quick and easy fixes—and the most satisfying.
Pro Tips & Common Mistakes to Avoid
Even with a clear guide, small mistakes can ruin your repair. Here’s how to avoid them:
- Don’t assume all bulbs are the same. LED bulbs come in different voltages (e.g., 3V, 6V) and bases (e.g., E10, E12). Using the wrong one can damage the string or cause flickering.
- Never use incandescent bulbs in LED sockets. They draw more current and can overheat the circuit.
- Avoid over-tightening bulbs. It can crack the socket or break the base. Hand-tight is enough.
- Don’t skip the fuse check. A blown fuse is often the simplest fix, but many people overlook it.
- Don’t leave exposed wires. Even a small gap can cause a short circuit or shock.
- Don’t ignore moisture. Water in sockets or wires causes corrosion. Dry the string thoroughly before testing.
- Don’t rush the multimeter test. Double-check your settings and probes. A wrong setting can give false readings.
Warning: If you smell burning or see smoke, unplug immediately. The string may have a short circuit or damaged transformer.
Pro tip: Label your repaired strings. Use a tag or marker to note the issue and fix date. This helps you track longevity and avoid repeating the same problem.
Also, store LED strings in a cool, dry place. Wrap them around a cardboard tube or plastic reel to prevent tangling. Proper storage reduces wear and tear—and makes future how to troubleshoot LED light strings quick and easy fixes much easier.
FAQs About How to Troubleshoot LED Light Strings Quick and Easy Fixes
Q1: Why do LED light strings stop working even if the bulbs look fine?
A: Even if bulbs appear okay, the base or socket might be corroded. Also, the wiring between bulbs or the control box could be faulty. Moisture, vibration, or age can damage internal connections. Always check sockets and wires, not just the bulbs.
Q2: Can I replace an LED bulb with a regular incandescent bulb?
A: No. LED strings are designed for low-current bulbs. Incandescent bulbs draw more power, which can overload the circuit, melt wires, or blow fuses. Always use LED replacements.
Q3: My LED string flickers. What’s the most likely cause?
A: Flickering is often due to a loose bulb, a failing control box, or a bad connection. Check the bulbs first—wiggle them gently. If flickering stops, the base is loose. If not, test the control box or wiring.
Q4: How do I know if the fuse in the plug is blown?
A: Open the plug (it usually has a small door). Look at the fuse—a blown fuse has a broken wire or blackened glass. You can also test it with a multimeter in continuity mode. If it doesn’t beep, it’s blown.
Q5: Can I repair an LED string with a broken wire?
A: Yes, but you need basic soldering skills. Cut out the damaged section, strip the wires, and solder them together. Cover with heat-shrink tubing or electrical tape. For short breaks, electrical tape may work temporarily.
Q6: Why does only part of my LED string work?
A: In parallel strings, a bad bulb or socket usually affects just one section. In series strings, one failure can kill the whole strand. Use the section test (Step 2) to isolate the problem.
Q7: Are outdoor LED strings harder to fix than indoor ones?
A: Not necessarily, but they’re more exposed to moisture and temperature changes. Check for water in sockets, corroded contacts, and cracked insulation. Use waterproof tape for repairs and store them dry when not in use.
Final Thoughts
Learning how to troubleshoot LED light strings quick and easy fixes isn’t just about saving a few dollars. It’s about reducing waste, extending the life of your decorations, and gaining confidence in your DIY skills.
Most LED string issues are simple: a bad bulb, a loose connection, or a blown fuse. With the right tools and a methodical approach, you can fix them in under an hour.
Remember: always start with the power source, then work your way to bulbs, sockets, and wiring. Use a multimeter if you have one, but don’t let its absence stop you—many fixes are visual or hands-on.
And if you hit a wall? Don’t force it. Some strings are cheaper to replace than repair. But for high-end or sentimental sets, a little effort can bring them back to life.
Next time your lights go dark, skip the trip to the store. Grab your tools, follow this guide, and fix it yourself. You’ve got this. Mastering how to troubleshoot LED light strings quick and easy fixes is a skill you’ll use year after year.

