Featured image for how to untangle wired led string lights
Image source: pathmarkinnovation.com
Start by laying the tangled LED string lights flat on a clean surface to assess the knots and loops. Gently separate the wires by hand, working from the plug outward, and avoid yanking to prevent damage. For stubborn tangles, use a soft brush or your fingers to tease apart knots—patience and steady motion are key to quick, damage-free untangling.
How to Untangle Wired LED String Lights Fast and Easy
Key Takeaways
- Start from the plug end: Work outward to minimize new knots.
- Use your hands, not tools: Gentle fingers prevent wire damage.
- Loop lights around cardboard: Organize as you untangle for efficiency.
- Store properly post-use: Wrap lights around a reel or hanger.
- Check for damaged bulbs: Fix or replace before storing to avoid future issues.
- Patience is key: Rushing risks breaking wires or sockets.
Why This Matters / Understanding the Problem
It’s the week before the holidays, and you’re ready to bring some festive cheer. You pull out your favorite wired LED string lights from storage—only to find them knotted like a spiderweb. Sound familiar? You’re not alone. Every year, millions of people struggle with tangled holiday lights, wasting time, energy, and sometimes even damaging the delicate wires.
Tangled lights aren’t just annoying—they can shorten the lifespan of your LEDs. Kinks, sharp bends, and over-tightening can break internal filaments or cause shorts. That’s why knowing how to untangle wired LED string lights fast and easy isn’t just a convenience—it’s essential for preserving your decorations and saving your sanity.
Whether you’re decorating a tree, wrapping a banister, or lighting up a porch, starting with smooth, unknotted lights makes the job faster and safer. In this guide, we’ll walk you through a proven method that works every time—no special tools, no magic tricks, just smart, simple steps. You’ll learn how to prevent future tangles, handle stubborn knots, and get your lights ready in under 15 minutes.
What You Need
Before you dive in, gather these basic tools and materials. You probably already have most of them at home. The goal is to work efficiently and avoid unnecessary stress.
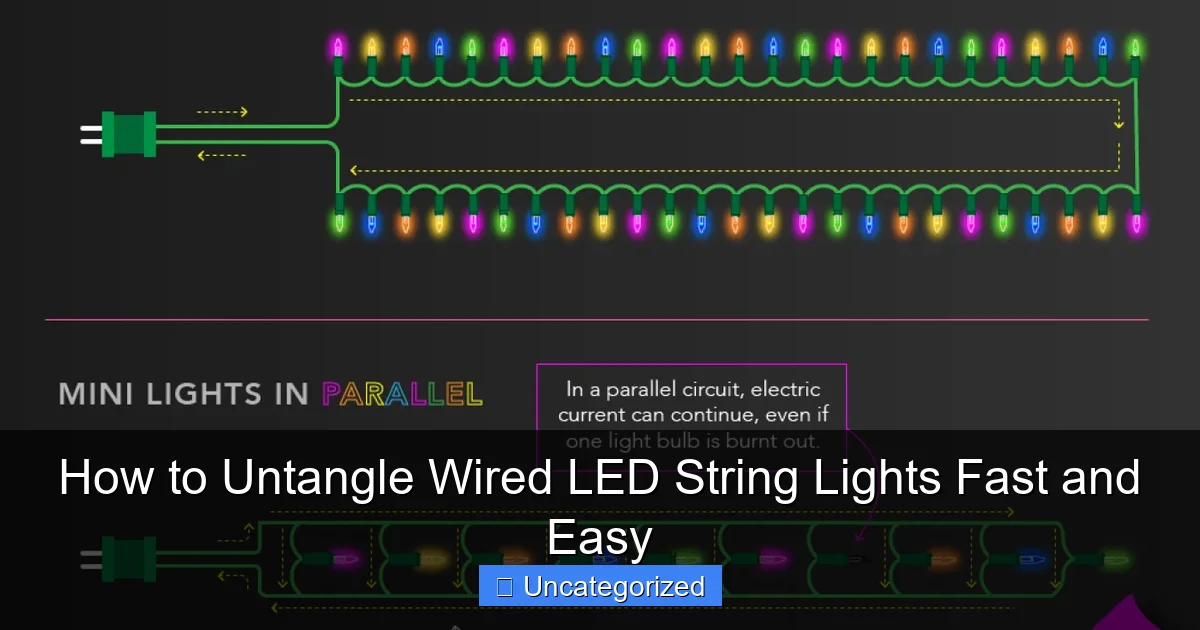
Visual guide about how to untangle wired led string lights
Image source: energy.gov
- A flat, clutter-free surface (like a table, floor, or large blanket)
- Two chairs, a doorknob, or a hook to hang one end of the lights
- Your tangled LED string lights (duh!)
- A soft cloth or towel (to protect surfaces and wires)
- Rubber gloves (optional, but helpful for grip and protection)
- Zip ties or twist ties (for storage after untangling)
- A helper (optional)—great for long strands or extra-knotty messes
You don’t need expensive gear or a degree in engineering. Just a little patience and the right setup. This method focuses on prevention through organization, which is key to learning how to untangle wired LED string lights fast and easy without frustration.
Pro Tip: Work in a well-lit area. Good lighting helps you spot knots, kinks, and damaged sections before they become bigger problems.
Step-by-Step Guide to How to Untangle Wired LED String Lights Fast and Easy
Let’s break down the process into clear, doable steps. This method uses the “anchor-and-spread” technique—a favorite among holiday decorators and lighting pros. It works for 50-light strands, 200-light garlands, and even multi-color or battery-powered sets.
Step 1: Clear Your Workspace and Inspect the Lights
Start by choosing a large, flat area—your dining table, living room floor, or even a clean garage floor. Cover it with a soft towel or blanket to protect both the surface and the light wires.
Unpack the tangled bundle and lay it out as much as possible. Don’t force anything yet. Instead, look for:
- Broken bulbs or missing covers
- Frayed or split wires
- Knots near the plug or end connector
Spotting damage early prevents further issues. If a bulb is loose or a wire is split, mark it with a small piece of tape. You’ll fix it later—just focus on untangling first.
Warning: Never pull on damaged wires. You could worsen the break or create a safety hazard.
Step 2: Anchor One End to a Stable Point
This is the secret to how to untangle wired LED string lights fast and easy—you need a fixed starting point. Find a chair, doorknob, or hook to hang the plug end of the lights.
Loop the plug over the anchor so it dangles freely. This keeps tension off the rest of the strand and gives you a clear “starting line.” Think of it like unspooling yarn from a ball—you need one end secured so the rest can unwind naturally.
If your lights are battery-powered or have a remote control box, hang that part instead. The key is to fix the power source end, not just any random point.
Now, gently pull the rest of the strand away from the anchor. You’ll start seeing loops and twists appear. That’s normal—and good! It means you’re loosening the tangle.
Step 3: Work from the Anchor Outward, One Loop at a Time
Now comes the real work. Starting at the anchored end, walk backward slowly, pulling the lights taut but not too tight. Use both hands to gently separate loops as you go.
Here’s how to handle common knot types:
- Simple loops: Slide one loop off the other with your fingers. No tools needed.
- Figure-8 knots: Pinch the center of the “8” and twist in opposite directions to loosen.
- Overhand knots: Gently pull the two ends in opposite directions while wiggling the knot to open it.
Go slowly. Rushing leads to more tangles. If a knot won’t budge, stop pulling. Instead, trace the wire back a few inches and loosen the surrounding area. Often, the knot is just trapped by tension from elsewhere.
Pro Tip: Use rubber gloves for better grip, especially if your hands are dry or the wires are slick.
Step 4: Lay Out the Lights in a “Figure-8” or “S-Curve” Pattern
As you untangle, lay the lights in a loose, flowing pattern on the floor or table. A figure-8 (∞) or S-curve works best because it prevents new tangles and keeps wires evenly spaced.
Why this works: Straight lines encourage coiling. Curves break the pattern and reduce friction between wires. Think of it like laying out a garden hose—you never leave it in a straight line on the ground.
As you walk backward, alternate the direction of each curve. For example:
- Loop 1: Curve to the left
- Loop 2: Curve to the right
- Loop 3: Curve to the left again
This creates natural slack and keeps the strand from twisting as you work. Plus, it makes it easier to spot remaining knots.
Step 5: Address Stubborn Knots with the “Reverse Tension” Trick
Some knots just won’t budge. That’s when you need the reverse tension method. Instead of pulling the knot tighter, you’re going to loosen the surrounding area.
Here’s how:
- Find the knot.
- Trace the wires back 6–12 inches in both directions.
- Gently wiggle and loosen the wires around the knot.
- Now, pull the ends of the wires (not the knot itself) in opposite directions.
This often releases the knot without force. It’s like untangling a shoelace—you don’t yank the knot, you loosen the laces around it first.
If the knot is near a bulb or connector, avoid pulling directly on the bulb. LED bulbs are fragile. Instead, grip the wire just before the bulb base.
Warning: Never use pliers, scissors, or knives to cut or pry open knots. You’ll likely cut the wire or damage the insulation.
Step 6: Check for Kinks, Tangles, and Damage
Once the lights are fully untangled, run your fingers along the entire length. Look for:
- Sharp kinks (where the wire bends at a 90-degree angle)
- Twisted sections (where the wire spirals tightly)
- Loose bulbs or cracked covers
Kinks are especially dangerous—they can cause internal wire breaks. If you find one, gently massage it with your fingers to straighten it. If it won’t budge, it’s best to replace that section.
Test the lights now. Plug them in (if AC-powered) or insert batteries. Watch for flickering, dim bulbs, or sections that don’t light up. These are signs of internal damage.
Mark any faulty sections with tape. You can repair them later or replace the whole strand if needed.
Step 7: Store Properly to Prevent Future Tangles
Now that your lights are smooth and tangle-free, how to untangle wired LED string lights fast and easy next year depends on how you store them now.
Here’s the best method:
- Use a light reel (available at hardware stores) or a piece of cardboard.
- Start at the plug end. Loop the lights around the reel or cardboard in a figure-8 pattern.
- Every 3–4 loops, secure with a zip tie or twist tie.
- End with the connector or battery pack, and tie it down too.
- Store in a cool, dry place—away from heat, moisture, and pets.
Avoid wrapping lights around your hand or a tree branch. These methods create tight coils that tangle easily.
Pro Tip: Label each strand with its length and type (e.g., “50 LED Warm White – Tree Lights”) so you don’t have to guess next year.
Pro Tips & Common Mistakes to Avoid
Even with the right method, small mistakes can turn a quick job into a nightmare. Here are the top pro tips and pitfalls to watch for.
Use the “Two-Person Method” for Long Strands
If you’re dealing with a 100+ light strand, get a helper. One person holds the anchor end, the other walks backward, untangling as they go. This reduces strain and prevents re-knotting.
Communication is key. Say “stop” if you see a knot forming, and work together to fix it before moving on.
Don’t Store Lights When They’re Hot
After using lights, let them cool for 30–60 minutes before storing. Hot wires expand, and when they cool in a tight coil, they can create kinks or weak spots.
This is especially important for incandescent lights, but it applies to LEDs too—especially if they’ve been on for hours.
Label and Sort Your Lights by Use
Group your lights by where they’ll be used:
- Tree lights (longer strands, often with timers)
- Outdoor lights (weatherproof, often with green or white wires)
- Indoor accent lights (shorter, decorative shapes)
Store each group separately. This saves time when decorating and reduces the chance of mixing tangled strands.
Common Mistakes to Avoid
- Pulling too hard: This stretches wires and breaks internal connections. Use gentle, steady pressure.
- Starting from the wrong end: Always anchor the power source first. Starting from a random point creates more knots.
- Ignoring small kinks: A tiny bend today can become a full break by next season. Fix them now.
- Storing in plastic bags: Plastic traps moisture and can cause corrosion. Use breathable fabric bags or cardboard boxes.
- Forcing knots open: If a knot won’t budge, stop. Work on the surrounding area instead. Force leads to damage.
Pro Tip: For extra-long strands, use the “accordion fold” method: fold the lights back and forth in 12-inch sections, then secure with ties. This works great for garlands and mantel lights.
FAQs About How to Untangle Wired LED String Lights Fast and Easy
Got questions? We’ve got answers. Here are the most common ones—straight, simple, and practical.
Q: Can I use a hairdryer to loosen a stubborn knot?
No, never use heat. Wires and plastic covers can melt or weaken. Heat also makes plastic brittle over time. Stick to manual untangling—it’s safer and more effective.
Q: What if a knot is near the plug or connector?
Be extra gentle. The plug has delicate internal connections. Instead of pulling, loosen the wires a few inches before and after the plug. Then, gently wiggle the knot free. If it’s really stuck, you may need to cut the knot and re-solder (but that’s a last resort).
Q: How do I untangle battery-powered lights?
The same method works! Anchor the battery box instead of the plug. The box is heavier, so it stays put better. Just make sure the box isn’t dangling by the wires—support it with your hand or a hook.
Q: Can I use a light reel for all types of LED lights?
Yes, but check the reel size. Some are designed for heavy-duty cords, others for lightweight strings. For delicate LED strands, use a soft reel (like foam or fabric-covered) to avoid crushing bulbs.
Q: What if my lights have a remote control or timer?
Anchor the control unit. These units are often heavier and more fragile than plugs. Wrap the unit in a soft cloth before hanging it, and avoid bending the antenna (if it has one).
Q: How long does it take to untangle a typical strand?
For a 50–100 light strand, 5–10 minutes with this method. Longer strands (150+) may take 15–20 minutes. The key is not speed—it’s consistency. Slow and steady wins the race.
Q: Can I prevent tangles without buying a reel?
Yes! Use a cardboard storage board:
- Cut a piece of cardboard into a 6”x12” rectangle.
- Make notches on both long sides.
- Loop the lights around the notches in a figure-8.
- Secure with twist ties.
It’s cheap, recyclable, and works great for seasonal storage.
Final Thoughts
Untangling wired LED string lights doesn’t have to be a holiday headache. With the right approach—anchor, spread, loosen, and store—you can go from a knotted mess to smooth, ready-to-use lights in minutes.
Remember: how to untangle wired LED string lights fast and easy isn’t just about speed. It’s about smart handling. Protect the wires, work from the anchor, and store properly. Do that, and you’ll save time, money, and stress every holiday season.
Next time you pull out your lights, take 10 minutes to inspect and organize them. It’s the best investment you can make. And when friends ask how you keep your lights so tangle-free, you’ll have the perfect answer: “I just follow the anchor-and-spread method. Works every time.”
Now go enjoy your lights—and the peace that comes with knowing they’re ready to shine.

