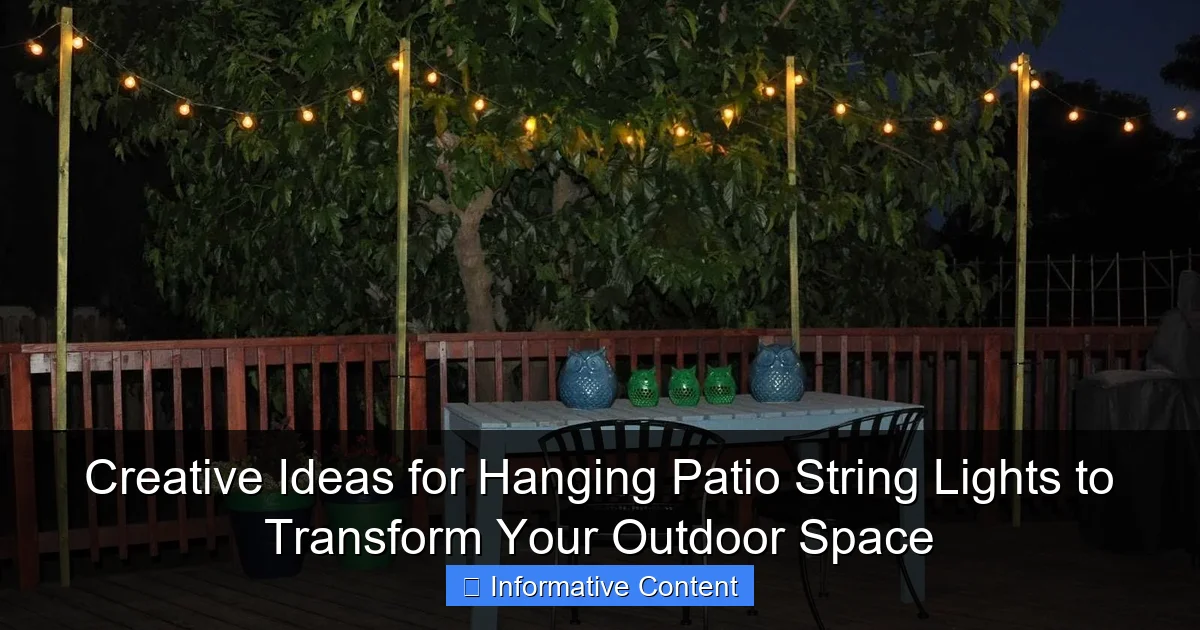
Featured image for ideas for hanging patio string lights
Image source: themprojects.com
Transform your outdoor space with strategic patio string light designs that blend ambiance and functionality. From zigzag patterns across open ceilings to draped canopies between trees or pergolas, these creative installations instantly elevate evening gatherings. Explore weather-resistant mounts, hidden fasteners, and layered lighting techniques to craft a stunning, inviting atmosphere that shines all night long.
Key Takeaways
- Hang lights in zigzag patterns between trees for a whimsical, dynamic glow.
- Use shepherd’s hooks to create adjustable, freestanding light displays on patios.
- Drape lights over pergolas for a cozy, intimate ambiance overhead.
- Wrap lights around railings to highlight architectural features with minimal effort.
- Install tension wires for clean, straight lines in large outdoor areas.
- Layer lights with lanterns to mix heights and textures for visual depth.
📑 Table of Contents
- Why String Lights Are the Secret to a Cozy Outdoor Oasis
- 1. Classic Ceiling and Roofline Hanging: Timeless and Elegant
- 2. DIY Canopy and Tension Wire Systems: For Open Spaces
- 3. Tree and Natural Element Integration: Organic and Whimsical
- 4. Railing and Fence Mounting: Simple and Space-Saving
- 5. Creative Shapes and Themes: Personalize Your Glow
- 6. Maintenance, Safety, and Pro Tips for Long-Lasting Beauty
Why String Lights Are the Secret to a Cozy Outdoor Oasis
Imagine this: It’s a warm summer evening. The air is soft, the crickets are humming, and your patio glows with a warm, golden light. You’re sipping iced tea, laughing with friends, and the atmosphere feels magical—not because of fancy decor, but because of a simple string of lights. That’s the power of patio string lights. They’re more than just decoration; they’re mood-setters, conversation starters, and space-definers all in one.
String lights have become a staple in outdoor living spaces, and for good reason. They’re affordable, easy to install, and instantly transform any area into a cozy retreat. Whether you have a sprawling backyard, a modest balcony, or a tiny urban patio, string lights can elevate your space. And the best part? There’s no one right way to hang them. From whimsical zigzags to elegant canopy drapes, the possibilities are endless. In this guide, we’ll explore creative, practical, and visually stunning ideas for hanging patio string lights that suit any style, space, and budget.
1. Classic Ceiling and Roofline Hanging: Timeless and Elegant
The simplest way to hang patio string lights is also one of the most effective—draping them across your roofline or ceiling. This method works beautifully for covered patios, pergolas, and decks with a solid overhead structure. It creates a warm, ambient glow that mimics the feeling of being under a starry sky.
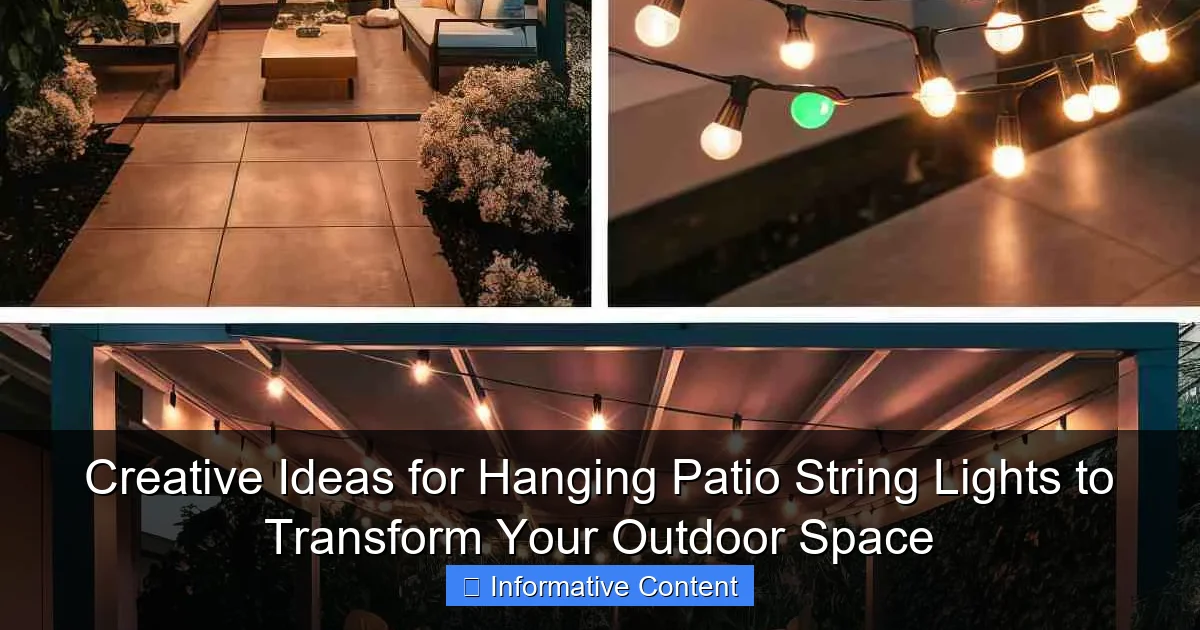
Visual guide about ideas for hanging patio string lights
Image source: homebuildingsmart.com
How to Achieve the Roofline Look
- Use hooks or screws: Install small cup hooks or eye screws along the edge of your roof, pergola beams, or eaves. Space them 2–3 feet apart for even lighting. If you’re renting or don’t want to drill, use adhesive hooks rated for outdoor use (like 3M Command Outdoor Hooks).
- Measure twice, hang once: Before buying lights, measure the perimeter of your space. Add 10–15% extra length to account for sagging and connection points. Most string lights come in 25, 50, or 100-foot lengths.
- Create a “V” shape: For a dynamic look, run lights from one corner of the patio to the opposite corner, forming a diagonal pattern. This adds visual interest and draws the eye upward.
- Layer with fairy lights: Pair larger globe lights with delicate fairy lights for depth. The combination creates a layered glow that feels more luxurious.
Pro tip: If your patio has a sloped roof, use a ladder and a friend to help guide the lights. Avoid pulling too tight—allow a gentle sag for a relaxed, natural look.
Real-World Example: The Urban Balcony Transformation
Take Sarah, a renter in Chicago with a 6×8 foot balcony. She used adhesive hooks to string 50 feet of warm white Edison-style bulbs along the railing and ceiling beams. The lights created a cozy nook perfect for reading and evening chats. “I didn’t want to damage the building,” she says, “but the lights made my balcony feel like a private retreat.”
Pros and Cons of Roofline Hanging
- Pros: Simple, elegant, protects lights from wind, ideal for covered spaces.
- Cons: Not suitable for open patios, requires structural support, may need ladder access.
2. DIY Canopy and Tension Wire Systems: For Open Spaces
No roof? No problem. If you have an open patio, backyard, or garden, a DIY canopy or tension wire system is your best bet. This method uses vertical posts (like poles, trees, or existing structures) connected by wires or cables, creating a “ceiling” for your lights.
Setting Up a Tension Wire Canopy
- Anchor points: Use sturdy trees, existing fence posts, or install metal or wooden poles (at least 6 feet tall). For poles, bury them 18–24 inches deep and secure with concrete for stability.
- Install guide wires: Use high-tensile steel wire or paracord. Tighten with turnbuckles or wire clamps. The wire should be taut but not overly tight—allow a slight dip for aesthetics.
- Hang lights: Clip or tie string lights to the wire. Use zip ties or light clips for easy adjustments. For a starry effect, hang multiple strands in a crisscross pattern.
- Add height variation: Run lights from a taller post to a shorter one to create a gentle arc. This adds dimension and prevents a flat, boxy look.
Pro tip: Use LED string lights with warm white or amber tones for a soft, inviting glow. Avoid blue-white LEDs—they can feel cold and clinical.
Creative Variations
- Triangle canopy: Set up three poles in a triangle and run lights from each corner to the center. Great for small patios or fire pit areas.
- Rectangular grid: Create a grid pattern with multiple wires for a modern, architectural look. Ideal for large backyards or event spaces.
- “Floating” canopy: Suspend a lightweight fabric (like sheer white voile) between poles, then hang lights on top. The fabric diffuses the light for a softer glow.
Real-World Example: The Backyard Party Space
Mike, a DIY enthusiast in Austin, turned his open backyard into a party-ready zone. He installed four 8-foot metal poles, connected them with paracord, and strung 150 feet of warm white LED lights in a grid. “It took a weekend,” he says, “but now my backyard feels like a resort. The lights are bright enough to see, but not so bright they kill the mood.”
Pros and Cons of Canopy Systems
- Pros: Works for open spaces, highly customizable, creates a defined area.
- Cons: More time-consuming, requires planning, may need permits for permanent poles.
3. Tree and Natural Element Integration: Organic and Whimsical
Nature is the best decorator. If you have trees, shrubs, or climbing plants near your patio, use them as natural light posts. This method blends lights seamlessly into your landscape, creating a magical, fairy-tale atmosphere.
Hanging Lights on Trees: Do’s and Don’ts
- Do: Wrap lights gently around trunks and main branches. Use soft, flexible cords (like LED fairy lights) to avoid damaging bark.
- Don’t: Wrap tightly or use metal wires that can cut into the tree. Avoid overloading with heavy strands.
- Do: Use zip ties or plant-safe clips to secure lights. Remove after each season to prevent long-term harm.
- Don’t: Leave lights on during the day in hot weather—they can overheat and harm the tree.
Creative Tree-Based Ideas
- Canopy of stars: Hang lights from the highest branches down to lower ones, creating a cascading effect. Use a mix of warm white and soft yellow bulbs.
- Tree trunk halo: Wrap lights in a spiral around the trunk, then run a few strands outward to nearby poles or fences.
- “Lighted forest”: If you have multiple trees, connect them with diagonal light strands to create a cohesive glow. Use different light colors for a playful look (e.g., warm white on one tree, soft pink on another).
- Hanging orbs: Suspend large, round light balls (like solar-powered orbs) from tree branches for a whimsical touch.
Real-World Example: The Garden Gathering Spot
Lena, a gardener in Portland, has a small patio surrounded by Japanese maples. She wrapped warm white fairy lights around the trunks and ran strands between the trees. “It looks like fireflies,” she says. “I host dinner parties under the lights, and guests always say it feels like dining in an enchanted forest.”
Pros and Cons of Tree Integration
- Pros: Natural, low-cost, blends with landscape, eco-friendly.
- Cons: Tree health risks if done improperly, limited reach, may not work for young or thin trees.
4. Railing and Fence Mounting: Simple and Space-Saving
For small patios, balconies, or decks, railing and fence mounting is a game-changer. It’s quick, renter-friendly, and perfect for adding vertical interest without taking up floor space.
Easy Railing Installation Tips
- Use adjustable clips: Look for light clips designed for railings (like plastic or rubber-coated metal). They grip without scratching.
- Create a zigzag pattern: Run lights diagonally from one corner of the railing to the opposite, then back. This adds visual depth.
- Layer with garlands: Weave string lights through a faux ivy or eucalyptus garland for a lush, textured look.
- Hang vertically: Attach lights to the vertical posts of your railing for a “curtain” effect. Great for privacy and ambiance.
Fence Mounting Ideas
- Horizontal strands: Run lights across the top of the fence, then drape them downward in loops.
- Geometric patterns: Use zip ties to create squares, diamonds, or waves on a chain-link or wooden fence.
- “Lighted fence”: Install a second, lower wire or rope below the fence to hang additional strands, creating a double-layer glow.
Real-World Example: The Tiny Balcony Retreat
Alex, a renter in New York, has a 4×6 foot balcony. He used adjustable clips to hang a zigzag pattern of warm white lights along the railing. “It took 20 minutes,” he says, “and now my balcony is my favorite place to unwind. The lights make it feel bigger and more private.”
Pros and Cons of Railing/Fence Mounting
- Pros: Fast, renter-friendly, no structural changes, great for small spaces.
- Cons: Limited coverage, may not work for high railings, wind can cause swaying.
5. Creative Shapes and Themes: Personalize Your Glow
Why stop at straight lines? String lights are a canvas for creativity. Use them to create shapes, themes, or even art installations that reflect your personality and style.
Shape-Based Ideas
- Heart or star: Bend lights into a heart or star shape and secure with zip ties to a fence or pergola. Perfect for romantic evenings.
- Geometric shapes: Create triangles, hexagons, or circles using wire frames. Hang them as “light sculptures.”
- “Lighted pathway”: Run lights along the edge of a garden path or walkway. Use low-voltage LED rope lights for safety.
- “Lighted curtain”: Hang vertical strands from a wire or beam to create a shimmering wall of light. Great for privacy and drama.
Themed Installations
- Bohemian: Mix colored lights (like teal, purple, and orange) with dreamcatchers and macramé hangings.
- Modern minimalist: Use all-white or all-gold lights in clean, straight lines. Pair with sleek furniture.
- Coastal: Combine blue and white lights with seashell garlands and driftwood accents.
- Festival vibe: Use multicolored lights, paper lanterns, and tassels for a fun, energetic look.
Real-World Example: The Boho Patio Party
Jasmine, a designer in Santa Monica, created a boho-themed patio. She hung a large, wire-framed sun shape with warm white lights, then added colored fairy lights and tassels. “It’s my happy place,” she says. “The lights make me smile every time I step outside.”
Pros and Cons of Creative Shapes
- Pros: Highly personal, visually striking, great for events.
- Cons: More time-intensive, may require tools, not ideal for permanent setups.
6. Maintenance, Safety, and Pro Tips for Long-Lasting Beauty
String lights are low-maintenance, but a few smart practices will keep them looking great for years. Here’s how to ensure safety, durability, and optimal performance.
Safety First
- Use outdoor-rated lights: Look for “UL Wet Listed” or “IP65” ratings. These can handle rain, snow, and humidity.
- Check for damage: Before hanging, inspect cords for cracks, fraying, or loose bulbs. Replace damaged strands.
- Use GFCI outlets: Always plug into a ground-fault circuit interrupter (GFCI) outlet to prevent electric shocks.
- Don’t overload circuits: Most outdoor outlets can handle 1,500–1,800 watts. Check your light wattage and add up the total.
Maintenance Tips
- Clean bulbs gently: Wipe with a dry microfiber cloth. Avoid water if bulbs aren’t fully sealed.
- Store properly: After the season, remove lights, untangle them, and store in a cool, dry place. Use a reel or cardboard box to prevent knots.
- Use timers or smart plugs: Automate on/off times to save energy and extend bulb life.
- Trim nearby branches: Prevent leaves and twigs from snagging or damaging lights.
Pro Tips for Longevity
- Choose LED: LEDs last 25,000+ hours and use 80% less energy than incandescent bulbs.
- Use connectors: For long runs, use waterproof connectors to join multiple strands.
- Test before hanging: Plug in lights indoors to ensure they work before spending time outdoors.
Data Table: String Light Types Compared
| Type | Lifespan | Energy Use | Weather Resistance | Best For |
|---|---|---|---|---|
| LED String Lights | 25,000–50,000 hrs | Low | High (IP65+) | All outdoor uses |
| Incandescent | 1,000–2,000 hrs | High | Medium (IP44) | Short-term events |
| Fairy Lights | 10,000–20,000 hrs | Very Low | Medium-High | Delicate, layered looks |
| Rope Lights | 25,000+ hrs | Low | High | Pathways, edges |
Hanging patio string lights isn’t just about adding light—it’s about creating a feeling. Whether you’re crafting a cozy nook, hosting a lively party, or simply enjoying a quiet evening, the right lighting transforms your space into something special. From classic rooflines to whimsical tree wraps and bold geometric shapes, there’s a method for every style and space. Remember: the best ideas are the ones that make you smile. So grab some lights, get creative, and let your patio shine. After all, magic isn’t just for the movies—it’s in your backyard, one string light at a time.
Frequently Asked Questions
What are the best ways to hang patio string lights without drilling holes?
Use adhesive hooks, tension rods, or wrap lights around existing structures like railings or trees. This keeps your walls damage-free while creating a cozy ambiance. For renters or temporary setups, this is a perfect solution for hanging patio string lights.
How can I hang string lights in a large patio area with no overhead support?
Install freestanding poles, shepherd’s hooks, or use a pergola-style frame with zip ties to create a custom canopy. Drape the lights in a crisscross pattern for even coverage and visual interest.
What are creative ideas for hanging patio string lights for small spaces?
Try zigzag patterns across walls, wrap them around a balcony railing, or create a “light curtain” by hanging multiple strands vertically. These techniques maximize impact in tight areas.
Can I leave patio string lights up year-round, and how do I secure them safely?
Only use weatherproof (IP65+) lights and anchor them with UV-resistant clips or ties. Check connections regularly to avoid fraying, especially in high-wind areas.
How do I hang string lights on a sloped or uneven backyard?
Use adjustable poles, staggered heights, or attach lights to trees or fences at different levels. This adds depth and ensures the lights follow your yard’s natural contours.
What’s the easiest way to create a DIY light canopy for a patio?
Stretch a wire or nylon cord between two fixed points (e.g., posts or walls) and clip lights onto it. Add layers for density, or use a grid pattern for a starry-night effect.

