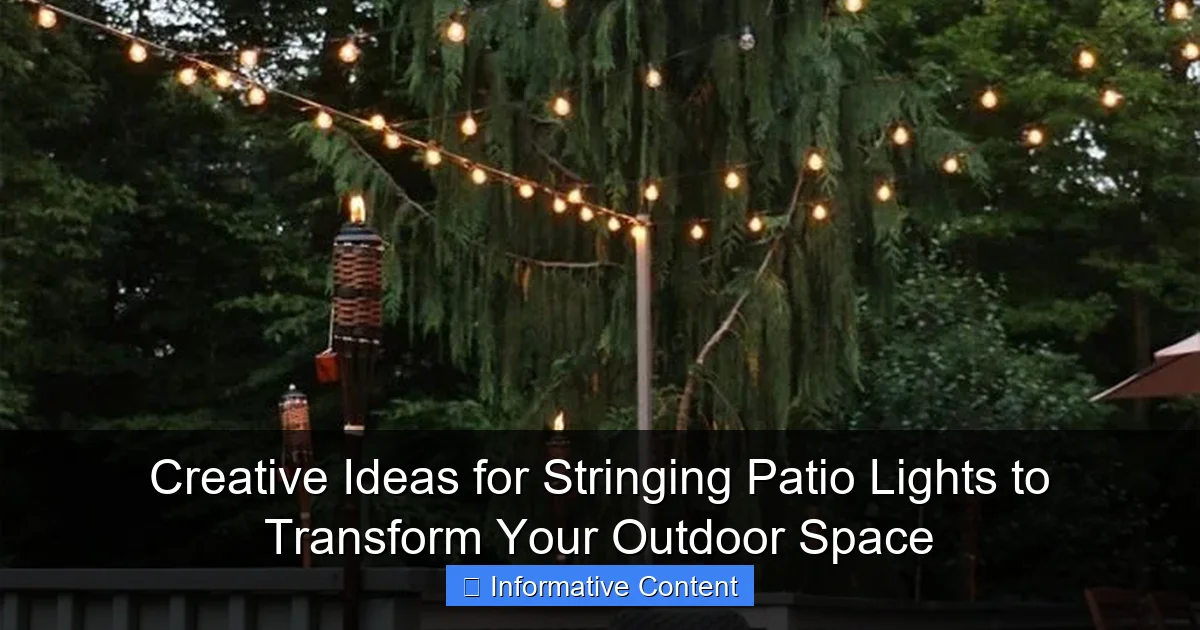
Featured image for ideas for stringing patio lights
Image source: mycozylive.com
Transform your outdoor space with creative patio light ideas that blend ambiance and functionality—from zigzag patterns across open ceilings to wrapping lights around pergolas, trees, and railings for a magical glow. Experiment with layered lighting, curtain effects, or geometric shapes to elevate your patio’s style and usability for unforgettable evenings.
Key Takeaways
- Use trees or poles: Anchor lights between vertical structures for a natural, elevated glow.
- Try zigzag patterns: Create visual interest by crisscrossing lights above seating areas.
- Highlight pathways: Line walkways with low-hanging lights for safety and ambiance.
- Layer with lanterns: Combine string lights with lanterns for depth and texture.
- Opt for dimmers: Adjust brightness to set the perfect mood for any occasion.
- Weatherproof connections: Use outdoor-rated extension cords and seals to protect setups.
📑 Table of Contents
- Why Patio Lights Are the Secret to a Magical Outdoor Space
- 1. Start with the Basics: Choosing the Right Type of String Lights
- 2. Creative Stringing Ideas for Different Patio Layouts
- 3. Power Solutions: How to Keep Your Lights Running
- 4. Design Tips: Elevate Your Lighting Game
- 5. Maintenance and Safety: Keeping Your Lights Looking Great
- 6. Inspiration Table: Real-World Examples and Materials
- Final Thoughts: Light Up Your Life
Why Patio Lights Are the Secret to a Magical Outdoor Space
There’s something undeniably enchanting about stepping onto a patio bathed in the soft glow of string lights. Maybe it’s the way they mimic a starry night, or how they instantly make even the most modest backyard feel like a cozy retreat. I remember the first time I strung up lights in my own outdoor space—I wasn’t sure what to expect, but the moment the sun set and those tiny bulbs flickered on, it felt like I’d transformed my patio into a personal oasis. That’s the power of patio lights. They’re not just about visibility; they’re about mood, ambiance, and connection.
Whether you’re hosting a summer barbecue, enjoying a quiet evening with a book, or sharing stories under the stars with loved ones, the right lighting can elevate the experience. But here’s the thing: not all stringing methods are created equal. Some look haphazard, some are hard to maintain, and others just don’t deliver that “wow” factor. The good news? With a little creativity and some thoughtful planning, you can design a lighting setup that’s as functional as it is beautiful. In this post, I’ll share some of my favorite creative ideas for stringing patio lights—from simple DIY tricks to more elaborate installations—so you can turn your outdoor space into something truly special.
1. Start with the Basics: Choosing the Right Type of String Lights
Before you start stringing, it’s important to pick the right lights for your space. Not all string lights are created equal, and your choice will impact everything from durability to the overall look. Let’s break it down.
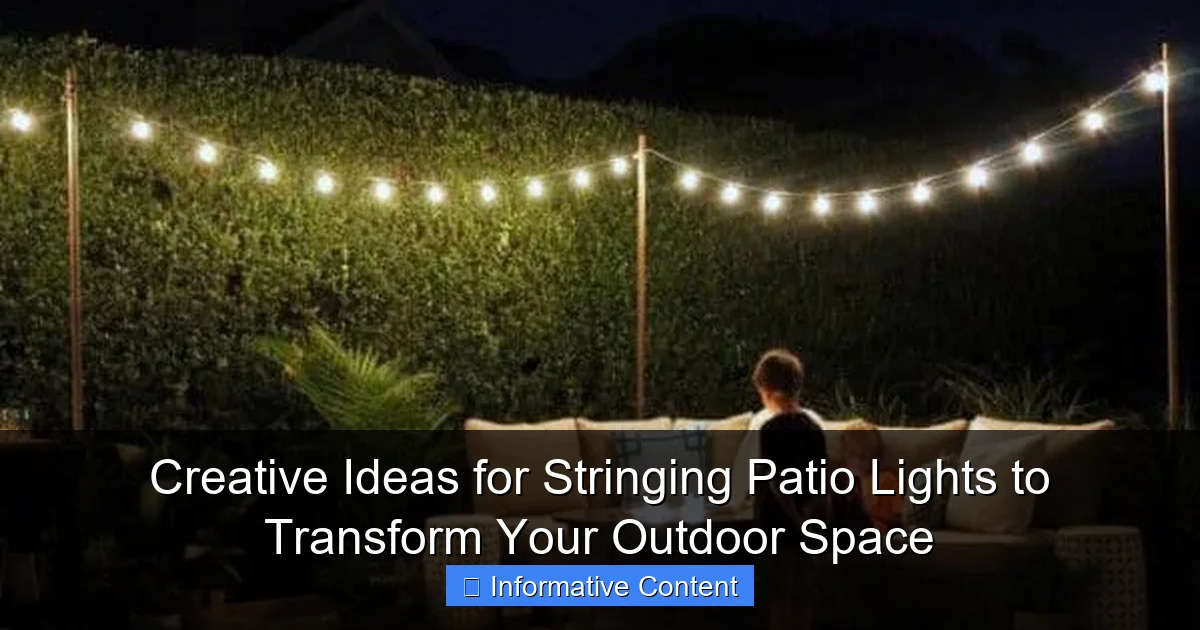
Visual guide about ideas for stringing patio lights
Image source: nextluxury.com
Types of Bulbs: LED vs. Incandescent
LED lights are the clear winner for most outdoor setups. They use up to 80% less energy than incandescent bulbs, last significantly longer (often 25,000+ hours), and stay cool to the touch—making them safer around kids and pets. They also come in a variety of colors and brightness levels, from warm white (my personal favorite for a cozy vibe) to multicolor (great for parties).
Incandescent bulbs, while nostalgic and slightly more affordable upfront, burn out faster, get hot, and use more power. They’re better suited for short-term use or seasonal decor, not permanent installations.
Weather-Resistant vs. Indoor-Only
This is a big one. Always check the packaging for an IP rating (Ingress Protection). For outdoor use, look for at least IP44, which means the lights can handle splashes and light rain. For areas with heavy rain or snow, go for IP65 or higher. Indoor-rated lights will fail quickly when exposed to moisture.
I once made the mistake of using indoor lights on my patio. After one summer storm, half the strand was dark. Lesson learned: invest in weather-resistant lights from the start.
Bulb Shapes and Spacing
Consider the bulb shape: globe lights create a classic, festive look; Edison-style bulbs give a vintage, industrial feel; and mini bulbs offer a delicate, twinkling effect. Spacing matters too. Lights spaced 4-6 inches apart provide even coverage, while tighter spacing (2-3 inches) creates a denser glow—ideal for smaller patios or accent lighting.
- Tip: Use a measuring tape to plan your layout. Count how many feet you need, then buy a strand that’s 10-20% longer to allow for curves and extra reach.
- Pro insight: If you’re unsure, buy one strand first and test it in your space. You can always add more later.
2. Creative Stringing Ideas for Different Patio Layouts
Now that you’ve got the right lights, let’s talk about how to hang them. The way you string your patio lights can completely change the feel of your space. Here are some creative ideas based on common patio layouts.
The Classic Canopy: Overhead Grid Pattern
This is the most popular method for a reason. String lights in a grid pattern across your patio, anchored to posts, walls, or trees. It creates a “ceiling” of light that feels cozy and immersive.
- How to do it: Use eye hooks or screw-in hooks spaced 4-6 feet apart. Run horizontal wires first (you can use galvanized wire or heavy-duty fishing line), then attach the light strands vertically. Use zip ties or S-hooks to secure the lights to the wire.
- Best for: Rectangular or square patios, especially if you have existing support structures like pergolas or fences.
- Bonus tip: For a softer look, drape the strands slightly instead of pulling them tight—this creates gentle waves in the light.
Zigzag or “Zipline” Style
Instead of a grid, zigzag the lights diagonally from one corner to another. This adds visual interest and works well in long, narrow spaces.
- How to do it: Start at one corner of your patio and run the strand diagonally to the opposite corner. Then zigzag back, keeping the angles consistent. Use turnbuckles or tensioners to keep the lines taut.
- Best for: Rectangular patios or decks where a grid might feel too rigid.
- Real-life example: I used this method on my 12×20 ft deck, and it made the space feel more dynamic. The zigzag pattern also helped distribute light evenly without needing extra strands.
Hanging from Trees or Natural Features
If you have trees, use them! Wrap lights around trunks or drape them between branches. This works especially well in wooded or garden-style backyards.
- How to do it: Use soft, flexible LED strands that won’t damage bark. Wrap the trunk in a spiral (don’t wrap too tight), or use zip ties to attach lights to low-hanging branches. For long spans, use a fishing line to guide the strand from one tree to another.
- Best for: Natural, rustic, or garden-themed patios.
- Caution: Avoid wrapping young or delicate trees. And never use nails or staples—they can damage the tree and create entry points for disease.
Along Railings or Staircases
For decks or multi-level patios, string lights along railings or stairs. This adds safety and charm.
- How to do it: Use adhesive clips (like Command Outdoor Light Clips) or zip ties to secure the strand. For a seamless look, tuck the lights behind the railing where possible.
- Best for: Decks, elevated patios, or homes with multiple levels.
- Tip: Use warm white or amber lights to avoid glare at eye level. And make sure the strand is secured every 12-18 inches to prevent sagging.
Floating Canopy with Poles
No walls, trees, or pergola? No problem. Install temporary or permanent poles to create your own support structure.
- How to do it: Use metal T-posts, wooden stakes, or even repurposed flagpoles. Sink them into the ground at the corners of your patio, then string lights between them. For a permanent look, use concrete footings.
- Best for: Open yards, patios with no natural anchor points, or renters who want a non-destructive option.
- Pro insight: Paint the poles a dark color to make them less visible at night. And add small planters around the base for a polished look.
3. Power Solutions: How to Keep Your Lights Running
Let’s talk about the less glamorous but oh-so-important part: power. Without a solid power plan, even the best lighting design will fall flat.
Outdoor Outlets and Extension Cords
The simplest solution is to plug into an outdoor GFCI outlet. But make sure your extension cord is rated for outdoor use (look for “SJTW” on the label).
- Tip: Use a heavy-duty 14-gauge cord for longer runs (over 50 feet) to avoid voltage drop, which can dim the lights.
- Warning: Never daisy-chain multiple extension cords. It’s a fire hazard and can overload the circuit.
Power Strips and Timers
Use an outdoor-rated power strip to connect multiple strands. And install a timer so your lights turn on and off automatically—no more running outside every night.
- My favorite: A dusk-to-dawn timer with a manual override. It turns on when it gets dark and shuts off after 6 hours, saving energy and extending bulb life.
- Bonus: Some smart timers connect to Wi-Fi, so you can control the lights from your phone. Handy for vacations or surprise parties.
Solar-Powered Lights
For areas far from an outlet, solar lights are a great option. Modern solar strands have improved dramatically—many offer 8+ hours of light after a full day of sun.
- Best for: Garden paths, tree canopies, or patios with limited access to power.
- Caveat: They’re not as bright as plug-in lights, and performance drops on cloudy days. Use them as accent lighting, not primary illumination.
- Tip: Place the solar panel in direct sunlight, even if the lights are under shade. The panel needs sun to charge.
Hidden Wiring and Conduit
For a clean, professional look, run wires through conduit or bury them under mulch. This is more work upfront but pays off in the long run.
- How to: Use PVC conduit for above-ground runs, or bury low-voltage landscape wire (at least 18 inches deep) for underground runs. Always use a GFCI-protected circuit.
- Best for: Permanent installations or high-traffic areas where cords are a tripping hazard.
4. Design Tips: Elevate Your Lighting Game
Great lighting isn’t just about hanging bulbs—it’s about creating layers, balance, and drama. Here are some design tricks I’ve picked up over the years.
Layer Your Lighting
Think of your patio lighting like a recipe: you need a base, a middle, and a top note. The base is your string lights. Add a middle layer with path lights or step lights, and a top layer with lanterns or candles.
- Example: String lights overhead, LED path lights along the walkway, and a few citronella candles on the table. This creates depth and ensures you’re not just staring into a bright ceiling.
- Tip: Use warm-toned lights (2700K-3000K) for a cozy, inviting feel. Cool white (4000K+) can feel too clinical for outdoor spaces.
Play with Height and Depth
Vary the height of your lights to add dimension. Hang some strands lower (7-8 feet) near seating areas, and others higher (10+ feet) over dining tables.
- Trick: Use pulleys or adjustable hooks so you can change the height seasonally. Lower lights in winter for intimacy, higher in summer for openness.
- Pro insight: If you have a pergola, hang lights at different levels—some on the beams, some dangling from the rafters.
Incorporate Other Elements
Don’t limit yourself to just lights. Combine them with other decor for a richer look.
- String lights + sheer curtains: Hang lightweight fabric between posts, then string lights behind it. The fabric diffuses the light and adds texture.
- String lights + plants: Weave lights through potted plants or climbing vines. The greenery softens the glow and makes it feel natural.
- String lights + mirrors: Place a large mirror on an outdoor wall to reflect the light and make the space feel bigger.
Color and Theme
While warm white is a safe bet, don’t be afraid to experiment. Amber lights feel cozy, blue lights create a beachy vibe, and multicolor lights are fun for parties.
- My rule of thumb: Stick to one dominant color, then add one accent color (like warm white with a few red or blue bulbs).
- Seasonal tip: Use color-changing smart bulbs (like Philips Hue) to match holidays or moods. Red and green for Christmas, orange for fall, etc.
5. Maintenance and Safety: Keeping Your Lights Looking Great
Even the best-laid plans need upkeep. Here’s how to keep your patio lights safe, functional, and beautiful.
Regular Inspection
Check your lights every few months. Look for:
- Frayed wires or loose connections
- Burnt-out bulbs (replace them promptly to maintain even glow)
- Corroded sockets (especially in humid climates)
- Secure anchors (tighten loose hooks or clips)
Cleaning and Storage
When the season ends, clean your lights before storing. Wipe down bulbs with a dry cloth, then coil them loosely in a box. Avoid wrapping them around a cardboard tube—it can kink the wires.
- Tip: Store in a cool, dry place. Humidity can cause mold or corrosion.
- For permanent installations: Use waterproof covers for outlets and connections.
Safety First
Outdoor lighting isn’t without risks. Follow these safety rules:
- Never use indoor lights outside
- Keep cords away from high-traffic areas to prevent tripping
- Use GFCI outlets to prevent shocks
- Don’t overload circuits—stick to the manufacturer’s guidelines
- Turn off lights during storms or high winds
Real-life lesson: I once left my lights on during a thunderstorm. The next day, half the strand was dead. Lightning can travel through wires. Always unplug during severe weather.
Repairing Common Issues
Most problems are fixable. If a section isn’t lighting up:
- Check the fuse in the plug (many outdoor strands have a small fuse compartment)
- Replace burnt-out bulbs
- Look for loose connections or damaged wires
- If all else fails, cut out the bad section and splice in a new one (use waterproof wire connectors)
6. Inspiration Table: Real-World Examples and Materials
Sometimes, seeing real examples helps. Here’s a quick reference table of popular patio lighting setups, including materials, costs, and best uses.
| Setup Style | Best For | Materials Needed | Estimated Cost | Installation Time | Notes |
|---|---|---|---|---|---|
| Overhead Grid | Square/rectangular patios with walls or pergola | LED string lights, eye hooks, galvanized wire, zip ties | $80-$150 | 2-4 hours | Most popular; easy to customize |
| Zigzag | Long, narrow patios or decks | String lights, turnbuckles, anchors, tensioners | $70-$130 | 1.5-3 hours | Adds visual movement; good for small spaces |
| Tree Canopy | Wooded or garden-style backyards | Flexible LED strands, zip ties, fishing line | $50-$100 | 1-2 hours | Natural look; avoid wrapping delicate trees |
| Railings | Decks, elevated patios | Adhesive clips, zip ties, LED strands | $40-$80 | 1-2 hours | Easy to install; great for renters |
| Pole Canopy | Open yards, no natural anchors | T-posts, string lights, concrete (optional) | $100-$200 | 3-5 hours | More work upfront but very durable |
| Solar Accent | Paths, garden beds, shaded areas | Solar string lights, stakes | $30-$70 | 1 hour | No wiring needed; best as supplemental light |
Remember, these are estimates. Costs vary by region and brand, and installation time depends on your experience. But this table should give you a solid starting point for planning your own creative ideas for stringing patio lights.
Final Thoughts: Light Up Your Life
There’s a reason patio lighting is one of the most popular outdoor upgrades—it’s relatively affordable, easy to install, and delivers instant impact. But more than that, it’s about creating a space where you want to be. A place where you can unwind after a long day, host unforgettable gatherings, or simply enjoy the quiet beauty of a summer night.
The key is to start small. Pick one idea that resonates with your space and style. Maybe it’s a simple grid over your dining table, or lights wrapped around a favorite tree. Test it out, see how it feels, then build from there. Don’t be afraid to mix and match styles—your patio is a reflection of you, after all.
And remember: the best lighting setup is one that works for you. It doesn’t have to be perfect. It just has to make you smile when you step outside and see those little bulbs twinkling in the dark. That’s the magic of stringing patio lights—it’s not just about the light. It’s about the moments it helps you create.
Frequently Asked Questions
What are the best ideas for stringing patio lights in a small backyard?
For compact spaces, try zigzag patterns across the ceiling or wrap lights around a pergola or umbrella. Use adhesive clips or tension wires to keep installations tidy and damage-free.
How can I hang patio lights without drilling into my house or deck?
Use removable hooks, adhesive clips, or tension rods between trees or posts. Freestanding shepherd’s hooks or weighted bases work well for renters or temporary setups.
What are some creative ways to arrange string lights for a cozy ambiance?
Weave lights through railings, drape them in a canopy, or create a “wall” of lights with vertical lines. Layering with lanterns or fairy lights adds depth and warmth.
Can I use ideas for stringing patio lights year-round, or are they just for summer?
Absolutely! Use weather-resistant lights in winter for holiday displays or warm-white bulbs for year-round ambiance. Just ensure fixtures are rated for outdoor use.
How do I power patio lights if there’s no nearby outlet?
Use solar-powered string lights or a weatherproof extension cord routed safely along walls or fences. Battery-operated LEDs are another flexible option for remote areas.
What’s the easiest way to hang string lights in a large, open patio?
Anchor lights between sturdy posts, trees, or a retractable wire system. For even coverage, crisscross lights in a grid pattern or outline the space with perimeter lighting.

