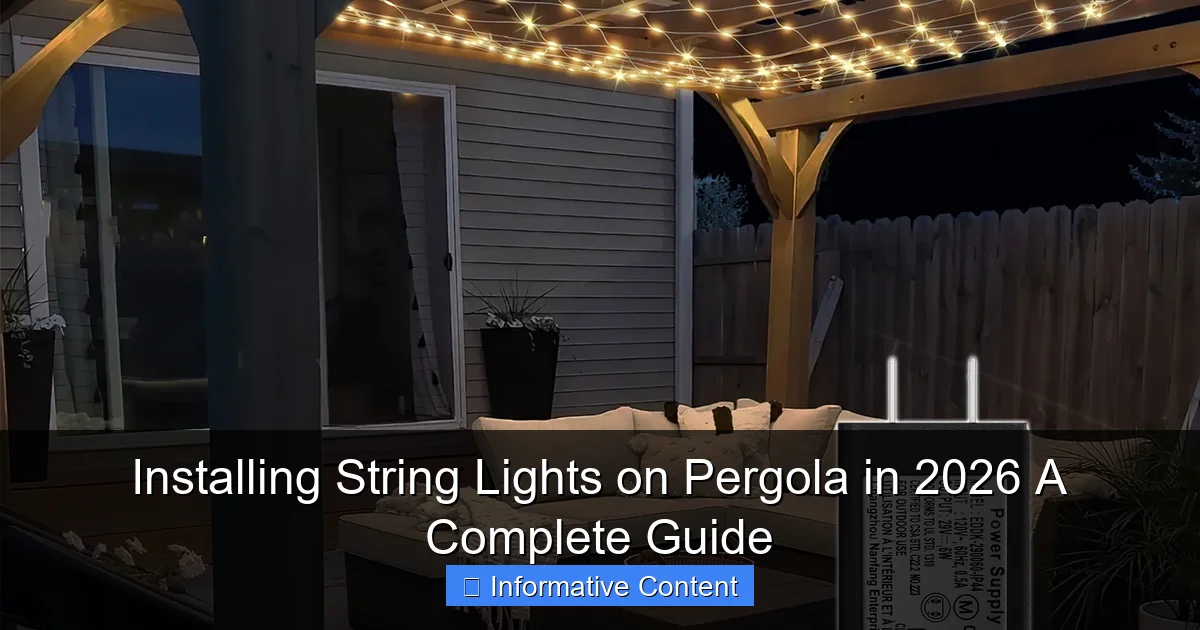
Featured image for installing string lights on pergola
Image source: i5.walmartimages.com
Transform your pergola into a stunning nighttime retreat by securely mounting string lights with weather-resistant hardware and a strategic layout. This guide walks you through measuring, spacing, and connecting lights for a professional look that enhances ambiance and safety. With smart timers and durable, dimmable LEDs, your 2026 outdoor space will shine with style and efficiency.
Key Takeaways
- Plan layout first: Sketch light placement to ensure even coverage and avoid mid-project changes.
- Use outdoor-rated lights: Choose weatherproof, durable string lights for long-term pergola use.
- Secure with hooks or clips: Install mounting hardware to prevent sagging and damage.
- Measure power needs: Confirm outlet access and use extension cords only if rated for outdoors.
- Test before finalizing: Check connections and brightness prior to permanent installation.
- Consider smart controls: Opt for dimmers or timers to boost ambiance and energy efficiency.
📑 Table of Contents
Why String Lights and Pergolas Are a Match Made in Outdoor Heaven
Picture this: a warm summer evening, a gentle breeze rustling through the trees, and your pergola glowing with soft, twinkling lights overhead. That’s the magic of installing string lights on a pergola. It’s not just about adding light—it’s about creating a mood, a vibe, a space where memories are made. Whether you’re hosting a backyard barbecue, enjoying a quiet night with a book, or celebrating with friends, string lights instantly transform your pergola from a simple structure into a cozy outdoor retreat.
I remember my first attempt at hanging lights on my pergola. I thought it’d be a quick job—just loop them over the beams and call it a day. But after one gust of wind sent half the lights tumbling, I learned the hard way that a little planning goes a long way. Since then, I’ve experimented with different setups, materials, and lighting styles. And in 2026, with smarter tech, better materials, and more design options than ever, now is the perfect time to upgrade your outdoor space. This guide walks you through every step, from choosing the right lights to securing them safely, so your pergola shines—literally—for years to come.
Choosing the Right String Lights for Your Pergola
Not all string lights are created equal. Picking the right ones for your pergola depends on your goals, your space, and your lifestyle. Let’s break it down so you don’t end up with lights that burn out after one season or look like a carnival in your backyard.
Types of String Lights: LED vs. Incandescent
LED lights are the clear winner in 2026. They’re energy-efficient (using up to 80% less power than incandescent), last 25,000–50,000 hours, and come in a rainbow of colors and brightness levels. Incandescent bulbs? They’re nostalgic and warm, but they burn out faster, get hot, and cost more to run. Unless you’re going for a vintage vibe and don’t mind replacing bulbs often, LED string lights for pergola are the smarter, safer choice.
Pro tip: Look for LEDs with a warm white (2700K–3000K) color temperature. They mimic candlelight and create a cozy ambiance. Cool white or blue tones can feel too sterile for outdoor relaxation.
Light Spacing and Bulb Style
Spacing matters. Too close together, and the lights feel overwhelming. Too far apart, and the glow feels sparse. Most pergolas work best with bulbs spaced 4–6 inches apart. If your pergola is large (say, 12×16 feet or bigger), go with 6-inch spacing. Smaller ones (8×8 or less) can handle 4-inch spacing for a fuller look.
As for bulb style, you’ve got options:
- Mini bulbs: Classic, subtle, great for soft glow. Ideal for intimate gatherings.
- Globe or Edison bulbs: Larger, more decorative. They make a statement and work well in modern or rustic pergolas.
- Net or curtain lights: These drape like a waterfall and are perfect if you have a pergola with a solid roof or lattice sides.
Smart vs. Traditional Lights
In 2026, smart string lights are more affordable and user-friendly than ever. With Wi-Fi or Bluetooth control, you can:
- Turn lights on/off from your phone
- Adjust brightness and color temperature
- Set schedules (e.g., turn on at sunset)
- Sync with music or holiday themes
For example, I use a smart LED set that automatically turns on at dusk and off at 11 PM. It saves energy and means I never forget to turn them off. But if you prefer simplicity, traditional plug-and-play lights work just fine—just make sure they’re rated for outdoor use and have a weatherproof plug.
Weather Resistance and Durability
Your pergola is exposed to sun, rain, wind, and maybe snow. So your lights need to handle it. Look for:
- IP65 rating or higher: This means they’re dust-tight and protected against water jets (like rain).
- UV-resistant wiring: Prevents the cord from cracking in direct sunlight.
- Heavy-duty connectors: Avoid cheap plastic plugs that melt in summer heat.
I once bought a “budget” set that claimed to be outdoor-rated. After two weeks of sun, the wires turned brittle and broke. Lesson learned: spend a little more upfront for quality.
Planning Your Layout: Design and Spacing
Now that you’ve picked your lights, it’s time to plan where they’ll go. A good layout enhances the pergola’s structure and creates balanced lighting. No one wants a lopsided glow or a tangled mess.
Measure Your Pergola (Yes, Actually Measure)
Grab a tape measure and note:
- Length and width of the pergola
- Distance from the ground to the top beam (for vertical drops or net lights)
- Number of crossbeams (they’ll be your anchor points)
For example, my pergola is 10×12 feet with four crossbeams. I needed about 45 feet of string lights to run across all beams with a little slack for draping. Always buy 10–15% extra—better to have too much than too little.
Choose Your Hanging Pattern
There are several ways to arrange string lights on a pergola. Here are the most popular, with pros and cons:
| Pattern | Best For | Pros | Cons |
|---|---|---|---|
| Linear (straight across beams) | Modern, minimalist pergolas | Clean look, easy to install | Can feel flat if beams are far apart |
| Crisscross (zigzag between beams) | Larger pergolas with wide spacing | Adds depth, fills space visually | More complex setup, needs more lights |
| Draped (curved loops between beams) | Romantic, boho-style spaces | Soft, inviting glow | May sag over time if not secured well |
| Vertical (from beam to ground or lattice) | Pergolas with side panels or railings | Creates a “wall” of light, great for privacy | Needs more hardware (clips, hooks) |
I started with a linear layout but switched to a crisscross pattern after a friend pointed out my pergola looked “naked” at night. The zigzag added dimension and made the space feel cozier. Moral: don’t be afraid to experiment!
Account for Power Sources and Extensions
Where’s your outlet? Can you reach it without a long extension cord? If not, plan accordingly. I have an outdoor GFCI outlet on one side of the pergola, so I run the main cord there and use a weatherproof extension to reach the opposite end.
Pro tip: Use a heavy-duty outdoor extension cord (rated for 15+ amps) and keep it off the ground to avoid tripping and water damage. If you’re using multiple light strands, daisy-chain them (connect end-to-end) but don’t exceed the manufacturer’s recommended limit (usually 2–3 strands).
Tools and Materials You’ll Need
You don’t need to be a DIY pro to install string lights on a pergola, but having the right tools makes it faster and safer. Here’s my tried-and-true checklist:
Essential Tools
- Ladder: A sturdy step or extension ladder. I use a 6-foot step ladder with a tool tray—keeps everything within reach.
- Measuring tape: For spacing and layout planning.
- Drill and bits: For installing permanent hooks or anchors (if your pergola is wood or metal).
- Wire cutters: To trim zip ties or excess cord.
- Flashlight or headlamp: For early morning or evening work.
Fasteners and Hardware
How you attach the lights depends on your pergola’s material:
- For wooden pergolas: Use outdoor-rated screw hooks or cup hooks. Pre-drill small holes to avoid splitting the wood.
- For metal or aluminum pergolas: Use magnetic hooks or adhesive cable clips (rated for outdoor use). Avoid drilling into aluminum—it’s soft and can warp.
- For vinyl or composite pergolas: Use heavy-duty outdoor adhesive clips or zip ties with UV protection.
I once used regular zip ties on my vinyl pergola. After one summer, they turned brittle and snapped. Now I only use UV-resistant nylon zip ties—they last years.
Optional but Helpful Extras
- Light clips or hooks: Designed specifically for string lights. They grip the wire without damaging the bulb sockets.
- Weatherproof cord covers: For extension cords running along the ground. They prevent tripping and protect from rain.
- Smart plug: Lets you control lights remotely even if they’re not “smart” lights.
- Level: If you’re installing permanent hooks, a level ensures they’re straight and even.
Bonus tip: Buy a few extra fasteners. You’ll probably need them, and it’s annoying to run to the store mid-project.
Step-by-Step Installation Process
Alright, let’s get to work. This is the part where your pergola starts to shine—literally.
Step 1: Turn Off Power (Safety First!)
If you’re working near an outlet or extension cord, unplug everything. Even if the lights are off, it’s better to be safe. I learned this the hard way when I got a tiny shock from a frayed cord. Not fun.
Step 2: Mark Your Anchor Points
Use a pencil or painter’s tape to mark where each hook or clip will go. For a linear layout, place anchors every 12–18 inches along the beams. For crisscross, mark points at the corners and midpoints.
Pro tip: Stand back and look at your marks. Do they look balanced? Adjust if needed. It’s easier to fix now than after you’ve drilled holes.
Step 3: Install Fasteners
Drill pilot holes for screw hooks (1/8 inch smaller than the screw diameter). Then twist the hooks in by hand—don’t overtighten. For adhesive clips, clean the surface with isopropyl alcohol first for better grip.
For my wooden pergola, I used 1.5-inch cup hooks spaced 14 inches apart. They’re sturdy and don’t stick out too far.
Step 4: Hang the Lights
Start at the power source. Drape the first strand across the hooks, leaving a little slack for a soft curve. If using a crisscross pattern, weave the lights diagonally between beams.
For vertical drops, attach clips along the side rails and run strands down to the ground (or to a lower beam). Use zip ties to secure loose ends.
Don’t pull the lights too tight—they should have a gentle sag. Too tight, and the wire can stretch or the bulbs pop out.
Step 5: Connect Strands and Test
Connect additional strands end-to-end (if daisy-chaining). Make sure all connections are snug. Plug in the lights and turn them on.
Walk around and check for:
- Dark spots (add more lights or adjust spacing)
- Flickering bulbs (tighten the socket or replace the bulb)
- Loose wires (re-secure with clips or zip ties)
I once skipped the test phase and discovered a dead strand after everything was up. Had to take half the lights down to fix it. Lesson: test early, test often.
Step 6: Secure Loose Ends and Cords
Use zip ties or adhesive clips to bundle excess cord. Tuck it behind beams or along the pergola frame. For extension cords, use cord covers or run them under a rug (if on a deck).
Final step: step back, grab a drink, and admire your handiwork. You’ve just created an outdoor oasis.
Maintenance and Long-Term Care
Good news: once your string lights on pergola are installed, they’re pretty low-maintenance. But a little care goes a long way in extending their life.
Seasonal Checks
Twice a year (spring and fall), do a quick inspection:
- Check for loose bulbs or wires
- Clean dust and debris from bulbs with a dry cloth
- Inspect hooks and clips for rust or wear
- Ensure extension cords are dry and undamaged
I keep a small kit with spare bulbs, zip ties, and a multimeter (to test dead strands). It saves me from emergency trips to the hardware store.
Winter Care
If you live in a cold climate, consider taking down the lights in winter. Snow and ice can weigh down strands, and freezing temps can damage wiring. Store them in a cool, dry place—coil them loosely to avoid kinks.
If you leave them up, use winter-rated LED lights (rated for -20°F or lower) and secure them tightly to prevent sagging under snow.
When to Replace or Upgrade
Even the best lights don’t last forever. Replace them when:
- More than 20% of bulbs are out
- The cord is cracked or frayed
- The color is fading (especially with RGB smart lights)
- You want to try a new style (e.g., color-changing or motion-sensing)
I upgraded my lights last year from warm white to smart color-changing ones. The difference was night and day—literally. Now I can match the lighting to the occasion, from romantic dinners to holiday parties.
Final Thoughts: Light Up Your Life
Installing string lights on a pergola isn’t just a weekend project—it’s an investment in your outdoor lifestyle. With the right lights, a smart layout, and a little care, your pergola can become the heart of your backyard. Whether you’re after a soft glow for quiet evenings or a vibrant display for parties, the possibilities are endless.
Remember: it’s not about perfection. It’s about creating a space that feels like you. Maybe your first try isn’t flawless—mine wasn’t. But every adjustment, every bulb replaced, every late-night test made it better. And now, when I sit under those twinkling lights with a glass of wine, I don’t see wires or hooks. I see memories in the making.
So grab your ladder, pick your favorite lights, and get started. Your pergola is waiting. And who knows? In 2026, your outdoor space might just become the talk of the neighborhood.
Frequently Asked Questions
How do I install string lights on a pergola without drilling holes?
Use adhesive hooks, zip ties, or magnetic mounts designed for outdoor use to secure lights without damaging your pergola. These methods work well for lightweight string lights and are ideal for renters or temporary setups.
What type of string lights work best for a pergola in 2026?
Solar-powered or low-voltage LED string lights are top choices for pergolas in 2026 due to energy efficiency and weather resistance. Look for IP65-rated or higher for durability against rain and sun exposure.
How far apart should I space hooks when installing string lights on a pergola?
Space hooks or mounting points every 12–18 inches to prevent sagging and ensure even light distribution. For heavier lights, reduce spacing to 10 inches for added support.
Can I install string lights on a pergola by myself?
Yes, most DIYers can install string lights solo using basic tools like a ladder and zip ties. For complex layouts or high pergolas, having a helper improves safety and efficiency.
Do I need a professional to install electrical string lights on my pergola?
For plug-in lights, DIY installation is usually safe if outlets are nearby and wiring is protected. However, hire a licensed electrician for permanent hardwired installations or complex electrical setups.
How do I hide the wires when installing string lights on a pergola?
Use wire clips, conduit channels, or tuck cords behind pergola beams for a clean look. Choose light-colored wires to blend with wood, or use cable raceways for a polished finish.

