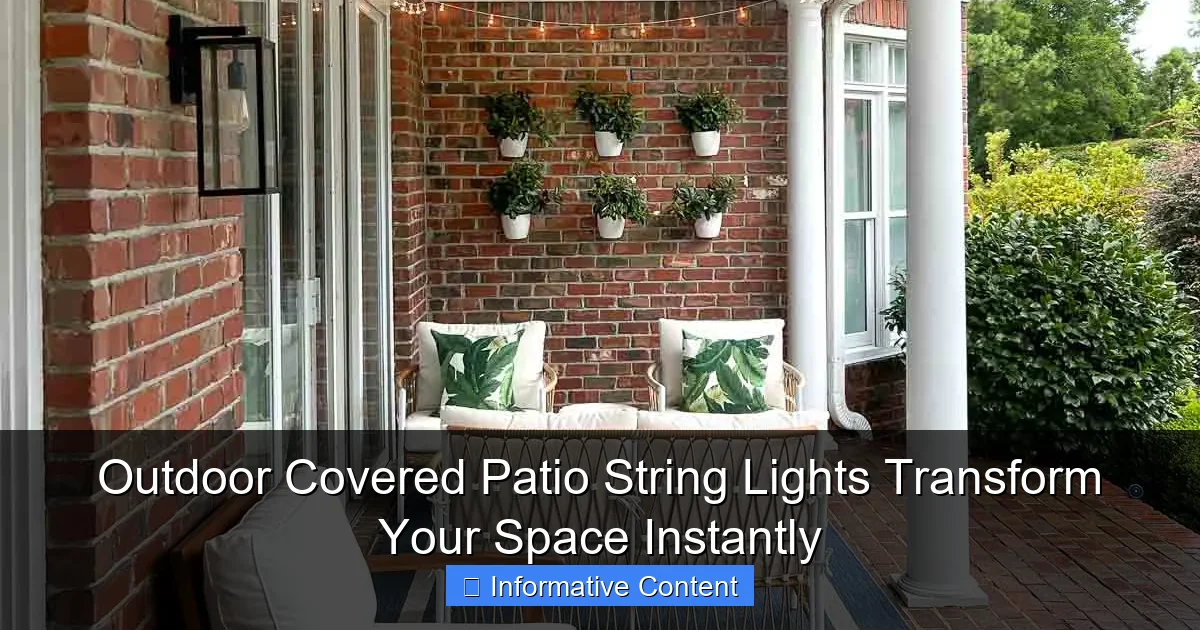
Featured image for outdoor covered patio string lights
Image source: drivenbydecor.com
Outdoor covered patio string lights instantly elevate your outdoor space with warm, inviting ambiance and year-round functionality. Designed to withstand the elements while adding a touch of magic, these versatile lights enhance mood, extend usable hours, and create a cozy atmosphere perfect for entertaining or relaxing. Easy to install and energy-efficient, they’re the ultimate upgrade for transforming ordinary patios into enchanting retreats.
Key Takeaways
- Choose weatherproof lights: Ensure durability for year-round outdoor use.
- Opt for warm white LEDs: Creates a cozy, inviting ambiance instantly.
- Install with tension wires: Prevents sagging and ensures even light distribution.
- Use dimmers for versatility: Adjust brightness to match any occasion effortlessly.
- Layer lighting for depth: Combine string lights with lanterns or spotlights.
- Measure your space first: Buy the right length to avoid gaps or excess.
📑 Table of Contents
- Why Outdoor Covered Patio String Lights Are the Ultimate Game Changer
- How to Choose the Perfect String Lights for Your Covered Patio
- Top 5 Creative Ways to Hang String Lights on a Covered Patio
- Installation Tips: Safety, Tools, and Pro Tricks
- Maintenance and Longevity: Keep Your Lights Glowing for Years
- Top 3 String Light Brands Compared (With Real User Insights)
- Final Thoughts: Light Up Your Life—Literally
Why Outdoor Covered Patio String Lights Are the Ultimate Game Changer
Picture this: it’s a warm summer evening. The sun has just dipped below the horizon, and you’re sitting on your covered patio with a glass of wine, surrounded by the soft, golden glow of string lights. The air is still, the crickets are chirping, and the ambiance is nothing short of magical. That’s the power of outdoor covered patio string lights—they don’t just illuminate a space; they transform it into a sanctuary.
Whether you’re hosting a dinner party, enjoying a quiet night with your partner, or just unwinding after a long day, these lights have a way of making everything feel more intimate, cozy, and inviting. But it’s not just about aesthetics. The right string lights can also enhance safety, extend your outdoor living hours, and even boost your mood. And the best part? You don’t need to be an electrician or spend a fortune to get that dreamy, magazine-worthy look.
How to Choose the Perfect String Lights for Your Covered Patio
1. Consider the Bulb Type: LED vs. Incandescent
When shopping for outdoor covered patio string lights, the first decision you’ll face is bulb type. Let’s break down the pros and cons of each:
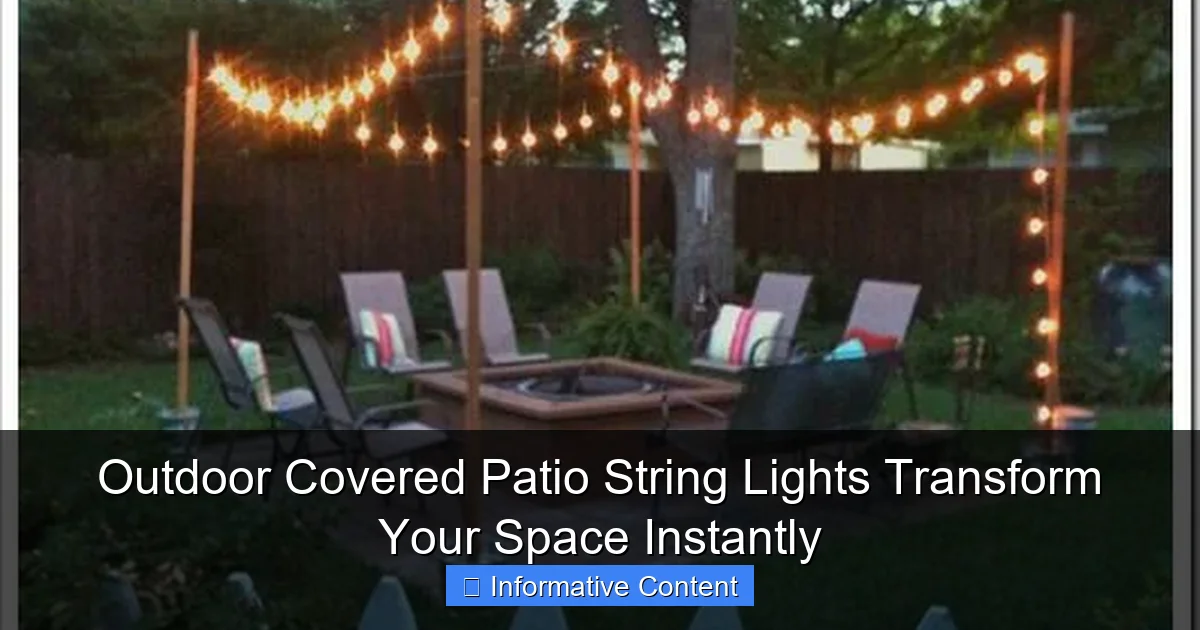
Visual guide about outdoor covered patio string lights
Image source: landscapelightingguru.com
- LED bulbs: Energy-efficient, long-lasting (up to 50,000 hours), cool to the touch, and available in a range of color temperatures (warm white, cool white, multicolor). They’re pricier upfront but save money over time.
- Incandescent bulbs: Classic, warm glow with a nostalgic feel. They’re cheaper but consume more energy, get hot, and burn out faster (about 1,000–2,000 hours).
Pro tip: For a covered patio, LED is almost always the better choice. They’re safer (less heat), more durable (resistant to weather), and perfect for year-round use. Plus, many modern LED options now mimic the soft flicker of incandescent bulbs—best of both worlds!
2. Evaluate the Bulb Shape and Style
The shape of the bulb affects both the light quality and visual appeal. Here are the most common options:
- Globe (round) bulbs: Classic and versatile. They cast a soft, diffused glow ideal for ambient lighting. Great for dining areas or lounge spaces.
- Edison (filament) bulbs: Vintage charm with exposed filaments. They give off a warm, amber glow and add a rustic or industrial vibe. Perfect if you love farmhouse or boho aesthetics.
- Mini (pearl) bulbs: Tiny and delicate. They create a subtle, starry-night effect. Best for minimalist setups or layering with other light sources.
- G40 (golf ball) bulbs: Slightly larger than mini bulbs. They offer more brightness and a retro look. Ideal for patios with higher ceilings or larger spaces.
Real-world example: I once used Edison bulbs on my covered porch and got so many compliments from neighbors. They thought I’d hired a designer! The exposed filaments added character without being over the top.
3. Check the Cord and Plug Type
Not all string lights are created equal when it comes to durability. Look for:
- Weather-resistant cords: Thick, rubberized insulation that can handle rain, humidity, and UV exposure. Avoid thin, flimsy cords.
- End-to-end connectors: Allow you to link multiple strands. Handy for large patios or wrapping around pillars.
- Outdoor-rated plugs: Must be UL-listed for wet or damp locations. If your patio has an open side or roof vents, “wet-rated” is essential.
Caution: Don’t assume “indoor/outdoor” means it’s safe in heavy rain. Read the fine print. I learned this the hard way when my first set shorted out during a storm—lesson learned!
Top 5 Creative Ways to Hang String Lights on a Covered Patio
1. The Classic Ceiling Grid (Most Popular)
This is the go-to method for a reason: it’s simple, effective, and looks polished. Here’s how:
- Use ceiling hooks (screw-in or adhesive) every 12–16 inches along the perimeter.
- Hang the lights in a grid pattern (like a checkerboard) or parallel lines.
- For a fuller look, use two layers: one close to the edge, one deeper into the space.
Tip: Use a laser level to ensure your lines are straight. Nothing ruins the vibe like crooked lights!
2. Wrap Around Beams and Columns
Got exposed beams or support columns? Turn them into design features. Wrap lights around each beam in a spiral pattern. For columns, go vertical or diagonal. This adds depth and draws the eye upward—great for patios with high ceilings.
Bonus: Use zip ties or clear fishing line to secure the lights without damaging wood or paint.
3. Create a Canopy with Rafters
If your patio has rafters or a pergola, suspend lights between them to form a “roof” of light. Use:
- Eye hooks screwed into rafter ends.
- Turnbuckles to adjust tension (prevents sagging).
- Clear plastic clips to guide the cord along the rafters.
Pro move: Add a sheer fabric canopy underneath the lights. The fabric diffuses the glow and softens shadows—like a built-in diffuser!
4. Drape Across the Back Wall
For a cozy, intimate feel, hang lights horizontally along the back wall (the one leading into your house). Use:
- Picture hooks or wall anchors to secure the cord.
- Curtain rod clips to create gentle waves instead of straight lines.
Why it works: It frames the space and makes the patio feel like an extension of your indoor living area.
5. Mix and Match for a Layered Look
Don’t limit yourself to one style! Combine:
- Ceiling grid lights for general illumination.
- Wrapped beam lights for accent lighting.
- Mini string lights draped over potted plants or railings for sparkle.
Example: My friend Sarah did this on her screened porch. She used Edison bulbs on the ceiling, mini LEDs around her ferns, and fairy lights on the railing. The result? A magical, multi-dimensional space that changes moods throughout the evening.
Installation Tips: Safety, Tools, and Pro Tricks
1. Plan Your Layout First (Seriously, Don’t Skip This)
Before you buy a single bulb, sketch your patio layout. Ask:
- Where are the power sources? (Outlets, GFCI-protected circuits)
- How many strands do you need? (Measure the perimeter and ceiling area)
- Will you need extension cords? (Use outdoor-rated, heavy-duty ones)
Tool kit essentials:
- Ladder (for ceiling work)
- Measuring tape
- Drill and drill bits (for hooks)
- Level
- Zip ties and adhesive clips
- GFCI outlet tester (safety first!)
2. Use the Right Fasteners
Different surfaces need different solutions:
- Wood (beams, rafters): Screw-in hooks or eye bolts. Pre-drill holes to avoid splitting.
- Stucco/concrete: Use masonry anchors and screws. A hammer drill helps.
- Metal (pergola, railing): Magnetic hooks or zip ties.
- Glass (screened porch): Adhesive clips (like Command™ Outdoor Hooks).
Warning: Avoid nails—they can damage surfaces and aren’t secure. I once used a nail on a wooden beam, and the light sagged after a week. Not a good look.
3. Prevent Sagging and Tangles
Nothing ruins the ambiance like droopy lights. To keep them taut:
- Use turnbuckles every 10–15 feet for long runs.
- For shorter spans, tighten the cord as you install, then secure with clips.
- If using adhesive hooks, apply them in a “V” shape (one high, one low) to create tension.
Pro trick: Install lights in the morning when the air is cool. Cords expand in heat, so they’ll stay tighter in summer evenings.
4. Power Safety: Don’t Overload the Circuit
This is critical. Most outdoor circuits can handle 15–20 amps. Calculate:
- Check the wattage of each light strand (usually 10–20W for LEDs).
- Divide your circuit’s amps by the strand wattage. Example: 15A circuit ÷ 15W = 10 strands max.
- Use a power strip with a GFCI to protect against surges and moisture.
Real-life lesson: My neighbor plugged 15 strands into one outlet during a party. The circuit tripped, and the lights went out mid-dinner. Embarrassing—and preventable!
Maintenance and Longevity: Keep Your Lights Glowing for Years
1. Clean Bulbs and Cords Annually
Dust, pollen, and grime dull the glow. Here’s how to clean:
- Turn off and unplug the lights.
- Use a microfiber cloth and mild soap/water mix.
- For stubborn grime, a soft toothbrush works wonders.
- Let bulbs dry completely before rehanging.
Note: Never submerge bulbs in water—even if they’re “weatherproof.”
2. Store Properly Off-Season
If you live in a cold climate, take down lights in winter. Store them:
- Wrapped loosely in plastic bins (not airtight—moisture causes corrosion).
- With desiccant packs to absorb humidity.
- Labeled by type (LED, Edison, etc.) for easy setup next year.
Alternative: Use outdoor-rated lights that can stay up year-round. Just cover them with a tarp during snowstorms.
3. Replace Bulbs and Fuses
Even LED bulbs eventually burn out. Keep spares on hand. For incandescent strands:
- Check for blown fuses (tiny glass tubes in the plug). Replace with the same amperage.
- Replace individual bulbs—don’t toss the whole strand.
Pro tip: Take a photo of your setup before taking it down. It’ll help you remember where everything goes next year!
Top 3 String Light Brands Compared (With Real User Insights)
Not all brands are equal. Here’s how three top contenders stack up:
| Brand | Best For | Pros | Cons | Price Range (25-ft) |
|---|---|---|---|---|
| Brightech Ambience Pro | Large patios, heavy use | Wet-rated, 20,000-hour lifespan, 2-year warranty | Bulbs can’t be replaced individually | $35–$45 |
| Koopower Edison String | Vintage look, small spaces | Affordable, warm amber glow, easy to install | Shorter cord (16 ft), not ideal for large areas | $20–$30 |
| Twinkle Star Outdoor | Budget-friendly, basic needs | UL-listed, 100,000-hour lifespan, 50 bulbs per strand | Plastic bulbs feel cheap, limited color options | $15–$25 |
User insight: Brightech gets rave reviews for durability, but Koopower is a hit for quick, affordable upgrades. Twinkle Star? Great for renters or temporary setups.
Final Thoughts: Light Up Your Life—Literally
Let’s be honest: outdoor covered patio string lights aren’t just decor. They’re mood-makers, conversation starters, and little slices of joy. Whether you’re creating a romantic nook for two or a festive space for 20, the right lights can turn an ordinary patio into an extraordinary retreat.
But here’s the secret: it’s not about spending the most money or buying the fanciest brand. It’s about intentional design. Plan your layout, choose quality lights, and install them safely. Take the time to layer, experiment, and personalize. Maybe add a dimmer switch for mood control. Or try color-changing LEDs for holidays. The possibilities are endless.
And remember—this isn’t a one-time project. Your patio’s needs will change with the seasons, your tastes, and life’s little moments. That’s the beauty of string lights: they’re flexible, forgiving, and always ready to adapt.
So go ahead. Grab a ladder, call a friend, and start stringing. The glow you create won’t just light up your patio—it’ll light up your life. And who knows? You might just find yourself spending more evenings outside, sipping tea under the stars, and realizing that the best moments are the simple ones, softly illuminated by the perfect string of lights.
Frequently Asked Questions
What are the best outdoor covered patio string lights for year-round use?
The best outdoor covered patio string lights are weather-resistant (rated IP65 or higher) and made with durable materials like shatterproof bulbs and rubberized cords. Look for LED options with warm white or color-changing features for versatility.
Can I leave covered patio string lights up in winter?
Yes, if the lights are rated for extreme temperatures and have waterproof seals. Always check the manufacturer’s guidelines and opt for commercial-grade outdoor covered patio string lights for added durability in snow or ice.
How do I install string lights on a covered patio without drilling holes?
Use adhesive hooks, tension rods, or magnetic mounts for damage-free installation. For pergolas or railings, zip ties or adjustable clips work well to secure the lights while maintaining a clean look.
What’s the ideal spacing for string lights on a covered patio?
Space lights 12–18 inches apart for even illumination, adjusting based on your patio size. For a layered effect, hang multiple rows at varying heights, especially over dining or seating areas.
Are solar-powered string lights bright enough for covered patios?
Solar-powered lights work well under covered patios if they receive direct sunlight for 6–8 hours daily. Choose models with high-lumen LEDs and adjustable brightness settings for consistent glow.
How do I clean and maintain my outdoor patio string lights?
Wipe bulbs and cords with a damp cloth and mild soap, avoiding harsh chemicals. Store lights in a dry place during off-seasons, and inspect connections annually to prevent corrosion or wear.

