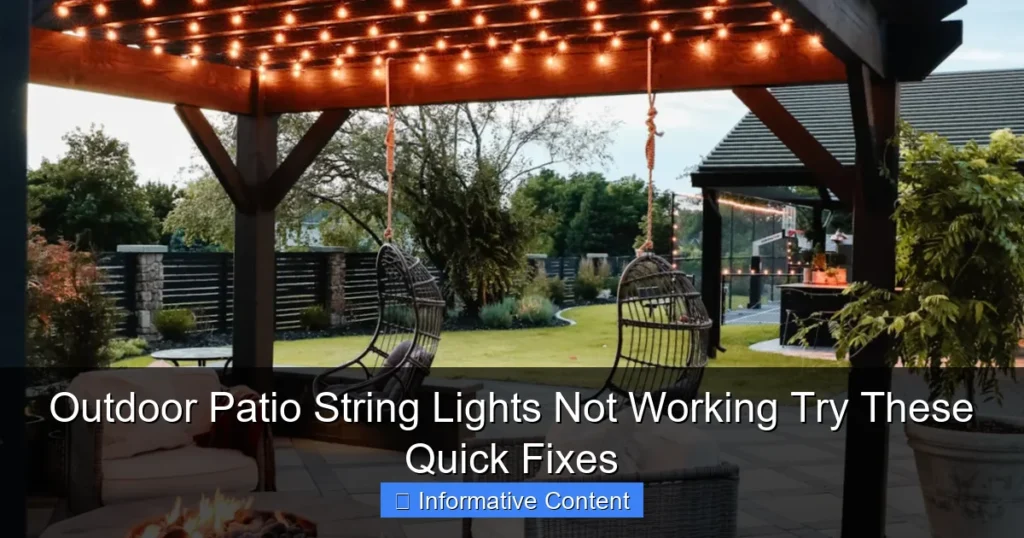
Featured image for outdoor patio string light on guid wire
Image source: m.media-amazon.com
Transform your outdoor space with patio string lights on a guide wire—effortless, elegant, and endlessly customizable. This setup ensures perfect, droop-free illumination across large patios, pergolas, or backyards, eliminating the hassle of poles or trees while delivering a professional, ambient glow ideal for entertaining or relaxing.
Key Takeaways
- Choose durable lights: Opt for weather-resistant, commercial-grade string lights for longevity.
- Install guide wires: Use steel cables to support lights and prevent sagging over time.
- Spacing matters: Hang bulbs 12-18 inches apart for balanced, even illumination.
- Smart controls: Use dimmers or timers to adjust brightness and save energy effortlessly.
- Layer lighting: Combine string lights with lanterns or spotlights for dynamic ambiance.
- Secure connections: Seal all electrical connections to protect against moisture and damage.
📑 Table of Contents
Transform Your Outdoor Space with String Lights on Guide Wire
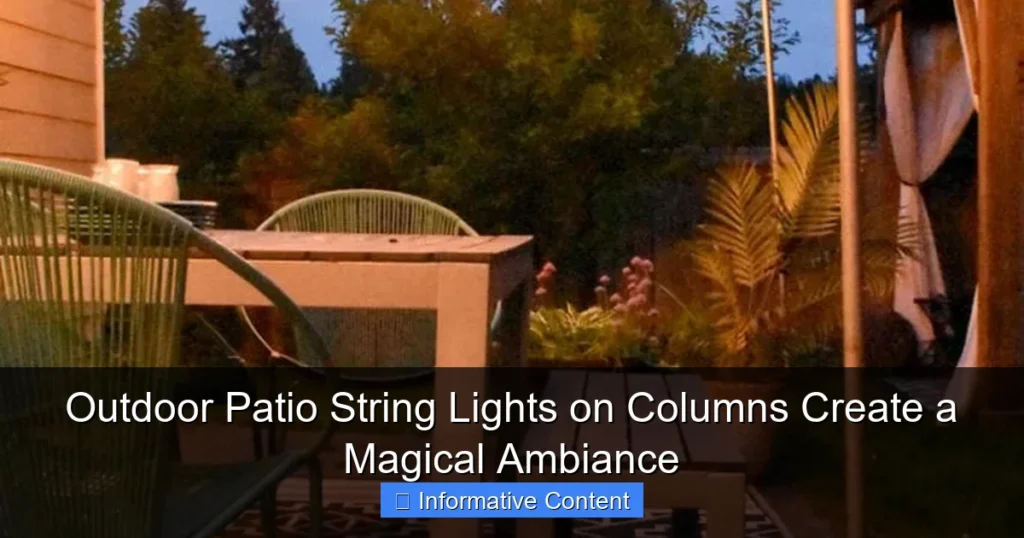
Imagine this: It’s a warm summer evening, and you’re sitting on your patio, wrapped in the soft glow of twinkling lights. The air is filled with laughter, the scent of grilled food, and the gentle hum of conversation. The atmosphere feels magical, almost like you’ve stepped into a scene from a movie. What’s the secret behind this enchanting ambiance? Outdoor patio string lights on guide wire.
String lights have become a staple in outdoor decor, but mounting them securely and stylishly can be tricky. That’s where guide wire systems come in. They offer a clean, professional look without the hassle of drilling holes or dealing with sagging wires. Whether you’re hosting a backyard BBQ, enjoying a quiet night with your partner, or throwing a birthday party, these lights can instantly elevate your space. In this guide, I’ll share everything you need to know about choosing, installing, and maintaining outdoor patio string lights on guide wire to create the perfect vibe for any occasion.
Why Guide Wire Systems Are a Game-Changer
The Struggle with Traditional String Light Installations
Let’s be honest—hanging string lights the traditional way (using hooks, nails, or adhesive clips) often leads to frustration. Lights sag, fall down, or look uneven. And if you have a large patio or uneven surfaces, the challenge multiplies. I once tried to hang lights across my pergola using only adhesive hooks. Within a week, half of them had fallen off, and the rest were sagging like a deflated balloon. Not exactly the cozy, inviting look I was going for.
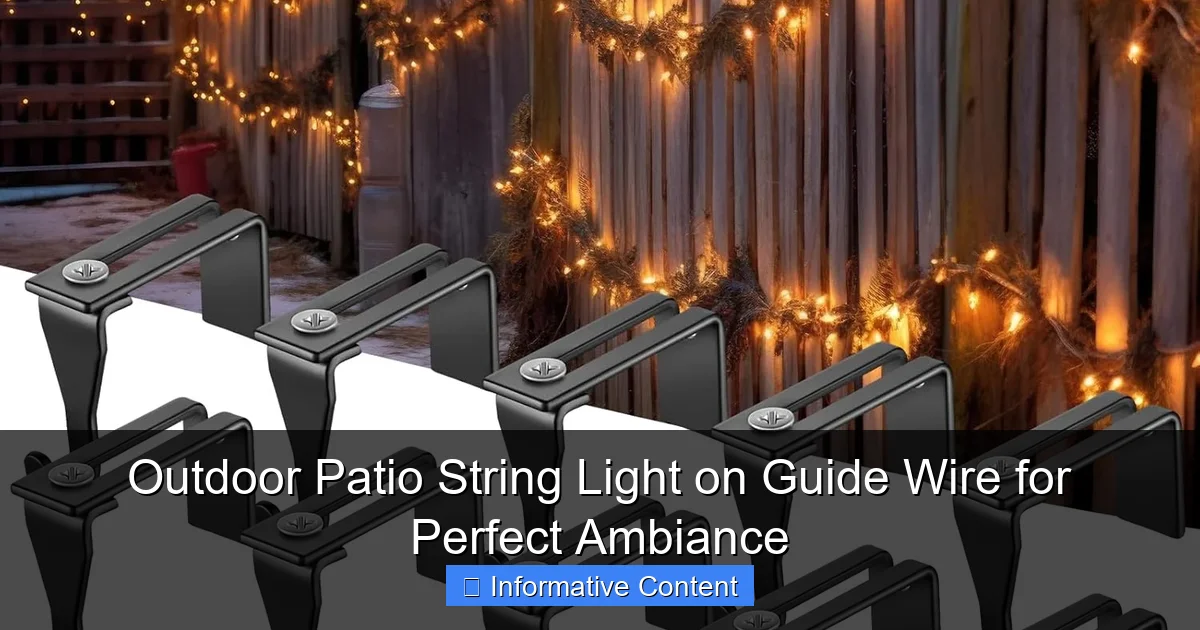
Visual guide about outdoor patio string light on guid wire
Image source: cdn.christmaslightsetc.com
Guide wire systems solve these problems by providing a sturdy, tensioned foundation for your lights. Think of it like a clothesline for your patio—strong, reliable, and designed to hold weight without drooping. The wire is anchored between two points (like poles, walls, or trees), creating a taut “rail” for your string lights to hang from. This method ensures even spacing, eliminates sagging, and gives your space a polished, intentional look.
How Guide Wires Enhance Aesthetics and Functionality
- No More Sagging: The tension in the wire keeps your lights perfectly straight, even over long distances. No more worrying about lights dragging on the ground or looking messy.
- Flexible Design: You can create straight lines, zigzags, or even geometric patterns (like diamonds or squares) by adding multiple guide wires. This lets you customize the look to match your patio’s vibe.
- Easy to Maintain: Since the lights are attached to the wire with simple clips or ties, replacing bulbs or adjusting spacing is a breeze. No more climbing ladders to fix loose wires.
- Weather-Resistant: High-quality guide wire systems are made from materials like stainless steel or galvanized cable, which resist rust and corrosion. They can handle rain, wind, and even snow.
For example, my friend Sarah used a guide wire system to create a canopy of lights over her rectangular patio. She anchored the wire to two sturdy posts at either end, then clipped her Edison-style bulbs along the wire. The result? A stunning, symmetrical display that looked like it was done by a professional decorator. Best of all, it took her less than two hours to install.
Choosing the Right Components for Your Setup
Guide Wire: Material, Thickness, and Tension
Not all guide wires are created equal. The material and thickness you choose will determine how durable and reliable your system is. Here’s what to look for:
- Material:
- Stainless Steel: The gold standard. It’s strong, rust-proof, and lasts for years. Perfect for coastal areas or humid climates.
- Galvanized Steel: A budget-friendly option that’s still weather-resistant. Just make sure it’s coated properly to avoid rust.
- Aluminum: Lightweight and corrosion-resistant, but not as strong as steel. Best for short spans or lightweight lights.
- Thickness:
Guide wires are measured in gauge (lower numbers = thicker wire). For most patios, a 10-14 gauge wire works well. If you’re spanning a long distance (over 30 feet) or using heavy lights, go for 10-12 gauge.
- Tension:
The wire needs to be tight enough to hold the lights without sagging. Use a turnbuckle or tensioner to adjust the tightness after installation. Pro tip: Install the wire slightly tighter than you think you need—it’ll loosen slightly over time.
String Lights: Types, Bulbs, and Brightness
Now, let’s talk about the stars of the show—the lights themselves. Here are the key factors to consider:
- Type of String Lights:
- Edison Bulbs: Vintage, warm glow. Great for a rustic or romantic vibe. They’re a bit heavier, so make sure your guide wire can handle the weight.
- LED Mini Lights: Energy-efficient, cool to the touch, and come in various colors (white, warm white, multicolor). Perfect for year-round use.
- Fairy Lights: Tiny, delicate bulbs. Ideal for wrapping around the wire or creating a “twinkle” effect. Less durable but very whimsical.
- Bulb Spacing:
Closer spacing (e.g., 6 inches between bulbs) creates a dense, cozy glow. Wider spacing (12-24 inches) gives a more subtle, starry-night effect. Choose based on your patio size and desired ambiance.
- Brightness (Lumens):
For ambient lighting, 100-300 lumens per bulb is ideal. If you want task lighting (e.g., for a dining area), opt for 500+ lumens. Dimmer switches can help adjust brightness.
Example: For my patio, I chose warm white LED mini lights (150 lumens) with 12-inch spacing. The guide wire (12-gauge stainless steel) spans 20 feet, and the lights clip on easily with plastic S-hooks. The result is a soft, inviting glow that’s perfect for evening chats.
Hardware and Accessories: Anchors, Clips, and Tensioners
Don’t overlook the small stuff! The right hardware ensures your system stays secure and looks professional.
- Anchors: Use heavy-duty anchors for walls, trees, or posts. For concrete, go for masonry anchors; for wood, lag bolts work best. Avoid flimsy plastic anchors—they won’t hold up.
- Clips and Hooks:
- S-Hooks: Simple and cheap. Just clip them onto the wire and hang the lights. They can slip, though, so use them with caution.
- Zip Ties: Durable and adjustable. Wrap them around the wire and light sockets. Cut them off when you need to replace a bulb.
- Specialty Clips: Some brands make clips designed specifically for guide wires (e.g., the “WireClip” from Outdoor Lighting Co.). These are pricier but super convenient.
- Tensioners: Turnbuckles or cable clamps let you tighten the wire after installation. They’re essential for long spans or heavy lights.
Step-by-Step Installation Guide
Planning Your Layout
Before you start drilling holes, take time to plan your layout. Here’s how:
- Measure Your Space: Use a tape measure to find the distance between your anchor points (e.g., from the house to a post). Note any obstacles (trees, furniture) that might affect the wire path.
- Sketch a Design: Draw a rough sketch of your patio, including the guide wire path and light placement. This helps you visualize the final look and avoid surprises.
- Choose Anchor Points: Look for sturdy surfaces to attach the wire. Walls, posts, and tree trunks are ideal. Avoid weak structures (like thin fences) or surfaces that might rot (untreated wood).
- Check Local Codes: Some areas have rules about outdoor electrical installations. If you’re using a transformer or timer, make sure it’s up to code.
Tip: If you’re unsure about anchor points, use a temporary setup (like a ladder or step stool) to test the wire tension and light placement before committing.
Installing the Guide Wire
Now, let’s get down to business. Here’s how to install the guide wire:
- Attach Anchors: Drill holes and secure anchors at your chosen points. Use a level to ensure they’re perfectly aligned. (Slight misalignment can cause the wire to sag.)
- Run the Wire: Unroll the guide wire and thread it through the anchors. Leave extra length on both ends for tensioning.
- Add Tensioners: Connect turnbuckles or cable clamps to the ends of the wire. These will help you adjust the tightness later.
- Tighten the Wire: Use a wrench or pliers to turn the tensioners until the wire is taut. Test it by gently pressing down—it should feel firm, not wobbly.
- Trim Excess Wire: Cut off any extra wire with wire cutters. Leave a small loop at each end to prevent fraying.
Example: For my 20-foot patio, I used two stainless steel eye bolts (anchored to the house and a pergola post) and a turnbuckle. After tightening, the wire had zero sag—even with the weight of the lights.
Hanging the Lights
With the guide wire in place, it’s time to add the lights. Follow these steps:
- Test the Lights: Plug them in before hanging to make sure all bulbs work. Replace any duds.
- Clip or Tie the Lights:
- For S-hooks or clips, attach them to the wire first, then hang the lights.
- For zip ties, wrap them around the wire and light sockets, then tighten. Cut off excess.
- Adjust Spacing: Step back and check the spacing. If bulbs are too close or too far apart, adjust the clips or ties.
- Secure the Cord: If your lights have a long cord, use zip ties to attach it to the guide wire. This prevents it from dangling or getting tangled.
Pro Tip: Start hanging lights from the middle of the wire and work outward. This helps you spot spacing issues early.
Maintenance and Troubleshooting
Keeping Your System in Top Shape
Outdoor lighting systems need a little TLC to stay beautiful. Here’s how to maintain yours:
- Clean the Lights: Wipe down bulbs and wires with a damp cloth every few months. Remove dust, pollen, and spider webs.
- Check Connections: Inspect the anchor points and clips for rust or looseness. Tighten any loose screws or replace corroded hardware.
- Inspect the Wire: Look for fraying, kinks, or rust spots. Replace the wire if it’s damaged.
- Trim Nearby Foliage: If trees or shrubs grow into the wire, trim them back. Overgrown plants can weigh down the wire or damage the lights.
Example: I clean my lights every spring and fall. It takes about 30 minutes and keeps them looking fresh all year.
Common Problems and Fixes
Even the best systems can have hiccups. Here are common issues and how to fix them:
- Sagging Wire: Tighten the tensioners. If the wire has stretched over time, replace it with a thicker gauge.
- Flickering Lights: Check for loose bulbs, damaged cords, or faulty transformers. Replace any defective parts.
- Corroded Anchors: Swap out rusty anchors for stainless steel or galvanized ones. Coat them with rust-inhibiting spray for extra protection.
- Weather Damage: If your lights stop working after a storm, unplug them and inspect for water damage. Use weatherproof covers for outlets and transformers.
Real-Life Examples and Inspiration
Small Patio: Cozy and Intimate
For a 10×10-foot patio, a single guide wire with warm white mini lights creates a snug, inviting vibe. Anchor the wire to the house and a nearby post, then hang the lights with 12-inch spacing. Add a dimmer switch to control the brightness for movie nights or romantic dinners.
Large Backyard: Grand and Dramatic
In a spacious yard, use multiple guide wires to create a “canopy” effect. Run parallel wires from the house to a pergola, then hang Edison bulbs with 18-inch spacing. For extra drama, add a second layer of fairy lights above the main wires.
Table: Comparison of Popular Guide Wire Systems
| Brand | Material | Max Span | Price (10 ft) | Best For |
|---|---|---|---|---|
| Outdoor Lighting Co. | Stainless Steel | 50 ft | $25 | Long spans, heavy lights |
| Brightech | Galvanized Steel | 30 ft | $15 | Medium patios, budget-friendly |
| String Light Solutions | Aluminum | 20 ft | $12 | Short spans, lightweight lights |
Final Thoughts: Light Up Your Life
There’s something magical about a well-lit patio. It’s not just about visibility—it’s about creating a space where memories are made. Outdoor patio string lights on guide wire offer the perfect blend of beauty, durability, and ease of use. Whether you’re a DIY newbie or a seasoned decorator, this system can transform your outdoor area into a haven of warmth and charm.
Remember, the key to success is planning, quality materials, and a little patience. Take your time with the installation, and don’t be afraid to tweak the design until it’s just right. And when you finally sit back under your twinkling lights, sipping a drink and watching the stars, you’ll know it was worth every effort. So go ahead—light up your life, one guide wire at a time.
Frequently Asked Questions
How do I install outdoor patio string lights on a guide wire?
To install outdoor patio string lights on a guide wire, first secure the wire tightly between two anchor points using turnbuckles or hooks for tension. Then, attach the string lights to the guide wire using zip ties, S-hooks, or clips, ensuring even spacing for a balanced look. This method keeps lights stable and avoids sagging.
What’s the best type of string lights to use with a guide wire system?
LED string lights are ideal for guide wire setups because they’re energy-efficient, weather-resistant, and long-lasting. Choose commercial-grade or shatterproof bulbs for durability, especially if your patio is exposed to wind or rain. Look for lights with reinforced hanging loops for easy attachment.
Can I use guide wires for string lights in a sloped or uneven backyard?
Yes, guide wires are perfect for uneven outdoor spaces—adjust the anchor heights to create a level lighting line. Use tensioners to maintain consistent wire tightness, preventing the lights from drooping. This flexibility makes them ideal for customizing ambiance on any patio.
How do I keep my outdoor patio string lights from sagging on the guide wire?
Prevent sagging by using a high-tensile guide wire (like aircraft cable) and tightening it with turnbuckles before hanging lights. Space attachment points no more than 2-3 feet apart and opt for lightweight lights to reduce strain. Regularly check tension after installation.
Are guide wire string lights safe for year-round outdoor use?
Absolutely, as long as you use weatherproof string lights (rated IP65 or higher) and stainless steel or galvanized guide wires to resist rust. Ensure connections are sealed with silicone to protect against moisture. Proper installation ensures safety in all seasons.
How can I dim or control outdoor patio string lights on a guide wire?
Use dimmable LED string lights paired with a compatible dimmer switch or a smart plug for remote/voice control. For guide wire setups, choose lights with a plug-in transformer to easily integrate with smart home systems. This lets you adjust brightness for any ambiance.