Featured image for outdoor patio string lights hooks
Image source: thecampdiary.com
Choosing the right outdoor patio string lights hooks is essential for creating a safe, stylish, and long-lasting ambiance. From heavy-duty screw-in hooks for permanent installations to versatile s-hooks and adhesive mounts for renter-friendly setups, the right hardware ensures your lights stay secure in any weather. Elevate your outdoor space with confidence—function meets flair when you pick the perfect hooks for your string lights.
Key Takeaways
- Choose durable hooks: Opt for weather-resistant materials like stainless steel or coated metal.
- Plan spacing wisely: Space hooks 12-16 inches apart for balanced, sag-free lighting.
- Secure mounting is key: Use wall anchors or screws for stability on all surfaces.
- Prioritize adjustability: Select hooks with swivel or tension features for easy alignment.
- Blend with design: Match hook finishes to your patio’s aesthetic for seamless style.
- Test before finalizing: Hang a few lights first to confirm spacing and brightness.
📑 Table of Contents
- Why the Right Hooks Make All the Difference for Your Outdoor String Lights
- Types of Outdoor Patio String Lights Hooks: Finding Your Perfect Match
- Materials Matter: Durability, Safety, and Aesthetics
- Installation 101: Step-by-Step Guide to Flawless Hanging
- Creative Ideas to Elevate Your Patio Ambiance
- Maintenance and Troubleshooting: Keeping Your Lights Glowing
- Data Table: Hook Comparison by Type
- Final Thoughts: Lighting Up Your Outdoor Dreams
Why the Right Hooks Make All the Difference for Your Outdoor String Lights
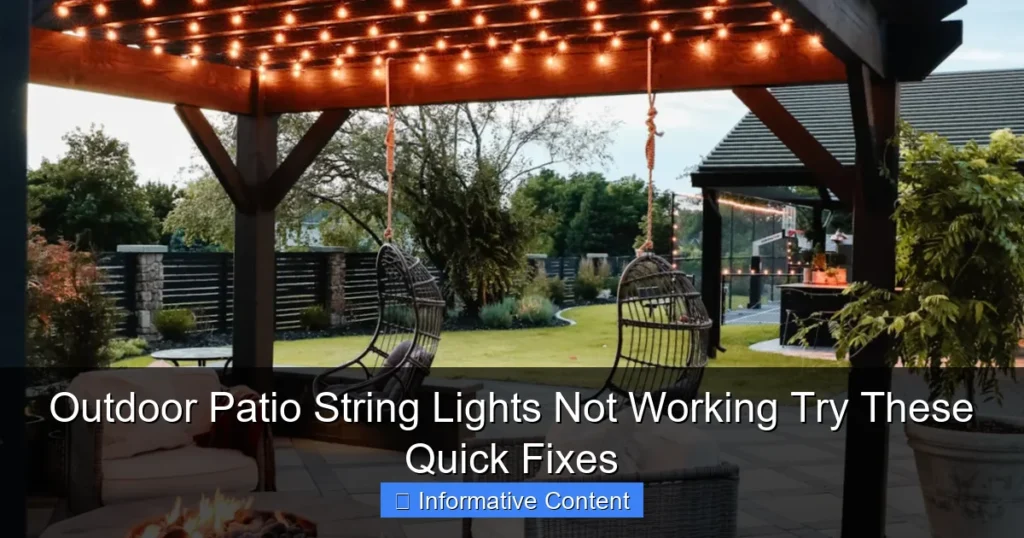
Remember that magical moment when you first turned on your outdoor string lights? The soft glow transformed your patio into a cozy, inviting haven—perfect for late-night conversations, summer BBQs, or just unwinding after a long day. But here’s the thing: none of that charm happens by accident. Behind every perfectly lit space are the unsung heroes—outdoor patio string lights hooks. These small but mighty fixtures hold your lights securely, shape the ambiance, and ensure safety and longevity. Without the right hooks, even the most beautiful string lights can sag, fall, or create a tangled mess.
I learned this the hard way. A few years ago, I tried using flimsy adhesive clips to hang my favorite Edison-style bulbs around my deck. By the second week, half the lights were dangling like sad party streamers. After some trial, error, and a few DIY upgrades, I discovered that the secret to a flawless, long-lasting setup lies in choosing the right hooks and installing them thoughtfully. Whether you’re lighting up a sprawling backyard, a cozy balcony, or a pergola, the right hooks can make or break your outdoor oasis. In this guide, I’ll walk you through everything you need to know about outdoor patio string lights hooks—from types and materials to installation tips and creative ideas—so you can create the perfect ambiance without the headaches.
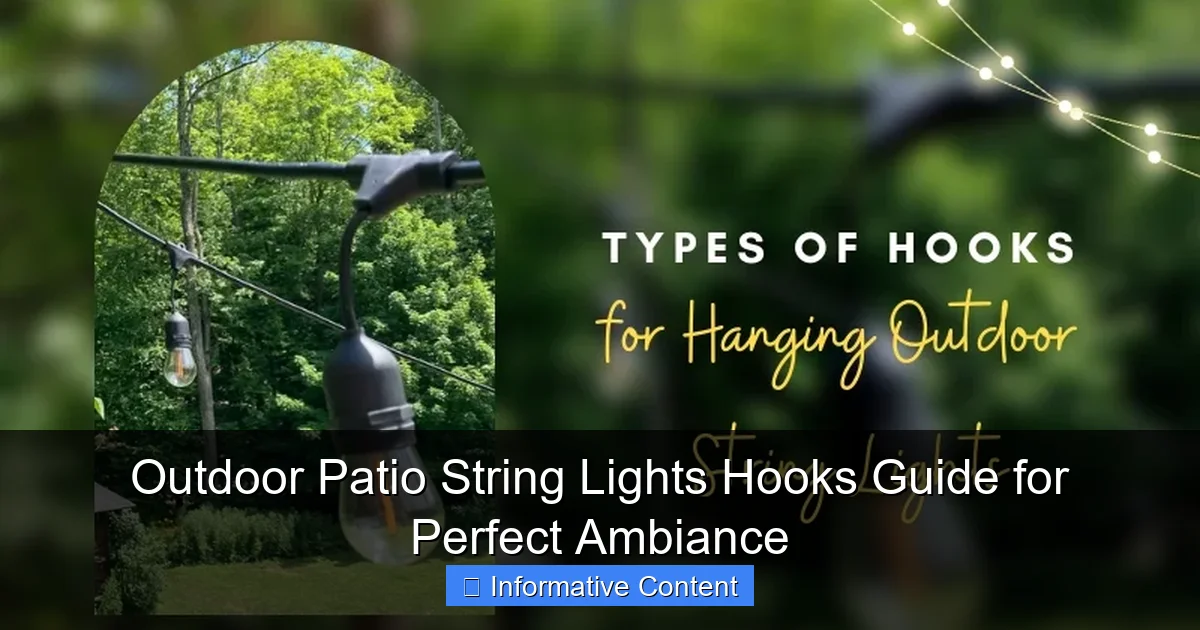
Types of Outdoor Patio String Lights Hooks: Finding Your Perfect Match
Not all hooks are created equal. The right choice depends on your space, the weight of your lights, and your aesthetic goals. Let’s break down the most common types and their best use cases.
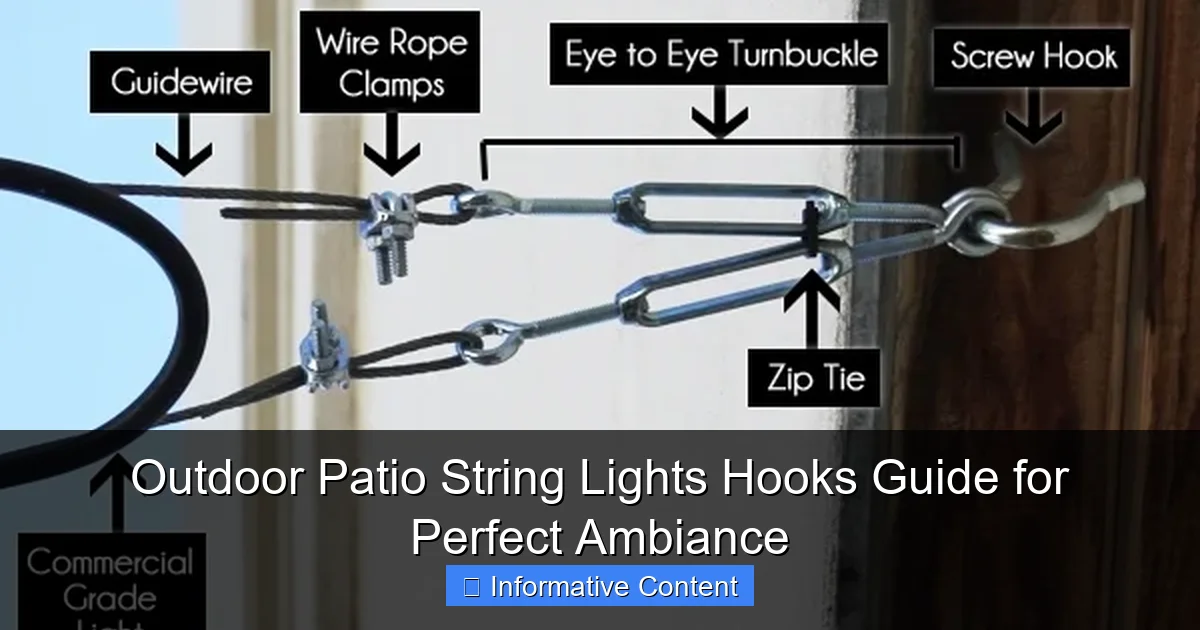
Visual guide about outdoor patio string lights hooks
Image source: menterarchitects.com
1. Wall-Mounted Hooks (Screw-In or Toggle Bolts)
These are the workhorses of outdoor lighting. Wall-mounted hooks screw directly into wood, stucco, brick, or siding. They’re ideal for permanent installations or when you want a clean, minimalist look. Best for: patios with wooden fences, house exteriors, or pergolas with solid support beams.
- Pros: Extremely secure, can support heavy-duty string lights, and won’t budge in wind.
- Cons: Requires drilling, so not ideal for renters or temporary setups.
- Pro tip: Use toggle bolts for hollow walls or stucco to avoid pull-out. For wood, stainless steel screws prevent rust.
Example: I used these to hang 50-foot LED strands along my cedar fence. After three years, they’re still rock-solid, even through heavy snowfall.
2. Adhesive Hooks (Heavy-Duty or Outdoor-Grade)
Perfect for renters or those who want a no-drill solution. Look for hooks labeled “outdoor-rated” with UV-resistant adhesive. They work on smooth, non-porous surfaces like painted wood, metal, or vinyl.
- Pros: Easy to install, removable without damage, and great for temporary events.
- Cons: Can fail in extreme heat, humidity, or on textured surfaces. Not for heavy lights.
- Pro tip: Clean the surface with rubbing alcohol before applying. Let the adhesive cure for 24 hours before hanging lights.
Example: I used 3M Command Outdoor hooks on my apartment balcony. They held 20 feet of lightweight fairy lights for an entire summer—until I moved out, when they peeled off cleanly.
3. Gutter Hooks and Clips
Designed specifically for rooflines, these clip onto gutters without nails. They’re a godsend for wrapping lights around eaves or creating a canopy effect.
- Pros: No drilling, easy to adjust, and perfect for holiday lighting.
- Cons: Only work with gutters. Can slip if overloaded.
- Pro tip: Choose adjustable gutter hooks with rubber grips to protect your gutters and prevent sliding.
4. Ground Stakes and Post Hooks
Ideal for freestanding installations. Ground stakes hammer into soil, while post hooks attach to existing poles, trees, or deck railings.
- Pros: Portable, great for renters, and create dynamic lighting patterns.
- Cons: Less stable in soft soil. Tree hooks can damage bark if not padded.
- Pro tip: Use rubber tree guards or fabric strips to protect bark when wrapping around trees.
5. Magnetic Hooks
A niche but clever option for metal surfaces like sheds, railings, or even cars (for mobile lighting).
- Pros: Instant setup, no tools needed, and removable.
- Cons: Limited to magnetic surfaces. Weak in strong winds.
Materials Matter: Durability, Safety, and Aesthetics
The material of your hooks isn’t just about looks—it’s about survival in the elements. Here’s what to consider for long-term performance.
Stainless Steel: The Gold Standard
Why it’s great: Resists rust, handles extreme temperatures, and supports heavy loads. Look for marine-grade 316 stainless steel for coastal areas.
- Best for: Permanent installations, pergolas, and high-wind zones.
- Watch out: Can be pricier, but worth it for longevity.
Example: My neighbor used cheap zinc-plated hooks on his deck. Within a year, they rusted and snapped, dropping his lights into a planter. Stainless steel would’ve lasted a decade.
Aluminum: Lightweight and Rust-Free
Aluminum hooks are corrosion-resistant and perfect for lighter string lights. They’re often powder-coated for extra protection.
- Best for: Renters, temporary setups, or areas with moderate weather.
- Watch out: Not as strong as steel—avoid for heavy Edison bulbs.
Plastic and Composite Hooks: Budget-Friendly but Limited
Great for lightweight fairy lights or seasonal use. UV-stabilized plastic holds up better in sunlight.
- Best for: Holiday lighting, small patios, or short-term events.
- Watch out: Can warp in heat or become brittle in cold. Not for year-round use.
Coated vs. Uncoated: The Aesthetic Trade-Off
Many hooks come with black, white, or clear coatings to blend into your space. While coated hooks look sleeker, the coating can chip over time—exposing the metal underneath. Tip: If you want a seamless look, choose hooks that match your surface color (e.g., black hooks on a dark fence).
Installation 101: Step-by-Step Guide to Flawless Hanging
Even the best hooks fail if installed poorly. Here’s how to do it right, with real-world tips from my own mishaps and wins.
Step 1: Plan Your Layout (Measure Twice, Hang Once)
Sketch your patio or yard, noting where lights will hang. Measure distances between anchor points and calculate the total weight of your lights. Rule of thumb: Place hooks every 12–18 inches for heavy strands, 24 inches for lightweight fairy lights.
- Pro tip: Use painter’s tape to mock up hook positions. Step back and adjust for symmetry.
Step 2: Choose the Right Fastener for Your Surface
Not all screws are created equal. Match your fastener to the material:
- Wood: Use #8 or #10 stainless steel wood screws.
- Brick/Stone: Masonry screws with plastic anchors.
- Stucco: Toggle bolts or specialized stucco anchors.
- Metal: Self-tapping screws or magnetic hooks.
Step 3: Install Hooks (The No-Slip, No-Sag Method)
- Drill pilot holes to prevent splitting (especially in wood).
- Insert anchors if needed (for masonry or stucco).
- Screw in hooks, leaving 1–2 inches of thread exposed for adjustment.
- Use a level to ensure hooks are aligned. Crooked hooks = crooked lights!
Example: I once installed hooks on my pergola without leveling. The lights sagged in the middle, creating a “U” shape. A quick level check would’ve saved me an hour of rework.
Step 4: Hang and Adjust Your Lights
- Start at the power source to minimize cord strain.
- Clip lights into hooks, but don’t pull too tight—leave a slight curve for wind movement.
- For a “draped” look, space hooks 2–3 feet apart and let lights hang in gentle loops.
- Test with a ladder: Walk around and check for sagging or sharp angles.
Step 5: Secure the Cord (Don’t Skip This!)
Even with perfect hooks, loose cords can create tripping hazards or strain connections. Use outdoor-rated cord clips or zip ties to secure excess cord every 10–15 feet. Bonus: Wrap cords around hooks in a figure-eight pattern to prevent sliding.
Creative Ideas to Elevate Your Patio Ambiance
Hooks aren’t just for straight lines. With a little creativity, you can transform your patio into a lighting masterpiece.
1. The Canopy Effect (Pergola or Deck)
Use hooks to create a grid or crisscross pattern overhead. This casts a warm, dappled light—like dining under the stars.
- How to: Install hooks on opposite beams, then weave lights back and forth.
- Pro tip: Mix bulb styles (e.g., round and globe) for visual interest.
2. Tree Wraps (For Natural Charm)
Wrap string lights around tree trunks or branches using padded hooks or fabric strips. Caution: Avoid tight wraps—they can girdle the tree.
- How to: Use ground stakes at the base to anchor the start/end points.
- Pro tip: Choose warm white lights to mimic fireflies.
3. Railing and Fence Lines (Simple but Effective)
Line your deck railing or backyard fence with evenly spaced hooks. This creates a glowing border that defines the space.
- How to: For railings, use L-shaped hooks that clamp over the top.
- Pro tip: Add a “wave” effect by alternating high and low hooks.
4. Floating Lights (For Open Yards)
Use ground stakes or tall posts to hang lights between trees, sheds, or freestanding poles. This works magic for large, open spaces.
- How to: Install hooks at different heights for depth.
- Pro tip: Add a central “chandelier” hook for a focal point.
5. The “Floating” Table Illusion
Suspend lights 1–2 feet above a patio table using hooks on nearby structures. The result? A cozy, intimate glow that feels like dining in a lantern-lit garden.
- How to: Use adjustable hooks to fine-tune the height.
Maintenance and Troubleshooting: Keeping Your Lights Glowing
Even the best setups need TLC. Here’s how to avoid common pitfalls and extend your lights’ lifespan.
Seasonal Checkups (Do This Twice a Year)
- Spring: Inspect hooks for rust, loose screws, or damage. Tighten or replace as needed.
- Fall: Before storing, check for frayed wires or burnt-out bulbs. Clean hooks with a damp cloth.
Common Problems & Quick Fixes
- Sagging lights? Add more hooks or tighten existing ones. For long runs, use a support wire (e.g., aircraft cable) under the lights.
- Hook pulling out? Switch to longer screws, toggle bolts, or adhesive with higher weight capacity.
- Adhesive failing? Clean the surface thoroughly and reapply. Avoid using in temperatures below 50°F (10°C).
- Wind damage? Use rubberized hooks or add a secondary support line.
When to Replace Hooks
- Rust spots on metal hooks (especially if spreading).
- Cracks in plastic hooks.
- Adhesive that no longer sticks after cleaning.
Example: I ignored a slightly rusted hook on my pergola. Six months later, it snapped during a storm, taking half my lights with it. A $3 replacement would’ve saved me $80 in new lights.
Data Table: Hook Comparison by Type
| Type | Best Surface | Weight Capacity | Installation | Lifespan | Cost |
|---|---|---|---|---|---|
| Wall-Mounted (Screw-In) | Wood, stucco, brick | 20–50 lbs | Drilling required | 10+ years | $$ |
| Adhesive | Painted wood, metal | 5–15 lbs | Peel-and-stick | 1–3 years | $ |
| Gutter Hooks | Roof gutters | 10–20 lbs | Clip-on | 5–7 years | $ |
| Ground Stakes | Soil, grass | 15–30 lbs | Hammer-in | 5+ years | $$ |
| Magnetic | Metal surfaces | 5–10 lbs | Instant | 3–5 years | $$ |
Final Thoughts: Lighting Up Your Outdoor Dreams
Creating the perfect outdoor ambiance isn’t just about the lights—it’s about the foundation they’re built on. Outdoor patio string lights hooks are the invisible framework that turns a simple strand into a breathtaking experience. From the durability of stainless steel to the creativity of canopy designs, every choice you make shapes the mood, safety, and longevity of your space. I’ve seen too many beautiful setups fail because of cheap hooks or rushed installation. But with the right knowledge, you can avoid those pitfalls and enjoy a patio that’s not just lit, but truly alive.
So, whether you’re a DIY newbie or a seasoned pro, take the time to pick hooks that match your vision. Measure carefully, install thoughtfully, and don’t be afraid to experiment. A little extra effort upfront means years of cozy evenings, unforgettable gatherings, and that magical glow that makes your outdoor space feel like home. After all, the best memories are made under the stars—or at least under a perfectly hung string of lights.
Frequently Asked Questions
What are the best outdoor patio string lights hooks for stucco walls?
For stucco walls, use adhesive-backed hooks with strong bonding (like 3M VHB tape) or plastic anchors with screws to prevent damage. Avoid metal hooks that can scratch the surface or corrode over time.
How do I install outdoor patio string lights hooks without drilling holes?
Opt for damage-free solutions like removable adhesive hooks, tension rods, or magnetic hooks for metal surfaces. These options are ideal for renters or those who want to preserve their patio’s aesthetics.
Can I use the same hooks for heavy-duty string lights and lightweight fairy lights?
No—match the hook weight capacity to your lights. Heavy-duty hooks (e.g., screw-in J-hooks) work for commercial-grade lights, while adhesive or plastic hooks suffice for delicate fairy lights.
How far apart should I space outdoor patio string lights hooks?
Space hooks 12–18 inches apart for even support, adjusting slightly based on bulb size and wire weight. Closer spacing (10–12″) is better for long, heavy strands to prevent sagging.
Do outdoor patio string lights hooks work on wood, brick, or vinyl siding?
Yes, but the installation method varies: use nails or screws for wood, masonry anchors for brick, and adhesive hooks or vinyl siding clips for no-damage vinyl options.
Are there weatherproof outdoor patio string lights hooks?
Look for hooks labeled “weather-resistant” or made of stainless steel, aluminum, or UV-protected plastic. These materials resist rust, fading, and warping from sun, rain, or snow.