Featured image for outdoor patio string lights rail
Transform your outdoor space into a captivating retreat with the right patio string lights rail setup. Choosing a durable, weather-resistant rail system ensures your lights stay secure and evenly spaced for a flawless glow all year round. From sleek stainless steel to discreet mounting options, the perfect rail enhances both safety and ambiance.
Key Takeaways
- Choose durable materials: Opt for weather-resistant rails to ensure long-lasting outdoor use.
- Plan spacing carefully: Hang lights 12–18 inches apart for balanced, ambient illumination.
- Use dimmers for control: Adjust brightness to match moods and occasions effortlessly.
- Secure rails properly: Install with sturdy brackets to handle wind and weight safely.
- Mix bulb styles creatively: Combine vintage and LED bulbs for unique visual appeal.
- Prioritize energy efficiency: Select solar-powered or low-wattage LEDs to save on costs.
📑 Table of Contents
- Transform Your Backyard with Outdoor Patio String Lights Rail
- Why You Need a String Lights Rail for Your Patio
- Types of Outdoor String Lights Rails: Which One Fits Your Space?
- Choosing the Right String Lights for Your Rail
- Installation Tips: From Planning to Perfect Placement
- Maintenance and Longevity: Keeping Your Lights Shining
- Top Picks: Data Table of Recommended Rails and Lights
- Final Thoughts: Light Up Your Life (Literally)
Transform Your Backyard with Outdoor Patio String Lights Rail
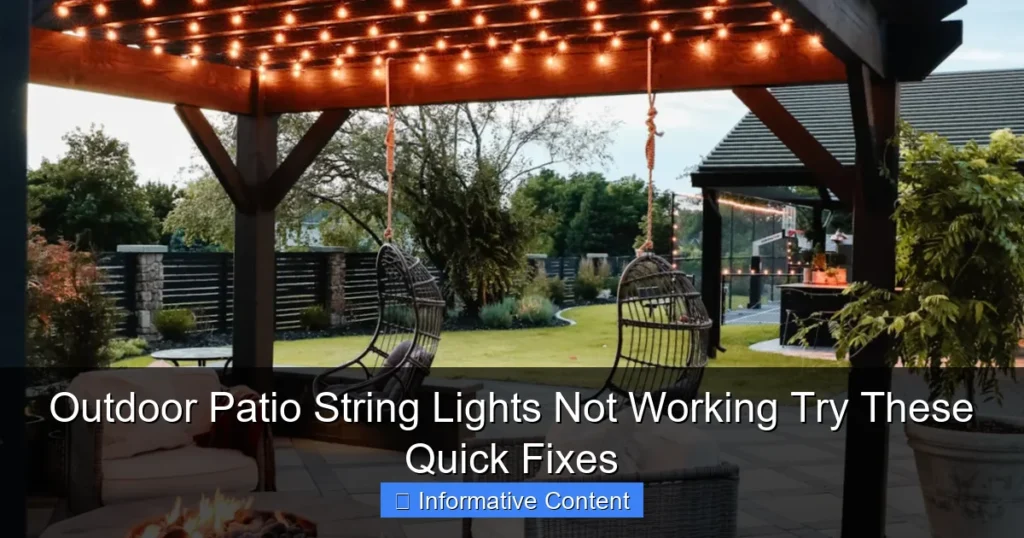
Remember that magical evening when you sat outside, sipping wine under a canopy of twinkling lights? The soft glow transformed your ordinary patio into a cozy retreat. That’s the power of outdoor patio string lights rail—a simple addition that can elevate your outdoor space from basic to breathtaking. Whether you’re hosting a summer barbecue, enjoying a quiet night with your partner, or just unwinding after a long day, the right lighting sets the mood like nothing else.
But here’s the thing: not all string lights are created equal. And installing them without a plan can lead to tangled wires, uneven coverage, or worse—lights that don’t last through the season. That’s where the outdoor patio string lights rail comes in. Think of it as the backbone of your lighting setup, giving you structure, stability, and style. It’s not just about hanging lights; it’s about creating a seamless, durable ambiance that feels intentional and inviting. Whether you’re a DIY novice or a seasoned decorator, this guide will walk you through everything you need to know to get it right.
Why You Need a String Lights Rail for Your Patio
Stability and Safety First
Let’s face it: draping lights across trees, poles, or fences can work, but it’s not always safe or reliable. Wind, rain, and time can loosen connections, leaving dangling wires or lights that flicker out. A outdoor patio string lights rail eliminates that risk. These rails—usually made of aluminum, steel, or weather-resistant wood—are designed to hold your lights securely, no matter the weather.
For example, if you’ve ever tried to hang lights between two trees only to find them sagging or pulling the branches down after a few weeks, a rail solves that. It distributes the weight evenly and keeps your lights taut. Plus, many rails come with built-in clips or grooves that hold bulbs in place, so you won’t spend hours reattaching them every spring.
Flexibility in Design
One of the best things about a string lights rail is how adaptable it is. Want a straight, linear look? A rail gives you that crisp, modern edge. Prefer a zigzag or crisscross pattern? Rails can be mounted in sections to create unique shapes. I once saw a homeowner install a U-shaped rail around their pergola, turning it into a glowing frame for the entire space. The result? A professional-looking setup that looked like it was done by a designer—but it was all DIY.
And if you’re renting or can’t drill into your patio, no problem. Some rails are designed as freestanding systems or attach to existing structures like railings or fences. This flexibility makes them perfect for renters, apartment dwellers, or anyone who wants to avoid permanent changes.
Long-Term Value
Sure, a rail is an upfront investment, but it pays off. Without a rail, you’re likely replacing lights every year due to damage or wear. With one, your lights last longer because they’re protected from strain and weather. Plus, many rails are modular, meaning you can expand or reconfigure them as your outdoor space evolves. It’s a one-time setup that grows with you.
Types of Outdoor String Lights Rails: Which One Fits Your Space?
Metal Rails (Aluminum or Steel)
Metal rails are the most popular choice for a reason: they’re durable, lightweight, and weatherproof. Aluminum is a favorite because it resists rust and won’t corrode, even in humid or coastal areas. Steel rails are sturdier but may require a protective coating to prevent rust. Both work well for permanent installations, especially if you’re mounting them to a pergola, fence, or deck.
Pro tip: Look for rails with a matte or powder-coated finish. These reduce glare and blend seamlessly into your patio, so the focus stays on the lights, not the hardware.
Wooden Rails
If you love the rustic charm of natural materials, wooden rails are a great option. Cedar and redwood are naturally resistant to rot and insects, making them ideal for outdoor use. They’re perfect for patios with a farmhouse, cottage, or Scandinavian aesthetic.
But here’s the catch: wood requires more maintenance. You’ll need to seal or stain it annually to protect it from moisture and UV damage. And unlike metal, it can warp or crack over time. If you’re okay with the upkeep, though, the warmth and texture of wood can’t be beaten.
Modular and Freestanding Systems
Not ready to commit to a permanent install? Modular rails—like those made of PVC or interlocking metal segments—are your best friend. These are easy to assemble, disassemble, and store, making them perfect for renters or seasonal use. Some even come with ground stakes or weighted bases, so you don’t need to drill holes at all.
Freestanding systems are another great option. Imagine a sleek, arched rail that stands on its own, like a modern art piece. These work well for small patios or balconies where space is tight. Just make sure they’re weighted enough to stay put in the wind.
Integrated Rails (Built into Pergolas or Gazebos)
If you’re building a new pergola or gazebo, consider rails that integrate directly into the structure. These are often pre-installed or designed to fit seamlessly, giving you a clean, custom look. They’re more expensive upfront but eliminate the need for separate hardware and create a polished finish.
Choosing the Right String Lights for Your Rail
Bulb Types: LED vs. Incandescent
When it comes to bulbs, LED is the clear winner for most people. They’re energy-efficient (using up to 80% less power than incandescent), last 10-25 times longer, and stay cool to the touch. Plus, LEDs come in a range of colors and styles, from warm white to multicolor to color-changing options.
Incandescent bulbs have a nostalgic charm—think vintage Edison bulbs with their soft, yellow glow—but they’re less efficient and burn out faster. They’re also hotter, which can be a safety concern if you have kids or pets nearby. For a rail system, LEDs are the smarter choice.
Lighting Styles and Patterns
The way your lights are spaced and arranged makes a huge difference. Here are a few popular options:
- Evenly spaced bulbs: Perfect for a clean, modern look. Great for dining areas or patios where you want consistent lighting.
- Clustered bulbs: Creates a boho or romantic vibe. Think of them as “light clouds” that add depth and texture.
- Drop-down bulbs: These hang vertically from the rail, adding dimension. Ideal for pergolas or covered patios.
- Twinkle or flicker lights: Adds movement and magic. Best used sparingly, as too much can feel chaotic.
One of my favorite tricks? Mix and match styles. For example, use evenly spaced LEDs for the main rail and add a few drop-down bulbs near seating areas for extra ambiance.
Smart Lights and Controls
If you love tech, smart string lights are worth considering. These connect to apps or voice assistants (like Alexa or Google Home), letting you adjust brightness, color, or even set schedules from your phone. Some even sync to music or change colors based on the time of day.
But—and this is a big but—smart lights can be finicky. They require a stable Wi-Fi connection, and the apps aren’t always user-friendly. If you’re not tech-savvy, stick with simple plug-and-play lights. You can always upgrade later.
Installation Tips: From Planning to Perfect Placement
Measure and Map Your Space
Before you buy anything, measure your patio and sketch out a plan. Decide where the rail will go—along the edge of your deck, around a pergola, or in a zigzag pattern across your yard. Mark the spots where you’ll need support posts or mounting brackets.
Pro tip: Use painter’s tape to outline the rail’s path on your patio. This helps you visualize the final look and catch any awkward angles before you start drilling.
Secure Mounting: Avoiding Sagging and Damage
A rail is only as strong as its mounts. For permanent installations, use stainless steel screws and anchors rated for outdoor use. If you’re attaching to wood, pre-drill holes to prevent splitting. For concrete or stone, use masonry anchors.
Spacing matters, too. Most rails need support every 3-5 feet to prevent sagging. If your patio is large, consider adding extra posts or cross-braces for stability. And if you’re using a freestanding rail, make sure it’s weighted enough to handle wind—nothing ruins a party like a knocked-over light setup.
Wiring and Power Sources
Outdoor electrical safety is non-negotiable. Use outdoor-rated extension cords and GFCI outlets to prevent shocks. If your rail is far from a power source, consider a solar-powered setup or a weatherproof power box.
For longer runs, check the maximum length your lights can handle before voltage drop becomes an issue. LED lights are less prone to this, but it’s still something to keep in mind. If you need more length, use multiple shorter strands instead of one long one.
Maintenance and Longevity: Keeping Your Lights Shining
Seasonal Care
Even the best setup needs a little TLC. At the end of each season, take down your lights and inspect them for damage. Look for frayed wires, loose bulbs, or corrosion on the rail. Store them in a dry, temperature-controlled place—never in a damp garage or shed.
If you live in a snowy climate, consider leaving the rail up but removing the lights. The rail itself is usually weatherproof, but the bulbs aren’t. This saves you the hassle of reinstalling every spring.
Troubleshooting Common Issues
Here’s a quick guide to fixing common problems:
- Flickering lights: Check for loose bulbs or damaged sockets. Replace any faulty bulbs.
- Partial outages: This often means a single bulb is dead. Use a bulb tester to find the culprit.
- Sagging rail: Tighten mounting brackets or add extra supports.
- Faded or dim lights: Clean the bulbs with a dry cloth and check for voltage issues.
And remember: if you’re ever unsure, consult an electrician. It’s better to be safe than sorry.
Top Picks: Data Table of Recommended Rails and Lights
| Product Type | Material | Best For | Key Features | Price Range |
|---|---|---|---|---|
| Aluminum Rail | Aluminum | Permanent installations, pergolas | Rust-proof, lightweight, easy to cut | $50-$150 |
| Cedar Wood Rail | Cedar | Rustic patios, natural aesthetics | Weather-resistant, warm texture, requires sealing | $80-$200 |
| Modular PVC Rail | PVC | Renters, seasonal use | Easy to assemble, lightweight, no tools needed | $30-$100 |
| LED String Lights (Warm White) | Plastic/LED | Even lighting, year-round use | Energy-efficient, dimmable, weatherproof | $20-$60 per strand |
| Smart Color-Changing Lights | Plastic/LED | Tech lovers, parties | App control, music sync, 16 million colors | $50-$120 per strand |
Final Thoughts: Light Up Your Life (Literally)
Creating the perfect outdoor ambiance isn’t about flashy gadgets or expensive decor. It’s about thoughtful details—like a well-placed outdoor patio string lights rail that turns your backyard into a haven. Whether you opt for sleek metal, rustic wood, or a modular system, the key is to choose what fits your space, your style, and your needs.
And don’t forget: the best lighting setup is one you’ll actually use. If it’s too complicated or high-maintenance, you’ll end up leaving it off. Keep it simple, keep it safe, and keep it beautiful. Before you know it, those twinkling lights will be the backdrop to countless memories—lazy summer evenings, laughter with friends, quiet moments under the stars. That’s the magic of a well-lit patio. Now go make it yours.
Frequently Asked Questions
What are the best outdoor patio string lights rail options for durability?
For durability, look for weather-resistant materials like commercial-grade rubber or shatterproof plastic with a high IP rating (e.g., IP65). Stainless steel or rust-proof aluminum rails ensure longevity, especially in humid or rainy climates.
How do I install outdoor patio string lights rail without drilling holes?
Use adhesive hooks, tension rods, or magnetic mounts for renter-friendly setups. Alternatively, opt for freestanding rails or attach lights to existing structures like fences or pergolas.
Can I leave my outdoor patio string lights rail up year-round?
Yes, if the lights and rail are rated for all-weather use (check for UV/water resistance). Remove bulbs or covers in extreme winter conditions to prevent damage.
What spacing should I use for string lights on a rail to maximize ambiance?
Space bulbs 6–12 inches apart for balanced illumination. For larger areas, use 2 parallel rails with staggered lights to avoid dark spots.
Are solar-powered string lights compatible with outdoor patio rails?
Absolutely! Solar lights work well on rails, but ensure the solar panel gets direct sunlight. Use rail-mounted panels or place them nearby for optimal charging.
How do I hide cords when using outdoor patio string lights rail systems?
Run cords through hollow rails or use cord covers for a clean look. Zip ties or clips can secure wires discreetly along the rail’s underside.