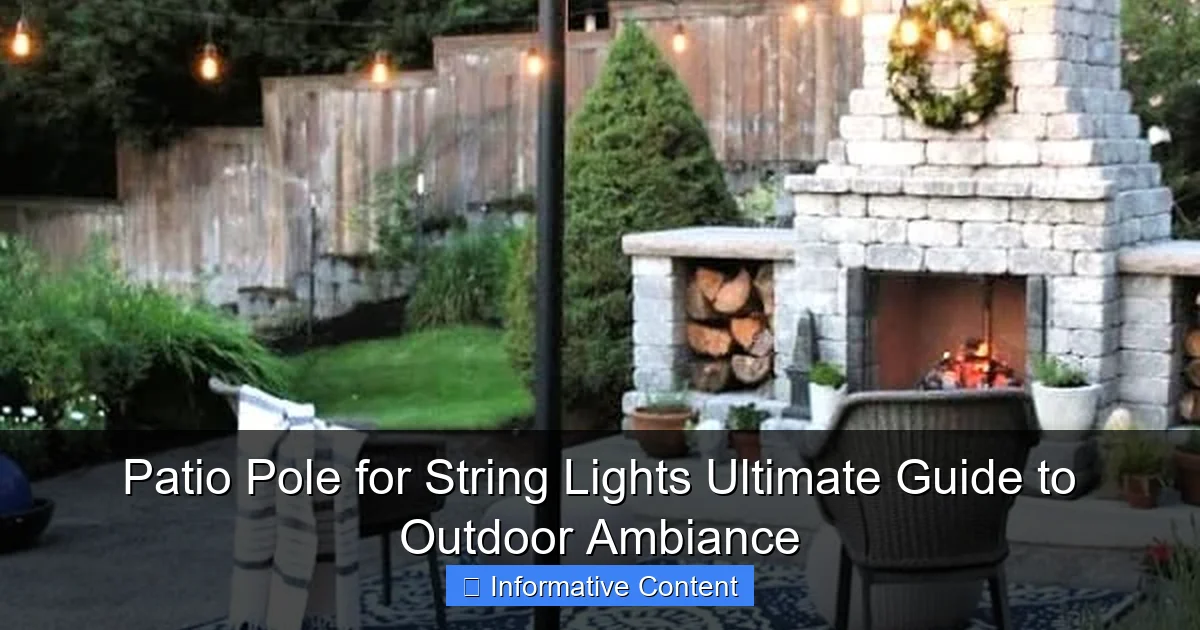
Featured image for patio pole for string lights
Image source: todayscreativelife.com
Transform your outdoor space into a captivating retreat with the right patio pole for string lights—essential for creating a safe, elevated, and stylish ambiance. Choose sturdy, weather-resistant poles with adjustable heights and secure mounting options to ensure your string lights shine brightly through every season. Perfect for patios, pergolas, or open yards, the right pole setup enhances both function and flair.
Key Takeaways
- Choose durable materials: Opt for rust-resistant metals or weather-treated wood for long-lasting patio poles.
- Prioritize height and stability: Ensure poles are tall enough and anchored securely for optimal light coverage.
- Install with spacing in mind: Place poles 8–12 feet apart to prevent sagging and ensure even illumination.
- Use adjustable poles: Select telescoping designs for easy height changes and seasonal adjustments.
- Anchor properly: Use ground stakes or weighted bases to prevent tipping in windy conditions.
- Blend with decor: Pick pole styles that complement your outdoor aesthetic for cohesive ambiance.
📑 Table of Contents
The Magic of a Patio Pole for String Lights
There’s something undeniably magical about stepping into a backyard at night and being greeted by a soft, twinkling glow. Whether you’re hosting a summer barbecue, enjoying a quiet evening with a glass of wine, or just unwinding after a long day, string lights instantly transform any outdoor space into a cozy, inviting retreat. But here’s the catch: getting that perfect ambiance isn’t as simple as draping lights across trees or fences. Without the right setup, your dreamy lighting can quickly turn into a tangled mess—or worse, a safety hazard. That’s where a patio pole for string lights comes in.
Imagine this: you’ve spent hours planning the perfect outdoor gathering. The menu is set, the playlist is ready, and the mood is just right—until you realize your lights are drooping, tangled, or barely visible. A patio pole solves all of that. It’s the unsung hero of outdoor decor, giving you a sturdy, reliable way to hang your lights exactly where you want them. Whether you’re working with a small balcony or a sprawling backyard, a well-chosen pole can elevate your space from “meh” to “wow.” And the best part? It’s easier than you think to set up and customize to your needs.
Why You Need a Patio Pole for String Lights
The Problem With DIY Hanging Methods
We’ve all been there: trying to tie lights to a tree branch that’s just out of reach, or using flimsy hooks that barely hold the weight. These quick fixes might work temporarily, but they come with major drawbacks. For starters, trees and fences aren’t always in the right spots. Maybe your backyard is open with no natural anchor points, or your trees are too delicate to support heavy lights. Even worse, uneven tension can cause lights to sag, creating an uneven, messy look.
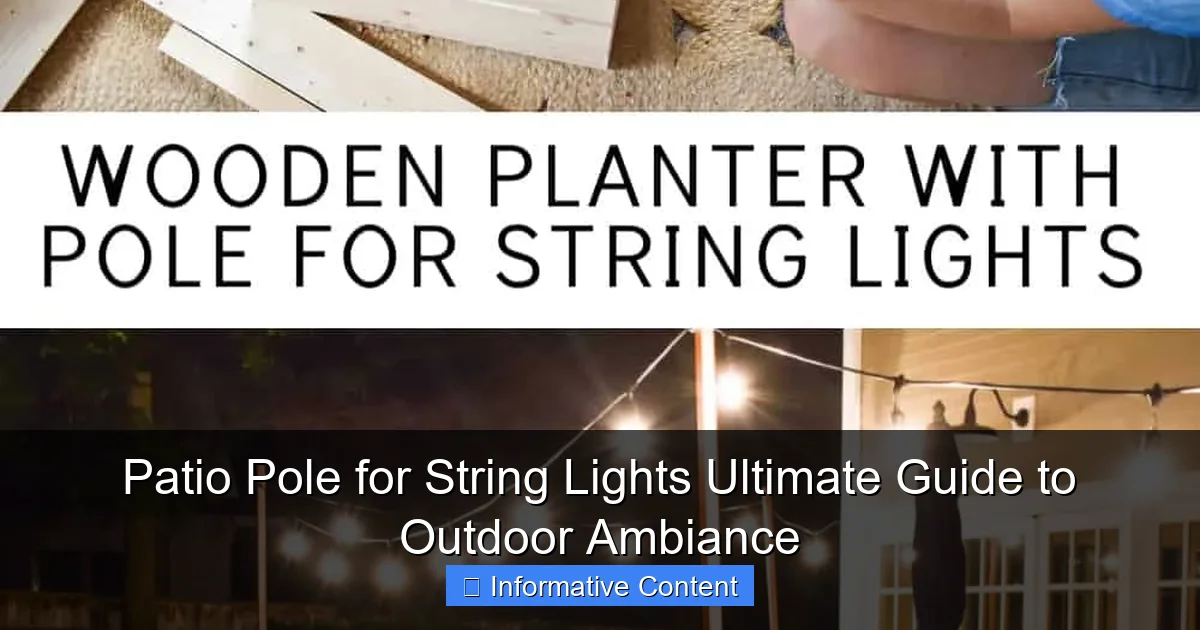
Visual guide about patio pole for string lights
Image source: atcharlotteshouse.com
Then there’s the issue of durability. Wind, rain, and snow can loosen knots or damage hooks, leaving your lights dangling—or worse, falling. And let’s not forget the hassle of adjusting or taking them down. A patio pole for string lights eliminates all these headaches. It’s a dedicated, stable structure designed specifically for this purpose, giving you full control over height, placement, and tension.
Benefits Beyond Aesthetics
Sure, a patio pole makes your space look amazing, but its benefits go far beyond looks. Here’s why it’s a game-changer:
- Stability: No more worrying about lights swaying in the wind or collapsing after a storm. Poles are built to handle weather and weight.
- Flexibility: Want to change your layout? With a pole, you can easily reposition lights or add more strands without starting from scratch.
- Safety: Properly installed poles reduce tripping hazards and electrical risks (e.g., lights touching the ground or water).
- Year-round use: Many poles are designed for seasonal decor, so you can switch from string lights to holiday garlands without extra effort.
Think of it like a blank canvas for your outdoor creativity. Once the pole is in place, you’re free to experiment with different lighting styles, colors, and patterns—no limitations.
Types of Patio Poles for String Lights
Freestanding vs. Ground-Inserted Poles
Not all patio poles are created equal. The two main types—freestanding and ground-inserted—each have their pros and cons.
- Freestanding poles: These sit on a weighted base (often concrete or sand-filled) and don’t require digging. They’re ideal for patios, decks, or rentals where you can’t modify the ground. Look for models with a wide base to prevent tipping.
- Ground-inserted poles: These are driven into the soil or secured with concrete. They’re more permanent and offer superior stability, especially in windy areas. Great for backyards or gardens.
Pro tip: If you’re unsure which to choose, measure your space. Freestanding poles work best for smaller areas, while ground-inserted poles handle larger setups.
Material Matters: Metal, Wood, and Composite
The material of your pole affects both durability and aesthetics. Here’s a quick breakdown:
- Metal (steel, aluminum, wrought iron): Durable and weather-resistant, but can rust if not coated. Aluminum is lightweight and rust-proof, while wrought iron offers a classic, elegant look.
- Wood (cedar, pine, teak): Adds warmth and blends with natural surroundings. Requires sealing or staining to prevent rot. Best for covered patios.
- Composite: A mix of plastic and wood fibers. Low-maintenance and weather-resistant, but can look less “natural” than real wood or metal.
For example, a black wrought iron pole looks stunning with vintage Edison bulbs, while a cedar pole pairs perfectly with boho-style fairy lights.
Adjustable vs. Fixed Height
Height matters! Adjustable poles (with telescoping sections or sliding brackets) let you customize the light placement. This is great for:
- Creating a canopy effect over a dining table.
- Lowering lights for intimate gatherings or raising them for parties.
- Adapting to uneven terrain (e.g., a sloped yard).
Fixed-height poles are simpler and often sturdier, but they’re less versatile. If you plan to use the pole for multiple purposes (e.g., string lights + holiday decorations), go adjustable.
How to Install a Patio Pole for String Lights
Step-by-Step Installation Guide
Installing a patio pole might sound intimidating, but it’s actually straightforward. Here’s how:
- Choose your location: Pick a spot that’s central to your seating area and away from foot traffic. Use a measuring tape to mark the exact spot.
- Prepare the base (for ground-inserted poles): Dig a hole 12–18 inches deep and 6–8 inches wide. For freestanding poles, assemble the base and fill it with sand or concrete.
- Insert the pole: Place the pole in the hole and level it. Backfill with soil or pour concrete, ensuring the pole is straight.
- Secure and cure: Let concrete dry for 24–48 hours (if used). For freestanding poles, tighten all bolts and ensure the base is stable.
- Add lighting hardware: Attach hooks, eyelets, or brackets to the pole at your desired height.
Real-life example: My friend Sarah installed a ground-inserted pole in her backyard in under an hour. She used a 6-foot steel pole with a concrete base and hung 3 strands of lights in a zigzag pattern. Now her patio feels like a café at night!
Tools and Materials You’ll Need
- Shovel (for ground-inserted poles)
- Level
- Measuring tape
- Concrete mix (optional)
- Wrench or screwdriver (for freestanding poles)
- Drill (if adding custom hooks)
Tip: If you’re renting or have a small space, skip the shovel and opt for a freestanding pole. No digging required!
Common Mistakes to Avoid
- Skipping the level: A crooked pole will throw off your entire lighting setup. Always check with a level before securing.
- Ignoring weight limits: Overloading the pole with heavy lights or decorations can cause it to bend or collapse. Check the manufacturer’s weight rating.
- Poor spacing: Hanging lights too close together creates glare. Aim for 12–18 inches between strands.
Design Ideas and Lighting Layouts
Classic Canopy Layout
Create a “roof” of lights over your patio with a crisscross or grid pattern. Use multiple poles (2–4, depending on your space) and hang lights at varying heights for depth. This works great for dining areas or lounges.
Example: For a 10×10 ft patio, place two poles on opposite corners and string lights diagonally between them. Add a third pole in the center for extra coverage.
Vertical Hanging (For Small Spaces)
No room for multiple poles? Go vertical! Hang lights from the top of a single pole down to the ground or a lower bracket. This adds height and drama to compact spaces like balconies or porches.
U-Shaped Layout (For Seating Areas)
Frame your seating with a U-shaped light setup. Use three poles (one on each end and one in the center) and connect them with lights. This creates a cozy, enclosed feel—perfect for fire pit areas or conversation nooks.
Color and Bulb Choices
- Warm white: Timeless and inviting. Pairs well with any pole material.
- Multicolor: Fun for parties or holidays. Use with metal poles for a modern look.
- Edison bulbs: Vintage charm. Best with wrought iron or wood poles.
- Fairy lights: Delicate and romantic. Works with any setup.
Top Patio Pole Options (With Pros and Cons)
Choosing the right pole can feel overwhelming, but here’s a handy comparison to simplify your decision:
| Model | Type | Material | Height | Pros | Cons |
|---|---|---|---|---|---|
| Outdoor Living Today 8-ft Steel Pole | Ground-inserted | Galvanized steel | 8 ft (fixed) | Extremely sturdy; rust-resistant; easy to install | Not adjustable; requires digging |
| Brightown Freestanding Light Pole | Freestanding | Aluminum + concrete base | 6–10 ft (adjustable) | No digging; portable; lightweight | Base can tip in high winds if not secured |
| Woodlink Cedar Pole | Ground-inserted | Cedar | 7 ft (fixed) | Natural look; blends with gardens; eco-friendly | Requires sealing; less durable than metal |
| VINGLI Telescoping Pole | Ground-inserted | Wrought iron | 6–12 ft (adjustable) | Classic style; heavy-duty; height customizable | Heavy; harder to install solo |
How to Choose Based on Your Needs
- Renters or small spaces: Brightown freestanding pole.
- Large backyard with wind: Outdoor Living Today steel pole.
- Eco-conscious or garden lovers: Woodlink cedar pole.
- Frequent decor changes: VINGLI telescoping pole.
Maintaining Your Patio Pole for Long-Term Use
Seasonal Care Tips
- Winter: Remove lights and store the pole indoors if possible. For ground-inserted poles, cover the top to prevent snow buildup.
- Spring: Inspect for rust, rot, or loose bolts. Touch up paint or sealant as needed.
- Summer: Wipe down metal poles with a damp cloth to remove pollen or dust. Check wooden poles for cracks.
- Fall: Clear leaves and debris from the base to prevent moisture buildup.
Cleaning and Storage
For metal poles: Use a mild soap solution and soft cloth. Avoid abrasive cleaners that can scratch the finish. For wooden poles: Sand lightly and reapply sealant every 1–2 years. If you take the pole down seasonally, store it in a dry place (e.g., garage or shed).
Troubleshooting Common Issues
- Rust on metal poles: Sand off rust spots and apply rust-resistant primer and paint.
- Wobbly freestanding pole: Add more weight to the base (e.g., extra sandbags).
- Faded wood: Sand and restain with a UV-protective sealant.
A patio pole for string lights isn’t just a practical solution—it’s a gateway to unforgettable outdoor moments. Whether you’re creating a romantic hideaway or a lively party space, the right pole gives you the freedom to design exactly what you want. From choosing the perfect type and material to installing it with confidence, this guide covers everything you need to know. Now grab your lights, pick your pole, and get ready to transform your outdoor space into something truly special. The night is young, and your patio is waiting!
Frequently Asked Questions
What is the best height for a patio pole for string lights?
The ideal height for a patio pole for string lights is typically 7–9 feet, ensuring the lights hang high enough to avoid obstructions while creating a cozy, ambient glow. Taller poles (up to 12 feet) work well for larger spaces or commercial settings.
How do I secure a patio pole for string lights in concrete or pavers?
Use a ground sleeve or auger-style anchor for soil, or opt for a weighted base (like a concrete-filled planter) for patios with pavers or concrete. Ensure the base is stable enough to withstand wind and tension from the lights.
Can I use a patio pole for string lights in windy areas?
Yes, but choose a heavy-duty pole with a sturdy base (e.g., steel or weighted) and consider shorter spans between poles to reduce sway. Tension cables or LED string lights (lighter than incandescent) can also help minimize movement.
What materials are best for patio poles for string lights?
Steel, aluminum, and powder-coated iron are top choices for durability and rust resistance. Aluminum is lightweight and portable, while steel offers maximum stability for permanent installations.
How far apart should patio poles for string lights be placed?
Space poles 8–12 feet apart, depending on the string light length and pole height. Closer spacing (6–8 feet) is better for heavier bulbs or windy locations to prevent sagging or stress on the poles.
Can I install a patio pole for string lights without drilling?
Absolutely! Use freestanding options like umbrella bases, planter stands, or clamp-on poles for railings. These are perfect for renters or temporary setups and require no permanent modifications.

