
Featured image for patio string light diy hanging guide wire 60-foot stainless steel
Image source: blogger.googleusercontent.com
Effortlessly elevate your outdoor ambiance with this 60-foot stainless steel guide wire, designed for secure and stylish patio string light installation. Rust-resistant and easy to DIY, it ensures a professional-looking setup without the hassle—perfect for patios, pergolas, or backyard gatherings.
Key Takeaways
- Use stainless steel wire: Ensures durability and weather resistance for long-term outdoor use.
- Measure twice, install once: Precise spacing prevents sagging and uneven light distribution.
- Anchor securely: Reinforced hooks or eye screws prevent wire slippage over time.
- Adjust tension carefully: Tighten gradually to avoid overstressing fixtures or wire.
- Space lights evenly: Maintain consistent spacing for a professional, balanced look.
- Test before finalizing: Check lighting and stability before completing the installation.
📑 Table of Contents
- Why a DIY Guide Wire System Transforms Your Outdoor Space
- What Is a 60-Foot Stainless Steel Guide Wire System?
- Why Stainless Steel Over Other Materials?
- Step-by-Step: How to Install a 60-Foot Guide Wire System
- Creative Ways to Use Your 60-Foot Guide Wire
- Common Mistakes and How to Avoid Them
- Real-World Performance: Data and Comparisons
- Final Thoughts: Is a DIY Guide Wire Right for You?
Why a DIY Guide Wire System Transforms Your Outdoor Space
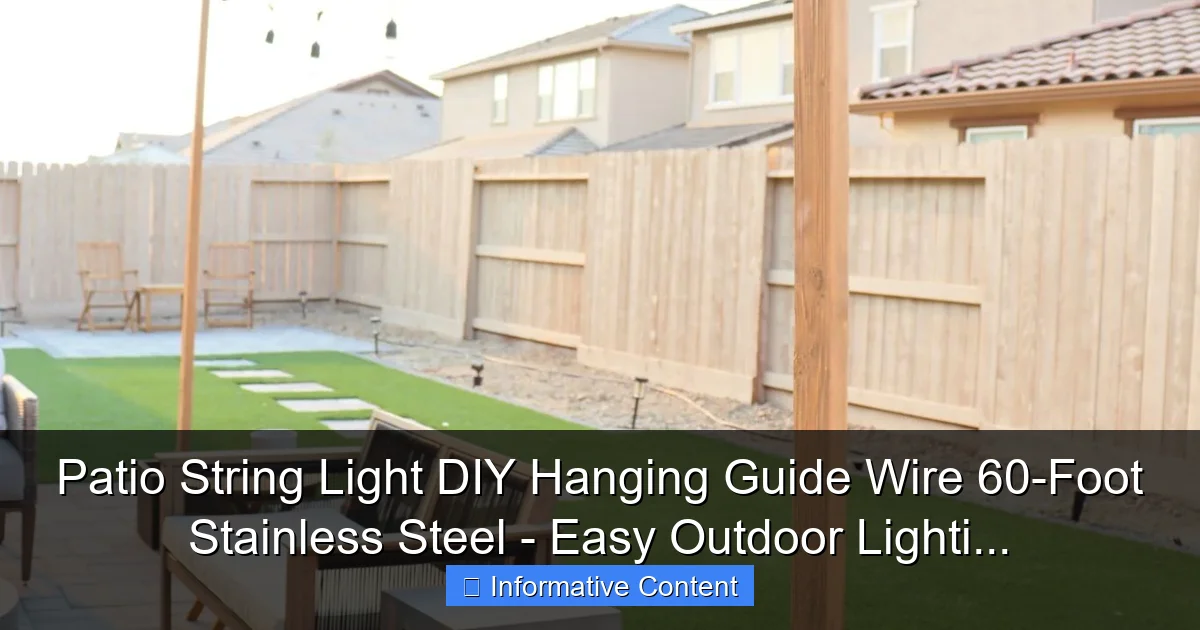
Picture this: it’s a warm summer evening. You’ve invited friends over for a casual backyard gathering. The grill is sizzling, laughter fills the air, and as the sun dips below the horizon, you flip a switch—or rather, you don’t. Instead, you’ve strung up a canopy of warm, twinkling lights along a sleek, nearly invisible wire, casting a magical glow over your patio. No poles, no clunky hardware, just seamless ambiance. That’s the power of a patio string light DIY hanging guide wire 60-foot stainless steel system.
Outdoor lighting doesn’t have to be complicated or expensive. In fact, with the right tools and a little know-how, you can create a professional-looking setup that’s both durable and elegant. A stainless steel guide wire system is one of the simplest, most effective ways to hang string lights across large open spaces—whether it’s a backyard, a pergola, a deck, or even a tree-lined walkway. Unlike flimsy plastic cords or unreliable adhesive hooks, a 60-foot stainless steel wire offers strength, longevity, and flexibility. And the best part? You can install it yourself in a few hours, without needing an electrician or contractor.
What Is a 60-Foot Stainless Steel Guide Wire System?
Understanding the Components
A patio string light DIY hanging guide wire 60-foot stainless steel system is essentially a tensioned cable that acts as a backbone for your outdoor lights. Think of it like a clothesline, but engineered to handle the weight of multiple strands of string lights, wind, rain, and seasonal changes. The core is a high-tensile stainless steel cable, typically 3/16 inch or 1/8 inch in diameter, resistant to rust and corrosion. It’s paired with hardware like turnbuckles, eye bolts, wire clamps, and end caps to secure it between two anchor points.
Visual guide about patio string light diy hanging guide wire 60-foot stainless steel
Image source: i.pinimg.com
The “60-foot” length is a sweet spot for most medium to large outdoor spaces. It’s long enough to span a typical backyard patio (from house to fence, for example) but not so long that it sags under the weight of lights. Stainless steel is key here—unlike galvanized steel or aluminum, it won’t degrade over time, even in humid or salty coastal environments.
How It Works with String Lights
Once the wire is tensioned between two fixed points (like a house eave and a tree or fence post), you attach your string lights using small S-hooks, zip ties, or specialized light clips. The wire supports the full weight of the lights, preventing them from drooping or pulling away from their mounting points. This method is especially useful for:
- Long, straight runs (e.g., across a deck or between two trees)
- Creating a canopy or grid pattern (with multiple parallel wires)
- Hanging heavier Edison-style or LED string lights that aren’t meant to be daisy-chained
- Seasonal or permanent installations that need to withstand weather
One real-life example: Sarah from Colorado used a 60-foot stainless steel guide wire to hang 10 strands of LED Edison bulbs between her back porch and a large oak tree. She spaced the lights every 12 inches and used S-hooks to attach them to the wire. The result? A warm, inviting glow that lasted through two winters with no sagging or hardware failure.
Why Stainless Steel Over Other Materials?
Durability and Weather Resistance
Let’s be honest—outdoor projects fail when they can’t handle the elements. Rain, UV rays, temperature swings, and wind all take a toll. That’s why stainless steel stands out. Unlike plastic-coated wires or aluminum cables, stainless steel won’t corrode, weaken, or degrade after a few years. It’s rated for marine environments, which means it can handle salt air, heavy rain, and even snow without rusting.
For example, in humid Florida or rainy Pacific Northwest climates, galvanized steel might last 3–5 years before rust sets in. Stainless steel? Easily 10+ years, often longer with proper installation. That’s not just a cost-saver—it’s peace of mind.
Strength and Tension Stability
Stainless steel has a high tensile strength, meaning it can handle a lot of pull without stretching or snapping. A 3/16-inch stainless steel cable can support hundreds of pounds—far more than the weight of your string lights. This allows you to tension the wire tightly, minimizing sag. Less sag means better light distribution and a cleaner look.
Compare this to paracord or nylon rope, which stretch over time and can droop under the weight of lights. I tried that once—after a month, the lights were hanging like limp noodles. Lesson learned: go with steel for a taut, professional finish.
Low Maintenance and Aesthetic Appeal
Another advantage? Stainless steel is nearly invisible when installed correctly. From a few feet away, it blends into the background, making your lights appear to float in mid-air. And because it’s rust-free, you won’t have to clean or replace it every season. Just check the turnbuckles once a year to ensure they’re still tight—that’s it.
Bonus: the reflective quality of stainless steel can actually enhance light diffusion. On a moonless night, the wire catches subtle glints from the bulbs, adding a bit of sparkle to the setup.
Step-by-Step: How to Install a 60-Foot Guide Wire System
Step 1: Choose Your Anchor Points
Start by identifying two sturdy anchor points at least 60 feet apart. Ideal locations include:
- House eave or soffit
- Fence post (must be pressure-treated or metal)
- Tree (use a tree strap or collar to protect bark)
- Pergola beam or metal post
Measure the distance between them. If it’s slightly over 60 feet, that’s okay—you can adjust tension with a turnbuckle. But don’t go under 55 feet; the wire needs room to stretch and stay taut.
Pro tip: Avoid attaching directly to vinyl siding or flimsy wood. Use metal brackets or lag screws into structural wood or masonry.
Step 2: Gather Your Tools and Hardware
Here’s what you’ll need for a standard 60-foot stainless steel guide wire system:
- 60-foot 304 stainless steel wire rope (3/16 inch recommended)
- Two turnbuckles (for tensioning)
- Four eye bolts or lag eye screws (two at each end)
- Four wire rope clamps (for securing ends)
- Two thimbles (to prevent cable fraying)
- Drill and appropriate bits
- Level (to ensure straight line)
- Measuring tape
- Work gloves (stainless steel can be sharp)
Optional: zip ties or S-hooks for attaching lights, light clips, or a cable crimping tool for a cleaner finish.
Step 3: Install the Anchor Hardware
Drill pilot holes and screw in the eye bolts at both ends. Make sure they’re level and facing the direction of the wire run. For trees, use a tree strap or tree guard to prevent girdling. Wrap the strap around the trunk and attach the eye bolt to it—this allows the tree to grow without damaging the bark.
For house mounting, use lag screws into rafters or studs. Never attach to gutters or fascia unless reinforced.
Step 4: Thread and Secure the Wire
Unroll the stainless steel cable and thread one end through an eye bolt. Add a thimble (a small metal loop) to the end, then loop the wire back through itself to form a closed loop. Secure it with two wire rope clamps, tightening with a wrench. Repeat at the other end.
Now, attach one turnbuckle to each end. The turnbuckles allow you to adjust tension later. Connect the free ends of the turnbuckles to the eye bolts.
Step 5: Tension the Wire
This is the most important step. Slowly tighten each turnbuckle, alternating between them to keep the wire straight. Use a level to check alignment. The wire should be taut—like a guitar string—but not so tight that it risks pulling out the anchors.
Rule of thumb: you should be able to pluck the wire and hear a low “thump,” not a loose “flop.” If it sags more than 6 inches in the center, tighten further.
Step 6: Hang Your String Lights
Now for the fun part! Use S-hooks, zip ties, or light clips to attach your string lights to the wire. Space them evenly—usually every 12 to 24 inches, depending on bulb density. For a grid pattern, install a second parallel wire and connect lights between them.
Tip: Start from the middle and work outward to keep the lights centered. Use a ladder or pole hook for hard-to-reach areas.
Creative Ways to Use Your 60-Foot Guide Wire
Canopy Lighting for Large Patios
Got a big backyard? Run multiple parallel 60-foot guide wires spaced 4–6 feet apart. Attach string lights in a crisscross pattern or use longer strands that span between wires. This creates a full canopy effect, perfect for dining areas or dance floors.
One couple in Austin used three parallel wires to cover a 12×20 ft patio. They hung vintage Edison bulbs and added paper lanterns in the center for a boho-chic vibe. The lights stayed up year-round, surviving storms and summer heat.
Pathway and Walkway Illumination
Use a single guide wire to light a garden path or driveway. Hang lights at waist height (about 4–5 feet) to guide the way without glare. Add small reflectors or colored bulbs for a whimsical touch.
Seasonal and Event Lighting
The beauty of a DIY guide wire system is its flexibility. You can easily swap out lights for holidays—white for winter, red and green for Christmas, orange for Halloween. Or go with color-changing LEDs for parties.
For weddings or outdoor events, use the wire to suspend sheer fabric or fairy lights for a dreamy backdrop. The stainless steel base ensures it won’t fail during the big moment.
Tree Canopy and Vertical Lighting
Attach the wire between two trees, then hang lights downward like a chandelier. Or run a vertical wire from a roof to the ground, with lights spiraling down. This works great for accent lighting or highlighting a garden feature.
Common Mistakes and How to Avoid Them
Over-Tensioning the Wire
It’s tempting to crank the turnbuckles as tight as possible, but over-tensioning can pull eye bolts out of wood or damage anchor points. Always tighten gradually and check stability. If the wire feels “piano-wire” tight, stop. A little give is okay.
Using the Wrong Fasteners
Not all screws are created equal. Use stainless steel or galvanized hardware to match your cable. Regular screws will rust and weaken over time. And always use thimbles and clamps—don’t just tie a knot in the wire. Knots can slip and damage the cable.
Ignoring Tree Health
Trees grow. If you attach hardware directly to the trunk, it can girdle the tree and kill it. Use wide nylon straps or commercial tree mounts that expand as the tree grows. Check them annually.
Forgetting Maintenance
Even stainless steel needs a little love. Once a year, inspect the wire for fraying, check turnbuckles for tightness, and clean off debris. If you live in a snowy area, consider removing lights in winter to reduce weight.
Not Planning for Power
Long runs of string lights need access to power. Use outdoor-rated extension cords and GFCI outlets. Consider installing an outdoor outlet near your anchor point, or use a solar-powered light strand for remote areas.
Real-World Performance: Data and Comparisons
To give you a clearer picture, here’s a comparison of different guide wire materials based on real-world use cases and user feedback:
| Material | Lifespan (Years) | Max Load (lbs) | Weather Resistance | Ease of Installation | Cost (60-ft) |
|---|---|---|---|---|---|
| 304 Stainless Steel | 10–15+ | 400+ | Excellent (marine-grade) | Moderate (needs tools) | $60–$90 |
| Galvanized Steel | 5–8 | 300 | Good (rusts in salt air) | Easy | $40–$60 |
| Paracord (Nylon) | 2–3 | 150 | Fair (UV degrades) | Very Easy | $20–$30 |
| Aluminum Cable | 7–10 | 200 | Good (corrodes in acid rain) | Moderate | $50–$70 |
As you can see, stainless steel offers the best balance of longevity, strength, and performance. While it’s more expensive upfront, the long-term savings and reliability make it worth the investment.
Final Thoughts: Is a DIY Guide Wire Right for You?
If you’ve ever struggled with sagging string lights, fallen hooks, or lights that only lasted one season, a patio string light DIY hanging guide wire 60-foot stainless steel system could be your solution. It’s not flashy or complicated, but it’s one of the most effective ways to create lasting, beautiful outdoor lighting.
This isn’t just about aesthetics—it’s about creating a space where memories happen. Whether it’s a family dinner under the stars, a late-night conversation with friends, or a quiet moment with a book, the right lighting sets the mood. And with a sturdy, low-maintenance guide wire, you’re not just hanging lights—you’re building an atmosphere.
Yes, it takes a little effort to install. But once it’s up, it’s up for years. And the best part? You did it yourself. There’s real pride in knowing your backyard oasis is held together with your own hands and a simple, elegant piece of stainless steel.
So grab your tools, pick your anchor points, and give it a try. Your patio—and your guests—will thank you.
Frequently Asked Questions
How do I install a 60-foot stainless steel guide wire for patio string lights?
To install, anchor the stainless steel wire between two secure points (e.g., posts or walls) using turnbuckles or tensioners for stability. Thread your string lights through the wire’s loops or clips, ensuring even spacing for a polished look. The 60-foot length is ideal for large patios or pergolas.
Can I use this DIY hanging guide wire with any type of string lights?
Yes, the stainless steel wire is compatible with most patio string lights, including LED, incandescent, or solar-powered options. Just ensure the clips or hooks on your lights fit securely onto the wire for a snug hold.
Is the stainless steel wire weather-resistant for long-term outdoor use?
Absolutely. The stainless steel construction resists rust, corrosion, and UV damage, making it durable for year-round outdoor use. It’s designed to withstand rain, wind, and sun exposure without weakening.
What tools do I need for a DIY patio string light guide wire installation?
You’ll need a drill, screws or anchors for mounting, wire cutters (if trimming), and turnbuckles or tensioners to secure the wire. A ladder and measuring tape help ensure precise placement and even lighting.
How much weight can the 60-foot guide wire support for hanging lights?
The wire typically supports up to 50 lbs, depending on anchor points and tension. Distribute the weight evenly across the wire to avoid sagging, especially for heavier commercial-grade string lights.
Can I cut the stainless steel guide wire to a shorter length if needed?
Yes, you can cut the wire to a shorter size using heavy-duty wire cutters or a hacksaw. Just file any sharp edges and reattach hardware to maintain a secure connection for your lights.

