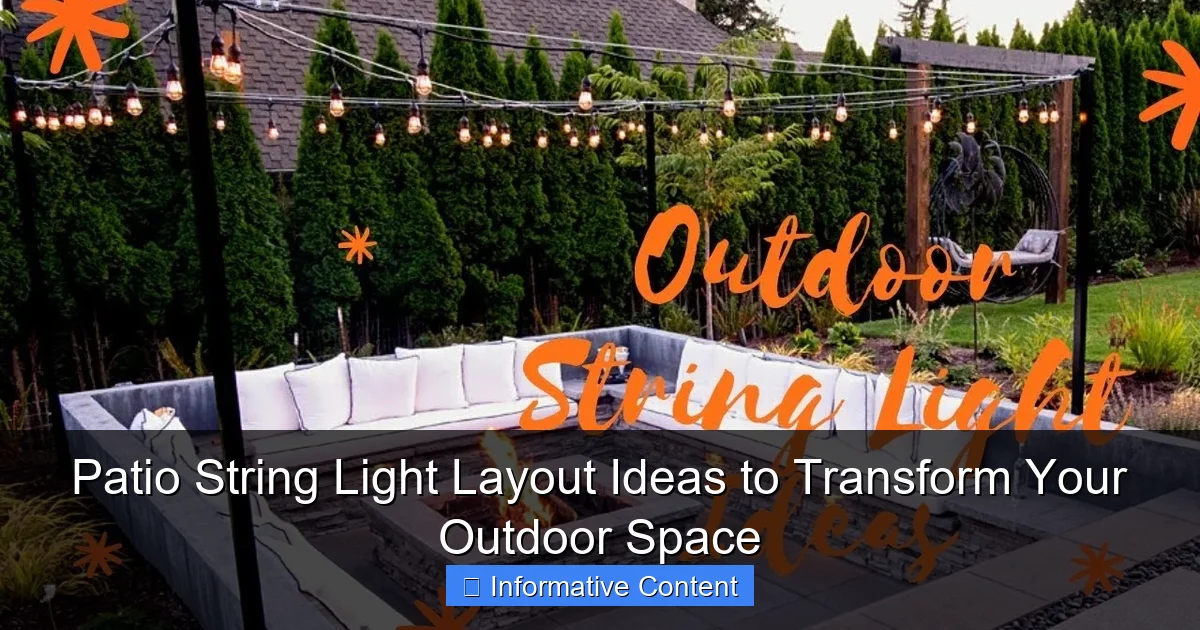
Featured image for patio string light layout
Image source: i.ytimg.com
Transform your patio into a magical retreat with strategic string light layouts that enhance ambiance and functionality. Whether you opt for a canopy grid, zigzag pattern, or draped perimeter, the right arrangement highlights key areas like dining spaces, seating nooks, or pathways. These creative layouts not only extend usability into the night but also add a touch of warmth and charm to any outdoor gathering.
Key Takeaways
- Plan your layout first: Sketch your space to avoid over- or under-lighting.
- Mix heights and patterns: Add depth by layering lights at varying levels.
- Anchor to structures: Use walls, trees, or poles for a secure, balanced look.
- Choose warm bulbs: Opt for 2200K-2700K for a cozy, inviting glow.
- Create zones: Define dining or lounging areas with strategic light placement.
- Use dimmers: Adjust brightness to match moods and occasions effortlessly.
📑 Table of Contents
- Why Patio String Lights Are the Secret to a Dreamy Outdoor Space
- 1. Choosing the Right String Lights for Your Space
- 2. Creative Layout Ideas for Every Patio Style
- 3. Tools and Materials You’ll Need (and How to Use Them)
- 4. Pro Tips for a Flawless Setup
- 5. Seasonal and Themed Layouts
- 6. Maintenance and Safety: Keeping Your Lights Glowing
- Final Thoughts: Your Patio, Your Rules
Why Patio String Lights Are the Secret to a Dreamy Outdoor Space
Imagine this: It’s a warm summer evening, the sun is setting, and you’re sitting on your patio with friends, sipping a drink, and laughing under a canopy of soft, twinkling lights. Sounds magical, right? That’s the power of patio string light layout—a simple, affordable way to transform your outdoor space into a cozy, inviting retreat. Whether you’re hosting a dinner party, enjoying a quiet night with a book, or just want to elevate your backyard’s ambiance, the right string light setup can make all the difference.
But here’s the catch: Not all patio string light layout ideas are created equal. A poorly planned setup can leave your space looking cluttered, dim, or even unsafe. The good news? With a little creativity and planning, you can design a lighting scheme that’s both functional and beautiful. In this guide, we’ll walk you through practical tips, creative ideas, and real-life examples to help you nail the perfect patio string light layout—no electrician required.
1. Choosing the Right String Lights for Your Space
Before you start hanging lights, it’s crucial to pick the right type. Not all string lights are the same, and the wrong choice can ruin your vibe. Here’s what to consider:
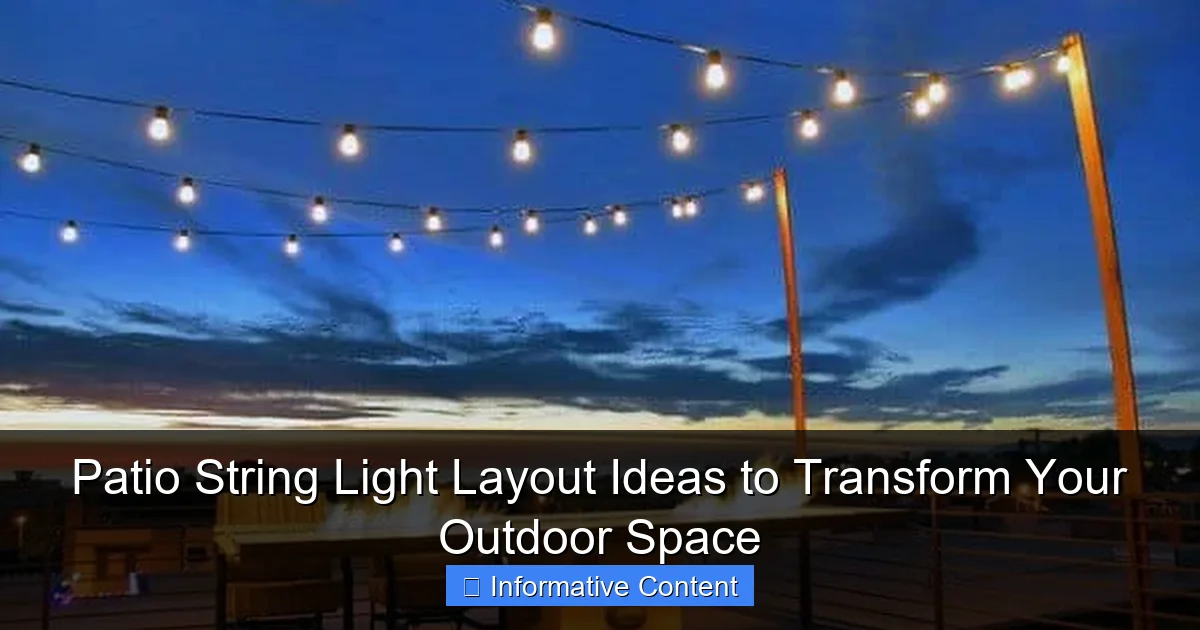
Visual guide about patio string light layout
Image source: nextluxury.com
Bulb Type: LEDs vs. Incandescent
- LED string lights are energy-efficient, long-lasting (often 25,000+ hours), and cool to the touch—ideal for families with kids or pets. They come in warm white, cool white, or color-changing options.
- Incandescent bulbs give off a classic, warm glow but use more energy and burn out faster. They’re great for a vintage look but require more maintenance.
- Pro tip: If you’re going for a romantic, candle-like feel, choose Edison-style bulbs. For a modern look, go with sleek, globe-shaped LEDs.
Length and Spacing
- Measure your patio’s dimensions before buying. A 25-foot string might look great on a small balcony but get lost on a large deck.
- For larger spaces, use multiple strings connected with outdoor-rated extension cords (check for “UL Listed” or “ETL Certified” labels).
- Space bulbs 6–8 inches apart for a balanced glow. Too close, and it feels like a carnival; too far, and it’s underwhelming.
Weather Resistance
- Look for lights with an IP65 or IP67 rating—this means they’re dustproof and can handle rain or snow.
- Even if your patio is covered, humidity and wind can damage cheap lights. Invest in quality!
2. Creative Layout Ideas for Every Patio Style
Now that you’ve got your lights, let’s talk about placement. The layout is where your creativity shines (pun intended). Here are five fail-proof ideas:
The Classic Canopy (Grid or X-Pattern)
- How to do it: String lights in a grid (horizontal and vertical lines) or an “X” pattern across your patio ceiling or pergola. This creates a cozy, intimate feel—like dining under the stars.
- Real-life example: Sarah, a homeowner in Austin, used 40-foot LED strings to create a grid over her 12×16 ft deck. She anchored them to the pergola with stainless steel hooks and added dimmers for ambiance.
- Tip: Use a laser level or chalk line to keep lines straight. Nothing ruins a layout like crooked lights!
Zig-Zag or “V” Shape
- How to do it: Hang lights in diagonal lines from one corner to another. This works great for rectangular patios and adds visual interest.
- Why it works: The zig-zag pattern draws the eye upward, making small spaces feel larger.
- Bonus: Add a few extra strings along the edges to create a “frame” effect.
Hanging Lanterns or “Floating” Lights
- How to do it: Suspend lights from trees, posts, or a freestanding frame using clear fishing line or wire. This creates a “floating” effect—perfect for open yards.
- Pro tip: For a boho vibe, mix string lights with paper lanterns or mason jar lights.
- Caution: Avoid overloading trees. Use lightweight hooks and check local regulations if you’re near power lines.
Staircase or Railing Lights
- How to do it: Wrap lights around railings, stairs, or columns. This guides guests safely at night and adds a festive touch.
- Real-life example: Mark in Seattle used warm white LEDs to wrap his deck railing. He spaced the bulbs 4 inches apart for a “twinkling” effect.
- Tip: Use zip ties or adhesive clips (rated for outdoors) to secure lights without damaging wood.
Focal Point Lighting
- How to do it: Highlight a specific area, like a dining table, fire pit, or outdoor bar. Use a cluster of lights or a single large pendant.
- Why it works: This creates a “zone” for activities and makes your patio feel intentional.
- Bonus: Pair with dimmable lights to switch from dinner mode to party mode.
3. Tools and Materials You’ll Need (and How to Use Them)
You don’t need a degree in electrical engineering to hang patio lights—just a few key tools. Here’s a rundown:
Anchoring Solutions
- Hooks: Use stainless steel or brass hooks for permanent installations. For temporary setups, try adhesive-backed clips (great for renters).
- Eye screws: Screw into wood or concrete to create anchor points. Pre-drill holes to avoid splitting.
- Zip ties: Ideal for wrapping around railings or poles. Cut off excess for a clean look.
Measuring and Leveling
- Laser level: A game-changer for straight lines. If you don’t have one, use a chalk line or a long straightedge.
- Tape measure: Measure your patio and light strings before buying. Always buy 10% extra for mistakes.
Extension Cords and Connectors
- Use outdoor-rated extension cords (look for “SJTW” or “SJTOW” labels).
- For long runs, opt for a heavy-duty gauge (14 or 16 AWG) to avoid voltage drop.
- Pro tip: Hide cords under outdoor rugs or use cord covers to prevent tripping.
4. Pro Tips for a Flawless Setup
Even the best lights can fail if you skip these details. Let’s fix the common mistakes:
Plan for Power Sources
- Map out where outlets are and how cords will run. Avoid daisy-chaining more than 2-3 strings unless they’re LED (which draw less power).
- Example: If your outlet is on the far side of the patio, run a single heavy-duty cord along the edge, then branch off with lighter cords.
- Caution: Never overload a circuit. Check your home’s electrical panel if unsure.
Test Before You Hang
- Unroll and plug in lights indoors first. Check for dead bulbs or frayed wires.
- Pro tip: Buy a light tester (under $10) to quickly identify issues.
Weatherproof Your Connections
- Wrap plug connections with electrical tape or use a weatherproof outlet cover.
- Elevate plugs off the ground to avoid water pooling.
Use Dimmers and Timers
- Dimmers: Create mood lighting with dimmable LEDs. Look for “0-10V” or “ELV” compatible lights.
- Timers: Set lights to turn on at sunset and off at 11 PM. No more forgetting to unplug!
5. Seasonal and Themed Layouts
Your patio isn’t static—why should your lights be? Here’s how to adapt your patio string light layout for different seasons and occasions:
Summer: Bright and Breezy
- Use cool white or color-changing LEDs for a festive vibe.
- Add solar-powered path lights to guide guests.
- Tip: Hang lights higher to avoid heat from grills or fire pits.
Fall: Cozy and Warm
- Switch to warm white or amber LEDs for a “campfire” glow.
- Pair with string lights in pumpkins or gourds for a harvest theme.
- Bonus: Use battery-powered fairy lights in mason jars for a rustic touch.
Winter: Festive and Safe
- Use icicle lights or net lights for snowy areas.
- Keep lights away from icicles or snow buildup to prevent damage.
- Caution: Avoid metal hooks in freezing temps—they can crack.
Special Occasions: Weddings, Parties, and More
- For weddings, create a “chandelier” with lights draped over a pergola.
- For birthdays, use color-changing LEDs synced to music (many smart lights do this).
- Pro tip: Rent lights for one-time events to save money.
6. Maintenance and Safety: Keeping Your Lights Glowing
Great lighting isn’t a one-and-done deal. Here’s how to keep your setup safe and beautiful:
Cleaning and Storage
- Wipe bulbs with a dry microfiber cloth every few months.
- Store lights in a cool, dry place. Wrap them around a cardboard tube to prevent tangling.
- Tip: Label strings by length or color for easy setup next year.
Safety Checks
- Inspect lights annually for frayed wires, cracked bulbs, or loose connections.
- Replace damaged lights immediately—they’re a fire hazard.
- Caution: Never use indoor-rated lights outdoors, even under a covered patio.
Upgrading Over Time
- Add smart plugs or voice control (Alexa/Google Home) for convenience.
- Swap bulbs for different colors or shapes (e.g., vintage bulbs for a retro look).
Data Table: Recommended String Lights for Different Needs
| Use Case | Recommended Type | Key Features | Price Range |
|---|---|---|---|
| Large Patio | 48-ft LED String Lights | IP67 waterproof, warm white, 50,000-hour lifespan | $30-$50 |
| Small Balcony | 25-ft Solar String Lights | Self-powered, 6-hour runtime, auto on/off | $20-$35 |
| Party/Event | Color-Changing Smart Lights | App-controlled, syncs to music, 16 million colors | $40-$80 |
| Year-Round Use | Commercial-Grade LED | Heavy-duty, 100,000-hour lifespan, dimmable | $50-$100 |
Final Thoughts: Your Patio, Your Rules
At the end of the day, the best patio string light layout is one that reflects your style and makes you want to spend time outside. Whether you go for a minimalist grid, a whimsical zig-zag, or a festive canopy, the key is to have fun with it. Don’t stress about perfection—your guests will remember the laughter under the lights, not whether the strings were exactly 8 inches apart.
Remember: Start small. Try one layout, tweak it, and see what feels right. And if something doesn’t work? No worries. String lights are one of the easiest, most forgiving upgrades you can make. So grab a glass of wine, put on some music, and start hanging those lights. Your dreamy outdoor oasis is just a few twinkles away.
Frequently Asked Questions
What are the best patio string light layout ideas for small spaces?
For small patios, opt for zigzag or crisscross patterns above seating areas to maximize coverage without overwhelming the space. Drape lights along railings or fences to add vertical interest while keeping the floor area uncluttered.
How do I plan a patio string light layout for a large backyard?
Divide your yard into zones (dining, lounging, pathways) and use a combination of overhead grids, tree-mounted strands, and post-to-post runs. This patio string light layout ensures balanced illumination and defines functional areas.
Can I use string lights for a romantic patio ambiance?
Absolutely! Hang lights in a dense canopy or “starlight” effect above your seating area, or wrap them around pergola beams for soft, indirect glow. Warm white bulbs enhance the romantic vibe.
What’s the easiest DIY patio string light layout for beginners?
Start with a simple perimeter layout—attach lights along the edges of your patio using hooks or zip ties. This requires no complex tools and instantly adds a cozy, inviting feel.
How many string lights do I need for my patio layout?
Measure your patio’s perimeter or planned layout path, then add 10–15% extra for draping or overlapping. For grids, calculate based on spacing (e.g., 2–3 feet between strands for even coverage).
Are there weatherproof patio string light layout options?
Yes! Choose UL-listed outdoor-rated lights with waterproof seals and UV-resistant cords. Use commercial-grade strands for permanent installations, and secure them with weatherproof hooks or cable ties.

