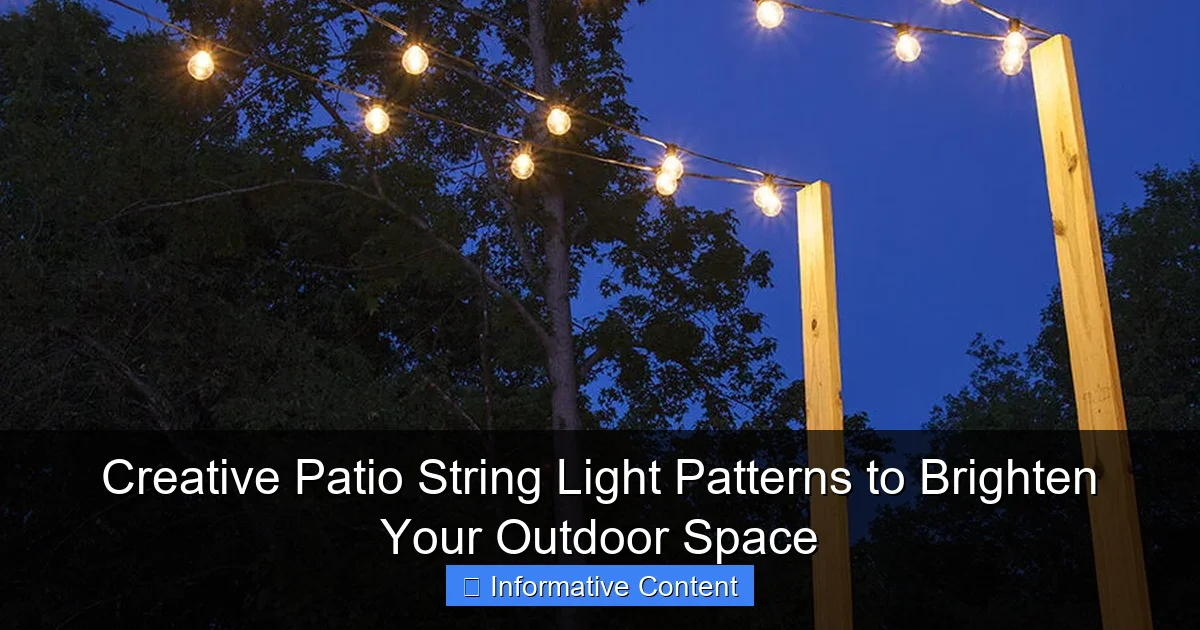
Featured image for patio string light patterns
Image source: img.yardenvy.com
Transform your patio into a captivating nighttime oasis with creative string light patterns that go beyond simple illumination—think geometric shapes, cascading waves, or crisscrossed canopies for visual drama. Strategic designs not only enhance ambiance but also highlight key areas like seating zones, dining tables, or garden features, making your outdoor space functional and magical after dark.
Key Takeaways
- Mix bulb shapes: Combine globe, Edison, and fairy lights for visual depth and charm.
- Frame key areas: Outline seating, dining, or pathways to define and enhance spaces.
- Layer heights creatively: Hang lights at varying levels for dynamic, eye-catching dimension.
- Use color strategically: Warm whites for coziness; colors for festive, mood-boosting effects.
- Try geometric shapes: Zigzags, diamonds, or waves add modern flair and movement.
- Anchor with structure: Attach lights to poles, fences, or trees for secure, lasting displays.
📑 Table of Contents
- The Magic of Patio String Light Patterns
- Why Pattern Matters: More Than Just Decoration
- Top 5 Creative Patio String Light Patterns to Try
- Choosing the Right Lights for Your Pattern
- Tools and Materials for a Flawless Setup
- Seasonal and Themed Patterns for Special Occasions
- Data Table: Comparing Popular String Light Options
- Bringing It All Together
The Magic of Patio String Light Patterns
There’s something undeniably magical about stepping outside on a warm summer night and being greeted by the soft glow of patio string lights. Whether you’re hosting a backyard barbecue, enjoying a quiet evening with your loved ones, or just unwinding after a long day, the right lighting can transform your outdoor space into something special. But it’s not just about hanging any old lights and calling it a day. The real magic lies in the patio string light patterns you choose.
From zigzag layouts that add whimsy to geometric designs that scream modern elegance, the way you arrange your string lights can make or break the ambiance. I remember the first time I tried stringing lights around my patio—I just looped them haphazardly around the fence, thinking, “Good enough.” Spoiler: it wasn’t. The uneven spacing and lack of intention made the space feel cluttered, not cozy. That’s when I realized that patio string light patterns aren’t just about aesthetics; they’re about creating a mood, defining zones, and even making the most of your space. So, let’s dive into some creative, practical, and downright beautiful ways to use string lights to brighten your outdoor area.
Why Pattern Matters: More Than Just Decoration
Before we get into the nitty-gritty of specific designs, let’s talk about why patio string light patterns matter so much. It’s not just about looking pretty—though that’s a big part of it. The right pattern can:
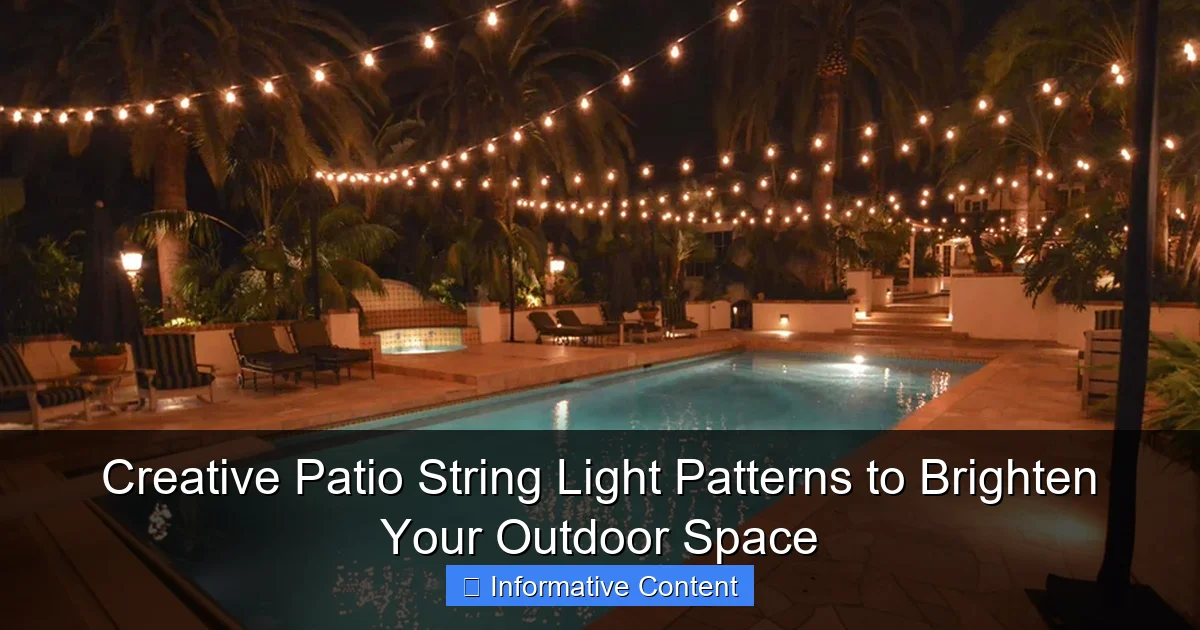
Visual guide about patio string light patterns
Image source: img.yardenvy.com
- Define your space: Use lights to highlight seating areas, dining tables, or walkways, making your patio feel more intentional.
- Create ambiance: Soft, diffused lighting (think draped or crisscrossed) feels cozy, while sharp, geometric lines feel modern and energetic.
- Enhance functionality: Strategic placement can illuminate key areas, making your outdoor space usable after dark.
- Add visual interest: Patterns can distract from less-than-perfect landscaping or architectural quirks, drawing the eye where you want it.
The Psychology of Light Patterns
Here’s a fun fact: our brains are wired to respond to patterns. Symmetrical, balanced designs (like a grid or diamond pattern) feel calming and organized, while asymmetrical or organic patterns (like a vine or drape) feel playful and relaxed. Think about the mood you want to create. Hosting a dinner party? A clean, symmetrical pattern might set a sophisticated tone. Just want to chill with a book? A loose, cascading drape could be perfect.
Common Mistakes to Avoid
Even the best intentions can go awry. Here are a few pitfalls I’ve learned the hard way:
- Overcrowding: Too many lights or overly busy patterns can feel chaotic, not cozy.
- Ignoring scale: A tiny zigzag pattern might look cute on a small balcony but get lost on a sprawling patio.
- Neglecting the power source: Always plan your layout so the cord can reach an outlet without being a tripping hazard.
- Forgetting about maintenance: If you’re draping lights through trees or over high pergolas, make sure you can reach them to replace bulbs or adjust the pattern.
Top 5 Creative Patio String Light Patterns to Try
Now that we’ve covered the “why,” let’s get to the “how.” Here are five of my favorite patio string light patterns, each with its own vibe and practical tips to make it work in your space.
1. The Classic Grid (Perfect for Structure)
If you want a clean, modern look, the grid pattern is your best friend. It’s simple but impactful, and it works especially well for patios with pergolas, gazebos, or even just a flat ceiling (like a covered porch).
- How to do it: Run horizontal strings across the space, then add vertical strings to create a grid. For a tighter look, use more strings; for a looser, airier feel, space them wider apart.
- Pro tip: Use zip ties or hooks to secure the strings at even intervals. If you’re working with a pergola, attach the strings to the crossbeams for a seamless look.
- Best for: Dining areas, outdoor kitchens, or anywhere you want to create a defined, functional zone.
Example: I used this pattern on my friend’s pergola, spacing the strings about 18 inches apart. It made the space feel like a cozy outdoor dining room, and the even lighting was perfect for hosting dinner parties.
2. The Zigzag (Whimsical and Fun)
The zigzag pattern is all about playfulness. It’s great for adding visual interest without a lot of effort, and it works well in smaller spaces where a grid might feel too rigid.
- How to do it: Start at one corner of your patio and run the string diagonally to the opposite side. Then, loop it back at a slight angle to create a zigzag effect. Repeat until the entire area is covered.
- Pro tip: Use a laser level or chalk line to ensure your zigzags are even. Nothing ruins the vibe like a lopsided pattern.
- Best for: Backyard hangouts, boho-themed patios, or spaces with a lot of curves or irregular shapes.
Example: I tried this on a small balcony, using a single strand of lights. It added a ton of charm, and the diagonal lines made the space feel bigger.
3. The Diamond (Elegant and Timeless)
The diamond pattern is a step up from the grid—it’s more intricate, but still clean and modern. It’s perfect for creating a sophisticated, upscale vibe.
- How to do it: Start with a grid, then add diagonal strings to connect the corners of each square, creating a diamond shape. You can use the same spacing as your grid or go tighter for a denser look.
- Pro tip: Use a heavier-duty string light (like LED Edison bulbs) for this pattern, since the diagonal lines create more tension.
- Best for: Formal patios, wedding venues, or spaces with a modern or minimalist aesthetic.
Example: A client used this pattern on her pergola for a backyard wedding. The diamonds created a stunning backdrop for photos, and the lighting was soft but bright enough for guests to move around safely.
4. The Drape (Romantic and Relaxed)
If you want a soft, romantic vibe, the drape pattern is the way to go. It’s perfect for creating a cozy, intimate atmosphere, and it works well in spaces with trees, railings, or other natural features.
- How to do it: Run the string lights in loose, cascading loops from a high point (like a tree branch or pergola) down to a lower point (like a railing or fence). The more dramatic the drop, the more romantic the effect.
- Pro tip: Use a timer or dimmer to control the brightness—this pattern looks best when the lights are soft and diffused.
- Best for: Seating areas, fire pits, or anywhere you want to create a relaxed, cozy vibe.
Example: I used this pattern around my own patio, draping the lights from the roofline down to the fence. It made the space feel like a secret garden, perfect for late-night conversations.
5. The Vine (Organic and Natural)
The vine pattern is all about blending your lights into the natural surroundings. It’s perfect for patios with a lot of greenery or for creating a whimsical, fairytale-like feel.
- How to do it: Run the string lights along trees, shrubs, or trellises, following the natural curves and shapes. You can also use them to outline pathways or garden beds.
- Pro tip: Use waterproof, outdoor-rated lights for this pattern, especially if you’re running them through trees or near water features.
- Best for: Garden patios, rustic spaces, or anywhere you want to create a magical, natural vibe.
Example: A client used this pattern to highlight her rose garden. The lights followed the trellis, making the flowers glow at night and creating a stunning focal point.
Choosing the Right Lights for Your Pattern
Not all string lights are created equal. The type of lights you choose can make or break your patio string light patterns, so let’s break down what to look for.
Bulb Type: LED vs. Incandescent
- LED: Energy-efficient, long-lasting, and cooler to the touch. Great for intricate patterns (like the diamond or grid) since they don’t get hot. Plus, they come in a variety of colors and brightness levels.
- Incandescent: Warmer, softer light—perfect for romantic patterns like the drape or vine. But they use more energy and burn out faster. Use them for temporary setups or special events.
Bulb Shape: Globe, Edison, or Mini
- Globe bulbs: Soft, diffused light. Great for creating a cozy, ambient glow.
- Edison bulbs: Vintage look with a warm, filament glow. Perfect for the diamond or grid pattern.
- Mini bulbs: Small and discreet, ideal for the vine or zigzag pattern.
String Length and Spacing
- Longer strings (25-50 feet): Better for large patios or complex patterns like the grid or diamond.
- Shorter strings (10-20 feet): Easier to work with for smaller spaces or simpler patterns like the drape or vine.
- Bulb spacing: Closer spacing (2-4 inches) creates a denser, brighter look. Wider spacing (6-12 inches) feels more airy and relaxed.
Tools and Materials for a Flawless Setup
Even the most beautiful patio string light patterns can fall flat if you don’t have the right tools. Here’s what I always keep in my lighting kit:
Essential Tools
- Measuring tape: For spacing your lights evenly.
- Zip ties or hooks: To secure the strings without damaging surfaces.
- Extension cords: Make sure they’re outdoor-rated and the right length for your layout.
- Timer or dimmer: To control the lighting without having to manually turn it on and off.
- Step ladder: For reaching high points safely.
Pro Tips for a Smooth Installation
- Test the lights first: Plug them in before you start hanging to make sure they work.
- Start from the power source: This ensures you don’t run out of cord in the middle of your pattern.
- Use a laser level: For patterns like the grid or diamond, it’s a game-changer for keeping things straight.
- Secure the ends first: This gives you something to pull against, making it easier to keep the strings taut.
Seasonal and Themed Patterns for Special Occasions
Why stick to the same pattern year-round? Your patio string light patterns can change with the seasons or for special events, keeping your outdoor space fresh and exciting.
Seasonal Ideas
- Summer: Go bright and bold with a zigzag or vine pattern. Add colorful bulbs for a festive touch.
- Fall: Use warm, amber lights in a drape or grid pattern for a cozy, harvest vibe.
- Winter: Create a magical winter wonderland with a diamond or vine pattern. Add snowflake-shaped bulbs for extra charm.
- Spring: Use soft, pastel lights in a drape or grid pattern to celebrate the new season.
Theme Ideas
- Weddings: Use the diamond pattern with clear or white bulbs for a classic, elegant look.
- Holidays: Swap out your regular bulbs for red, green, or blue lights in a grid or zigzag pattern.
- Birthdays: Use a mix of colors and patterns (like a zigzag with globe bulbs) for a fun, playful vibe.
Data Table: Comparing Popular String Light Options
| Brand/Type | Bulb Type | Length | Bulb Spacing | Best For | Price Range |
|---|---|---|---|---|---|
| Brightech LED Globe | LED Globe | 48 ft | 6 in | Grid, Drape | $25-$35 |
| Twinkle Star Edison | LED Edison | 33 ft | 4 in | Diamond, Grid | $30-$40 |
| Minetom Mini | LED Mini | 25 ft | 2 in | Zigzag, Vine | $15-$25 |
| Philips Hue Outdoor | Smart LED | 20 ft | 8 in | All patterns (with app control) | $100-$150 |
Bringing It All Together
At the end of the day, patio string light patterns are about more than just lighting—they’re about creating a space that feels like an extension of your home. Whether you go for a clean grid, a playful zigzag, or a romantic drape, the right pattern can turn your patio into a place where memories are made.
Remember, there’s no one-size-fits-all solution. The best pattern for your space depends on your layout, your style, and the mood you want to create. So don’t be afraid to experiment. Try a new pattern this weekend, or swap out your bulbs for a seasonal twist. And if something doesn’t work? That’s okay. The beauty of string lights is that they’re easy to change, easy to move, and always forgiving.
So go ahead—string up some lights, grab a glass of wine, and step outside. Your patio is waiting to shine.
Frequently Asked Questions
What are the most popular patio string light patterns for outdoor spaces?
Popular patio string light patterns include zigzag, crisscross (or “web”), cascading waterfall, and symmetrical grid layouts. These designs maximize coverage while adding visual interest, making them ideal for patios, pergolas, and decks.
How do I create a zigzag string light pattern on my patio?
To create a zigzag pattern, attach hooks or clips along parallel edges of your patio (e.g., roofline and railing), then run lights diagonally back and forth between them. This dynamic layout adds movement and dimension to your outdoor area.
Can I use patio string light patterns to highlight specific features like a dining area?
Absolutely! Use focused patterns like a tight crisscross or circular halo above a dining table to create a dedicated ambiance. Pair with dimmable bulbs to adjust brightness for different occasions.
What tools do I need to install creative string light patterns?
Essential tools include screw hooks, adhesive clips, a measuring tape, and extension cords. For complex patterns like a “starburst” or grid, use a chalk line or laser guide to ensure symmetry.
How can I make my patio string lights last longer with any pattern?
Choose LED bulbs, which are energy-efficient and durable, and ensure all connections are weatherproofed. Avoid over-tightening wires in your chosen pattern to prevent fraying or breakage.
Are there solar-powered options for creative patio string light patterns?
Yes! Solar-powered string lights work well for most patterns, especially in open, sunny areas. Just ensure the solar panel is positioned to receive 6+ hours of sunlight daily for optimal brightness.

