Featured image for string light patterns for patio
Image source: backyard.exmark.com
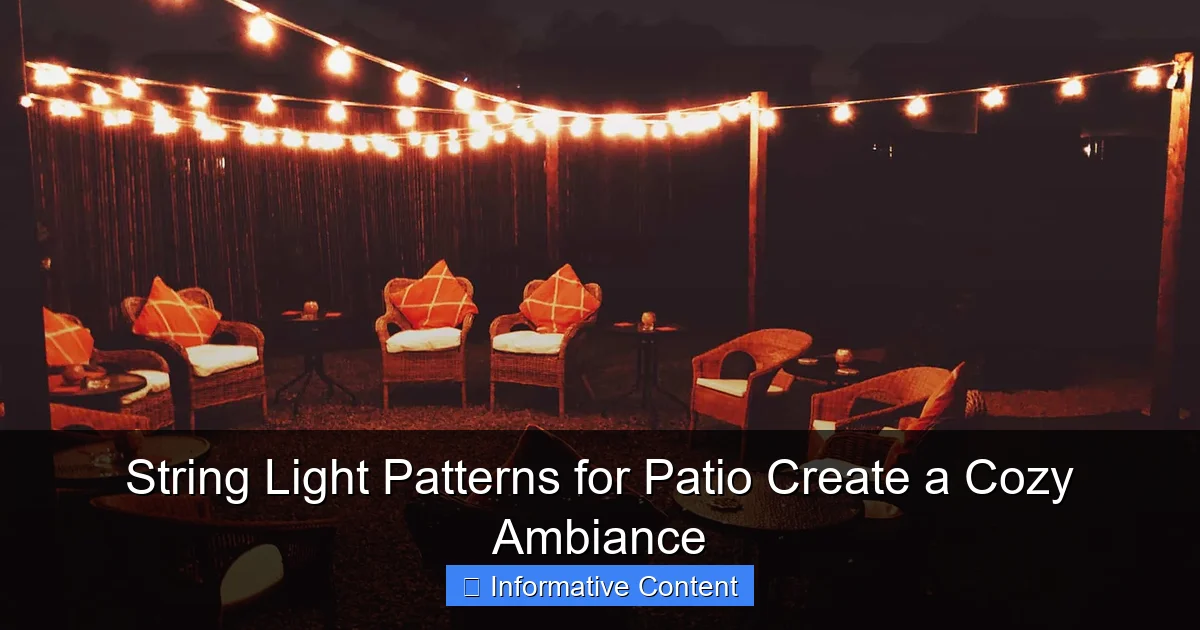
String light patterns for patio instantly transform outdoor spaces into inviting, cozy retreats by combining strategic placement with stylish designs. Geometric shapes, cascading drapes, and zigzag lines enhance ambiance while maximizing coverage, making your patio perfect for relaxing or entertaining after dark.
Key Takeaways
- Choose warm white lights: Creates a welcoming, cozy patio atmosphere.
- Mix hanging patterns: Combine zigzag and crisscross for visual depth.
- Use dimmers: Adjust brightness to match mood and occasion.
- Highlight focal points: Frame seating or dining areas with focused lighting.
- Add timers: Automate lights for effortless ambiance every evening.
- Opt for weatherproof strings: Ensure durability and year-round use.
📑 Table of Contents
- The Magic of String Lights: Why Your Patio Deserves a Glow-Up
- Understanding the Basics: Types of String Lights and Key Considerations
- 5 Stunning String Light Patterns for Patio Ambiance
- Pro Tips for Installation: Safety, Spacing, and Longevity
- Seasonal and Themed Variations: Adapting Your Lights Year-Round
- Maintenance and Troubleshooting: Keeping Your Lights Glowing
- Final Thoughts: Your Patio, Your Glow
The Magic of String Lights: Why Your Patio Deserves a Glow-Up
Remember that one summer night when you sat outside, sipping lemonade, and felt completely at peace? Chances are, soft, twinkling string lights played a part in that magic. String lights aren’t just for holidays—they’re year-round mood enhancers that transform any patio into a cozy, inviting retreat. Whether you’re hosting friends, enjoying a quiet evening, or simply want to elevate your outdoor space, the right string light patterns for patio can make all the difference.
But here’s the thing: not all lighting is created equal. Draping a single strand haphazardly might look festive, but it won’t deliver the ambiance you’re after. The secret lies in thoughtful string light patterns for patio that balance brightness, spacing, and design. Done right, these lights can make your patio feel like an extension of your living room—warm, intimate, and full of character. In this guide, I’ll walk you through my favorite patterns, practical tips, and even a few mistakes I’ve learned from (yes, there were tangled messes). Let’s turn your patio into a glowing oasis.
Understanding the Basics: Types of String Lights and Key Considerations
Before diving into patterns, let’s cover the essentials. Not all string lights are the same, and choosing the right type is the first step to a successful setup.

Visual guide about string light patterns for patio
Image source: img.yardenvy.com
Types of String Lights: Which One Fits Your Patio?
- Incandescent Bulbs: Classic warm glow, but less energy-efficient. Perfect for a vintage or nostalgic feel.
- LED Bulbs: Energy-saving, long-lasting, and cooler to the touch. Available in warm white, cool white, and multicolor.
- Fairy Lights (Micro LED): Delicate and dainty, ideal for wrapping around railings or creating a “starry sky” effect.
- Globe Lights: Larger, spherical bulbs that cast a soft, diffused light. Great for a bistro or café vibe.
- Edison Bulbs: Vintage-style with exposed filaments. Adds a rustic, industrial charm.
Key Factors to Consider Before Hanging
- Power Source: Will you use plug-in lights (requires an outdoor outlet) or solar-powered (eco-friendly but less bright)?
- Weather Resistance: Check the IP rating (e.g., IP44 for splash resistance, IP65 for heavy rain). Coastal patios need corrosion-resistant materials.
- Bulb Spacing: Closer bulbs (e.g., 2–4 inches apart) create a dense glow; wider spacing (6+ inches) gives a more subtle effect.
- Length and Coverage: Measure your patio’s perimeter or area. Always buy 10–15% extra to account for curves or mistakes.
- Control Options: Look for dimmers, timers, or smart bulbs (e.g., Philips Hue) for flexibility.
Pro Tip: I once bought lights with 8-inch spacing for a small balcony—way too sparse! Now, I test spacing by laying lights on the ground first. A 4-inch gap is usually the sweet spot for coziness.
5 Stunning String Light Patterns for Patio Ambiance
Now for the fun part: the patterns. These designs work for patios of all sizes, from tiny balconies to sprawling decks. Mix and match based on your space and vibe.
1. The Classic “Canopy” (Overhead Grid Pattern)
This is the gold standard for large patios. Imagine a grid of lights stretched overhead, mimicking a starry sky.
- How to Install: Anchor hooks or eye bolts into your roof, pergola, or trees. Run horizontal strands first, then vertical ones to create a grid. Space lines 2–3 feet apart.
- Best For: Entertaining, dining, or creating a “room” effect under a pergola.
- Pro Tip: Use globe lights for a softer glow or Edison bulbs for a rustic look. Add sheer curtains between lines for extra drama.
- Watch Out: Avoid sagging! Use tensioners or zip ties every 3–4 feet to keep lines taut.
Real-Life Example: My neighbor used this pattern on her 12×16 ft patio. With a 3×3 grid, it felt like dining under a fairy-tale tent—even in the middle of the city.
2. The “Rail & Wrap” (Vertical Accent Pattern)
Perfect for patios with railings, fences, or columns. This pattern draws the eye upward, adding height and depth.
- How to Install: Wrap lights around vertical structures (railings, pillars) or run them vertically between overhead beams and the ground.
- Best For: Small patios, privacy screens, or adding dimension to flat spaces.
- Pro Tip: Alternate fairy lights (wrapped tightly) with globe lights (spaced 6 inches apart) for contrast.
- Watch Out: Don’t wrap too tightly—it can stress the bulbs. Use clips or hooks instead of adhesive for easier removal.
3. The “Zigzag” (Dynamic Diagonal Pattern)
Add movement and energy with diagonal lines. This works wonders on rectangular patios.
- How to Install: Start at one corner, angle lights diagonally to the opposite side, then zigzag back. Use clips or hooks to secure at each turn.
- Best For: Modern patios, creating a sense of motion, or breaking up long, straight edges.
- Pro Tip: Use warm white LEDs for a clean, contemporary look. Add a second zigzag layer 1–2 feet below the first for depth.
- Watch Out: Diagonals can look chaotic if lines aren’t parallel. Measure angles carefully!
4. The “Cascade” (Waterfall Effect)
Ideal for patios with a wall, trellis, or overhang. Lights “flow” downward like a waterfall.
- How to Install: Hang a horizontal strand at the top (e.g., from a pergola), then let strands drape down in staggered lengths. Secure the bottom with hooks or weights.
- Best For: Creating a focal point, softening hard edges, or adding romance.
- Pro Tip: Use micro LED fairy lights for a delicate effect or globe lights for a bolder cascade.
- Watch Out: Ensure strands don’t tangle. Test with a temporary setup first.
5. The “Cluster” (Focal Point Pattern)
Great for small patios or when you want to highlight a specific area (e.g., a seating nook).
- How to Install: Hang a dense cluster of lights (e.g., 3–5 strands) in a circular or teardrop shape above the focal point. Let strands fan outward.
- Best For: Cozy seating areas, fire pits, or dining tables.
- Pro Tip: Use warm white or amber lights to mimic firelight. Add a dimmer for adjustable ambiance.
- Watch Out: Don’t overdo it—too many strands can look cluttered. Stick to 3–5 max.
Pro Tips for Installation: Safety, Spacing, and Longevity
Even the best pattern fails if installed poorly. Here’s how to avoid common pitfalls.
Spacing: The Secret to a Balanced Glow
- Horizontal Lines: 2–3 feet apart for a “room” feel; 4–6 feet for a more open look.
- Vertical Lines: 1–2 feet apart on railings; 3–4 feet for cascades.
- Overhead Grids: Aim for a 3×3 or 4×4 grid on a 12×12 ft patio. Adjust spacing based on bulb brightness.
My Rule of Thumb: If you can’t see the patio floor clearly at night, lights are too close. If it feels like a dark cave, they’re too far apart.
Anchoring: How to Hang Lights Without Damage
- For Wood: Use cup hooks, eye screws, or outdoor-rated zip ties.
- For Brick/Concrete: Use masonry anchors or adhesive hooks (e.g., 3M Command Outdoor).
- For Railings: Wrap lights with zip ties or use railing clips (no drilling!).
- For Trees: Use tree-friendly straps or clips—never nails or screws!
Caution: I once used duct tape on a metal railing. It left a sticky mess and faded in the sun. Always test adhesives first.
Power and Safety: Avoiding Overloads and Hazards
- Check Wattage: Most outdoor outlets support 15–20 amps. Don’t exceed 80% capacity (e.g., 1,800 watts for a 15-amp circuit).
- Use GFCI Outlets: These cut power if they detect a ground fault—critical for outdoor safety.
- Weatherproof Connections: Use silicone sealant on plugs or buy weatherproof covers.
- Inspect Annually: Look for frayed wires, loose connections, or water damage.
Real-Life Lesson: A friend ignored a frayed wire and nearly had a fire. Now, I replace lights every 3–4 years, even if they “still work.”
Seasonal and Themed Variations: Adapting Your Lights Year-Round
Your patio lighting shouldn’t be static. Here’s how to refresh it for seasons and occasions.
Summer: Bright and Airy
- Pattern: Canopy or Zigzag with cool white LEDs.
- Extras: Add citronella candles or string lights with built-in bug repellent.
- Tip: Use solar-powered lights for energy savings.
Fall: Warm and Cozy
- Pattern: Cascade or Cluster with amber or orange lights.
- Extras: Pair with pumpkins, hay bales, or string lights shaped like leaves.
- Tip: Add a dimmer for a flickering, fire-like effect.
Winter: Sparkle and Cheer
- Pattern: Rail & Wrap with multicolor or white lights.
- Extras: Hang icicle lights or snowflake-shaped bulbs.
- Tip: Use timers to avoid leaving lights on all night.
Special Occasions: Festive and Fun
- For Parties: Use RGB smart lights (e.g., Philips Hue) to change colors or sync with music.
- For Romance: Cluster pattern with warm white and fairy lights.
- For Kids: Add novelty shapes (stars, hearts, animals).
Maintenance and Troubleshooting: Keeping Your Lights Glowing
Even the best lights need upkeep. Here’s how to keep them shining.
Cleaning: Removing Dirt and Grime
- Bulbs: Wipe with a microfiber cloth and mild soap. Avoid harsh chemicals.
- Wires: Use a damp cloth. Never submerge in water.
- Frequency: Clean every 3–6 months, or after storms.
Storage: Preventing Tangles and Damage
- Wrap Neatly: Use a reel or cardboard spool. Never ball up lights!
- Label: Mark sets by color or type for easy setup next year.
- Store in a Dry Place: Moisture breeds mold and corrosion.
Common Issues and Fixes
| Issue | Likely Cause | Fix |
|---|---|---|
| Half the strand is dark | One loose bulb or broken wire | Replace bulbs or splice wires with a waterproof connector |
| Flickering lights | Loose connection or faulty bulb | Tighten all connections; replace bulbs |
| Dim lights | Overloaded circuit or voltage drop | Reduce the number of strands; use shorter extension cords |
| Water in sockets | Poor sealing or cracked housing | Replace the strand; use silicone sealant on plugs |
Final Thoughts: Your Patio, Your Glow
String lights aren’t just decorations—they’re storytellers. The right string light patterns for patio can turn a simple outdoor space into a place where memories are made. Whether you opt for a classic canopy, a dynamic zigzag, or a romantic cascade, the key is to design with intention. Think about how you use your patio: Is it for quiet evenings? Lively gatherings? A mix of both? Let that guide your choices.
And remember, perfection isn’t the goal. My first attempt at a grid pattern looked lopsided, and my neighbor’s cascade tangled in the wind. But that’s part of the fun! Lighting is about experimentation, not precision. Start small, adjust as you go, and don’t be afraid to try something new. With these patterns and tips, you’re not just hanging lights—you’re crafting an experience. So grab those bulbs, invite a friend, and let your patio shine. After all, the best moments happen under a glow. 🌟
Frequently Asked Questions
What are the best string light patterns for patio ambiance?
The best string light patterns for patio use include classic zigzags, canopy draping, or geometric grids. These styles evenly distribute light while creating a warm, inviting atmosphere for gatherings. Choose weather-resistant LED bulbs for longevity and energy efficiency.
How do I arrange string lights on a patio without trees or poles?
Use freestanding poles, attach lights to railings, or create a suspended grid with ceiling hooks or pergola beams. String light patterns for patio spaces can also be woven through lattice panels or along fences for a seamless glow.
Can I mix different string light patterns for a unique look?
Absolutely! Layering patterns—like combining a canopy with accent clusters—adds depth and visual interest. Just ensure bulbs are spaced evenly and match in color temperature (e.g., warm white) for a cohesive design.
What spacing works best for patio string light patterns?
For even illumination, space bulbs 6–8 inches apart in straight lines or grids. If draping lights, allow slight sagging (2–3 feet between anchor points) to avoid tension and create a soft, organic flow.
Are there solar-powered string light patterns for patios?
Yes! Solar-powered string lights work well for simple patterns like zigzags or perimeter outlines. Opt for high-capacity solar panels and LED bulbs to ensure consistent brightness, especially in shaded areas.
How do I secure string lights to a patio without damaging surfaces?
Use removable adhesive hooks, tension rods, or magnetic mounts for a damage-free setup. For wooden structures, try cup hooks or zip ties, and always test weight limits to prevent sagging or falling.

